Assembling an electric engraver with a tripod and flexible shaft
An electric engraver is the most common type of this type of tool at home. To make a functionally complete device yourself, capable of competing with industrially produced analogues, you will need an electric motor that runs on 220 V alternating current. Such electric motors can be taken from the following equipment:
- Soviet-style reel-to-reel tape recorders;
- DVD players;
- washing machines;
- angle grinders;
- electric sewing machines.
The last option is optimal because it is possible to adjust the speed over a fairly wide range using the built-in rheostat.
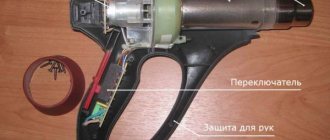
Holding an electric motor from any of the listed types of equipment in one hand is inconvenient, and in most cases it is simply impossible. Therefore, you will need a flexible shaft for the engraver. In this case, the general view of the future device will turn out approximately as in the photo below.
The functionality of the created engraving device will depend on the materials and mechanisms used during assembly. The motor can be placed on a table, but it is more convenient to make a tripod for the engraver, or rather something similar.
Manufacturing of flexible shaft
With a flexible shaft everything is relatively simple. It can be done in several ways:
- from an old drive shaft, for example, from a dental drill;
- using the speedometer cable of a motorcycle or car.
The working attachment on the shaft can also be used from a drill or made independently from different materials, for example, wood, textolite, plastic pipes. A device (handle) for holding the equipment is made from textolite as follows:
- cut 2 textolite platinums (sheet thickness should be about 1 cm) measuring approximately 2 by 10 cm;
- connect them together and grind them with a file or emery from the outside to form a cylinder;
- grooves are machined from the inside;
- metal rings secure the parts to each other;
- a tube is inserted into the front part of the handle, under a cartridge consisting of two separate halves connected with a bolt.
The end result will be a handle like the one in the photo below.
Assembling the engraving unit
It’s very easy to make a tripod (a base for installing an electric motor) from plywood or the same PCB. To do this, do this:
- cut out several pieces (4 are enough) from a sheet of material corresponding to the size of the electric motor;
- a motor is attached to one of the fragments using clamps;
- assemble the box;
- A hole is drilled in the front part for the flexible shaft.
The created structure is hung on the wall.
It is convenient to use a factory holder on clamps for an engraver, if the dimensions of the electric motor allow. The mount connects to any table. But such a device will need to be purchased additionally.
Further assembly of the engraving device is carried out in the following sequence:
using a coupling made from a drilled bolt, connect the cable to the electric motor shaft;
put a rubber hose of the appropriate diameter on the cable and attach a handle made to it;
- install a start button;
- connect equipment to the network;
check the functionality of the device made.
When creating homemade straight grinders, you can also use electric motors designed for 380 V, but if they can be adapted for 220 V. In such cases, you will need to tinker a little more. There is a lot of information on this issue both on the Internet and in books on electrical engineering.
How to make it at home with your own hands?
Engraving on metal can be done not only in a special workshop, but also at home. Regardless of the conditions in which the work takes place, the main priority is to obtain a quality product. If you plan to do the work yourself, then the best option would be to purchase a special tool known as an engraver.
The process of processing a product at home consists of several steps.
- Before starting work, it is imperative to prepare an image or inscription. The product is placed using a marker, or you can outline the contours using a sharpened pencil.
- Engraving requires close attention. Any work can only be carried out if the room is sufficiently lit. Otherwise, you can not only damage the product, but also get injured during the metal finishing process.
- After all engraving work is completed, the surface that has been processed must be coated with a special varnish. If this is not enough, then to obtain the most lasting result you need to use wax, which is applied in a small layer.
Engraving on metal at home can also be done using electrochemical action. To carry out the work, a set of tools that any person has at hand can be used.
- The container used must fully match the dimensions of the product itself. The metal object should fit into the container without any problems, the neck should not stick out. If the product is not large in size, then a faceted glass can be used. Today, a glass jar continues to be the best option.
- Wires for connection with clamps. An excellent option would be to use household clothespins.
- A regular mobile battery will be sufficient.
Another fairly effective way to engrave metal at home is to use a drill. It should be noted that this tool is quite expensive, so it is worth buying it only if the processing will not be carried out on a one-time basis.
When using such a tool, its working part is capable of effectively removing a layer of metal using a special attachment. It is usually offered as a kit. Do not use the tool on the material immediately. It is best to try it on various workpieces.
In addition to the drill, you can use other equipment. For more than 5 thousand years, humanity has been inventing various devices capable of processing metal.
A distinctive feature of home laser engraving is that it can be carried out in combination with a paste solution. It is usually applied to the material before engraving begins. This must be done carefully so as to only touch the area being treated. An image or inscription is burned using a laser. This happens due to a change in temperature, which becomes possible as a result of a chemical process. This method is very effective and fast, however, its cost is quite high, so there is no point in purchasing such a device if you need to carry out a one-time engraving.
Thus, metal engraving allows you to put an image or inscription on an object, radically changing its appearance. There are many engraving methods available, each with its own strengths and weaknesses. The choice of a particular method depends not only on the skills of the person, but also on the characteristics of the material used.
Making a gravel for engraving on metal
Making a serger of the simplest design is possible for a home craftsman with metalworking skills. To do this, take as a basis:
- file or needle file;
- spring leaf;
- part of the bearing race.
The main thing is that the steel is high-strength and elastic. Strength is necessary for the graver to successfully cut the metal of the workpiece, not become dull for a long time and maintain the specified sharpening shape. Elasticity will allow the tool not to break under load.
A higher-quality cutter can be obtained by forging, but for this you must have good blacksmithing skills and have a forge. A file made from a needle file will be noticeably inferior to a forged one in both strength and flexibility.
Before you start sawing and forging metal, you should build a drawing of the tool. You will need not only a large-scale image of the cutter itself, but also a drawing of the handle.
Engraving pen
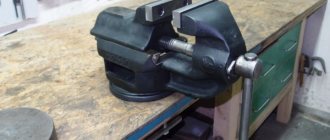
Manual engraving at home requires: - A graver - A metal workpiece - Something solid to hold the metal workpiece, possibly a vice
For beginners, we recommend using a softer metal, such as copper or aluminum, as a workpiece.
A shtikhel is a rod, usually 120 -130 millimeters in size. The tip of the gravel is cut at a certain angle and sharpened. The second tip is inserted into the handle, usually wooden. Engraving pens come in various shapes and differ in the width of the working surface. If you don’t have this tool, you can easily make it yourself if you have the right materials. To make a graver you need tool steel. The metal used in ball bearings and springs is excellent here. To make a cutting surface, you need to use a cutter, a needle file, a file, cutting it into thin strips. The best material to make an engraving pen is P18 steel. You can also make a graver from circular saw blades. Then we sharpen the workpiece at an angle, which will allow us to make a notch of the required width. If we talk about the handle of a wooden pen, then it must be made of hardwood, with a width convenient for the master to hold in his hand. The mushroom shape is, in our opinion, the best option.
General technology
The technique can be manual or mechanical (various equipment is used).
It is also divided into line and armor:
- The line engraving technique is performed by applying contour lines and strokes to an object. Metal carvings are not deep, affecting only the surface of the object;
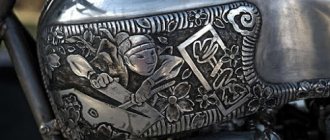
- Defensive, otherwise called three-dimensional, mechanical deep technique allows you to achieve a three-dimensional pattern. See photo.
Incisive engraving is performed with a special tool – a graver.
If you ask yourself how to make it yourself and where to buy these tools, then the answer is simple: this tool is sold in the same stores where you can find various art supplies.
The finest lines are made with a Messer-Stichel. If you need to make parallel lines, they are made with a rap pen.
Photo:
To perform high-quality work, this tool must be sharpened; for this, a fine-grained whetstone is used, which is pre-moistened with water or oil.
The graver is brought “to readiness” with a leather product (you can take an old belt) coated with chromium oxide.
Manual processing of small items at home requires the presence of a special pillow; you can easily make it yourself: take two pieces of fabric of the same size (round or square), sew them together along the edge, stepping back from it a little, but you need to leave a small gap in order to so you can pour sand inside.
The cushion engraving tool is ready.
How to properly hold the instrument in your hand?
This should be done as if you were holding a regular ballpoint pen: the index finger should be on top of the blade (that’s what the metal part of the cutter is called), and the thumb should hold it on the side.
Work must be done on your own.
In the case when you need to change the direction of the pattern, unfold the pillow with the object on which the element is being applied, but do not change the direction of movement of the hand.
What else is useful to know about incisors?
To do your own engraving at home, it is advisable to first practice so that the carving turns out beautiful in the end.
It is better to purchase a set of tools: it is better to apply rounded lines with a square section of cutters, and it is better to make straight lines with a round section.
You can make the scraper yourself. To do this, you will need a file, from the edges of which you need to grind off the notch.
Before application, the surface must be cleaned with fine sandpaper and polished. A special polishing paste is used for polishing.
The paste can be easily replaced with chromium oxide (oil paint). The surface of the object must be thoroughly and vigorously rubbed. The paste is ground with a thick piece of leather.
This is interesting: Shtangenreysmas - purpose, verification, GOST
How to make a metal stencil with your own hands?
The history of metal engraving goes back thousands of years. If you want to decorate your things in such an amazing way, then this article is just for you. You will learn useful information about how to properly do metal carving with your own hands.
Engraving is a method of applying a pattern to the surface of solid materials using cutting engraving tools. This is the most sophisticated type of all carvings, because it conveys the subtlety and sophistication of all lines.
Artistic metal engraving arose a long time ago and is capable of giving an object special value, individuality and uniqueness, a beautiful and original appearance that attracts the attention of others. An inscription that is personally dedicated to you always has and has had special value.
It also means wealth, because not every person will afford to buy beautiful and exquisite carvings on expensive metals or leather goods. Engraving is the transfer of a design onto a metal object.
Well, if you are reading this text, then most likely you are interested in learning how to do metal carving with your own hands, because, as the masters say, it is not so difficult.
The main thing is to have patience, talent and gain more experience.
There are two types of metal carving: manual and mechanical, it can only affect the surface of the material (linear), or it can go deep, then sophisticated 3D works are created (three-dimensional).
Breaking down the basics
The main element through which metal carving is made is the gravel. But there are a huge number of varieties of this tool that make it easier to work with different types of carving. For example, with a messer-sticker you can make very, very thin lines, and with a rep-sticker you can make parallel patterns.
Craftsmen advise purchasing a set of tools in specialized stores, because this will make your work easier.
A couple more tips from experienced professionals on how to do the work at home: the work should be done on your own, and the tool should be held like a regular ballpoint pen.
Read this: Bird wood carving: photos of interesting ideas for creativity
There is a simple method that most craftsmen started with; it tells you how to make a good product.
For carving, we use a metal object on which we want to make (for a gift, to practice) a text or a drawing. Next, you take a disposable glass into which you pour water and dissolve a lot of table salt in it. You also need electrical tape, which should be wrapped around the entire metal part, leaving only the tip.
Using a sharp knife, cut out the text/drawing on the electrical tape. Then, taking a DC generator, attach the positive end of the wire to our object, and the negative end to a nail or metal plate.
We immerse all metal parts in a saline solution and turn on the generator to the electrical network. After a short period of time you will notice the engraving.
This is one of the easiest ways to carve metal.
Of course, you shouldn’t cut out everything at once, because on the Internet and in various literature there are many patterns that inspire with their beauty. You can find thousands of different designs, like the one by Canadian artist Cal Lane.
At first, this woman was simply fascinated by ornaments, looked for them in thematic magazines or the Internet, and then she learned to cut out such unusual design patterns herself. All designs and openwork lace came into carving from various types of art (they covered tablecloths or decorated houses).
Most often these were stretching and intertwining plants, huge leaves, and less often flowers.
Read this: Wood carving: a selection of creative ideas
For any thread, the following main elements are distinguished: thread profile, profile angle, profile height, thread pitch, outer diameter, middle and inner diameters of the thread. Very often the smallest elements are depicted; large ones do not look very aesthetically pleasing.
Also in the patterns you see birds, animals, and some make copies of people, which are decorated very beautifully. You are provided with a selection of various photos about patterns and elements for them. In the 4th picture you will see the same Cal Lane, and then her work.
Her creations are most often made from unnecessary things that people wanted to throw away.
There are a lot of different types of metal engraving on the Internet, which you can choose to suit your taste and color. This article will talk about only some of the more famous ones.
Diamond engraving is used when working with various expensive metals (gold, silver). A huge advantage of this carving is that the metal is not removed, but only bends under the influence of the engraver’s force.
Photo engraving. A fairly common occurrence and, by the way, a great gift. The photograph is divided into small squares, which are subsequently transferred to the metal. The depth of the product itself will depend on the strength.
Milling is a fairly common form of engraving due to frequent use. It uses milling cutters or conical engravers, which rotate very, very quickly. Interestingly, jewelry making is done using a combination of the first and third methods. These products are very different in complexity and sophistication of details, everything depends on the hand of the master and his experience.
Unfortunately, elements made using solvents wear out very quickly, but there are more effective technologies that will extend the life of your product (laser engraving or mechanical).
Laser engraving is a very good method and can be used to cut very fine and fine lines.
But the only drawback is that this is a very expensive activity; for a small laser you need to pay more than 15,000 rubles.
Mechanical engraving is much cheaper, but you must have a lot of experience, because this is very painstaking work and not everyone knows how to cut out various details so clearly. This work will require a “sharp eye” and a trained hand.
on the topic of the article
Well, at the end of this article we would like to recommend you video lessons, thanks to which you can learn a lot of useful information.
How to make engraving on metal at home
Applying a pattern to various objects by removing a substance from its surface has been known to mankind for many millennia.
With the advent of new materials, the need arose to develop working methods that allow engraving on objects that are much harder than wood and stone.
New technologies make it possible to fully automate the engraving process when applying a design to a metal surface, but for a home craftsman, the most suitable option is to master the manual method of applying a design.
Do-it-yourself metal engraving is possible at home, if you have the tools and a suitable room to perform this type of work.
What is needed for engraving
For manual engraving at home, you will need the following tools and materials:
- Stichel.
- Metal blank.
- A vice or similar device for holding a workpiece stationary.
General technology
The technique can be manual or mechanical (various equipment is used).
It is also divided into line and armor:
- The line engraving technique is performed by applying contour lines and strokes to an object. Metal carvings are not deep, affecting only the surface of the object;
- Defensive, otherwise called three-dimensional, mechanical deep technique allows you to achieve a three-dimensional pattern. See photo.
Incisive engraving is performed with a special tool – a graver.
If you ask yourself how to make it yourself and where to buy these tools, then the answer is simple: this tool is sold in the same stores where you can find various art supplies.
The finest lines are made with a Messer-Stichel. If you need to make parallel lines, they are made with a rap pen.
To perform high-quality work, this tool must be sharpened; for this, a fine-grained whetstone is used, which is pre-moistened with water or oil.
The graver is brought “to readiness” with a leather product (you can take an old belt) coated with chromium oxide.
Manual processing of small items at home requires the presence of a special pillow; you can easily make it yourself: take two pieces of fabric of the same size (round or square), sew them together along the edge, stepping back from it a little, but you need to leave a small gap in order to so you can pour sand inside.
The prepared form is turned inside out, dried sand is poured in, and the remaining hole is sewn up.
The cushion engraving tool is ready.
How to properly hold the instrument in your hand?
This should be done as if you were holding a regular ballpoint pen: the index finger should be on top of the blade (that’s what the metal part of the cutter is called), and the thumb should hold it on the side.
Work must be done on your own.
In the case when you need to change the direction of the pattern, unfold the pillow with the object on which the element is being applied, but do not change the direction of movement of the hand.
What else is useful to know about incisors?
To do your own engraving at home, it is advisable to first practice so that the carving turns out beautiful in the end.
It is better to purchase a set of tools: it is better to apply rounded lines with a square section of cutters, and it is better to make straight lines with a round section.
During work, burrs very often appear, which cannot be avoided, but they can be removed with the help of a scraper.
You can make the scraper yourself. To do this, you will need a file, from the edges of which you need to grind off the notch.
Before application, the surface must be cleaned with fine sandpaper and polished. A special polishing paste is used for polishing.
The paste can be easily replaced with chromium oxide (oil paint). The surface of the object must be thoroughly and vigorously rubbed. The paste is ground with a thick piece of leather.
: Stangen gauge - purpose, verification, GOST
Engraving pen
Hand engraving at home requires: - Stichel - Metal blank
— Anything solid holding a metal workpiece, possibly a vice
For beginners, we recommend using a softer metal, such as copper or aluminum, as a workpiece.
A shtikhel is a rod, usually 120 -130 millimeters in size. The tip of the gravel is cut at a certain angle and sharpened. The second tip is inserted into the handle, usually wooden.
Engraving pens come in various shapes and differ in the width of the working surface. If you don’t have this tool, you can easily make it yourself if you have the right materials.
To make a graver you need tool steel.
The metal used in ball bearings and springs is excellent here. To make a cutting surface, you need to use a cutter, a needle file, a file, cutting it into thin strips.
The best material to make an engraving pen is P18 steel. You can also make a graver from circular saw blades.
Then we sharpen the workpiece at an angle, which will allow us to make a notch of the required width.
If we talk about the handle of a wooden pen, then it must be made of hardwood, with a width convenient for the master to hold in his hand. The mushroom shape is, in our opinion, the best option.
Glass engraving
Photo 4. For home engraving you will need regular salt, nail polish, nail polish cleaner and a glass of water.
Do-it-yourself engraving on the glass surface is done chemically and mechanically. The mechanical method involves the use of a nozzle that is driven by an electric motor. Procedure:
- Using a dark marker, the drawing is transferred to the glass.
- A damp sponge is applied to the image on the glass. This must be done carefully so as not to smudge the drawing.
- When working, you must use safety glasses.
- After completing the drawing, it is washed and examined for gaps. If necessary, missed places are processed again.
Color engraving
To make the drawing look more clear and beautiful, use a glass pencil or ink.
In order for the effect of using these tools to remain as long as possible, the surface is coated with colorless varnish.
You can make the drawing clearer using a needle and oil paints. This set allows you to scratch auxiliary lines of the pattern, which are subsequently covered with paint.
Artistic color engraving allows you to make the product colorful. To do this, those elements that do not need to be painted are coated with transparent varnish.
:
How to blacken a metal object? Special equipment is not used for this, but the following substances are required: sulfur and potash (potassium carbonate) in a ratio of 1:2.
This composition must be put on fire; to do this, it is poured into a tin can. The mixture must be constantly stirred, and the fire should not be high.
The mixture is removed from the heat when it turns black. Before this, it will need to be ground in a mortar; after the fire, it is also placed in a mortar and ground again (cooled).
Blackening occurs as follows:
- Water is added to the resulting mixture (1:9);
- A brass object is placed in the solution;
- It is heated until the product acquires the desired shade.
You can make the background dark before applying the drawing. In this case, varnish is not needed.
You can make an object brown with your own hands by keeping it in a solution of zinc chloride and copper sulfate with the addition of water (100g, 100g, 200g, respectively).
Hand painting in steel gray color is obtained from 1 liter of water, two grams of ordinary salt and two grams of a mixture of sulfur and potash.
The orange-red color is obtained from a solution of potassium sulphide: 1 gram of the substance per 250 grams of water.
Upon completion of work, the varnish is erased.
The blackening of an object and the blackness we know are two different things. The technique used to create niello is mechanical; it cannot be done with your own hands.
Metal engraving
Metal engraving allows you to create beautiful products - paintings, panels, jewelry, etc. applying an image to a sheet of metal mechanically can be done using different tools - using a cutter, laser, gravel, etc. Let's take a closer look at manual engraving on a metal surface.
In this example, metal engraving work is performed in the reverse manner - when the design is depicted with light lines and strokes on a dark background. Before you begin, you need to prepare everything you need:
- Brass sheet 0.6-1 mm thick
- Engraver with bur for metal
- Degreasing agent
- Sodium sulfate crystals
- Tracing paper
- Clear varnish
Let's start experiments
Decorative patterns using the engraving method are applied to plates, knives, pistols, sabers, medals, cups, and apartment numbers.
All patterns and inscriptions are preserved almost forever and do not require expensive and rare consumables or special equipment for execution. The design can be applied to steel, aluminum, brass, copper, and metal alloys.
The method does not pollute the environment. It is impossible to wash off or erase the drawing using conventional methods and means.
It is recommended to start by applying simple inscriptions on cutlery. Relatives and friends may appreciate such a gift. You need to prepare for work (photo No. 4).
Photo 2. Engraved wedding rings, the wedding date and the initials of the bride and groom are usually written on them.
- Nail polish that my wife doesn't really need.
- Toothpick with sharp tips.
- You may need an ordinary match.
- Salt.
- Charger for car battery. It can be successfully replaced by charging from a mobile phone.
- Glass or porcelain dishes in the form of a glass, mug or jar.
- Nail polish remover.
The work is done in this order:
- Take a spoon and cover it with nail polish. The entire surface must be varnished very carefully, otherwise there will be defects in the work.
- Using a match or toothpick, a pattern, name, or other image is scratched through the layer of varnish.
- Pour 2 tablespoons of salt into a glass glass or jar. Some people add a spoonful of salt and a spoonful of soda.
- Water is poured into the vessel, the salt is thoroughly stirred until completely dissolved.
- We connect a car or other charger with the positive terminal to the product being processed, and the negative terminal to any metal object that will be placed in a vessel with water. This item could be another spoon, a piece of thick wire, or a metal plate.
- The rectifier is connected to the network. Almost immediately, an etching reaction will begin in the glass with darkening of the liquid. It lasts 1-5 minutes. It depends on the magnitude of the current. The product is checked periodically. After reaching the desired etching depth, it is removed from the container.
- The varnish is washed off with nail polish remover. The result should look something like this (photo No. 3).
Making your own gravel
To make a gravel, it is necessary to use tool steel. The metal used in springs and ball bearings is excellent for this purpose. To make a cutting surface, you can use old files and needle files, as well as various cutters that need to be cut into thin strips.
The ideal material for making an engraving pen is P18 steel. From old circles for circular saws you can make a large number of blanks for the production of gravers at home. Next, the working part of the workpiece is sharpened at an angle that will make it possible to make a notch of a certain width on the metal surface.
The handle of the gravel is made of hardwood, and should be of such a width that the master can comfortably hold the tool in his hand. The recommended length of this part of the gravel is usually 50 mm.
A mushroom-shaped handle is the most suitable for making this tool, but you can experiment and make several different options, and in the process choose the most suitable option.
:
Preparation of the workpiece
First of all, you should select a blank on which the drawing will be displayed. The selected product must be free of rust and chips. To prepare the surface you will need:
- Sandpaper P400.
- GOI paste No. 1 or No. 2
First, the workpiece is polished using sandpaper. Then final polishing is carried out using GOI paste.
To avoid damage to the surface, when carrying out polishing work with GOI paste, it is recommended to use this product only No. 1 or No. 2.
You should also do the following before finishing polishing with this product:
- Prepare a flannel cloth and moisten it with white spirit
- Pour GOI paste onto a dampened cloth.
- Wipe the unwanted area of metal with a cloth to remove large pieces that could scratch the surface.
After such preparation, the workpiece is polished using uniform circular movements. After completing the polishing activities, the metal object must be rinsed in kerosene and dried at room temperature.
The process of engraving on metal
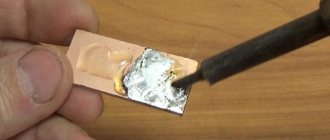
If you are engraving a metal surface for the first time, then before you start applying the main design, it is recommended to practice on an unnecessary piece of metal.
The ideal option for such training is to use a copper plate. A piece of copper should be securely fixed to a wooden board using self-tapping screws with wide heads. When the workpiece is secured, the board is laid on the table, additional lighting is turned on if necessary, the cutting tool is clamped in the right hand, and an even notch is made on the metal surface.
To prevent the hand from slipping when making a straight line, on the surface of the metal plate the thumbs of the left and right hands should be connected and touch the plate where the drawing is made.
The index finger of the right hand, at this time, rests on the tool’s cutter and completely controls the process of drawing lines. It is recommended to first make several straight parallel stripes on the workpiece.
When the smooth areas look good, you can move on to making semicircular lines.
When your hand is already a little full, you can begin to engrave the design on the workpiece. To carry out this work, the metal object must also be securely fixed. For this purpose, a device similar to the self-tapping locking mechanism described above should be made.
To engrave simple figures, initials and other simple images, you can begin immediately after securing the metal object. If you need to make a complex drawing, it is recommended to first transfer the image to the workpiece.
:
Transferring a complex image to metal
The original method of transferring an image to a metal base is carried out in the following sequence:
- Varnish is applied to the surface of the metal being processed.
- Using a soft graphite pencil, an image is drawn on a polyester film that will be engraved on the workpiece.
- The drawing is covered with tape, pressed over the entire area to the film and carefully removed from it. In this case, the image drawn earlier will remain on the sticky surface of the tape.
- When the varnish dries, the tape is attached to the metal surface, smoothed with a roller or other soft object, and then removed.
After correctly performing the described steps, a pattern will remain on the product, which can be used for engraving.
:
Other engraving methods
In addition to the manual engraving method at home, the following methods can be used to change the relief of a metal surface:
- Chemical engraving is a method that can be easily done at home, even with regular table salt and a phone charger.
- Using a drill is a great method for home use. The principle of metal removal by this method is similar to manual engraving, but instead of a sercie, a drill or similar device with a rotating thin drill is used.
- Laser engraving is the most advanced way of applying a design to a metal surface, but equipment for this type of work will be too expensive. The use of this engraving method is justified only when the hobby of drawing designs on metal becomes a profession and brings in a constant income.
:
Conclusion
How to make engraving on metal and which method to master to perform this type of work, everyone must decide for themselves. To begin with, it is recommended to purchase a professional tool for manual work. After working with hand tools for some time, you can move on to mastering the equipment, which will significantly speed up the engraving process.
https://www.youtube.com/watch?v=FPqL93UELzwu0026t=3172s
It is recommended to purchase metal engraving tools only in specialized stores. When making your own gravers, you should pay attention to the cutting surface of the tool, which must be perfectly sharpened.
A gravel that is not sharp enough and has knocked down corners will not allow you to remove the metal correctly. When working with the tool, you must also be careful, otherwise you can seriously injure yourself.
If such a nuisance has already occurred, then the wound should be disinfected and bandaged.
Purpose of the graver
For engraving, the master needs a set of metal stamps of different shapes to engrave various elements of the image. The most common are:
- Spitz is a wedge-shaped cutter with a slope of 30 to 40°, used to design the outline of an image and clear elements of great depth;
- Messer - resembles a knife, the wedge slope is from 15 to 30°, it is used to make fine details;
- flah - similar to a chisel blade 0.15-6 mm wide, used to select depressions in the design;
- bol - a rounded point with a radius of 0.2-0.6 mm; with its help, semicircular depressions are selected, from which text elements of the design are formed;
- hornbeam - diamond-shaped section, large elements on concave elements are chosen with it;
- facet - a trapezoidal section with a blade sharpening angle from 50 to 115°, used for forming images of high complexity;
- Shatir - the blade has a serrated shape with a distance between the teeth from 0.1 to 0.5 mm, it is used to obtain several parallel strokes.
Stichels for carving metal of other shapes are rarely used for restoration work and when making particularly complex images.
Stieheli
The main type of cutting tool for manual engraving is gravers. Translated from German, the word “stihel” means “cutter”. This term immediately gives a clear idea of the type of tool used mainly for metal engraving.
A modern metal cutter, or shtikhel, consists of three parts: a blade, a handle and a ring (Fig. 3, b). The handle, which has a mushroom shape, is turned on a lathe from hardwood - beech, birch, etc. A metal (usually brass) sleeve is placed on the thin end of the handle, which protects the wooden handle from cracking when it is attached to the blade. The shank of the blade is driven into the end of the handle from the side of the ring. From below, approximately at the level of the lower edge of the blade, part of the handle is cut off. Thanks to this cut, the engraver is able to hold the tool at a slight angle to the metal surface, which ensures the removal of thin chips.
The length of the handle can be different (from 30 to 70 mm) - the engraver selects it according to his hand. But in a set of gravers, all handles must have the same dimensions. The length of the blades together with the shanks is also a constant value (100–120 mm), despite the difference in their sections.
Sticker blades vary in shape and cross-sectional size. Each cross-sectional size corresponds to a specific gravel number, and the larger the number, the larger its cross-sectional area.
The main quality of the gravel is the durability of its working part. This is facilitated by good sharpening and proper hardening: under-hardening promotes rapid dulling, over-hardening contributes to chipping of the cutting edge. It is necessary that the graver is not afraid of impacts and bends, so that its cutting edge does not deform or crumble during engraving. As the cutting edge wears out, the gravel is re-sharpened, which shortens its length. It is difficult to engrave with a shortened engraving pen. By using handles of various sizes, you can compensate for the wear of the gravers and use them almost until they are completely worn out. A set of professional engraver's pens consists of 60–80 pieces. – 10–16 pcs. each profile; The set also includes special gravers.
Engraving examples
Engraving on different objects has its own characteristics. Let's look at a few product examples.
Engraving on wedding rings
Usually they are engraved with words and inscriptions, but it is important that it is easy to read. But for this you need a suitable size of the product, because it will not be possible to apply such an inscription on a ring that is too narrow
Engraving can be applied to the front, inner side of the ring and its side edges.
Engraving in production
It is usually used in the manufacture of nameplates, plates, serial numbers, license plates and many other products.
But most importantly, do not forget that when producing industrial nameplates you must comply with the requirements established by law. Using markings, information about the product and manufacturer is applied to the nameplate. It includes technical characteristics of the device, manufacturer data, Rostest data, device serial number and a description of safety when working with the item.
The inscriptions are very thin and clear, so the nameplate itself is small. In addition, when applying inscriptions to a nameplate, their durability is important, so production uses exclusively laser marking methods. And thanks to the high speed of work, their production has no restrictions on circulation.
#114 Wood cutters from a feather drill
How to make wood cutters from a feather drill
(The photo shows the upper chisel made of bearing steel from the USSR HF set, placed specifically for comparison)
If you are thinking about making chisels for wood carving with your own hands, then you already know that it is now difficult to find good metal. These tips from Evgeny Korotin are for those who find it difficult to buy a real imported set of cutters because of its cost. The author always made the tool himself, you won’t believe it, but even from a bayonet shovel. Moreover, the latter has been working for many years.
This photo shows chisels made from feather wood drill bits with an SDS+ shank (RIGHT) for working with a rotary hammer or a SPARKY jackhammer for large sculptures.
About the choice of drills: Feather drills from 6 mm are now on sale. up to 55 mm. it turns out - practically take anything and make a cutter. And the author has a whole set made this way, plus a couple of jambs.
For forging, you can heat it in the flame of a gas stove with the flame divider removed, and then give it the desired shape.
About forging tools
Here is a photo of a homemade matrix that Evgeniy uses to make chisels from feather drills. It is made from a piece of rail.
The author's matrix was milled at the factory according to his sketches. The work took an hour and a half, there was such an opportunity.
Also for forging you need a hammer with a ball-shaped striker. Evgeniy made the hammer himself using a grinder.
Types of gravers
In addition to traditional hand tools, mechanized cutters have recently become increasingly widespread. The shape of their blade is exactly the same as that of a manual blade, but the pressure on the cutter is carried out due to a mechanical drive. Depending on the type of drive, the following types of gravers are distinguished:
You can buy an electromechanical serger, or you can make it yourself. This will require serious skills in electrical engineering and design.
The design and manufacturing technology of a pneumatic hammer for metal is much simpler. To assemble it, it is enough to grind (or select a suitable one) a cylinder and a piston, which, under the influence of compressed air supplied through the pipe, will hit the shank of the graver.
How to forge a graver
Beginner engravers make do with purchased gravers or repurposed files. Mature craftsmen often feel the need for a reliable forged chisel.
Making a forged graver yourself requires intermediate level blacksmithing skills. Instructions on how to make a gravel using the hot forging method are given below.
Forging is divided into the following main stages:
- forging workpieces;
- hardening;
- final processing and finishing.
During forging, it is necessary to constantly monitor the temperature of the part. It is determined by a pyrometer or the traditional method - by the color of the glow. At the beginning of the process, the part should be light yellow, in the last operations it should be light red.
A well-heated workpiece must be grabbed from the forge with pliers and placed on the anvil. Light, frequent blows knock off the scale. To obtain a rectangle, the cross-broaching technique is used. To form a triangular shape of a part, it is pulled longitudinally on the edge of the anvil, turning it at the required angle. A similar technique is used for broaching for a trapezoidal section shape.
In a more complex way, the blacksmith achieves a diamond-shaped section. First, the tip is pulled in one direction, then the product is turned over and pulled in the opposite direction. In this case, part of the part will have to be cut off.
The next operation is broaching the tail part of the cutter. it must be additionally calcined and stretched until a pyramidal tail is formed.
You can move on to the next stage - hardening. Hardening of carbon alloys is carried out in the following sequence:
- heat the product to 805 ±15 °C;
- quickly immerse in cold water;
- check the degree of hardening with a file: if it slides over the metal without forming chips, then the required hardness has been achieved;
- When chips form, quenching should be repeated.
And the final stage is machining. The grinder is given its final shape on the abrasive wheel. Here the blade is sharpened to the required sharpness. The final finishing is done on a fine-grained wheel.
Do-it-yourself metal graver for engraving
Making a gravel for engraving on metal
Making a serger of the simplest design is possible for a home craftsman with metalworking skills. To do this, take as a basis:
- file or needle file;
- spring leaf;
- part of the bearing race.
The main thing is that the steel is high-strength and elastic. Strength is necessary for the graver to successfully cut the metal of the workpiece, not become dull for a long time and maintain the specified sharpening shape. Elasticity will allow the tool not to break under load.
A higher-quality cutter can be obtained by forging, but for this you must have good blacksmithing skills and have a forge. A file made from a needle file will be noticeably inferior to a forged one in both strength and flexibility.
Before you start sawing and forging metal, you should build a drawing of the tool. You will need not only a large-scale image of the cutter itself, but also a drawing of the handle.
How to forge a graver
Beginner engravers make do with purchased gravers or repurposed files. Mature craftsmen often feel the need for a reliable forged chisel.
Making a forged graver yourself requires intermediate level blacksmithing skills. Instructions on how to make a gravel using the hot forging method are given below.
Forging is divided into the following main stages:
- forging workpieces;
- hardening;
- final processing and finishing.
During forging, it is necessary to constantly monitor the temperature of the part. It is determined by a pyrometer or the traditional method - by the color of the glow. At the beginning of the process, the part should be light yellow, in the last operations it should be light red.
A well-heated workpiece must be grabbed from the forge with pliers and placed on the anvil. Light, frequent blows knock off the scale. To obtain a rectangle, the cross-broaching technique is used. To form a triangular shape of a part, it is pulled longitudinally on the edge of the anvil, turning it at the required angle. A similar technique is used for broaching for a trapezoidal section shape.
In a more complex way, the blacksmith achieves a diamond-shaped section. First, the tip is pulled in one direction, then the product is turned over and pulled in the opposite direction. In this case, part of the part will have to be cut off.
The next operation is broaching the tail part of the cutter. it must be additionally calcined and stretched until a pyramidal tail is formed.
You can move on to the next stage - hardening. Hardening of carbon alloys is carried out in the following sequence:
- heat the product to 805 ±15 °C;
- quickly immerse in cold water;
- check the degree of hardening with a file: if it slides over the metal without forming chips, then the required hardness has been achieved;
- When chips form, quenching should be repeated.
And the final stage is machining. The grinder is given its final shape on the abrasive wheel. Here the blade is sharpened to the required sharpness. The final finishing is done on a fine-grained wheel.
Purpose of the graver
For engraving, the master needs a set of metal stamps of different shapes to engrave various elements of the image. The most common are:
- Spitz is a wedge-shaped cutter with a slope of 30 to 40°, used to design the outline of an image and clear elements of great depth;
- Messer - resembles a knife, the wedge slope is from 15 to 30°, it is used to make fine details;
- flah - similar to a chisel blade 0.15-6 mm wide, used to select depressions in the design;
- bol - a rounded point with a radius of 0.2-0.6 mm; with its help, semicircular depressions are selected, from which text elements of the design are formed;
- hornbeam - diamond-shaped section, large elements on concave elements are chosen with it;
- facet - a trapezoidal section with a blade sharpening angle from 50 to 115°, used for forming images of high complexity;
- Shatir - the blade has a serrated shape with a distance between the teeth from 0.1 to 0.5 mm, it is used to obtain several parallel strokes.
Stichels for carving metal of other shapes are rarely used for restoration work and when making particularly complex images.
Engraving with a graver on metal surfaces
Sticky engraving on metal requires the engraver to have a faithful eye, a steady hand and artistic taste, but above all, patience and perseverance. It is also necessary to decide on the material for the blanks.
Copper and brass are more suitable for a novice craftsman.
More experienced engravers work on other non-ferrous metals and soft steel alloys, using specific engraving methods and improved tools.
All that is needed for engraving tools and equipment is a work table and a set of gravers. At the first stage of mastering hand engraving technology, it is recommended to achieve stable quality of straight and curved strokes. When they begin to turn out confidently, you can move on to more complex elements of the image.
Before starting to engrave the workpiece, the master traditionally checks the sharpness of the sharpening pen by running it along the tip of the nail. If the strip can be cut without effort or pressure, the sharpness is sufficient. The handle is clamped in the working hand, the thumb and index fingers cover the incisor 10-20 mm from the tip.
The blade is pressed against the surface of the workpiece at an angle of 35-45°, then the angle is sharply reduced to 5-10°, while a piece of metal is cut out of the workpiece and a stroke is formed. For beginners, it is not recommended to limit their length to 3-4 mm. As you gain experience, you will begin to get longer ones.
Types of gravers
In addition to traditional hand tools, mechanized cutters have recently become increasingly widespread. The shape of their blade is exactly the same as that of a manual blade, but the pressure on the cutter is carried out due to a mechanical drive. Depending on the type of drive, the following types of gravers are distinguished:
- electric softener;
- pneumatic squeegee.
You can buy an electromechanical serger, or you can make it yourself. This will require serious skills in electrical engineering and design.
The design and manufacturing technology of a pneumatic hammer for metal is much simpler. To assemble it, it is enough to grind (or select a suitable one) a cylinder and a piston, which, under the influence of compressed air supplied through the pipe, will hit the shank of the graver.
Is it possible to do engraving at home?
If we are talking about mechanical or manual engraving, then, of course, yes. It is enough to purchase only cutters and a drill.
But if you are planning to engage in laser engraving, then it is worth considering that the equipment for it is much more expensive, so it will only pay off if the craft becomes your business. Of course, for mass production it is better to allocate a special room, at least for safety reasons. After all, to work on laser equipment you will need voltage stabilization and grounding.
But we have several clients who use fiber markers at home for small production. Desktop markers with small dimensions are suitable for this.
General technology
Carrying out engraving processes involves many types of techniques. The main methods are manual and mechanical, the latter is divided into the categories of defensive and line.
- A three-dimensional design can be obtained by using defense engraving; deeper processing involves three-dimensional engraving.
- When performing surface actions, the line technique is used. The process is carried out in several steps, the lines of the processing contour are drawn, and part of the metal is removed from the surface using dashed movements.
Carrying out incisive engraving yourself is done with a graver. A special tool can be purchased at art stores. Accessories for the manual process are divided into types:
- Messer - a graver is necessary for making fine lines.
- Engraving with parallel lines is done with a pen marker.
Tools for metal engraving cannot be used without high-quality sharpening of the gravel. For high-quality work, you need to sharpen the tool with a fine-grained whetstone, and then wipe it with a leather cloth.
When working with small objects, you will need a special pillow. You can make this tool with your own hands; material of the same size is connected with a thread along the edges. It is necessary to leave an intermediate space for filling with bulk material or sand. The workpiece is turned inside out, sand is poured into the hole formed, after which the rest of the pillow is sewn up with a stitch.
Using the tool will require careful handling and preliminary skills. You need to use the tool like a regular pen when writing, holding the tool to the side with the thumb of your working hand.
It is possible to apply a design to metal using laser engraving. A unique piece can be used as a gift or as a signature fitting. Changes in design and inscriptions on metal products are available using technology such as laser engraving.
General technology
The technique can be manual or mechanical (various equipment is used).
It is also divided into line and armor:
Incisive engraving is performed with a special tool – a graver.
If you ask yourself how to make it yourself and where to buy these tools, then the answer is simple: this tool is sold in the same stores where you can find various art supplies.
The finest lines are made with a Messer-Stichel. If you need to make parallel lines, they are made with a rap pen.
The graver is brought “to readiness” with a leather product (you can take an old belt) coated with chromium oxide.
Manual processing of small items at home requires the presence of a special pillow; you can easily make it yourself: take two pieces of fabric of the same size (round or square), sew them together along the edge, stepping back from it a little, but you need to leave a small gap in order to so you can pour sand inside.
The cushion engraving tool is ready.
How to properly hold the instrument in your hand?
This should be done as if you were holding a regular ballpoint pen: the index finger should be on top of the blade (that’s what the metal part of the cutter is called), and the thumb should hold it on the side.
Work must be done on your own.
In the case when you need to change the direction of the pattern, unfold the pillow with the object on which the element is being applied, but do not change the direction of movement of the hand.
What else is useful to know about incisors?
To do your own engraving at home, it is advisable to first practice so that the carving turns out beautiful in the end.
It is better to purchase a set of tools: it is better to apply rounded lines with a square section of cutters, and it is better to make straight lines with a round section.
You can make the scraper yourself. To do this, you will need a file, from the edges of which you need to grind off the notch.
What is needed for engraving
For manual engraving at home, you will need the following tools and materials:
- Stichel.
- Metal blank.
- A vice or similar device for holding a workpiece stationary.
The blank for applying the pattern can be used from any metal, but for beginning craftsmen it is better to use aluminum or copper.
The graver is a rod up to 120 mm long. One end of this tool is cut at an angle and sharpened, the other is installed in a handle made of wood or plastic.
The graver can be of different shapes and also differ in the width of the working surface. If you do not have this tool, you can make it yourself if you have materials suitable for this purpose.
Making your own gravel
To make a gravel, it is necessary to use tool steel. The metal used in springs and ball bearings is excellent for this purpose. To make a cutting surface, you can use old files and needle files, as well as various cutters that need to be cut into thin strips.
The ideal material for making an engraving pen is P18 steel. From old circles for circular saws you can make a large number of blanks for the production of gravers at home. Next, the working part of the workpiece is sharpened at an angle that will make it possible to make a notch of a certain width on the metal surface.
The handle of the gravel is made of hardwood, and should be of such a width that the master can comfortably hold the tool in his hand. The recommended length of this part of the gravel is usually 50 mm.
A mushroom-shaped handle is the most suitable for making this tool, but you can experiment and make several different options, and in the process choose the most suitable option.
Preparation of the workpiece
First of all, you should select a blank on which the drawing will be displayed. The selected product must be free of rust and chips. To prepare the surface you will need:
- Sandpaper P400.
- GOI paste No. 1 or No. 2
First, the workpiece is polished using sandpaper. Then final polishing is carried out using GOI paste.
To avoid damage to the surface, when carrying out polishing work with GOI paste, it is recommended to use this product only No. 1 or No. 2.
You should also do the following before finishing polishing with this product:
- Prepare a flannel cloth and moisten it with white spirit
- Pour GOI paste onto a dampened cloth.
- Wipe the unwanted area of metal with a cloth to remove large pieces that could scratch the surface.
After such preparation, the workpiece is polished using uniform circular movements. After completing the polishing activities, the metal object must be rinsed in kerosene and dried at room temperature.
The process of engraving on metal
If you are engraving a metal surface for the first time, then before you start applying the main design, it is recommended to practice on an unnecessary piece of metal.
The ideal option for such training is to use a copper plate. A piece of copper should be securely fixed to a wooden board using self-tapping screws with wide heads. When the workpiece is secured, the board is laid on the table, additional lighting is turned on if necessary, the cutting tool is clamped in the right hand, and an even notch is made on the metal surface.
To prevent the hand from slipping when making a straight line, on the surface of the metal plate the thumbs of the left and right hands should be connected and touch the plate where the drawing is made. The index finger of the right hand, at this time, rests on the tool’s cutter and completely controls the process of drawing lines. It is recommended to first make several straight parallel stripes on the workpiece. When the smooth areas look good, you can move on to making semicircular lines.
When your hand is already a little full, you can begin to engrave the design on the workpiece. To carry out this work, the metal object must also be securely fixed. For this purpose, a device similar to the self-tapping locking mechanism described above should be made.
To engrave simple figures, initials and other simple images, you can begin immediately after securing the metal object. If you need to make a complex drawing, it is recommended to first transfer the image to the workpiece.
Pneumostihel Sergei Valtman
and so, I played with these tubes and motors, gradually began to understand for myself what weight of pistons for what work, which compressor is better to take, the engine.
Well, there was an ambush with the turners, but my hands were itching terribly, I bought a lathe and started making my own version from a stainless tube. Based on my considerations, I chose the size of the tool holder and the intermediate impact element, to match the rubber bands that are available in the auto store, sat down and drew on graph paper, and this is the first option I got
The drawings were drawn by Rumen Radkov
Oleg has already posted the details on the forum. The pistons are only now different with fluoroplastic jackets
Of course, I ruined a couple of blanks, but then I got what I needed, well, of course, I sanded the .. raw .. stainless steel and carbonitrated the cylinder tube and lock nut, in the composition that I wrote about at the beginning, after two hours, the result was a beautiful black part like a weapon , with surface hardness, the file slides. Then I used felt and polishing paste to just add gloss and that’s it!
Color engraving
To make the drawing look more clear and beautiful, use a glass pencil or ink.
In order for the effect of using these tools to remain as long as possible, the surface is coated with colorless varnish.
You can make the drawing clearer using a needle and oil paints. This set allows you to scratch auxiliary lines of the pattern, which are subsequently covered with paint.
Artistic color engraving allows you to make the product colorful. To do this, those elements that do not need to be painted are coated with transparent varnish.
Video:
How to blacken a metal object? Special equipment is not used for this, but the following substances are required: sulfur and potash (potassium carbonate) in a ratio of 1:2.
This composition must be put on fire; to do this, it is poured into a tin can. The mixture must be constantly stirred, and the fire should not be high.
The mixture is removed from the heat when it turns black. Before this, it will need to be ground in a mortar; after the fire, it is also placed in a mortar and ground again (cooled).
Blackening occurs as follows:
- Water is added to the resulting mixture (1:9);
- A brass object is placed in the solution;
- It is heated until the product acquires the desired shade.
You can make the background dark before applying the drawing. In this case, varnish is not needed.
You can make an object brown with your own hands by keeping it in a solution of zinc chloride and copper sulfate with the addition of water (100g, 100g, 200g, respectively).
Hand painting in steel gray color is obtained from 1 liter of water, two grams of ordinary salt and two grams of a mixture of sulfur and potash.
The orange-red color is obtained from a solution of potassium sulphide: 1 gram of the substance per 250 grams of water.
Upon completion of work, the varnish is erased.
The blackening of an object and the blackness we know are two different things. The technique used to create niello is mechanical; it cannot be done with your own hands.
Engraving with a graver on metal surfaces
Sticky engraving on metal requires the engraver to have a faithful eye, a steady hand and artistic taste, but above all, patience and perseverance. It is also necessary to decide on the material for the blanks. Copper and brass are more suitable for a novice craftsman. More experienced engravers work on other non-ferrous metals and soft steel alloys, using specific engraving methods and improved tools.
All that is needed for engraving tools and equipment is a work table and a set of gravers. At the first stage of mastering hand engraving technology, it is recommended to achieve stable quality of straight and curved strokes. When they begin to turn out confidently, you can move on to more complex elements of the image.
Before starting to engrave the workpiece, the master traditionally checks the sharpness of the sharpening pen by running it along the tip of the nail. If the strip can be cut without effort or pressure, the sharpness is sufficient. The handle is clamped in the working hand, the thumb and index fingers cover the incisor 10-20 mm from the tip.
The blade is pressed against the surface of the workpiece at an angle of 35-45°, then the angle is sharply reduced to 5-10°, while a piece of metal is cut out of the workpiece and a stroke is formed. For beginners, it is not recommended to limit their length to 3-4 mm. As you gain experience, you will begin to get longer ones.