Repair time is inevitable. But for some it is limited to a banal re-gluing of wallpaper, while for others a complete internal and external change is not enough to satisfy their aesthetic needs. And since we are talking about something fundamentally new, then, therefore, we must talk about what will help in achieving these very innovations.
For some, repairs are limited to banal wallpapering, but for others, complete internal and external changes are not enough to satisfy their aesthetic needs.
The topic of today's conversation is the trowel or its academic name - trowel. Let's try to figure out what this product is used for, talk about its varieties and figure out how not to make a mistake with its choice.
Construction trowel
What is a trowel?
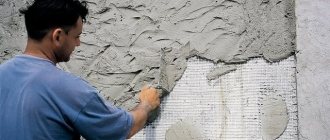
Trowel is a hand tool, a steel blade, ground on both sides. The handle of this device is curved and is usually made of plastic or wood. One of the most important tools when making both cosmetic and major changes in the interior and/or appearance of the house.
Trowel – hand tool, steel blade, ground on both sides
Purpose of the “trowel” tool
The main scope of application of this product is construction
work: applying a fastening solution, adhesive for tiling or stone cladding.
The main scope of application of this product is construction work: applying fastening mortar, adhesive for tiling or stone cladding.
It performs the function of a kind of dispenser - it is used when it is necessary to apply a certain amount of any building material. You can also use it to adjust the location of stone or tile on the surface.
Definition of the concept
The main tool with which all the necessary manipulations will take place is a trowel . But it should be noted that in addition to the trowel, other tools are also used, for example, a spatula. These are the two tools most often used when applying Venetian plaster.
A trowel for Venetian finishing is a type of construction tool used by plaster masters when carrying out finishing work that involves applying Venetian plaster to the surface.
Characteristics of trowels
Materials for making trowels
The materials used to create trowels are as follows:
Shoulder:
- High carbon steel
- Stainless steel (especially valued by plasterers)
- Plastic mass
Pen:
- Classic wood
- Rough wood (The main plus is the impossibility of accidental slipping)
- Plastic (Less durable compared to wood, but also valued by many experts)
- Metal (Rarely used as it adds extra weight and complicates the work process)
Dimensions and shape
The platform can be made in the form of a rectangle (standard version) or in the form of a trapezoid. In turn, the trapezoid itself can be either with three corners or without them at all (in the shape of a drop). Moreover, the specifics of the work should be taken into account.
For example, the drop-shaped one is ideal for tile work, and the oval one is well suited for pouring mortar. And the most specific model is the narrow strip. It is used only for external cladding. Handles do not have any varieties as such, so there is no point in dwelling on them in more detail.
The size directly depends on the use of the trowel. And, as a rule, it is determined by the size and type of product.
- For operations with stone and similar materials, the platform is 210 mm, and the total length is 310 mm. Platform width – 125
- For work with stoves, fireplaces, braziers – 200/327/125
- For working with tiles – 310/174/120
- For finishing plaster – 327/190/150
Advice. On many Internet portals, dimensions are indicated in centimeters or meters. Simply multiply or divide the indicators by ten in order to meet the required criteria
Weight
Depending on the size of the trowel itself, the weight of the structure varies between 300-400 grams. Some models can weigh around half a kilogram or a fifth or a quarter of it.
Depending on the size of the trowel itself, the weight of the structure varies between 300-400 grams
Trowel design.
The following elements are distinguished in the trowel design:
- Working platform - as a rule, the most flat part, rectangular or oval or ellipsoidal in shape (setting and leveling plaster, viscous material, etc.)
- Short handle (No need for extra length as it requires no effort to operate)
- Neck – connecting element between the shoulder blade and the neck
- Butt - a metal attachment at the end of the handle
Moreover, it is extremely important to take into account the degree of bending first, since it is this that determines for which area of work the product is used. Otherwise, only the proportions and combinations of materials used change.
It is extremely important to take into account the degree of bending of the working platform of the trowel, since it is this that determines for which area of work the product is used
Trowel varieties
Trowels, depending on their purpose, are of the following types:
- Mason's trowel. Used for masonry and cement mortar bags. Due to its unusual shape for the average person, it is used for working in hard-to-reach places. For example, gaps and corner cracks.
A mason's trowel is used for masonry
- Finishing trowel. Used for measuring, mixing and applying construction mixtures (such as cement, gypsum) to various surfaces. The most popular sizes are 120-180 mm. Taking less or more is irrational in professional and commercial terms.
Finishing trowel. Used for measuring, mixing and applying construction mixtures
- Concrete trowel. A triangular sheet used in brick laying, dosing and coating with concrete-cement mixture.
The concrete trowel is used for laying bricks, dosing and covering with concrete-cement mixture.
- Tiler's trowel. A teardrop-shaped spatula used for measuring and laying mortar during tile-laying work.
The tiler's trowel is used for measuring and laying mortar during tiling work.
- Plastering trowel. Laying, throwing and leveling cement-sand mixtures. The most commonly used sizes are 60 – 100 mm.
Plastering trowel. Laying, throwing and leveling cement-sand mixtures
- Grout trowel. The main function is to rub, iron and/or smooth the original material, leveling the plastered surface after drying. It is thanks to it that many buildings and structures are given an attractive appearance.
Grout trowel. The main function is to rub, iron and/or smooth the original material, leveling the plastered surface after drying
- Serrated trowel. The main task is to smooth the plastered surface, as well as to uniformly apply the adhesive solution. All this thanks to teeth of different sizes. The most common teeth parameters are 4-10 mm.
Serrated trowel
- Joining. The key role is the formation of mortar joints between brick rows. This one differs from other models in its non-standard shape - a narrow blade for sewing seams on one side and a curved end responsible for sewing short vertical seams on the other.
Joining. The key role is the formation of mortar joints between brick rows
There is also a pointed variation that is applicable to all the situations described above, with a number of minor points. The body of the blade reaches sizes of 75 or 100 mm.
There is also a pointed variation, applicable to all the situations described above, with a number of minor points
- Trowel for internal and external corners. The shape of the blade resembles an open door hinge. This design allows you to make both external and internal adjustments at once, without changing body position.
The design of the scapula allows you to make both external and internal adjustments at once, without changing the position of the body.
Moreover, the transition from the handle to the masonry part is accompanied by an angular metal tip that allows you to grip even the most difficult angles.
The transition from the handle to the masonry part is accompanied by an angular metal tip that allows you to grip even the most difficult angles
- Trowel for the Venetian. The most expensive model in the entire segment. Prices for it vary between 2500-3000 thousand. But for that kind of money, absolutely everything has been thought out about it. From the comfort of the handle to the shape of the polishing surface.
Trowel for the Venetian. The most expensive model in the entire segment
In general, its main difference from a trowel for jointing is the material used. The first is universal and suitable for everyone, and the second is only for decorative purposes. And, not least, metal is more flexible. But here there are more costs for the function performed, rather than any structural features.
The main difference between a Venetian trowel and a jointing trowel is the material used
Features of purpose
In practice, all work performed with trowels is divided into facing and roughing. The latter include backfilling of the outer mile and the construction of internal walls, and the first one includes processing the front part of the building.
Trowels for rough work
Capital walls themselves are massive and their construction will require a lot of building mixture. At the same time, it should be mentioned that they are folded in a short time and without worrying about accuracy, because in the future they will require cladding and will be plastered.
Such features left a certain imprint on the design of the trowel for rough work:
- It has a large working element to capture more mixture;
- It has sufficient metal thickness, which increases its overall strength;
- It is made with a heavy body for the purpose of properly tamping down blocks and bricks.
This trowel must be reliable, because the daily load placed on such a device is quite impressive. Any flaws in the design of the tool instantly make it unsuitable for work.
Its weakest part is the attachment of the blade to the handle. In cases where the seam is welded with insufficient quality, the masonry tool will easily fall apart during operation. Thus, only a welding machine will help correct this situation, and it is not always at hand.
Structures with a wooden handle also have weak points. Over time, the place where the curved metal neck is attached weakens and the handle begins to scroll. It becomes completely uncomfortable to work with such a trowel. And it’s not a matter of the load that falls on the trowel - it’s all to blame for the high humidity, due to which the wooden base of the handle is destroyed.
Repairing all the damage described can be done by enlarging the metal handle itself, wrapping it with a nylon cord, and then treating it with glue. Another option would be to carefully drive a couple of short nails into the base. Speaking of plastic trowels, they do not have the listed disadvantages, which is why they enjoy some popularity among some professionals.
Finishing trowel
Visually, it may seem somewhat “toy-like”, since completely different construction problems are solved with it. When laying out the outside of a building, the main emphasis is on attractiveness, cleanliness and neatness, so rough tools are unacceptable for such work.
Most often, trapezoid-shaped platforms are used for such operations, the advantage of which is the blunt end of the scapula. With its help, it is convenient to apply the mixture to the end of the brick and, as a result, the vertical joints with mortar will be properly filled.
Somewhat less often, a petal-shaped trowel is used for these works, i.e. its appearance resembles a “heart” and it is characterized by a more elongated platform. It also has a slightly rounded end, which distinguishes it from a trapezoid with a blunt end. However, it is more difficult for her to spread the mixture onto the brick end, since she will have to make an additional movement to level the mixture over the surface. In addition, a small drawback is that using a “heart” trowel is quite difficult to empty the container of solution residues.
Tips for trowels for cladding
When selecting, you need to pay careful attention to the handle, especially to its back. It is highly advisable to have a metal cap installed on it as a means of additional protection. Such protection is necessary so that the outer cladding can be lined properly and accurately. Of course, such an operation can be performed not only with the end of the handle, but also with the edge, however, it is believed that the handle is more reliable. At the same time, unprotected handles made of wood or plastic will wear out much faster than those with a metal cap, which can more or less withstand mechanical shocks. It is worth mentioning that not all samples are equipped with the mentioned tips. There are two ways to correct the situation:
- A large bolt/nail is inserted into a plastic handle heated over a fire, with the head facing outward;
- You can screw a self-tapping screw with a wide head into a wooden one.
What is the difference between a trowel and a trowel?
There are no special differences. “Trowel” is nothing more than a play on words and an everyday name for a construction tool. Although, in some construction sources, albeit with a great stretch, and a number of clarifications, they say that the main thing is that their difference mainly rests on the form.
“Trowel” is nothing more than a play on words and an everyday name for a construction tool.
In general, the whole point is solely in the interpretation of the term. There is no clear criterion to classify this as a trowel and that as a trowel. As stated earlier, the first is a variation of the second. Even in construction stores, these positions are no different except in size, scope and price.
Some construction sources, albeit with great exaggeration and a number of clarifications, say that the main thing is that the difference between a trowel and a trowel mainly depends on the shape.
Scope of application and difficulties encountered
Do-it-yourself decorative plaster can be applied indoors and outdoors. If we are talking about facade finishing, then in the vast majority of cases structural materials are used for these purposes. They don't cost much, but the decorative effect won't be as beautiful as it could be. It's quite suitable for the façade. We are more interested in interior decoration, where people use decorative plaster for its intended purpose - not only to decorate walls, but also to create a unique atmosphere that will please the eye.
Where in the apartment can decorative plaster be applied?
- In the corridor and hallway it is best to use structural mortars with fine-grained filler. The smaller the filler, the more beautiful the pattern will be. Such materials have increased wear resistance and can withstand mechanical loads well.
- Decorative plaster finishing of ceilings can be done using Venetian. This is the best option, since the ceiling is already perfectly smooth, which is a necessary condition for simulating natural materials. The coating can be protected with varnish and wax, which will save it from moisture in the kitchen and bathroom.
- If Venetian is suitable for the ceiling of the kitchen and bathroom, then it is not necessary to use it for the walls, because it will be too expensive. Textured materials are ideal for the walls in these rooms.
- The bedroom and children's room can be decorated with both textured mixtures and Venetian. This is a matter of taste and financial capabilities.
- In the hall, due to its large area, structural plaster with a fine texture looks good.
- The columns must be finished with Venetian so that they become “marble”. You can do the same with arches, but you need to think about the transition between the arch and the wall.
Knowing where exactly the decorative plaster will be applied, you will understand what material you need. And after that you can study all kinds of application techniques.
How to use a construction trowel correctly?
The first thing you should pay attention to is the specificity of the trowel. Perhaps you will have an unusual plaster, or perhaps a classic one. But, be prepared for the fact that at the same time you can be a tiler, a plasterer, a concrete worker, and a mason. To avoid getting into trouble, follow the following tips.
- Use only a trowel that is suitable for the situation.
- Do not purchase models that are too heavy - with them the risk of an unplanned error is much higher.
- Handle the trowel in such a way as to avoid causing damage to yourself or others. For all their lightness, they make deep cuts extremely easily.
- Hold the instrument in your hands so that you do not have to bend your limbs unnaturally.
- Don't forget to change the platform from time to time if it is removable. As a rule, the metal on them is slightly worse than on non-removable ones, and it corrodes much faster, as a result of which the aesthetic component deteriorates.
- Don't use too much mixture. As it dries, it leaves uneven surfaces on the instrument.
- Price does not always equal quality. So, first of all, look at the product itself, not the price. Quite a few good copies are several times cheaper than branded units.
By following these not-so-complicated tips, you can do work of any complexity yourself, without resorting to the help of professionals, and, therefore, without spending an extra penny from your budget. Moreover, if the actions are correct, you will receive a huge portion of pleasure from them.
But still be careful. If you are not sure of the correctness and clarity of your actions, contact a specialist. He will certainly do everything as it should.
Review of manufacturers
As usual, tools from various manufacturers, tested by many plasterers with their own hands, become popular or, conversely, are rejected.
Among those that are of high quality and recognized as the best are the following:
- For a Venetian woman, the best products are considered to be from three Italian companies: Oikos (wooden handle, blade made of Oikos Inox steel, the most expensive) is considered the best for Venetian women; Pavan (for thin-layer plasters, including Venetian plasters) costs almost twice as much; Armego A233 (blade 0.7 mm thick, price four times lower than Oikos). All these tools have rounded edges, which is convenient when working.
- For thin-layer decorative finishes, the French product Senideco is also recognized as one of the best. They perform not only Venetian plaster, but also silk plaster.
- Other good trowels for decorative plaster are the English Haris and the Italian CO ME 310LEN.
If you are building a house or are going to make repairs and do plastering decorations yourself, then you will need tools, including a trowel for decorative plaster and a trowel for leveling rough mortars, which are not the last tools. After reading the article, you will easily find your way around the large number of different models offered by the market and will be able to choose what is suitable for the implementation of your ideas.
DIY Venetian trowel
Decorative finishing is most often used to correct uneven walls of a house. And if the accessories are selected incorrectly, the negative consequences will be felt for a very, very long time. However, you don’t have to go anywhere to get a good instrument. You can do it without leaving home. But, for this you should take into account.
- The thickness of the metal from which the platform will be made
- Material of the future handle. It should be temperature resistant and at the same time fit comfortably in the hand and not cause discomfort.
- Required application thickness. The amount of metal spent on making a trowel depends on this parameter.
- A preliminary plan is required. Without it, it is physically impossible to take into account all the subtleties during assembly.
- The metal itself should not rust or be inflexible. The best option is stainless steel - the perfect balance of flexibility and reliability
- Possibility of changing the plate
- Total product weight
- Suitability for certain types of work
The Internet is full of recommendations on how to choose everything you need and it won’t be much of a problem to find a video with recommendations. So go to any video hosting site, grab a paper and pen and get ready to write down a lot of useful information.
Be prepared for the fact that a homemade accessory may turn out to be a little more expensive than some options in hardware stores. But your own shirt is closer to your body, as they say. Here it is exclusively a question of the human factor - how to make it and where to buy it.
Sequence of work
The thickness of the decorative plaster layer must correspond to the thickness of the fraction.
Polymer compositions can be applied in 1 layer; in other cases, at least 2 are required. As an example, we consider the “fur coat” finishing technology using silicone plaster and a fur roller.
Stages of work:
Use a spatula to transfer a small amount of the composition onto the trowel; without scribbling, apply the plaster to the surface; align the tent with chaotic movements, without pressing on the trowel; Use a polyurethane float to rub the plaster in a circular motion; it is important not to press too hard on the trowel and trowel, so as not to “wash out” the filler; Before painting, the surface is covered with a primer in 1 layer and left until dry; a fur roller is lowered into the tinted composition and rolled slightly; rolling is carried out in a strictly horizontal or vertical position, starting from the top edge of the wall; as a result, the surface acquires a grainy texture; After drying, remove the falling out elements with a wet trowel and No. 320 sandpaper.
For tinting, you can use universal pigments or water-dispersion paints.
After adjusting the relief, the wall must be covered with a layer of natural wax. To do this, dip a foam roller into wax and roll it over the surface. Wearing fluffy mittens or taking a porous sponge, rub the composition into the surface. The protective layer dries in 12 to 24 hours.
Life hacks for using a trowel
And I would like to conclude today’s article with a selection of tips on how to use a trowel in such a way as to get the most out of it, save on its purchase, choose the best tool and simply not get into a puddle during cosmetic or construction work
- The most convenient material for a handle is wood. During contact with it, hands do not sweat as much as, say, with plastic, and at the same time, it does not heat up or cool down to an uncomfortable state for the hand.
- The best option for purchase is a little-known model in the mid-price segment. In terms of characteristics, they are no different from expensive ones, and cheap ones are too low-quality. Any consultant will tell you more about this.
- Don't use trowels that are too big or too small. When choosing, rely on the future function. If desired, the same version can be used for several types of work.
- Wholesale purchasing is cheaper than retail purchasing. Therefore, when going for everything you need for repairs, take everything at once.
- When rounding figures, take those that are closer to the smaller or larger.
- Don't trust market sellers. It is better to go to a specialized department, but be sure of the reliability of what you are buying.
IMPORTANT! Please inquire about return options. Some sellers refuse to return money for goods, arguing that this is due to the alleged rules of the trading company. This particularly applies to online companies.
And, remember, the most important thing is how this or that work was done, and not who did it.
How to create texture from plaster on a wall
The texture on the plaster depends on the size and purpose of the room, available materials, the capabilities of the craftsman and the flight of imagination. Using a trowel you can create a whole series of designs on the walls. Let's look at the most popular options.
"Grotto." It looks very expensive on the walls, especially dark and rich shades.
Apply 1 layer - primer. Dries in at least 8 hours. 2nd layer – plaster 2-3 mm. Also let it dry for at least three hours. The 3rd layer is the same plaster, but it is applied in islands: the trowel is dipped horizontally into a bucket of material, and then it touches the wall parallel to the surface. Pointed light touches. As a result, so-called “mountains” are formed. Their frequency and height depends on your desire. After partial drying (touch them with your finger - they should give in a little), we again smooth them with a trowel. We very easily walk along the tops of the mountains, comparing them. You should not start all movements on one side. Try to do it chaotically - then there will be no clear lines. After drying, the walls are painted with colorless varnish using a roller, or the plaster is diluted by 30 percent with water and the wall is also painted with a roller. After this, the completely dry walls are polished with a special device or manually rubbed with a woolen rag. Grotto is ready.
“Venetian” plaster is one of the most fashionable and popular options at the moment. Light, delicate colors look best.
1 layer – primer; 2nd layer – plaster (look at the sequence of working with the grotto). Next, using a trowel, we simply apply strokes of the material in different directions. After partial drying, press it down. We take the plaster a couple of shades darker and plaster it with a trowel again. The material will fill the gaps between already dried strokes. Next comes leveling, drying, varnishing and polishing. For a more noticeable effect, you can apply a radically different color to a washcloth and gently rub it over the wall. It will give the impression of greater relief.
Decorative plaster “Ottocento” is very similar in appearance to Venetian plaster. We repeat stages 1 and 2 (primer, first layer of plaster). Next, we apply the second layer and spread it along the wall, using a trowel to draw lying figure eights - something like a mathematical infinity sign. After partial drying, press down. Next we plaster with a slightly different color from the previous layer. The next steps are also known: drying, polishing.
If you don't have artistic skills, it doesn't matter. Don't chase fancy names. Make it as texture as you can. Just make sure that it is the same along the entire length of the walls.
In small rooms, pompous textures such as grotto and Venetian are not always appropriate. But if you still want something special, improve the tool yourself: take a trowel and wrap a thread of yarn around it, a fishing line with stringed beads or beads, put on a strong plastic bag, a fishing net, attach a kitchen sponge, the imagination is endless. And then touch the plaster that has not yet dried with such a tool. The frequency and size of the pattern depends on your desire and skill.