When replacing metal pipes, situations often arise when you need to cut threads to connect individual parts of the pipeline. To make a high-quality joint, a thread-cutting tool is used. It is important to understand what types of this equipment there are and how threads can be made so that, if necessary, you can carry out repair work yourself.
Threading tool
Varieties
To choose one of the types of threading tools, you need to understand what types of threaded connections there are:
- Cylindrical and conical threads.
- Multi-start - consisting of several helical lines.
- Single-thread - consisting of one helical line.
Pipe threads can be made by rotating the tool to the right or left. The direction depends on the selected tool.
Power tools
You can find a large selection of electric tapping tools in hardware stores. The equipment allows you to increase the efficiency of human labor and increase productivity. Additionally, the quality of the work performed increases. Modern power tools allow you to create different types of carvings and work in hard-to-reach places. There is a special vice to secure the surfaces to be processed on the tool.
However, it is important to remember that power tools overheat quickly. Therefore, coolants must be used during operation.
Hand tools
Hand taps can be a separate accessory for power tools or attached to hand held fixtures. A hand tool consists of a handle and a body for securing the die. They can be single or symmetrical (depending on the type of thread being created). Two-piece tools can be equipped with a ratcheting mechanism for ease of use and convenience.
Thread cutting with a die
This procedure includes several steps. Let's look at them.
- Preparation of the workpiece. First of all, the core part being processed must be securely secured in a strictly vertical direction in a vice.
- The die is inserted into the die holder and centered in it.
- Then it is recommended to grind the section of the rod on which the threaded knurling will be formed with sandpaper or a flat file to a depth of 0.4 millimeters.
- Next, the end of the rod is chamfered at an angle to its longitudinal axis equal to 40°. This will make it easier to center the tool and start the thread.
- Then a die is placed on the rod and the initial turns are cut. This point is the most important from the point of view of the finishing quality of the thread. In addition to centering, you need to control the strict horizontal position of the die in relation to the plane of the workbench.
- Actually, the procedure for forming a thread involves forcibly pressing the tool into the workpiece with its simultaneous smooth rotation using the handles of the die holder. The axis of the ladder must coincide with the longitudinal axis of the part. In this case, you need to monitor the amount of forward feed. It must match the thread pitch. Skewing the die is unacceptable, especially when the initial turns are formed.
- After the rod enters the die about half its thickness, you can stop putting pressure on the tool. But the section of the workpiece on which the thread will be formed must be lubricated with machine oil.
- Subsequently, self-tightening is carried out. Thread knurling continues under the influence of rotating force. It should be reciprocating in nature: several turns to the right, after which about half a turn back, that is, to the left. As a result of such actions, the chips are broken and removed through special holes in the die.
Ways to create a helix
To create threads, fastening threads and longitudinal grooves, you can use various devices and equipment. To make a quality connection, you need to know how to use certain devices.
Thread taps
Die
The die is used to create threads on metal pipes. The process of repair work:
- Places of future connection must be cleaned of dirt, paint, rust, and plaque.
- Remove the chamfer located at the ends of the pipe.
- Select a die of the required diameter and lubricate its teeth with special oil. Use it to treat the place where the carving will be.
- Make 6 turns of the die. In this case, you can do reverse scrolling to free the working surface from accumulating chips.
- Remove the die, clean it of chips, lubricate the teeth and pipe with oil. Repeat the procedure.
If the pipes are old, they must first be checked for defects. If there are cracks or holes, the product cannot be processed.
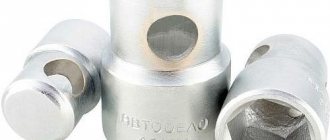
Klupp
It is a special thread-cutting tool for creating external threads. Work process:
- It is necessary to remove a layer of dirt, rust, and paint from working surfaces.
- Try to secure the workpiece in a stationary position.
- Apply drying oil to the work surface.
- Unscrew the support screws from the clamp and place it on the pipe.
- Attach the cutting dies and secure the structure with screws.
- With forward pressure, rotate the die clockwise.
Before removing the clamp, you need to squeeze out the dies.
With a cutter
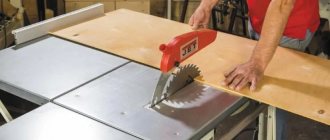
This option for making threads involves the use of turning equipment. The master secures the pipe into the spindle. After this, he fixes the cutter in the support and adjusts it. After turning on the electric motor, the workpiece begins to rotate. The master slowly brings it to the cutter and begins processing.
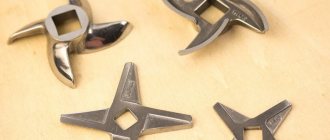
Tap
Taps are used to create internal threads. Use of taps:
- The product is fixed in a vice.
- The diameter of the tap is selected. It is secured in a special device - a collar.
- It is necessary to make two turns clockwise and half a turn in the opposite direction. This will prevent chips from getting stuck between the cutting teeth.
If a ductile metal alloy is used, you can use a screwdriver into which the tap is secured.
Before using taps, it is necessary to calculate the diameter of the future hole. There are certain tables for this that can be found on the Internet. For example, if the outer diameter of the pipe is 10 mm, then the hole should be 1 mm smaller.
Electric thread cutter
You need to use power tools carefully so as not to damage the surface being processed. Work process:
- Cut the pipe at a 90 degree angle.
- A support bracket is installed under the pipe.
- The working surface is covered with coolant.
- The guide lever is located.
- Next, you need to turn on the thread cutter and press it against the workpiece.
- Coolant must be supplied during operation.
To remove the cutting tool, reverse gear is engaged.
Classification
The division of dies into types is carried out according to many criteria. We will name only the most frequently used ones.
Design. According to this criterion, the dies are:
- round. Most widely used. The design is a solid ring, along the inner ridges of which the workpiece passes. This tool is characterized by high rigidity. Thanks to this property, high-quality threads with turns with a good profile are obtained;
- sliding (square). The design of such dies includes two parts. And the workpiece is fixed when they are connected. Setting the required diameter of the thread knurling is done by moving one of the parts of the die along the guides of the die (this is another name for the die holder);
- Split. They are used in case of low requirements for the quality of thread knurling.
Thanks to the existing radial cut, such a die has shock-absorbing properties. As a result, the cutting area is subject to less wear. But the end result is a thread of low precision. Its run-up (designation P) fluctuates in the range of 0.1 mm≤P≤0.3 mm;
Thread knurling direction. Dies can cut the following types of threads:
- right The thread is knurled in a clockwise direction. Such threads are present on most types of rod fasteners;
- left. The knurling direction is opposite to the clockwise movement. Used much less frequently. In particular, where the right-hand thread can unwind, in mechanisms that differ in the specificity of rotation, and in special components of vehicles. Such dies are marked with English letters LН;
Thread profile. Based on this feature, tools for cutting external threads, that is, dies, come in the following types:
- metric. As the name suggests, they are designed to form metric thread knurls. The designation in technical literature includes the letter M, followed by a figure or number indicating the thread diameter in millimeters. The values of this parameter (designation d) for round dies are approved by GOST 9740-71. They can vary in the range of 1.0 mm≤d≤68.0 mm;
- cylindrical pipes. Easily identified by the letter “G” present on the body. The unit of measurement for the threads they form is inch (indicated by a double stroke “″”). Its ratio to a millimeter looks like this: 1″ = 25.4 mm. The tool marking “G1/4” indicates that we are looking at a die for cutting quarter-inch pipe threads. Diameter change range – G1/8″≤d≤G2″;
- pipe conical. Marking with the letter “K” will prevent them from being confused with other types of such instruments. Used when it is necessary to obtain a threaded surface of a conical configuration. Scope of application – machine components, as well as critical connections operating under high pressure conditions;
- trapezoidal. The cross section of the turns has the shape of an equilateral trapezoid. Scope of application: power couples that convert rotational motion into translational motion. The simplest example is the combination of a lead screw and a nut, which are equipped with bench and machine vices.
Requirements for using the device
Before you start working with a power tool to create threads, you should familiarize yourself with certain requirements:
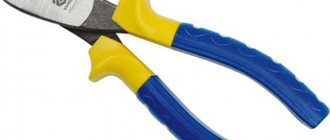
- When working with old pipes, you need to use a gas wrench to hold them.
- Before turning on the equipment, you need to clean the cutting part from old chips. The same applies to the surface being treated.
- Check the direction of rotation of the dies in advance.
- Use coolant during operation.
Before using a power tool, it is necessary to chamfer the end of the pipe.
Threading tool with gas wrench
Technology: how to use a thread tap
There are several stages, each of which is important. These are preparatory procedures, 1, 2, 3 or more approaches of rotation, finishing grinding. We'll talk more about preparation below. The manipulation of the tool itself is relatively simple. It is necessary to direct the tip, set it level, and then use the crank to make rotational movements.
Special recommendations:
- We do not recommend starting to cut unprepared workpieces. If you already have a sheet of metal where the through hole was obtained by stamping or other metalworking, you need to drill it out and then countersink it - cut off the edges.
- Remove the top 0.5 cm of chamfer from the sample. This must be done at an angle of 60 degrees.
- The device must be lubricated and cooled during the process, otherwise it will result in thermal treatment, during which the metal surface can acquire additional strength.
- Apply reverse stroke every 1-2 turns. This allows you to clear the working area from chips sticking to it.
Let's watch the video. It shows not only working with a tap for cutting internal threads, but also with a die for cutting external threads:
Marriage and its reasons
There are several reasons why a workpiece may be rejected:
- Lack of coolant.
- The craftsman did not chamfer before starting to cut the thread.
- Using faulty equipment.
- Dull or damaged teeth on the cutting tool.
Do not use excessive force when working with hand tools.
A thread-cutting tool allows you to independently create reliable connections between metal pipes and other parts. Knowing the types of accessories and equipment, you can easily select a device and easily carry out repair work. If you follow the basic rules for working with a tool, you can reduce the number of defects.
Taps, dies and heads for thread cutting
The most widely used hand tools are for thread cutting. They can be used in industry and everyday life.
The most widely used versions are:
- Similar tools are used to make bolts and studs. Such a product is a round washer, inside of which several ribs protrude. External threads can be formed and calibrated in just one pass. There are various versions of tools on sale; hardened tool steel is used in manufacturing.
- Taps are used to produce internal threads. It is also manufactured using hardened tool steel, which is characterized by high wear resistance. The tap has the shape of a rod, the working part of which has several depressions and protruding edges. Due to this, the thread cutting process is significantly simplified.
- Special heads can also be used to carry out the work in question. They can have different sizes and are used in conjunction with a special holder.
The cost of hand tools is low, but they are characterized by high efficiency in use.
How to correctly determine the diameter and cut a thread with a tap manually - table
There are special standards for determining the cross-section. Let's present all the data in the form of tabular values. Let’s say right away that they are not suitable for all tasks, but only for standard ones. These include all nuts on sale that fit the screws. Therefore, if you require a connection with a specific fastener, pay attention to its markings.
| Marking | Turn pitch | Drill diameter | ||||
| 2 | 0,4 | 1,6 | 0,25 | 1,75 | — | — |
| 3 | 0,5 | 2,5 | 0,35 | 2,65 | — | — |
| 4 | 0,7 | 3,3 | 0,5 | 3,5 | — | — |
| 5 | 0,8 | 4,2 | 0,5 | 4,5 | — | — |
| 6 | 1 | 5 | 0,75 | 5,2 | 0,5 | 5,5 |
| 7 | 1 | 6 | 0,75 | 6,2 | 0,5 | 6,5 |
The table can be continued, it is large, but we will not do this within the scope of this article. For more detailed values, we recommend that you refer to the document - GOST 19257 - 73.
These are standard sizes, but there are special purposes, unique connections. For them, everything is very simple to calculate independently. If the thread is marked M10 and the pitch is 0.3, then 0.3 mm must be subtracted from 10 mm. The result will be equal to the hole diameter - 9.7 mm.
If it is made smaller, it will be difficult for the tap to pass, and areas with poor processing will form. And if it is more, then the grooves will be shallow, the screw will wobble inside or even fall out over time.
Let's also imagine the international marking system in inches:
| Designation, inches | External | Interior | Thread, mm | Step |
| G 1/8 | 9,37 | 8,858,8 | 28 | 28 |
| G 1/4 | 13,16 | 11,89 | 11,8 | 19 |
| G 3/8 | 16,66 | 15,39 | 15,25 | 19 |
| G 1/2 | 20,95 | 19,17 | 19,00 | 14 |
| G 5/8 | 22,91 | 21,13 | 21,00 | 14 |
| G 3/4 | 26,44 | 24,66 | 24,50 | 14 |
| G 7/8 | 30,20 | 28,42 | 28,25 | 14 |
| G 1 | 33,25 | 30,93 | 30,75 | 11 |
| G 1, 1/8 | 37,90 | 35,58 | 35,30 | 11 |
| G 1, 1/4 | 41,91 | 25,59 | 39,25 | 11 |
| G 1, 3/8 | 44,32 | 45,00 | 41,70 | 11 |
| G 1, 1/2 | 47,80 | 45,48 | 45,25 | 11 |
| G 1, 3/4 | 53,74 | 51,43 | 51,10 | 11 |
| G 2 | 29,61 | 57,29 | 57,00 | 11 |
| G 2, 1/4 | 25,17 | 62,96 | 63,10 | 11 |
| G 2, 1/2 | 75,18 | 72,86 | 72,60 | 11 |
| G 2, 3/4 | 81,53 | 79,21 | 78,90 | 11 |
| G 3 | 87,88 | 58,56 | 85,30 | 11 |
| G 3, 1/4 | 93,98 | 91,66 | 91,50 | 11 |
| G 3, 1/2 | 100,33 | 98,01 | 97,70 | 11 |
| G 3, 3/4 | 106,68 | 104,3 | 104,00 | 11 |
| G 4 | 113,03 | 110,71 | 110,40 | 11 |