Almost every professional chef uses a custom-made knife for his work. The cost of such a customized instrument ranges from $200 to infinity. Looking at this price, many people get upset and forget about their dream. However, there is an alternative solution - to make a kitchen knife with your own hands. This process is not as difficult as it might seem at first glance, but it requires patience and desire. Manufacturing without additional costs takes about 20 hours, be prepared to sacrifice your personal time.
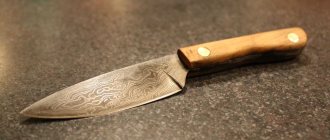
Homemade kitchen knife.
List of steps and preparation of everything needed
The entire manufacturing process can be divided into several parts for a more complete perception of information:
- selection and preparation of materials with tools;
- template selection;
- choice of steel;
- shaping the workpiece;
- heat treatment;
- knife sharpening;
- making a handle.
Each of these steps is associated with health hazards, so each stage should be approached carefully and thoughtfully, following all safety rules.
So, to create a really high-quality knife, we need a list of such materials (if you have experience in this matter, you can use an alternative):
- steel;
- tree;
- brass rivets;
- gypsum;
- iron sieve;
- gas-burner.
Tools:
- Metal file.
- Hacksaw for metal.
- Hand drill and drill bits for it
- Permanent marker.
- Metal scissors.
- Hammer.
- Kerner.
- Long nose pliers.
- Gloves.
- Nozzle.
- Metal or plastic brush.
- Miter box.
- Saw on wood.
- Sandpaper.
- Clear varnish or stain.
Drawing of a kitchen knife.
Step-by-step launch instructions
- Registration . Before starting a business, register with the tax authorities and obtain the status of an individual entrepreneur. OKVED code 28.6 “Production of cutlery and cutlery.”
- Premises . Despite the fact that a knife is a fairly compact tool, its manufacture requires a large number of different machines and devices. To place all the equipment, you will need to rent a room with an area of at least 60 m². The work involved in making knives is very noisy, so don't try to rent a room in the basement of a multi-story building. It's better to look for a place on the outskirts of the village. Rent is cheaper there too.
- Equipment and materials. Equipment costs will be about 82,000 rubles. Of these: Bulgarian – 10,000 rubles; drill – 5,000 rub.; sharpening machine - 20,000 rubles; engraver – 12,000 rubles; grinder – 18,000 rub.; jigsaw – 7,000 rub.; band saw – 10,000 rub. It is better to purchase steel from the manufacturer in bulk. It's much more profitable this way. First, decide on the grades of steel that are needed for production. After that, find several suppliers, compare prices, conditions and product quality. Only make a choice based on all these criteria. The same applies to the materials that will be used in the manufacture of handles. To purchase raw materials you will need about 50,000 rubles in the first month of work (the cheapest workpiece will cost about 500 rubles, the expensive one - from 5,000 or more; handles - from 300 to 2,500 rubles). Purchase material with a supply of 2-3 months.
- Staff . To work in a small workshop, it is enough to hire two craftsmen who have skills in working with all of the above tools. The manager can conduct accounting independently, or use the services of a visiting accountant, concluding agreements for the provision of professional services by a specialist at the end of the reporting period.
- . Before starting a knife manufacturing enterprise, you need to know exactly who the end consumers of the goods will be: housewives, professional chefs, hunters, fishermen, etc. The best source of attracting customers and sales will be an online store. Firstly, you won’t have to spend money on renting additional premises or furnishing them. Secondly, you will not need to look for large wholesale buyers, running around the city and without getting off your phone. You can even organize advertising via the Internet. Pay attention to various thematic communities on cooking, hunting and other topics where knives can be discussed.
Choosing steel for a kitchen knife
The choice of steel is the most important stage in the manufacture of a cutting tool, because the desired result depends on it. Steel is a combination of two substances – iron and carbon. The higher the carbon content in steel, the harder it is .
Hardness makes it possible to create a thinner, and therefore sharper, cutting edge that will not dull longer. But such proportions lead to the fact that the steel becomes more brittle and difficult to sharpen.
Historically, steel was made by blacksmiths using a forge. But a lot of time has passed since that time, technology has not stood still, and today it is no longer necessary to have the skills and tools of a blacksmith to make a personal cutting tool.
Metal with the necessary characteristics can be easily ordered online.
There are two main types of steel:
- rusting;
- stainless.
The chromium content in stainless steel is at least 13%, which prevents corrosion. Such material is difficult to heat treat, especially in artisanal conditions. If your choice falls on stainless steel, be prepared for the fact that you will have to resort to outside help.
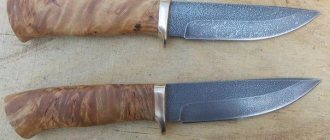
Kitchen knives with different steels.
Rust steel contains less than 13% chromium. The cost of this material is somewhat lower, and it is also easier to process. The sharpness of such a blade will be in no way inferior to a stainless steel one. The only drawback is some degree of corrosion, that is, the knife cannot be kept in damp conditions for more than 20 minutes, otherwise it will rust.
The best option, especially for making your first knife, would be alloyed tool or structural spring steel.
After choosing the metal grade, we decide on the dimensions. The recommended thickness is 2.5 mm, and the height is 40 mm. We select the length based on our needs.
Which steel to choose
I can already hear the comments - damask, damask. Yes, it’s a cool option, we just have to remember that not every experienced blacksmith is able to make it. And if you buy a blank, the cost of the product increases unjustifiably. The result will be some kind of museum exhibit, and not a tool for everyday use.
For our purposes, tool or spring steel is suitable. I won’t bore the reader with a comparison of different brands. If interested, open specialized literature. I will list the most popular steel grades:
- 9X18;
- 50Х14МФ;
- X12MF;
- CHVG;
- 50HGA;
- 40Х13.
I think this list is enough. If you find something from the list, half the battle is already done.
Shape selection
The shapes of kitchen knives vary greatly depending on their purpose. It is best to have a versatile cutting tool in your kitchen that can easily handle any task.
A good option is a Western Japanese knife, which is very similar to the Santoku. And this is entirely a matter of taste. Detailed drawings are not a problem in our high-tech times. For accurate construction, you can use a tool such as a pattern.
To begin with, it is better to cut out a natural sketch from cardboard, which will allow you to clearly determine how comfortable the blade fits in your hand. Once the issue with the form has been resolved, you can proceed to purchasing material that meets the requirements. But you need to remember that a large knife takes longer and is more difficult to process.
To clamp a sheet of steel in a vice, it is better to use wooden blocks so as not to leave dents or damage.
To cut out the initial workpiece, it is best to use a prepared template and a hacksaw. This stage requires special patience as it takes a lot of time.
Formation of a profile
As a rule, a knife has two triggers, less often three. The first goes along the entire blade, and the second forms the cutting edge. There are a large number of different profiles, each of them has its own pros and cons.
It is worth highlighting the three most common profiles that can be easily created at home:
- Wedge-shaped profile. One of the simplest methods of blade formation. Both sides of the blade rise evenly towards the butt. This method combines high sharpness and wear resistance.
- Pentagonal profile with inlet. This option contains three descent ribs: the bottom one is sharpened, the middle one stretches to the middle, and then turns into a descent at a slight angle or into a straight line. This profile is inferior to the first in sharpness, but is more resistant to wear.
- One-sided profile. With this method, only one side of the blade has a trigger. With such sharpening, the blade turns out to be very sharp and precise. The one-sided profile is characteristic of Japanese culture. The blade wears out quite quickly and requires some getting used to. Making such a blade is the easiest and fastest way.
Types of profiles for kitchen knives.
A sheet of steel 2.5 mm thick will require no less than 2 hours of hard work.
Financial calculations
Start-up capital
| Type of expenses | Amount, rubles |
| Paperwork | 1 000 |
| Rent | 30 000 |
| Equipment | 82 000 |
| Materials for production (blanks, handles) | 150 000 |
| 30 000 | |
| Total | 293 000 |
Monthly expenses
| Type of expenses | Amount, rubles |
| Rent | 30 000 |
| Workers' salaries | 60 000 |
| Taxes | 5 000 |
| Communal payments | 5 000 |
| Total | 100 000 |
How much can you earn?
In a month, the company can produce up to 100 pieces of products. The average cost of one knife ranges from 1,500 to 2,500 rubles. At the same time, its cost will not exceed 800-900 rubles. Consequently, from one unit of goods you can earn up to 600 - 1,500 rubles (net profit about 80,000 rubles).
Payback period
The profitability of such production will actually be high (about 45%), and the return on the initial investment will not exceed 4-5 months.
Polishing
Polishing is not only about giving the blade an aesthetic appearance, but also protecting it from corrosion. The smooth surface prevents water from accumulating in the recesses, which leads to the appearance of characteristic rusty spots on the knife.
Polishing can be roughly divided into 3 stages:
- Processing with coarse abrasive with large grain size.
- Processing with thinner stone.
- Finish polishing with fine grain.
As a result, we will get a shiny blade, but it will not yet have a mirror image. To achieve a mirror-like result, you will need to change a few more abrasives, gradually reducing their grain size, and eventually switch to a piece of leather with goya paste.
The whole process is quite simple - apply three abrasives along the blade until the entire surface becomes homogeneous, then reduce the grain size. This stage is one of the longest in the entire production, but at the same time the most exciting.
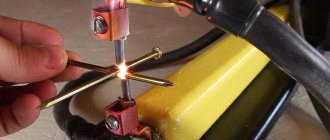
Drilling holes for attaching the handle
To form a handle from two wooden plates, you will need to drill 2 holes in the shank for rivets. This procedure must be carried out before heat treatment. It is even advisable to assemble the entire structure for a kind of test to make sure there are no defects.
We select the diameter of the drill based on the size of the purchased rivets. To speed up the process of drilling hard or thick metal, the location of future holes can be marked with a center punch. You can use any available drill.
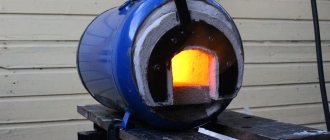
Making a forge
Heat treatment is not an easy and very traumatic stage of knife manufacturing, during which all previous efforts can be ruined if done incorrectly. To heat treat a blade, it must be heated to a temperature that leads to structural changes in the metal; usually 750 degrees is enough.
Forge for hardening.
Of course, you can use a special burner that will produce the required temperature. But it is not recommended to do this, since the steel heats up unevenly, which can lead to defects in the future.
Therefore, to perform heat treatment at home, you will need a forge. They are also on sale - this is not our method. Making a forge with your own hands is not difficult; a large number of instructions, articles, training videos, and diagrams can be found freely available on the Internet. The main materials used for manufacturing are sand and gypsum.
How to determine the temperature in such an oven without a special thermometer? There is an old proven method: we place ordinary kitchen salt in a steel container in a forge; if it begins to melt, then the temperature is quite suitable for hardening the blade.
When using complex alloys and grades of steel that are difficult to heat treat, it is better to seek the help of specialists.
Advantages of homemade models
There is a huge range of knives on sale now. You can get lost in it, but with some effort you can always find a ready-made model suitable for specific purposes. However, there is always a chance of encountering a poorly made blade or a finished model that does not fully meet expectations.
If the desired model is not available for sale, you can seek help from a blacksmith who will make a custom-made blade.
But such work, carried out in accordance with the wishes of the customer, is quite expensive. Usually in such a situation the idea comes to making a knife with your own hands from start to finish.
If you make a blade yourself, you can achieve a number of advantages:
- choose the type of knife according to your own needs;
- combine all the desired features and properties in one product;
- in accordance with the purpose and type of work to be done, choose the best steel for the blade;
- based on recommendations for heat treatment, select the best hardening and tempering mode that will provide the required ratios of strength, hardness, elasticity and ductility of the blade;
- decide on the design and make the handle according to your own ideas about the decorative characteristics of the future product;
- avoid mistakes and defects that are often present in finished products and spoil the impression of working with a purchased knife.
Heat treatment of the blade
During all the previous stages, the steel of the blade was quite soft and easy to process. After heat treatment, the purpose of which is to reveal all the best qualities of the knife, the material will no longer be so pliable. Therefore, right now you should make sure that you are satisfied with everything in your product.
Heat treatment is performed in two steps:
- the first step is to increase the strength of steel;
- the second is a slight weakening.
The required temperature to which the metal must be heated in order to harden it depends directly on the grade of steel and is calculated in special tables.
Before starting the main process, be sure to stock up on gloves made of thick material (welder gloves).
The blade must be heated evenly on all sides, periodically changing its position. After some time, due to the high temperature, the steel will begin to change color.
When it turns deep red, we check it with a magnet. If the material is magnetic, then we heat it up further; if not, the temperature is appropriate.
After heating, the metal must be cooled; used engine oil is usually used as a coolant. Be extremely careful, as when you lower a hot knife into the oil, a flame will burst out of it.
The size of the container into which the liquid is poured must completely accommodate the blade. It is not necessary to harden the end of the shank in a kitchen knife.
Heat treatment of the blade.
The next stage of heat treatment is tempering. This process reduces the brittleness and hardness of the blade, but increases its flexibility. The ratio of hardness and flexibility depends on the heating and tempering time.
To achieve the required values, you can use special tables. Hardness is measured on the Rockwell scale; for a kitchen knife, the normal value would be 60-64 units.
After the holiday, we carry out final polishing with a small-grain abrasive.
Handle making and assembly
Here everyone independently selects a style that will make their work unique and unrepeatable. You can find several different options, take the best from them and transfer them to your knife.
- We begin to cut 2 overlays from pre-prepared wood. We choose a convenient thickness, which should not exceed the length of the existing rivets. You should try to make both pads as similar as possible. This stage does not require special precision, the main thing is that they do not extend beyond the end of the shank.
- Drilling holes for fastening begins with a drill equal to the head of the rivet; the hole must be made slightly larger than the height of the head. Next, the hole is made with another drill of a smaller diameter in order to recess the rivet into the handle and better fix it.
- Now we just attach the pads to the handle.
- We cut off all excess parts with a jigsaw. Using a knife you can slightly change the shape of the handle.
- At the end we protect everything well with sandpaper.
- When the handle fits well in the hand and does not interfere with anything, we coat it with varnish, which will prevent the absorption of moisture and foreign odors.
Overlay installation of overlays on the workpiece.
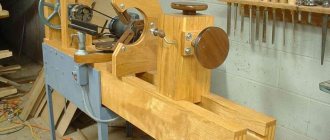
From a stick
From a stick, that is, a knot with a diameter of 3-4 cm, you can make a fairly sharp weapon:
- cut a piece about 15 cm long;
- turn a blade about 6 cm on a lathe, the remaining 9 cm will be a handle;
- thin the sharp edge using a machine with an emery attachment;
- bring the blade to the maximum possible sharpness using an abrasive stone.
The quality of the product cannot be compared with metal, but it can be used for cutting.
Final knife sharpening
It is simply impossible to sharpen a knife perfectly the first time. This is an art that requires skill and skill. If you have previously encountered the sharpening process and have your own technology, use it.
For beginners, the best option would be the standard, time-tested method - to move the blade along the abrasive without changing the angle of inclination.
This method is very simple, since everyone initially decides what sharpening angle they need, and after several passes, the hands themselves remember the required position of the blade. The smaller the angle, the sharper the knife, and the more fragile the cutting edge.
Final sharpening of the knife.
We begin the work according to the standard scheme: first, abrasive with a large grain and gradually reducing it. When you hear a hissing sound during operation, turn the blade over and work on the other side. Just this time make less movements.
Continue switching sides and decreasing the number of working movements. After this, we switch to a stone with a smaller abrasive grain.
And after a few days and one whole day of work, we receive our unique product that meets all our wishes.
Previous
KnivesMagnet for knives on the wall: types and making your own
Next
National knivesCanadian type knife: from classic models to modern blades
Useful tips
A few points to pay attention to before making a knife with your own hands:
- Only high-quality material must be used to make knives and knives. Thanks to this, the tool will be reliable and of high quality;
- It’s easier to use an already hardened metal plate for manufacturing;
- In order to check the sharpness of the knife after sharpening, you need to use a sheet of paper. It must be held suspended, the knife should easily cut the sheet, and not crush or bend it;
- the knife must be sharpened in a timely manner, otherwise there is a risk of accidental injury;
- Each type of knife must be used strictly for its intended purpose, then the tool will serve you for more than a dozen years.
Sources
- https://WarBook.club/oruzhie/holodnoe/nozh-v-domashnih-usloviyah/
- https://nowifi.ru/oruzhie/holodnoe/117-kak-sdelat-nozh.html
- https://tokar.guru/hochu-vse-znat/sdelat-nozh-svoimi-rukami-ot-nachala-do-konca.html
- https://homius.ru/kak-sdelat-nozh-svoimi-rukami-v-domashnih-uslovijah.html
- https://tutsvarka.ru/kovka/kovka-nozhej
- https://kaksdelat.guru/kak-sdelat-nozh/
- https://nozhik.online/kak-sdelat-nozh/
- https://svoimirykami.guru/nozh-svoimi-rukami/