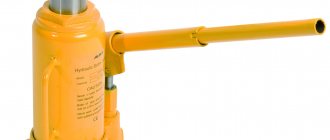
The float switch for electric pumps is an element of the general system of the pumping station and regulates the water level in the tank. They are also the most important protection against dry running of a pump with a float, which will increase the service life of the device.
Switches help reduce clogging due to sand getting into the system. They perform several necessary functions, and some pumping stations use several floats at once.
Description of the float switch
Submersible and drainage pumps operate in conditions where the liquid may unexpectedly run out or become contaminated. In this case, further pumping out water already mixed with a large amount of dirt can seriously harm the system. Therefore, it is mandatory to have a float switch for pumps to prevent damage due to dry running. Some floats require installation yourself, while other pumps are manufactured with an internal float.
They are placed in a variety of reservoirs - from tanks in wastewater pumping systems to wells with drinking water. And the tasks that floats perform, depending on the place of use, may vary. It is also possible to place more than one float in one tank, each of them performs different tasks:
- control over the operation of the main pump;
- monitoring the operation of the additional (auxiliary) pump, as well as improving its efficiency;
- level sensor;
- overflow sensor.
Float switch operation diagram
A level sensor is necessary so that the submersible pump does not run dry and thus does not suck in heavily contaminated water, which leads to breakdown of the entire station. An overflow sensor is required to ensure that the water tank does not overfill. Depending on the type of container, this can lead to serious problems, including a short circuit.
Types of floats for pumps
Float switches are connected to various types of pumps and can also be built-in. Installing a separately purchased float on a pump does not require much effort or extensive knowledge. A pump with a built-in float is much simpler, albeit more expensive, if you need to provide the system with float control as quickly as possible.
There is a light sump pump with a built-in float switch and a heavy one. The first type is suitable for a pump with a float used in water supply - wells, boreholes. And also in drainage systems. The second drainage pumps with a built-in float, heavy, require, firstly, a polluted environment, and secondly, difficult operating conditions. A drainage pump with a float of the second type is used in drains: sewer, rain, drainage.
Drain pumps with float switch
You should start your choice of a water level sensor by determining your goals - a lightweight one is better suited for water supply to a dacha, farm, house, or watering a plot. To organize a sewer system, drainage or waste, it is recommended to purchase a heavy unit.
Float Switch Specifications
The body of the device is made of plastic materials of various shapes. It requires absolute tightness and waterproofness. The float consists of the following elements:
- floating body made of plastic;
- electrical switch;
- lever for switch contacts;
- steel ball;
- three wires in the cable.
The wires are connected: one to a closed contact, the other to an open contact, and the third is common. There are floats with two wires. They break the electrical circuit if it is necessary to turn off the submersible pump and connect the circuit if it is necessary to turn it on again. Three-wire switches are universal; they are suitable for monitoring not only dry running, but also overflow. There is one common and two wires, between which modes are switched.
Their wires differ in color. The common one is usually the black wire. The blue wire turns off the system when the sump pump starts to run aground and there is too little water in the reservoir (such as a well). The brown wire controls the pump when the reservoir is full.
The float changes its position because there is air inside. Accordingly, when he is under water, he strives to surface. When there is little water left, it sinks. A special weight is used for adjustment.
Installing a submersible pump with a float in a well
Depending on the length of the wire from the weight to the float, the values at which the pump turns on or off will change. Thus, they can be easily adjusted manually to prevent overflow or dry running. It is also worth taking into account that the float should be turned off while the pump is still under water with a small margin.
A steel ball adjusts the position of the lever depending on the position of the float itself. The lever, in turn, switches the contacts to turn the pump with a float on or off. Magnets are used to fix the ball in the required positions. The tilt at which the ball moves from one position to another is most often 70 degrees, but you should check this when purchasing the device.
Features of float switch for water level control:
- ingress protection degree IP – 68;
- mains voltage 220 volts plus or minus 10 percent;
- operating temperature range from 0 to +60°C;
- 8 amperes – maximum switching current for reactive load;
- 10 amperes – active load.
How does an automatic float switch work? (video)
Connecting and repairing a float for a pump
Connecting a float switch to systems that use submersible pumps to pump out water is no different from connecting to drainage and sewer systems. Connection to the pump is made as follows:
- the sinker clings to the wire and the length from the sinker to the device is adjusted experimentally;
- the cable should be securely fixed to avoid it touching pipes and other devices inside the container;
- if the device is two-phase, then two (or more) units should be used - one for pumping water into the container, the other for pumping it out. In wells and self-filling tanks, one two-phase can be installed;
- connecting wiring to the pump.
When connecting to the pump, moisture-proof terminals are used. The wiring and connection points on the pump are marked; difficulties may arise only with connecting a two-phase float to a three-phase pump. Two important points when choosing devices:
- The same current consumption in amperes for the pump and the float (or even slightly less for the latter).
- The same number of connection phases.
The power of the pump should also be taken into account.
Disassembled float
The device installed in the system can be connected to the float in two ways:
- if its power is less than 1.2 kilowatts, then the connection is made directly through the network cable;
- if the power is higher than 1.2 kilowatts, in this case the connection occurs through an electromagnetic relay or other switching link.
Many malfunctions are caused by contamination. It is not difficult to repair a float from a submersible pump if it becomes clogged. To do this, simply pass a stream of clean water through it. If, after disassembling and cleaning the float, its functions are not restored and the damage is not noticeable, then it is recommended to replace the mechanism with another one, since a complex repair often costs the same cost.
DIY float switch
To make a float for a pump with your own hands you will need:
- 2 buildings;
- metal ball;
- two magnets;
- contact plates.
Contact plates are made of copper, tin-plated sheet, brass and other electrically conductive material. They should be located on the sides of the body inside, so that the ball, falling between them, makes contact. For springiness, strips of metal can be beaten with a hammer, placed on a file.
The magnets are selected so that they cannot lift the ball, but hold it at an angle of 60-70 degrees, even from the back of the device body. The case itself can be made of plastic, textolite, or any material that does not conduct electricity.
Design of a drainage pump with a float
Wires with a core cross-section of no more than 2 mm are soldered to the contacts. They are isolated and this structure is placed in a common float body made of plastic or similar material. The most important thing is to carefully insulate the inner casing so that there is no short circuit. Foam is poured inside the float cavity, and the outer casing is also insulated.
Hinges are installed at the ends of the main body. Depending on which loop the cord is connected to - from the contact side or the reverse side - the pump is a filling or drying pump.
Drain pumps with float switch
A drainage pump with a float switch is primarily designed to pump out rain or waste water from appropriate containers. Pumping is carried out using two connected pipes - ejection and suction. The most important thing to look for when choosing a unit is the insulation of the wire and the tightness of the plastic box. When purchased, the kit includes equipment for relieving mechanical stress from the device’s wires.
A drainage pump with a built-in float comes in two types, like the floats themselves - heavy and light, depending on their purpose. The lungs are used for drinking or irrigation water. And drainage pumps with built-in heavy float switches are used for wastewater treatment systems and clogged, dirty water. The most famous manufacturers: Gilex, Gardena, Grunsfos, Makita, Pedrollo, AL-KO, Karcher, Whirlwind, HERZ.
Technical characteristics of drainage devices:
- productivity from 6000 to 33000 liters of water per hour;
- delivery height from 5 to 27 meters;
- power consumption from 200 to 2000 watts;
- weight from 3 to 14 kilograms;
- dive up to 27 meters;
- cable length 10 meters.
Drain pump with float
You can repair the drain pump yourself if the following faults are found:
- the float is jammed - release it physically;
- secure the shock absorber if the fastening is loose (you need to remove the cover and tighten the nuts);
- the impeller is jammed - when ridding the impeller of mechanical inclusions, you should not tighten it;
- problems with the shock absorber - most often you can simply replace it yourself;
- the cable is frayed and broken - in this case, it is necessary to detect the damaged section of the cable inside the insulation using palpation and securely fasten it with insulating material.
You should not try to repair the drainage pump yourself in case of the following breakdowns:
- the winding burned out due to a short circuit;
- the rod broke;
- the valve is broken.
If the equipment is relatively cheap, in case of the above breakdowns it is cheaper and easier to buy a new one, since repairs can cost about the same cost.
The float for the pump is an important element of the unit for pumping water. It is designed to regulate the liquid level in the container and protect the pump from dry running. Float switches help reduce the amount of debris that enters the system and thereby increase the life of the pumping equipment.
Types of sensors
Sensors differ in the method of measuring liquid level and are divided into two types: alarms and level meters. Alarms monitor the specified filling point of the container and, when the required volume of liquid is reached, stop its flow (for example, a float in a toilet tank).
Level gauges continuously monitor the degree of filling of the tank (for example, a sensor on a mine drainage system).
According to the principle of operation, water level sensors in a tank are divided into the following types:
- Float - their design includes a float with a magnet and two sealed contacts (reed switches). When the minimum level of liquid in the tank is reached, the float moves down and acts with a magnet on the reed switch, at the same time the relay turns on and the pump starts, pumping water into the tank begins. When the container is completely filled, the float reaches the upper reed switch, and the relay is activated, turning off the pump.
- Ultrasonic - used not only in liquid environments, but also in dry ones. The devices work in this way: the emitter sends pulses that reach the reservoir and return to the receiver. The built-in signal processing controller analyzes the strength and duration of attenuation of the ultrasonic wave (these parameters are different for a full and empty tank).
- Electrode - used in liquid electrically conductive media. They consist of two electrodes that control the desired liquid level. The third electrode is an emergency electrode and is used when the specified parameters are exceeded and the pumping mode is turned on.
- Radar devices are universal mechanisms due to the fact that they can be used when working with aggressive and explosive liquids. The operating principle of the devices is based on the use of radio wave radiation - waves of a certain length are directed to the surface of the liquid process medium, reflected from it and entering the analyzer. The filling level of the container is determined by the speed of signal return.
These are the most common level sensors; in addition to them, there are capacitive, hydrostatic, radioisotope and other types of devices that are used in various industries.
Equipment classification
Float sensors can independently monitor the liquid level or send a signal to the control circuit. According to this principle, they can be divided into two large groups: mechanical and electrical.
Mechanical devices
Mechanical valves include a wide variety of float valves for the water level in the tank. The principle of their operation is that the float is connected to a lever; when the liquid level changes, the float moves this lever up or down , and it, in turn, acts on the valve, which shuts off (opens) the water supply. Such valves can be seen in toilet flush tanks. They are very convenient to use where you need to constantly add water from the central water supply system.
Mechanical sensors have a number of advantages:
- simplicity of design;
- compactness;
- safety;
- autonomy - do not require any sources of electricity;
- reliability;
- cheapness;
- ease of installation and configuration.
But these sensors have one significant drawback: they can control only one (upper) level, which depends on the installation location, and regulate it, if possible, then within very small limits. On sale, such a valve may be called a “float valve for containers.”
Electrical sensors
An electric liquid level sensor (float) differs from a mechanical one in that it itself does not shut off the water. The float, moving when the amount of liquid changes, affects the electrical contacts that are included in the control circuit. Based on these signals, the automatic control system makes a decision on the need for certain actions. In the simplest case, such a sensor has a float. This float acts on the contact through which the pump is turned on.
Reed switches are most often used as contacts. A reed switch is a sealed glass bulb with contacts inside. Switching of these contacts occurs under the influence of a magnetic field. Reed switches are miniature in size and can be easily placed inside a thin tube made of non-magnetic material (plastic, aluminum). A float with a magnet moves freely along the tube under the influence of liquid, and when it approaches, the contacts are activated. This entire system is installed vertically in the tank . By changing the position of the reed switch inside the tube, you can adjust the moment the automation operates.
If you need to monitor the upper level in the tank, then the sensor is installed at the top. As soon as the level drops below the set level, the contact closes and the pump turns on. The water will begin to increase, and when the water level reaches the upper limit, the float will return to its original state and the pump will turn off. However, in practice such a scheme cannot be used. The fact is that the sensor is triggered by the slightest change in the level, after which the pump turns on, the level rises, and the pump turns off. If the water flow from the tank is less than the supply, a situation arises when the pump constantly turns on and off, and it quickly overheats and fails.
Therefore, water level sensors for pump control work differently. There are at least two contacts in the container. One is responsible for the upper level; it turns off the pump. The second determines the position of the lower level, upon reaching which the pump turns on. Thus, the number of starts is significantly reduced, which ensures reliable operation of the entire system. If the level difference is small, then it is convenient to use a tube with two reed switches inside and one float that connects them. If the difference is more than a meter, two separate sensors are used, installed at the required heights.
Despite their more complex design and the need for a control circuit, electric float sensors allow fully automated liquid level control.
If you connect light bulbs through such sensors , they can be used to visually monitor the amount of liquid in the tank.
Selection rules
When purchasing a liquid level sensor in a tank, you need to take into account several factors; if they are observed, the device will work correctly and reliably. First of all, you need to determine the type of liquid medium and its density, the level of danger to humans. What matters is the material used to make the container and its volume—the operating principle of the selected sensor depends on these parameters.
The next point that you need to pay attention to is the purpose of the device ; it will be used to control the minimum and maximum liquid levels or to constantly monitor the filling of the tank.
When choosing industrial sensors, the number of criteria can be expanded; for household alarms and level meters, it is enough to take into account the volume of the tank and the type of device. At home, home-made devices are used - they work no worse than factory models.
WATTS IGD
Photo: https://beru.ru
A high-quality product from a German manufacturer that can function for ten years without requiring complex maintenance. Supplied in a plastic case that is well sealed and does not allow water and dust to pass through. The maximum operating temperature is 60 degrees. Thanks to the high-quality material, the product can be used even when pumping gasoline, without the outer layer being destroyed.
Watts Level float switch IGD 5m (set)
Advantages:
- robust housing
- durability
- ease of use
- efficiency
Flaws:
- not detected
DIY making
The easiest way is to make your own float sensor for the water level in the tank, or a fill indicator.
The principle of operation of such a device is that the float floats up in the liquid, when the container is filled to its maximum, it closes the contacts and signals that the water level is sufficient.
Manufacturing sequence:
- Two ballpoint pen caps are connected to each other and filled with glue to create a float.
- The tube from the handle body is cut in half - the previously made float should easily fit into it and move without restrictions. A transverse wire is attached to one side so that the float does not fall out of the body, but at the same time water can easily enter inside.
- Two copper wires 5-7 cm long are stripped, a square piece of foil is attached to them (clamped with pliers). The foil with wires is glued to the tube base and closed with a cap on top.
- The finished sensor is lowered into water, the wires are connected to an audible alarm. When the liquid level rises, the float floats up, closes the contacts, and a signal sounds.
The given sensor manufacturing scheme is the simplest; it is used for small containers.
The disadvantage of such a device is that it does not allow the pump to automatically turn off. To stop the flow of water into the tank, alarms are made using magnets and reed switches.
Inexpensive industrial devices
There are also inexpensive models of liquid level control sensors, which can be purchased in stores for about 2 thousand rubles
Various modifications of ARS
Such float sensors are usually used in reservoirs. The measuring head in devices of this type is small, which makes the device compact. The load capacity, according to the operating instructions, can reach 1 ampere. The wire entry into the devices is sealed. The body is made of plastic. The operating differential is 45 degrees. The maximum pressure for correct operation of devices is 3 bar. The cost is about 2 thousand rubles, depending on the modification.
“Crystal” container filling control devices
These float type sensors can be used in harsh environments. Very compact. The measuring head is 2.3 centimeters in diameter. The maximum pressure for correct operation reaches 3.3 bar. The wire input is made in the form of a plastic seal. The devices are equipped with a spark protection barrier. Can work in hot environments. The price is slightly higher than 2 thousand rubles, depending on the modification.
Burkle devices
These devices are designed for contaminated environments, but can also be used in clean ponds and clean water tanks. The maximum pressure for correct operation is 4.1 bar. The maximum possible load is 1A. It is possible to work in environments heated to 170 degrees, in liquids with a density of up to 3 kg per square meter. cm. The average price of the device is 2,200 rubles and depends on minor modifications made by the manufacturer.
Fine Tek and Wilo sensors
These float type devices can be used in harsh environments. They are used for drainage purposes and can also be installed in wells. The sensors can withstand loads up to 2 amperes. The measuring heads are compact and measure 2.5 cm. The wire inputs are made in a specialized seal. The cases are made of heat-resistant plastic. The devices are equipped with fuel probes, which allows their use in flammable environments. The price ranges from 2 thousand to 2500 rubles and also depends on the modification.
Wilo float-type devices are the cheapest, but are not functionally designed for aggressive environments and can only be used in clean water. The sensors have small measuring heads and are compact in appearance. The maximum temperature of use is 140 degrees. The operating differential is only 30 degrees. The maximum operating pressure does not exceed 2 bar. The price of such sensors fluctuates around 1900 rubles.
Float for pumps
Good day, dear readers of the blog nasos-pump.ru
In the “Accessories” section we will look at the simplest and, perhaps, the cheapest way to protect pumping equipment from “dry running” using a float switch or, more simply, a float. A great many different methods of controlling pumps have been developed, but one of the simplest and most frequently used is a float . The main advantage of this method of pump control is that the floats are simultaneously used both as a water level sensor and as an actuator for controlling the pump. They are installed in storage tanks, reservoirs, tanks, wells to control domestic and industrial water supply, sewerage and wastewater pumps. Several floats can be installed in one container and they can perform different functions: control of the main pump, control of the auxiliary pump, emergency level sensor, overflow sensor. Their use in these systems makes it possible to protect pumping equipment from operation in “dry running” mode, and when filling various types of containers, the float switch provides protection against overflow. Floats for pumps come in two types: light, for example: (IGD 2/S, IGD 5/S, IGD 10/S) and heavy (MAC/3, MAC/5-5S). Light ones are primarily used in water supply and wastewater systems, and heavy ones for drainage, fecal (sewer), and rainwater runoff. The floats are sold with cable lengths of 2, 3, 5 and 10 meters depending on the model.
Design and principle of operation of the switch
Float design: electric switch and steel ball placed in the internal cavity of a plastic housing. The cable length varies from 3 to 10 m. When the float switch reaches the upper mark, the switch contacts close, turning on the pump. As soon as the float descends to the lower mark, the steel ball acts on the switch lever, changing its location. The circuit opens and the system turns off.
Float switch connection diagram: a cable with three wires is connected to the switch. They vary in color, often being black, blue and brown. The common wire is marked in black. In the upper location of the float switch, the contacts of the common wire and the normally closed wire, indicated in brown, are closed. At the minimum mark, the circuit is closed with the participation of a common wire and a normally open wire, indicated in blue. The insulation of wires not currently used in the circuit must be very reliable. It is understood that in an aquatic environment the cable must have sufficient moisture resistance, and the plastic case must be leak-tight. The cable outlet is equipped to relieve mechanical stress and is reliably sealed. The polymer resin filling the cavity of the cable glands prevents moisture from getting inside. And the last word in favor of the float switch is the price, which usually varies from 300 to 500 rubles. The combination of a reasonable price and reliability makes the purchase of a float switch the best option for providing protection against unwanted breakdowns of expensive equipment, such as household and industrial pumps.
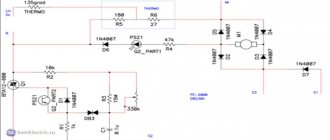
Along with spring this year, melt water also came into the basement of my house. Previously, he also appeared a little, but this year he showed all his stupidity. The basement floor is covered with metlakh tiles, there is no pit, so for drainage I use a 12-volt drainage pump for yachts and boats, with a capacity of 750 l/hour. Yesterday was “water day”: the pump had to be turned on hourly to prevent water from flowing through the threshold into other rooms. But today I have to go to work. Therefore, yesterday I quickly built an automatic float switch for the pump. I secured a bracket in a plastic ring, on which I installed a microphone with a MIZA-2 lever. I machined a float into a ring for the lever from a piece of sandwich used for finishing the slopes of plastic windows. The end of the sandwich was sealed with duct tape. Connected the pump circuit to an open circuit. As soon as the water level reaches 5-6 mm in the lowest corner of the floor, the float floats up and presses the microphone lever, the pump turns on and drains the floor in 3-4 minutes. I'll take a photo in the evening.
Read also: Program for sawing logs with a strip frame
Will the mikrik pull the pump? Maybe through a relay?
The float for the pump is an important element of the unit for pumping water. It is designed to regulate the liquid level in the container and protect the pump from dry running. Float switches help reduce the amount of debris that enters the system and thereby increase the life of the pumping equipment.
Float in the pump device - description of the element
Both the sump pump and the submersible float pump operate in conditions where debris can get into the fluid or it can run out. In the first case, solid waste fractions can severely damage the system. In order to avoid this, pumps are equipped with shut-off floats, which are activated when there is no water or when there is a large amount of debris in it.
Pumps can be placed and operated in various containers, wells or wells. Depending on where the unit is used, the functions of the float may differ. However, in all cases, the tasks of floats include:
- Adjusting the operation of the main pump;
- Adjusting the operation of the auxiliary pump and increasing its efficiency;
- Water level alarm;
- Overflow alarm.
A liquid level indicator is required to prevent the pump from running dry. An overflow alarm is necessary to eliminate the possibility of overfilling the tank in which the pump is located. This often leads to a short circuit in the device.
Maintenance Tips
After each use, remove the device from the water if the device is not in constant use.
Before immersing in liquid on the surface, plug in the unit and raise and lower the float several times. This way you can check the functionality of the pump.
When removing the device from the water, do not pull it by the cable or hose. For these purposes, a rope or cable is tied to the handle.
Pump out only relatively clean liquid (river water, groundwater, rain melt), without admixture of clay and silt.
Constantly clean the channels of the impeller protective box.
Types of floats and their purpose
All floats that are used in pumps are divided into two types:
- Lightweight – used when working with clean water for drinking or domestic needs;
- Heavy - used in large sewage and drainage pumps.
This classification of floats should be taken into account when choosing a pump. Light elements will not be able to cope with heavily polluted water, and it is not practical to buy units with heavy floats for pumping clean water due to their high cost.
Floats on mounting rod
One tank can contain up to several switches, each of which has its own function: one controls the auxiliary pump, another controls the main pump, the third acts as an emergency water level sensor, and the fourth monitors overflow.
In any case, the number of floats is determined by the number of connected pumps, as well as the need for protective devices in the system. Several floats are mounted on a special mounting rod. In its role, you can successfully use a plastic pipe securely fixed in the tank. The float switches are fixed on the rod at a distance from each other so as not to interfere with the work of the neighbor. The cable of each switch is secured using clamps. There are situations when necessity dictates the use of several rods at once for attaching floats. Taking into account operating conditions and project features, the number of float switches required to organize the work of a particular system is determined. There are two types of float switches:
- Lightweight - for a system that controls water supply or water disposal;
- Heavy - designed to control drainage or sewage pumps.
How to connect a float switch to a pump?
Installation of the float can be done in different ways. Before installation, make sure that the current consumed by the pump is less than the maximum permissible current specified in the system operating manual.
The easiest way to install a float is to install it in a container using a cable and a special sinker, which is included with the unit. Installation of the float is carried out according to the following algorithm:
- First, the sinker must be put on the cable and the free play of the float must be determined;
- After this, the sinker must be secured to the cable using a latch;
- Next you will need to fix the cable on the outside of the container.
After installing the element, you should connect the float switch to the pump. Before setting up the float, you need to carefully study the diagrams that come with the device.
Once connected, you will need to check if the system is working. To do this, start the pump and wait a couple of hours. If the device pumps out water stably, it means that the installation and connection were carried out correctly.
WWQ FS
Photo: https://beru.ru
A universal device that can be installed for any purpose. The device has a durable plastic case and a long cable. The maximum load is 4 kW, while the rated current is 4 A. The tightness is at the highest level, so neither dust particles nor water will penetrate inside the product, which ensures high durability and trouble-free operation.
Float switch WWQ FS
Advantages:
- low cost
- durability
- robust housing
- easy installation
Flaws:
- not detected
Float maintenance and repair
Subject to the operating rules, the float to turn on the pump will work for a long time and properly.
If the element is used in conditions of working with clean water, then it does not require special maintenance. If the float is used when working with dirty water and a large amount of solid fractions, then it, like the entire system, must be washed under running clean water. This must be done at least once a month. This will prevent the part from sticking to the pressure pipe or pump. If water gets inside the float, its contacts burn, or the integrity of the cable insulation is damaged, all faulty elements must be replaced, since they cannot be repaired. If the electronic float itself is completely out of order, then it must be changed at special service centers.
Causes of breakdowns
- Incorrect operation of the device. It is necessary to distinguish between drainage and fecal drainage, although at first glance they are similar. Using the former to pump out sewage is unacceptable. The device is used only for pumping conditionally clean water. Incorrect use often leads to damage to the unit. Constantly turning on and off at intervals of less than one minute has a detrimental effect on the motor and bearings.
- Cable damage. The power cable is one of the main elements of the pump. Without it, nothing will work. A break or break in the cord will result in the unit being de-energized. You can replace the cable yourself, the main thing is to choose the correct cross-section and number of cores. You cannot repair the cord only at the short circuit point. It is better to replace it completely, from the plug to the pump.
- Infrequent inspection and improper maintenance. Any device needs technical control. The drainage system is inspected for defects once every six months. If the unit is constantly in water, then it should be taken out once a quarter. During the inspection, procedures are carried out to lubricate the bearings and tighten the fixing bolts and nuts. Ignoring these steps will lead to breakdown of the main components of the device - repair of the drainage pump will be required.
- The unit runs dry. The pump must not operate without water. Only when immersed can it be connected to the network. The owners leave the units unattended, having pumped out all the water, the pump does not stop working, the engine overheats, and the braid of the engine compartment sticks together. A short circuit occurs - the device burns out completely, which leads to significant financial costs for expensive repairs.
- The device operating environment is incorrectly selected. There is an opinion that the drainer is suitable for pumping even liquids with a high content of silt and clay. Of course this is not true. In the first couple of hours, the motor will cope with the strained dense layer of sludge, but subsequently the movement of the thick fraction along the hose will create additional resistance to the motor. Eventually the unit will stop working. Small pebbles are detrimental to the impeller. The power of the device is enough to pull the pebbles into the impeller, but the rotation will stop once the stones get into the mixer augers.
- Incorrect installation of the unit. It must be placed in a container or reservoir, lowering the body with the float to a depth. It must be remembered that immersing the device and placing it on the bottom is unacceptable.
- Manufacturing defects. Nothing can be done about this phenomenon. There is only one piece of advice - do not throw away documents and the receipt for the purchased goods.
- Violation of the seal of the housing. When lowering the device to a depth or into a container for pumping out liquid, it is unacceptable to throw it or suddenly drown it. Hitting a rock or tank wall will cause cracks in the joints or the pump wall. Water will get inside and the engine will burn out or become unusable.
Making a float switch with your own hands
To make a part yourself, you will need to prepare:
- Metal ball;
- 2 buildings;
- 2 small magnets;
- Contact plates.
The plates can be made of brass or copper. They must be on different sides of the housing so that the ball between them can make contact. To make the metal strips more springy, they can be placed on a file and beaten with a hammer.
The magnets should lift the ball and hold it at an angle of 65 degrees. The housing itself can be made of any material that does not conduct electricity. Further work looks like this:
- First, wires with a cross-section of no more than 2 mm are soldered to the contacts;
- Next, the wires need to be insulated and placed in the housing;
- It is also necessary to carefully insulate the inside of the case;
- You will need to pour polyurethane foam into the float cavity and insulate the outer side of the housing;
- After this, you need to install loops at the ends of the case and connect the cord.
The manufactured float will last quite a long time, and you will save a lot of money on the purchase of equipment.
Wilo WA 65
Photo: https://beru.ru
A quality product with a 5 meter cable that is suitable for installation in a variety of tanks. The insulation is performed at a high level, which prevents accidental breakage and depressurization. The body is made of durable material that can function at 55-60 degrees. The kit includes a special weight.
Float switch WILO WA 65 (PSN-O) 5m
Advantages:
- length of cable
- universal application
- convenience
- easy to clean
- efficiency
Flaws:
- not detected
Scope of application of water level sensors
- Advanced country houses and farms engaged in growing fruits and vegetables use drip-type irrigation systems in their work. To ensure automatic operation of watering equipment, the design requires a large capacity for collecting and storing water. It is usually filled with submersible water pumps in a well, and it is necessary to monitor the level of water pressure for the pump and its quantity in the collection tank. In this case, it is necessary to control the operation of the pump, that is, turn it on when a certain water level in the storage tank is reached and turn it off when the water tank is completely filled. These functions can be implemented using float sensors.
Rice. 1 Operating principle of a float level sensor (RPL)
- A large storage tank for water may also be required for water supply at home if the flow rate of the water intake tank is very small or the performance of the pump itself cannot ensure water consumption corresponding to the required level. In this case, liquid level control devices for automatic operation of the water supply system are also necessary.
- The liquid level control system can also be used when working with devices that do not have protection against dry running of the well pump, a water pressure sensor or a float switch when pumping groundwater from basements and rooms with a level below the ground surface.
Related Posts
comments powered by HyperComments
When the need arises to control the fluid level, many do this work manually, but this is extremely ineffective, takes a lot of time and effort, and the consequences of oversight can be very expensive: for example, a flooded apartment or a burnt out pump. This can be easily avoided by using float water level sensors. These are devices that are simple in design and operating principle and are affordable.
At home, sensors of this type allow you to automate processes such as:
- monitoring the liquid level in the supply tank;
- pumping groundwater from the cellar;
- turning off the pump when the level in the well falls below the permissible level, and some others.
Types of water level sensors
All water level sensors for pump control can be divided into two large groups: contact and non-contact. Non-contact methods are mainly used in industrial production and are divided into optical, magnetic, capacitive, ultrasonic, etc. kinds. The sensors are installed on the walls of water tanks or directly immersed in the liquids being monitored, the electronic components are placed in a control cabinet.
Rice. 3 Vertical and horizontal reed sensors
Marco AS2
Photo: https://beru.ru
A good product made in Italy, which has a high service life and reliability. The main advantage of the device is the ability to control a small water level (from 20 to 50 mm). This is not found in every design, which makes the product unique. The body is smooth and has no irregularities, which allows it to be used in any system. The outer part is made of impact-resistant plastic, which is also a good solution. Operating current – 10 A.
Float switch Marco AS2
Advantages:
- efficiency
- durability
- stylish appearance
- wide range of applications
Flaws:
- not detected
Reed switch device
The main actuator element of the reed switch is the reed switch. The device is a small glass cylinder filled with an inert gas or with air evacuated. Gas or vacuum prevents the formation of sparks and oxidation of the contact group. Inside the flask there are closed contacts made of a ferromagnetic alloy of rectangular cross-section (permalloy wire) coated with gold or silver. When exposed to a magnetic flux, the contacts of the reed switch are magnetized and repel each other - the circuit through which the electric current flows opens.
Rice. 6 Float vertical water level sensors
A similar pump control circuit, placed in the control cabinet, can be used when monitoring the level in a tank with liquid, if the reed switches are swapped, that is, SV2 will be at the top and turn off the pump, and SV1 in the depths of the water tank will turn it on.
Level sensors can be used in everyday life to automate the process when filling large containers with water using electric water pumps. The easiest types of reed switches to install and operate are those produced by industry in the form of vertical floats on rods and horizontal structures.
Grundfos GIFAS-FS-E
Photo: https://beru.ru
An expensive and high-quality device that is suitable for sewer and water supply systems. The device is capable of operating simultaneously with two pumps. The case is made of durable material that can withstand temperature changes. Operating voltage is standard.
Float switch Grundfos GIFAS-FS-E (for filling) - cable length 3 m. with plug
Advantages:
- strength
- length of cable
- versatility
- easy to operate
Flaws:
- not detected
A simple float sensor for a garden watering barrel
Authorization on the site
A simple float sensor that allows you to monitor the moment a garden watering barrel is completely filled (to the very top) with water.
Greetings to all do-it-yourselfers, as well as summer residents and gardeners!
Now, at the end of summer, we are in a drought again and therefore we have to water the garden almost every day. At the same time, we water from three two-hundred-liter barrels standing in our garden. We first pour tap water into these barrels, and after it heats up, using watering cans and watering cans, we water the plants with it, both in greenhouses and in open ground. Many of our neighbors who have vegetable gardens do the same.
And here recently, I somehow got into a conversation with one of our neighbors - an elderly woman. By the way, she also uses a two-hundred-liter barrel to water her small garden. And this granny, among other things, complained to me about one problem. The problem is that when she fills a watering barrel with a hose, she can’t keep track of when the barrel is filled to the top with water.
The fact is that her barrel stands next to the house and the tap itself, which shuts off the water, is located on an inch steel water pipe leaving the house. A rubber hose is attached to the end of this pipe. So, when she puts the hose in the barrel and opens the tap, she herself sits on a chair next to the wall of the house where the tap is located (literally 2-2.5 meters from the barrel) and monitors the filling of the barrel.
But she can’t see clearly when the barrel is filled to the top with water, as a result of which the water often unnoticeably overflows over the edge and quite a lot of it can leak out until the grandmother finally understands that the barrel is filled to the top and will shut off the water.
This grandmother neighbor asked me to come up with something so that she could clearly see when the barrel was filled to the top with water, so that she could turn off the water in time.
After listening to her, I immediately realized that this problem could be solved by a simple float, which rises along with the surface of the water in the barrel when it is filled with water. When the barrel is filled to the top, this float will float to the surface and will rise above the barrel, which will signal that the barrel is filled to the top. The main thing is that this float is clearly visible from the outside.
This is perhaps the easiest way to solve this problem, and such a float sensor can be made in just a few minutes.
Manufacturing procedure for a float sensor
I must say that at first I wanted to make such a float out of foam plastic. This is perhaps the best material for a float. But I didn’t have it at hand, and I didn’t want to look for it for a long time. Therefore, as the basis of the float, I took a champagne cork.
At one end of this cork, I made a hole in the center with an awl and, right by hand, screwed a self-tapping screw into it to a depth of 2-2.5 cm.
This self-tapping screw will act as a sinker.
Then I took five plastic milk carton lids and used an awl to poke holes in the center of them.
And then I put these caps on a screw and screwed it in from the other end of the plug.
As a result, I got this float.
I spent only two minutes making it, no more.
Pedrollo T80/10
Photo: https://beru.ru
A high-quality float switch that can function for a long period without deteriorating or becoming clogged. The design is standard, the product is a “frog float”. Electric switch. The body is connected to the sinker using a contact cable.
Float switch Pedrollo T80/10 (with PVC cable 10 m long)
Advantages:
- durability
- easy maintenance
- convenient weight
- versatility
Flaws:
- not detected
Operation of the filling mechanism in the tank
Float valve for toilet
To begin with, you will need the most detailed familiarization with the design features and operating principle of such tanks.
This makes it possible to carry out sufficient repair work at a professional level with your own hands without outside help.
This ensures significant savings in the family budget.
As one of the main structural elements of the flush tank, a special button is used, interaction with which allows you to direct the flow of water into the container of the plumbing fixture, so that everything is flushed under pressure into the drainage system.
Filling is carried out in various ways:
- Water supply from below.
- Side feed device. During operation, quite a lot of noise occurs.
Upon superficial inspection, the mechanism of the tank seems quite simple. Visually, only the float device and part of the drain mechanism are determined.
In reality, the design of all components cannot be called so simple. The float valve circuit includes the following components:
- The housing on which the membrane is installed. This device is responsible for filling the container with water.
- A float connected to the membrane itself by several levers.
Operating principle of a float valve
In tanks made using old technologies, a toilet float valve with a bottom supply is installed. The main purpose of such a device is to ensure the optimal filling level of the tank.
The main disadvantage of such devices is the increased likelihood of failure. In addition, splashes are formed, as well as some other undesirable phenomena.
As the float is filled, it changes position. This ensures that the water supply process stops if its level reaches a certain level.
The main operating principle of float valve technology is as follows. When the float rises, the rod with the curved edge moves.
After this, the thrust exerts an influence on the lever, which presses on the valve, which is pressed against the seat with a special gasket. Water completely stops flowing into the container.
When draining occurs, the reverse function is performed. The volume of water decreases and the float lowers. The lever pressure on the piston stops, water flows back into the empty container.
Difficulty with the shut-off valve
If malfunctions of the shut-off valve occur, everyone can cope with them without much difficulty on their own. The most common cause of such malfunctions may be the membrane, as well as special water-conducting devices that can become clogged from time to time.
Most often, the cause of such malfunctions may be the membrane, as well as water-conducting mechanisms, which tend to become clogged periodically.
To resolve such problems, simply disassemble the float device. A removable cap is provided for this.
After this, the membrane is removed, cleaned and installed in its proper place. The cap must be screwed back on.
In most examples, membranes often fail, so when replacing it, you need to select sufficiently high-quality products that are guaranteed to last as long as possible. If it is difficult to purchase such a device, there is always the possibility of making a new element with your own hands in accordance with the specifications of the instructions.
An old faulty part can be used as a suitable template. It needs to be leaned as tightly as possible against thin, hard rubber. After which the required shape is cut out in accordance with the design features of the existing sample.
Design features of the device
The product is housed in a plastic case that is protected from water penetration. There is a lever and an electrical switch inside. Some designs are equipped with a steel ball. The main task of this element is to monitor and change position when the position of the device itself changes. The last element is a cable, which consists of three wires, where one is common (black), and the rest are connected to the contacts.
When the device is placed at the bottom of a container or reservoir, the connection is made through the black and blue wires. If the device is located at the top point, then the contacts will close brown and black. It is important to remember that all wires must have high-quality insulation; no cracks are allowed.
It is necessary to ensure that the supply cable has high moisture-proof properties; this is often indicated in the technical data sheet of the device. Tight sealing is achieved using a mechanical seal. The product is also equipped with a special element that prevents the occurrence of mechanical stress. To get rid of leaks, manufacturers add polymer resin; this does not make the sensor more expensive, but its safety increases significantly.
Cables made of thermoplastic rubber are able to withstand chemical and temperature exposure. For example, the device will function properly even in cases where it interacts with:
- Alcohol;
- Gasoline;
- Organic acid;
- Feces.
Due to the fact that the product does not have pores, no elements interfere with performance. Sand or paper does not remain on the surface, which has a positive effect on the buoyancy of the device.
The main characteristics of the float switch include the following parameters:
- Current limit value;
- Rated mains voltage;
- Resistive load, these include starters, heating elements, light bulbs, etc. devices;
- Reactive load. This takes into account the operation of the pump and compressor;
- Minimum and maximum temperature values;
- Protection class.