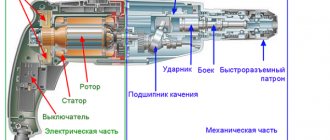
The chuck in a drill is considered one of the most used elements, which is why it wears out its life very quickly. As a result, this part often fails. To cope with a breakdown, you need to know how to disassemble a drill chuck. The procedure is considered simple, so it can be done independently. However, it is important to take into account some nuances.
Disassembling a drill chuck has certain features
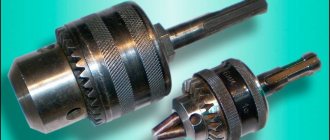
Drill chuck
The versatility of use is emphasized by the range of diameters and lengths of interchangeable nozzles. In this case, the processing of the material can be performed not only in the translational direction, continuing the body. In addition to the “classic” chucks with a clamping key, there is an angled chuck.
Angle chuck for drill
Unlike others, more common and described everywhere, it is almost unknown. Provides flexible work in the truest sense - right up to drilling around a corner or into the frame.
All types of chucks are divided into regular (key, quick-release, etc.) and special (flexible, extension, etc.). The whole difference is in versatility.
When it becomes necessary to choose a chuck for a drill, the types offered on the market will completely satisfy any master. Regardless of which drill and how often it will be used, you should pay attention to the simplicity of the chuck design.
Classic drill chuck
The cartridge is “classic”. The drill is fixed using a cam method - the replaceable nozzle is clamped from several sides. These cams (collets, petals) move under the influence of the compression screw and hold the shank of the nozzle.
Possible problems
The screwdriver chuck remains its most vulnerable part, this is due to the constant manipulations necessary to change the working tool. This main drawback of the node is caused by the very logic of its existence. It is impossible to avoid periodic replacement of the chuck during intensive use of the screwdriver. During operation of the tool, the unit constantly experiences tension, which is difficult to combine with the mobility of its individual parts.
Problems with the cartridge are easy to identify. The first signal will be frequent turns of the drill, first of a small diameter, and then of increasingly larger ones. Over time, bits may begin to pop out during operation. In some cases, the alignment is disturbed and the drill actively “beats”; this phenomenon is not only unpleasant, but also quite dangerous, as it causes the drill to break. At high speeds, its fragment can cause serious injury.
An incorrectly clamped bit can cause increased material consumption due to unintentional damage and can also cause injury when tightening a screw. When choosing a new cartridge to replace a worn one, you need to pay attention to the factory markings.
After a long period of use, it is often difficult to recognize its traces; in this case, the type of cartridge and the method of its fastening will have to be determined by eye.
How to choose a chuck for a screwdriver, see the video below.
Source: stroy-podskazka.ru
How to remove a chuck from a drill
How to remove the chuck from a drill? This simple question baffles many craftsmen. There are several possible answers, depending on the design.
Threaded connection. The essence is the presence of a certain type of thread between the inside of the chuck and the drill shaft. Replacing the chuck on a drill is done as follows.
- The collet jaws should be set inward to the maximum level.
- When you have access to the locking screw, remove it. Rotation will most often be required clockwise - due to the left-hand thread.
- Fixing the shaft after removing the screw.
- Turning the cartridge out counterclockwise. To ensure that the cartridge can be unscrewed well, it is better to use a gas wrench. The most difficult thing is to move from the heaviest point.
Accordingly, you will need: a screwdriver, a gas wrench, a hammer and a vice. Installation is in reverse order. Experienced specialists note: you can turn on the drill or screwdriver in reverse at low speed. The tool will even help you repair yourself.
Connection via Morse cone. The shaft tip has the shape of a conical transition. All you need for removal is a hammer and a vice:
- The drill is installed in a vice with the chuck facing down.
- Use a hammer (or similar tool) to strike the cartridge lightly.
- When subjected to force, the cartridge seems to move from the landing site and is removed.
Other types are specific and are considered in exceptional cases.
As for the type of fastening of the replacement nozzle, it does not affect the type of installation of the cartridge itself.
Battery or mains
Having decided on the class, you will need to decide whether you need a corded screwdriver or a cordless one. The disadvantages and advantages of both are obvious: the battery-powered one has higher mobility and the cord does not interfere with operation, but it weighs more. The network connection does not depend on the presence of battery charge, but not all construction sites have power supply. In general, the choice is not easy. The decisive point may be that a cordless screwdriver with a good battery costs significantly more than a similar model operating from the mains. The difference is due to the presence of a battery - good options are not cheap.
For a corded screwdriver, the length of the cord is important
If you decide to choose a corded screwdriver, pay attention to the cable length. The longer it is, the more convenient it will be to work - you won’t have to carry a carrier either.
To choose the right cordless screwdriver, you need to pay attention to the type of battery. The duration of operation on one charge, as well as the order of storage, depend on this.
- Lithium-ion (Li-lon). Holds a charge for a long time, charges quickly, has a large number of recharges, and almost never discharges during storage. In general, a good option, but expensive. Therefore, it is probably more common on professional models, where the duration of operation on a single charge is important. Disadvantages include fear of cold, which is important in our country.
Lithium-ion batteries have a long service life, are not subject to self-discharge, but are expensive - Nickel metal hydride (Ni-MH). This type of battery is environmentally friendly, small in size and weight, and has an average price. Disadvantages - they also do not like low temperatures, they have a short service life - about 3 years. But it’s easier to work with such a tool—the hand doesn’t get so tired. When storing the battery, the battery is fully charged; discharged batteries cannot be stored. During storage they are discharged, but moderately.
Nickel-metal hydride batteries are a good option, but they do not have a very long life. - Nickel-cadmium (Ni-CD). The main advantages are low price and service life of 5 years (number of charges - about 3000), it is not afraid of frost, that is, you can work outside in winter. Disadvantages - it takes a long time to charge (it takes twice as long as charging other types of batteries), has a “charge memory”. Charge memory is a nasty thing. If you charge a battery that is not completely discharged, the total capacity of the battery will decrease. It will become smaller by exactly the value from which the charge began. Therefore, you need to work with such a tool until the battery is completely discharged, which is not always convenient: it cannot always “tighten” the screw, you have to help with your hands or tighten it with a “fresh” battery. Store completely discharged, otherwise the capacity will decrease again.
The cheapest type of battery is nickel-cadmium, but they have a “charge memory”
So, if you choose a cordless screwdriver for periodic work, a nickel-cadmium battery will do just fine. If you use it carefully, it will last a long time. If you are starting large-scale work, it is better to use other batteries - there will be less downtime, the work will move faster.
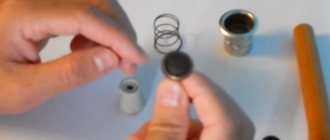
How to disassemble a drill chuck
How to disassemble a drill chuck? Everyone asks this question sooner or later.
There are 2 main methods for disassembling the cartridge - the key one (as the most used in household and professional appliances).
Perforator method:
- Diluting the collets before they go into the chuck.
- Install the insert into the cartridge.
- Support the drill with the insert against the shock absorber pad.
- Turn on the power tool for a couple of seconds - as a result, the “sleeve” (adjustment clutch) will be removed.
- The collets are removed - with the obligatory marking of their relative spatial position. The difficulty is that when assembling the collets, each one must take its place. Otherwise, centering the replacement tool will not be possible.
The need for a hammer drill lies in the fact that it is designed for forces that are greater than those of a drill.
Hammer disassembly method:
- Breeding collets.
- Install the chuck on the vice so that the body passes between the jaws, but the coupling does not.
- Warm up the coupling with a local heat source - a hair dryer is optimal.
- A plate is placed on the cartridge as a shock absorber.
- The housing from the adjusting coupling is knocked out with a hammer through the plate.
Drill chucks are quick-release. The order of their disassembly is as follows:
- The coupling is lifted and moved around the perimeter using a screwdriver.
- When the distance between it and the body becomes sufficient, you can remove it simply with your fingers.
- Extend your fists as far as possible.
- Insert the rod or bolt into the cartridge, and with calm blows of a hammer, the body is knocked out of the bottom of the coupling.
- Once these parts separate from each other, disassembly as a lubrication process stops. Further actions will lead to loss of structural integrity (assembly at this level is done under production conditions).
We choose a screwdriver based on the tasks
Do not think that a screwdriver is a universal tool suitable for all types of work designed for a screwdriver. Yes, there is some truth in this statement, but only some.
For example, to install drywall to the ceiling, you need a light and convenient tool so that your hands get less tired. Single-speed models with a quick-release chuck and a lithium-ion battery are suitable here.
For drilling, you need a more powerful tool, and therefore heavier. For drilling walls made of brick or lightweight concrete, impact screwdrivers are preferable, which we talked about here.
For furniture assemblers, electric screwdrivers are suitable - ultra-light class screwdrivers. These are low-power models, very compact and lightweight.
That's all I wanted to say.
Which way to unscrew the drill chuck?
Everyone probably remembers how to remove a cartridge from a Soviet drill. Modern electric models are not much different from the manual one.
The process of removing a chuck from an electric or hand tool begins with studying the documentation and markings. Any thread (regardless of the cutting side - left or right) is marked with an arrow and symbols.
Thread type - both metric and inch. Before applying physical force, you must ensure that the chosen direction is correct. There are frequent cases of normal breakdown and failure of this connection. Information is provided on the tool body and in the instructions.
The chuck rotates clockwise for drilling and tightening hardware. To ensure reliable fastening of the cartridge itself, the thread is usually made “left-handed”, left-handed. To unscrew it, you need to rotate it counterclockwise.
The thread size is indicated by letters. Type: M, metric, or UNF, inch. The numbers show diameter and pitch. The most commonly used thread is M14. It is very suitable for installing various adapters for the cartridge.
Features of the screwdriver gearbox
Not all screwdrivers have a drilling function, but it is recommended to choose models with the drilling capability - after all, when fastening, it is often necessary not only to screw in, but also to pre-drill a hole, for example, for a long self-tapping screw in hard wood. And the drilling function can be controlled with one tool.
Screwdrivers with a drilling function have a gear switch, from low speeds, but with greater force, for screwing in fasteners, and higher speeds with reduced force - for drilling.
Which drill chuck is better?
The drill chuck plays the role of an adapter between the drill and the working tool. For any task or for each type of drill, you need to select the optimal chuck option. Working hours and workload are also important.
What is the most influential factor on the operation of a cartridge and what factors can cause it to fail? Replacing a cartridge in the field can be difficult if you don't have a spare.
- Quality of materials. The “Chinese” cartridge can fail during heavily loaded operations. Therefore, it is better to purchase high-quality models.
- If the drill or the chuck itself falls out, time is lost. When drilling at height, safety is at risk. In case of a loose conical fit with a loose fastening, measures must be taken in advance.
- Drill chuck runout. If this occurs, you should disassemble the drill chuck, check for contamination or adjust the fastenings. If bent, it usually cannot be repaired manually; it is best to replace it with a new one.
- Collets or jaws jamming. To rectify the situation, you will need to disassemble the cartridge (remove the cartridge itself if you know how and have already changed it). Cleaning, lubrication and assembly are carried out.
The most popular varieties besides the key one are: quick-clamping (or “bzp”) and self-clamping.
Results
For “apartment” work (minor repairs, furniture assembly), a corded screwdriver with a power of 10-15 Nm is quite suitable. A tool with a Ni-Cd or Ni-MH battery is ideal for occasional use, for example, in the countryside.
You might be interested
If more serious work is planned (sheathing with plasterboard, drilling holes), the power of the tool should be at least 30-40 Nm. The choice of power supply is at your discretion, but if you prefer a battery type, then Li-Ion is the optimal solution.
Types of drill chucks
Any electric or hand drill has some kind of chuck for securing a replaceable tool. Depending on the type of installation on the drill itself, there are the following main types of cartridges:
- Threaded.
Installed by screwing onto the thread on the cartridge. Threads (type and diameter) are designated by casting and machining methods. Available for a certain range of working shank diameters.
- Conical (Morse cone).
It is installed by simply attaching it to a special cone-shaped element. It differs from the threaded one by the letter “B”. The best way to remove it is by knocking it down. Securing the replacement tool is most often done using the quick-clamping method.
Cone chuck for drill
Most often, the method is used in professional-grade power tools. The reason is the quality level of the cartridge fastening.
As for the methods of directly securing a replaceable tool, the types of cartridges according to this feature are given below.
Key
One of the most popular chucks for drills, mainly electric ones with low power.
Key cartridge
The main feature is the high reliability of fastening the replaceable tool. Replacement is performed with the tool turned off with both hands. In order to unscrew the attachment (drill or other, on the shank), a key is required.
It is a lever with a uniquely shaped part for interacting with the cartridge. Being fixed in the hole and receiving rotation, it displaces the lower part of the cartridge. In this case, the compression forces on the collets are removed, and the nozzle falls out. Everyone often forgets which way to turn the key: to unscrew it, you should turn it clockwise.
The scope of application has been expanded to impact drills. Thanks to the absence of drill rotation, the work process will not stop unexpectedly.
The interchangeability of keys contributes to the versatility of the power tool. A popular solution: attach this item with regular electrical tape to the power cord.
Quick-clamping
One of the most common types of drill chuck is the keyless chuck. Widely used for the production of electric drills and hammer drills.
Keyless chuck
Designed for the fastest possible replacement of interchangeable tools. Changing it is simple and does not require a key. You only need to hold the upper (end) part and unscrew it in the desired direction. Before work, it is recommended to study the instructions - there are models with left-hand threads.
There are chucks with 1 and 2 couplings. In a double-coupling one, you will have to hold the nozzle with both hands, so replacement may be inconvenient. An electric tool can, to some extent, be called a self-clamping chuck. In this case, the upper part with the nozzle is held with one hand. The second supplies power to the electric motor, which slowly rotates the shaft.
Collet chuck
The collet type of chuck is used for machines that process metal by cutting. The cutting tool is locked automatically. Limited use for mini drills.
Collet chuck
Main application: precision operations on lathes, drilling, milling machines. You can install both a cutting replacement attachment and a cylindrical workpiece to be processed. Due to the quick ability to change the chuck on a drill, it is optimal to use it on a drill or CNC machine.
The principle of operation is as follows. Design: collets (flat or volumetric clamping parts) and nut. As the collet nuts move, they compress, centering the inserted object and holding it in place. A cartridge with more collets works better. There are variations with three, four, six or more collets. Each of them is designed for a workpiece of a certain diameter.
Unscrewing such a tool is not difficult.
Mini chuck for drill
A mini drill chuck is also installed on a small drilling machine.
Mini chuck for drill
The main category of users are electronics engineers, jewelers and engravers, door and precision craftsmen. The main opportunity of this type of tool is to work with the diameter of the tail part of the cutting tool down to fractions of a millimeter.
The rotation frequency is almost unlimited, at the level of tens of thousands. Weight – up to tens of grams. Changing it is simple - the steps are similar to those performed for larger types.
Torque limit
Almost every screwdriver model has this function. The torque limit allows you to adjust the tightening level, above which the coupling slips, and the self-tapping screw or screw is screwed in to the desired level, without over- or under-twisting, which is important, especially when installing drywall.
Cheap models have 5-6 torque adjustment positions, more expensive ones have 10-20 or more. An unlimited mode is provided for drilling, and usually the position is indicated by a special icon.
