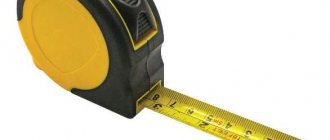
Taking measurements and making accurate markings are important stages of construction or installation work. To perform such operations, a construction tape is used. A convenient measuring device, consisting of a housing in which a flexible tape with divisions, rolled into a roll, and a special winding mechanism is placed, can be found in any household.
They come in small sizes, suitable for indoor measurements or short distances. The length of the measuring tape in such tape measures is from 1 to 10 meters. And there are tape measures for measuring large distances or volumes, where the length of the measuring tape varies from 10 to 100 meters. The longer the measuring tape, the more massive the construction tape.
Device
The structure of the mechanism inside the roulettes is almost the same. The main element is a measuring tape with a printed scale. The tape is made of a flexible, slightly concave metal profile or plastic. The concavity of the canvas is a prerequisite; due to it, additional rigidity is achieved along the edge of the centimeter to facilitate measuring work by one person. This is true for tape measures that are not very long. Meter tapes for geodetic measurements can be made of special nylon or tarpaulin.
Measuring mechanisms can be divided according to the method of winding the tape into a roll.
- Roulettes with manual tape winding. Most often, these are devices with a measuring tape over 10 meters, which is wound onto a reel using a handle. The service life of such devices is unlimited, since the winding mechanism is simple and very reliable.
- Roulettes with a mechanical return device , which is a ribbon spring twisted inside a special reel. This winding mechanism is suitable for measuring instruments with a web length of up to 10 meters.
- Roulettes with electronic drive for winding. Such devices also have the function of displaying the measurement result on a special display.
Many tape measure models have a button for fixing so that the tape measure does not roll up. A special hook is attached to the outer end of the measuring tape, which is used to fix the centimeter at the starting point. The tip hook can be simple metal or magnetic.
But, although the tape measure is simple, like any tool, it can break. The most serious failure of the device is that the measuring tape stops rewinding. Most often, such a breakdown occurs in instruments with a mechanical return device. In order not to buy a new tape measure, you can fix a broken one.
Quality indicators
Quality is determined depending on what material the tape is made of and how the markings are applied to the canvas. It is also important what material the tape measure body is made of - plastic, metal, with or without rubber inserts.
What to choose, a drill or a hammer drill?
Depending on the material of manufacture and the method of marking the measuring tape, tape measures are:
- With painted steel blade
- With painted steel sheet covered with polyimide
- With steel blade with divisions etched on the surface of the tape
- With a stainless steel blade, markings are applied on it using etching
- With fiberglass cloth and nylon cord (so-called rag tape)
It is very important how and with what composition the markings are applied to the canvas. The resistance to abrasion and durability of the markings during operation depend on this. The most durable is etched markings.
When choosing a construction tape, the most important parameters are the accuracy of the readings and the rigidity of the canvas. There are still quite a lot of factors that influence the choice: the length of the tape, the tape measure body, the system for fixing the blade, but the accuracy and rigidity of the tape are the most important.
The ability to carry out accurate measurements using a tape measure characterizes the accuracy class of the tape measure, that is, the range of error that the tape measure gives when measuring. The smaller the error, the more accurate the tape measure, but different tape measures (even of the same accuracy class) can show different results when measuring the same area.
The rigidity of the canvas shows what distance can be measured without helpers, that is, the canvas itself will hold its shape and not “break”. Rigidity is achieved due to the fact that the construction tape has a slight bend (in the shape of an arc). The material from which the measuring tape is made also affects the rigidity.
Repair features
There are several reasons why the centimeter does not curl back on its own:
- the tape has come off the spring;
- the spring burst;
- the spring jumped off the pin to which it was attached;
- the tape broke and a kink formed.
To determine the cause of the breakdown, you need to disassemble the casing of the tape measure; this is quite simple to do.
- Remove the side by unscrewing the bolts holding it, of which there are from one to four pieces.
- Remove the backstop.
- Extend the measuring tape to its full length. If the tape is not detached from the spring, then carefully remove it from the hook.
- Open the coil in which the coiled spring of the return mechanism is located.
If the tape is disconnected from the spring, then to repair the tape measure you need to:
- hook the tape back if it just slipped off;
- cut a new tongue for the hook if the old one is broken;
- punch a new hole in the tape if the old one is torn.
If the spring has come off its attachment point, this will be visible immediately when you open the coil. To resume operation of the winding mechanism, you need to return the tendril to its place. If the tendril is broken off, then you need to cut another one of the same shape. To do this, you need to remove the coil spring from the coil, making sure that it does not break off and hurt your hands. Due to the different stiffness of the spring, the tendril can be made using pliers; you will also need to heat the spring before processing, otherwise the cold metal will break. After cutting out a new tendril, carefully return the spring to its old place, carefully making sure that there are no fractures or bends.
When the spring breaks, the tape measure can be repaired if the break occurred close to the attachment point. The winding spring will become shorter and the meter tape will not go all the way into the body, but this will not affect the operating functions, and the tape measure will serve for some time.
However, in the future it is better to purchase a new tool, which will also have to be done if the spring breaks closer to the middle.
The meter does not twist on its own if the tape has bends or is covered with rust or dirt. It is almost impossible to revive a measuring tape if there are creases or rust on the meter tape; it is easier to buy a new one. But in case of contamination, the tape can be carefully cleaned of dust and dirt, and then returned to its place, avoiding kinks.
Having identified and eliminated the cause of the mechanism failure, the tape measure must be put back together.
- Adjust the spring of the winding mechanism so that it does not protrude anywhere above the surface.
- Attach the cleaned measuring tape to the spring so that the scale is on the inside of the roll. This is necessary to protect the divisions from abrasion.
- Wind the tape onto a reel.
- Insert the reel of tape into the housing.
- Replace the latch and the side of the housing.
- Screw the bolts back.
Measuring tapes with an electronic winding mechanism have a longer service life than mechanical ones. But if they have a malfunction in the internal circuit, then they can only be repaired in a specialized workshop.
How to do something yourself, with your own hands - home craftsman website
AN EXCELLENT TOOL FOR CRAFTERS AND HANDCRAFTS AND EVERYTHING FOR THE GARDEN, HOME AND Cottage LITERALLY FOR FREE - SEE FOR YOURSELF. THERE ARE REVIEWS.
When measuring large objects (over 3 m in size) in summer cottages, the spring of the return mechanism of the tape measure often breaks. The reason is the excessive force applied when drawing out the measuring tape (in everyday life “centimeter”) after the last size appears - either out of necessity, or out of carelessness.
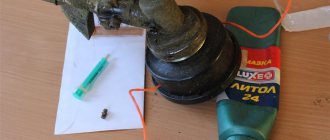
In this case, it is no longer possible to manually return the unwound measuring tape to the tape measure body, which complicates or eliminates its further use. A sad incident, especially if you liked the design of the instrument, and even if the measuring tape was in good condition. However, the measuring tape of a collapsed tape measure with a length of 3 m will continue to serve if you combine it (see photo 1) with a stationery clip for papers of the EK model and with a manual strap, like that of umbrellas, purses or handbags, equipped with a carabiner - these things are easy purchase in the store.
To begin with, the belt must be disengaged from the defective return mechanism. At the free end of the tape, with a deviation of 4-6 cm from the end, a hole with a diameter of 1.8-2.2 mm is stitched in the middle using a mechanical method (drilling, stamping, punch).
The end of the tape that has been freed from the snag (see photo 2, above) is folded into a single-layer oval ring until the technological hole (the coupling of the tape with the spring of the return mechanism) is aligned with the newly formed hole, tied along the aligned holes with a strong thread or thin soft wire, after which this the connection area is wrapped with narrow tape.
TOOLS FOR HOME AND GARDEN, HANDCRAFTS, ETC. PRICES VERY LOW
In this case, one mandatory condition must be met: the dimensional side of the tape, when winding it around the formed single-layer oval ring, must be on the inside of the formed skein, which will protect the measuring scale from contamination and erasing the markings during the operation of the tape.
Next, the free end of the tape is wound onto an oval ring. If necessary, during the winding process we make successive tightenings of the tape in order to achieve tight contact of the already wound layers to each other.
After completing the winding of the tape, we make a final tightening of all its layers until a single thickened ring is obtained.
Read also: How to remove a screw with a broken cross
Then, firmly holding the resulting oval skein from unwinding, we put the EK clamp on one side of it (see photo). Its brackets are released and turned in the opposite direction. We put the carabiner of the hand strap on the unfolded brackets of the EK clamp brought together.
An important stage of construction and installation work is accurate measurements and their markings. Thanks to this, the necessary materials are purchased in the right quantity, and the work is completed. These measurement operations are performed using a special tape measure. It can be found in any household, but it happens that the tape may fail. To repair a tape measure, you need to understand its structure.
Tips for use
To prevent the tape measure from breaking for a long time, you need to follow a few simple rules.
- The rewinding spring mechanism will last longer if you protect the spring from sudden jerks when using the tape for full ejection.
- After finishing the measurements, wipe the tape from dust and dirt so that the mechanism does not clog.
- The hook-tip has a slight play for accurate measurements. To prevent it from increasing, you should not wind up the tape measure with a click. When it hits the body, the tip becomes loose, which creates an error in the measurement of up to several millimeters, and can also lead to the toe being torn off.
- The plastic case does not withstand impacts on a hard surface, so you should protect the tape measure from falls.
To learn how to repair a measuring tape, watch the video below.
Source: stroy-podskazka.ru
Secret No. 2
By adding the two sizes we get the desired result
Having bought a tape measure, few people study the inscriptions on its body, but in vain. On most copies there is some numerical value (the length of the tape measure body), which perfectly helps to measure the distance between two surfaces.
To do this, you need to put it against the wall, take a measurement and add to the latter the numerical value indicated on the tape measure body.
DISASSEMBLY AND REPAIR OF THE MEASURING ROULETTE
I won’t be mistaken if I say that most often a radio amateur holds a caliper in his hands, followed by a ruler and a micrometer, but a tape measure, especially a 5-meter one, is a rarity. But now I needed it. I remember that I was somewhere, some kind.
Found. Yes, it is there, but it will be very difficult to use. The first thought was to cut off the defective meter, and the whole thing was not long enough. The truth will be no longer 5 meters, but only 4. This is the least of the inconveniences. But the need to constantly remember that, for example, 3m 47cm on a measuring tape will actually mean less and can be forgotten. In short, marriage in work is sooner or later guaranteed.
Thoughtfully, I disassembled the tape measure for inspection, cleaning and lubrication. There are no hopeless situations in repairs. So, if you wish, you can always find a way out of the current predicament. If only I could “turn on my brains.”
Indeed, while I was putting everything in order, I remembered that on the drum the length of the measuring tape is usually much longer (especially on multi-meter tape measures) and after the marked area there is still a margin of up to half a meter in length. I confidently unwound the drum with the intention of cutting off the missing piece of 12 centimeters from the excess and attaching it to the beginning of the tape, but I did not find what I was looking for. The margin was very insufficient to shorten it. Just 15 centimeters at most. No luck though.
I assembled a cleaned tape measure with a lubricated return spring and decided to act in a somewhat absurd manner at first glance. The addition to the missing section of the tape should not be made in the form of the beginning of the measuring tape, but rather in the form of its holder (like a handle). To do this, I selected a piece of non-rigid plastic of the appropriate width, 2 mm thick and suitable fasteners for this case.
2 holes with a diameter of 3 mm were drilled 1 cm from the edge of the tape and threaded screws securely secured the end of the measuring tape, clamping it between the plastic tape holder and the threaded metal strip.
Having measured the required distance of 12.5 cm, I attached an improvised stop to the edge of the plastic holder to fix the end of the tape in the hand during measurements. The working edge of the tape measure is adapted for comfortable and safe work. In my opinion, this is even much more convenient than it was. Nowadays there are a great variety of measuring tapes on sale. Both domestic and imported, but I don’t remember seeing at least one model where the beginning of the measuring tape was combined with a handle for holding. With a five-meter tape measure, and especially a longer one, as a rule, measurements are made by two people, and some inconsistency in movements that occurs in such cases often leads to the tip of the measuring tape slipping out of the hands of the person holding it. Of course it’s a small thing, but it gets to you quickly. A very small bend (corner) at the end is an unimportant helper.
Back side. And here everything turned out quite well. In short, he would have lived in America, filed a patent for his invention and gotten rich. I fixed the roulette and dreamed of millions of Babay iz Barnaula.
Source: elwo.ru
How does roulette work?
A construction tape is a compact measuring device. It consists of a flexible tape with unit markings, a twisting mechanism and a housing that holds the entire structure. The standard length can be from 1-10 meters to 100 m. The longer the tape measure, the larger its body.
The device of a construction tape measure is quite simple. The basis is a flexible tape with marked divisions in different units of measurement. It is made of flexible metal or plastic. The scale has millimeter, centimeter and meter marks. Subsequently, the canvas is painted.
The edge of the tape is marked with a concave sheet with additional metal or magnetic reinforcement. This is a mandatory condition due to which the rigidity of the tape measure is achieved. The concavity also makes it easier to take single measurements: the edge easily clings to any surface, allowing the tape to stretch. The hook is used to fix the tape measure at the reference point from which the measurement begins. Some models have a button that prevents the tape from rewinding, or performs this operation independently.
Purpose of the tool
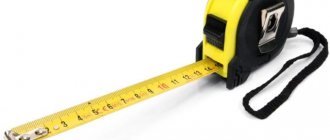
A measuring tape is a special device that is designed to determine the distance from one object to another. Such a tool is in demand not only in construction, but also in various fields, and even more so in everyday life. The master uses a tape measure at home when he needs to hang a shelf or a picture on the wall, make homemade items and boards, or simply find out the footage of his room. Without this specialized tool, performing any work will lead to inaccuracy, so it is important to always have a measuring device with you.
A tape measure is the same ruler, only in a flexible form, which is made for its compactness, and also has a 5-10 times larger size. The compactness of the tool is ensured by the flexibility of the measuring tape, the drum on which the leash is wound, as well as the drive device. The operating principle of the tool is simple and straightforward, and this needs to be understood in detail.
This is interesting! Modern tape measures are available in different lengths, so depending on the type of work performed, you should choose devices with a length from 3 to 100 meters. The longer the tape, the correspondingly more massive the instrument itself.
Common problems
The design of the tool is quite simple, but it can easily break. The most serious failure is associated with a defect in the main function. The measuring tape stops rewinding, making work difficult. You can fix it yourself; for this it is important to know how to disassemble the tape measure. Most often, this problem occurs in devices with mechanical tape return.
In any of these cases there is a possibility of repair. No special knowledge is required on how to make a tape measure.
Dividing the workpiece into several parts
The last but most useful life hack that few people know about. Let's say you need to divide a workpiece 29 centimeters long into 3 parts. What do you usually do? Measure the length of the workpiece, divide it by 3, then count separately and mark the place to cut each workpiece. This is especially inconvenient when you need to calculate millimeters.
In fact, you can do without complex calculations. We take the nearest number on the tape measure that is greater than the width of the workpiece. It must be a multiple of the number of parts (in our case, 3 parts). For our example, the number 30 is perfect - 1 cm more than the width of the workpiece and divided by 3. Now we apply the tape a little obliquely to fit the length of the workpiece to these 30 centimeters. Divide 30 by 3 and get 10 - make marks every 10 centimeters.
You can compare it with the first option - the marks will match.
( 2 ratings, average 4.5 out of 5 )
Roulette repair
The instructions are suitable for both disassembly and assembly. There is no need to think about how to put the tape measure back together; just repeat each step in reverse order.
Instrument diagnostics begins during the disassembly process. In other words, the damage is visible immediately when you open the case. The most common reason is that the tape stops curling.
A spring that has jumped off its mounting point is easy to notice. To resume work, you need to return and secure the small tendril in its place, thereby attaching the mechanism. But it often happens that it turns out to be broken, or breaks right in your hands during repairs. In this case, you need to cut out a replacement part of the same shape, otherwise the functionality of the tape measure cannot be restored.
It is possible to attach the tendril to the spring only when removing it from the grooves of the coil. You need to take it out carefully, since the mechanism may be damaged during removal, or your hands may suffer from the sharp edges of the parts. The tendril is bent on a spring using pliers. But be sure to heat the metal before processing to avoid cracks and breaks. After which the spring can be returned to its place, carefully monitoring any kinks. There shouldn’t be any, otherwise it will easily come out of the grooves of the coil.
A broken spring due to bending will affect the operation of the tape measure. If the fracture occurs at the edge of the mechanism, the tool will still serve for some time. It’s just that the measuring tape will not be completely hidden inside the case, which will not harm the work. But in this case, repairing the device is only possible if there is minor damage. If the spring bursts in the middle, then the tape measure will have to be replaced with a new one.
If the hook breaks, then a new tongue is cut out - from metal or plastic. Its dimensions should be taken into account so as not to cover the measurement scales. You can use any handy material that is suitable for hardness and flexibility. It is fixed in place of the old one using bolts or construction glue.
Another reason is the age of the roulette wheel. In this case, the measuring tape will not roll inward due to corrosion. The canvas is metal, so without proper care it will become rusty. It is almost impossible to clean it. But in case of simple contamination with dust and dirt, the tape can simply be wiped.
The tape measure is assembled with your own hands almost exactly the same way as it was disassembled. It is important to ensure that the spring does not protrude above the edges of the coil. Be sure to attach the tape so that the marks are on the reverse side. This way, the divisions will not wear off with frequent use.
Movable hook
Most users, when picking up a new tape measure, notice a rather strong play in the metal hook attached to the end of the blade, and strange slits in the metal near the rivets.
Some craftsmen consider it their duty to correct the situation, so they fix the hook with their own hands, finishing off the rivets until they are fully compressed.
In fact, such mobility is not a bug, but a feature. The fact is that you measure with a tape measure either by catching it or leaning it against it. The hook itself is made of a curved plate with its own thickness (about 1 mm), which must be somehow compensated for in order to obtain accurate results. This “limited” play serves precisely for such compensation.
Tips for use
Using a tape measure involves its gradual wear and tear. Some problems may be caused by non-compliance with operating instructions, or too frequent use. In order for the tape measure to continue to be a working tool, you need to comply with some standards.
Avoid working outdoors in rainy weather. The metal sheet will begin to rust faster when exposed to moisture. A wet tape rolled into a casing may show signs of corrosion. Literally rust, which will hide the measurement scales. Corrosion on the spring will also make it difficult to use the measuring tape. It will become more difficult to pull it out, and jerking will lead to loosening of the spring.
The following tips for using a measuring tape should be followed:
- do not pull the tape; to do this, do not pull it out completely - otherwise the spring will quickly wear out;
- reduce the rewinding speed so as not to loosen the hook;
- be sure to wipe away moisture and other contaminants;
- Protect from impacts - the plastic case breaks easily.
Following these rules will ensure that your measuring tape will last longer. However, only on condition that it is made of high-quality materials. Many cheap analogues usually cannot be repaired; you will have to buy a new tool.
Source: instrumentoria.ru
How to put a measuring tape back together
An ordinary construction tape, the tape does not wind back, how to repair a tape measure.
Without opening the “patient” it is difficult to say. The spring may have burst, the ruler may be too clogged, or there may be no connection between the ruler and the spring.
Well, let's start by disassembling the casing of the measuring tape. On some models, you will first have to remove the rubber cover from the case and under it you will find bolts holding the two halves of the case together. We unscrew them.
Inside you will see a locking button with strips that jam the tape and a reel itself, inside of which there is a return spring, and a measuring tape is wound on the outside. Unwind the measuring tape from the outside of the spool. Wash it from dust, dirt and resins. Check it for fractures and kinks. The measuring tape of a tape measure has a semicircular profile (if you look at its cut from the end) and, unfortunately, if a sharp bend occurs, not a ruler of tape measures of the average price category, no longer restores its profile and the place of the bend will remain and will interfere with the retraction of the tape.
Inspect the spring located inside the coil disk. It is better not to pull it out if it is not damaged - the tendril with which the spring clings to the slot in the central rod of the reel is intact and the “hangers” with which the spring holds the measuring tape are intact. You can rinse the spring directly in the coil by placing it in gasoline. But you can also try to revive a broken spring. Most often the spring breaks near the rod. And this is precisely what prevents the tape from retracting - the spring simply does not work.
If the tendril is broken off, you can make it on a spring with another one of the same geometry. The springs vary in stiffness; for some I just made a new tendril with pliers without heating them, but some need to be heated - they break when cold. Having made the same tendril, insert it into the rod and “charge” the spring. Winding a ruler around the outside of the reel. turn the charged spring several turns so that the ruler hook, located at the zero mark, is pressed against the collar with barely perceptible pressure. Reassemble the tape measure body in reverse order.
Main types of breakdowns
The most common measuring tapes have a mechanical return mechanism - a spring that automatically rewinds the tape. It is this type that most often breaks down compared to a tool with a manual winding method.
The most common reasons why a tape cannot be returned are:
- spring break;
- breakage of the measuring tape at the junction with the spring;
- break or bend of the tape.
In order to find out the exact reason, you need to disassemble the tool:
- Unscrew the bolts that hold the side of the tape measure.
- Remove the backstop.
- Extend the measuring tape to its full length. If it is attached to a spring, remove the latter from the hook.
- Open the coil in which the return mechanism spring is located.
How to fix
If the tape is disconnected from the spring, the following steps must be taken:
- hook the tape if it just jumped off the spring;
- make a new tongue for the hook on the spring if the old one is broken;
- cut a hole in the tape if the tape is torn in this place.
If the spring breaks, the tape measure can only be repaired if the break occurs at its edge. Also, in this case, there is no guarantee that the return mechanism will return the tape in full.
If the measuring tape is severely bent or broken, it is almost impossible to restore the tape measure - it is better to purchase a new tool.
When working with a measuring tape, many have more than once encountered such a situation when the metal tape “refuses” to wind up into a reverse spiral. If this is your first time encountering such a snag, do not rush to throw away the tape measure - it can still be repaired.
You will need
Instructions
1. The convenience of measuring with a tape measure is that you can always quickly take measurements from some objects. However, over time, the efficiency disappears somewhere, the tape stops independently curling into a spiral and you have to wind it up manually. This is not particularly troublesome if you need to reel in 0.5-1 meter. The problem manifests itself when the tape is released to its full length. If you don’t want to bother with fixing the tape measure, you can throw it away and buy a new one. But why spend extra money when in a few minutes you can return the instrument to its former novelty?
2. First you need to disassemble the tape measure . The sides of the measuring tool can be held on by one or four screws. You need to unscrew these screws, then remove one of their sides. Inside the tape measure, in the very center, you will see an additional metal spiral, which will probably be pulled off. You need to twist it again.
3. To twist the spiral, pull the tape out to its full length, then remove it (this will make it easier for you to wind the spiral again). Later, after you unfasten the tape, correct the position of the spiral so that its surface is perfectly flat (without differences) and twist it. Attach the measuring tape back and rotate the spiral until each tape is gathered into a ball. Make sure that there is no dust left between the layers of tape (the tape measure often has to be repaired under repair conditions). After the tape is assembled, put on the previously removed side of the tape measure and tighten the screws back. Now the tool will work as if you just brought it from the store.
There are methods to beat roulette. Finally, strategies do not provide an unconditional guarantee of winning. And it’s unlikely that you’ll be allowed to win much. However, you may still receive some income. The most important thing is not to get too enthusiastic. Only a cool head and sober calculation will give you the chance to win.
You will need
- -Roulette Assault program.