Tuning a plow is a real art. For more than a thousand years, farmers have begun plowing by adjusting this unit. The purpose of the plow is to turn over the top layer of soil, mix it and create favorable conditions for plant growth. This is a basic agricultural task that prepares the soil for sowing, making it fertile. Plowing is done once a year, and subsequent cultivation of the land is called harrowing.
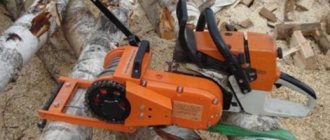
Agricultural equipment is used for plowing: cultivators, walk-behind tractors and tractors. A plow is connected to the equipment, which performs plowing. A walk-behind tractor is often used to work in dachas and garden plots.
The most important thing when plowing is to set up the plow correctly. If the adjustment is incorrect, the equipment will begin to slip, sink deeper into the ground, and the biochemical processes in the soil that are necessary for plant growth will be disrupted.
Plow device
Depending on the device model, its design varies. Main structural elements of the unit:
- Frame. The housing and the adjustment wheel are attached to it. There are two lanyards installed on the frame, which change the position of the body in horizontal and vertical positions.
- Frame. This is the main working element of the plow. The following are attached to it: a ploughshare (knife), a blade and a field board. The body is height adjustable by moving the stand. The ploughshare is responsible for cutting the soil layer, and the blade is responsible for turning the soil. The field board is a service element on which adjustments are made.
- Support wheel. Depending on the set height of the support wheel, the plowing depth also depends.
In addition to the main working and service parts, plows are equipped with other parts. It depends on the type of device and its purpose.
Safety precautions
The safety rules recommended for compliance when using a motor cultivator are not complicated.
You should adhere to the following rules:
- Operation may only begin after full reading of the instructions supplied with the device;
- It is prohibited for children to use the device, as well as persons who do not have experience in handling the device;
- during plowing, it is important to eliminate the proximity of any animals and other people;
- work should be carried out in closed clothing with long sleeves and closed shoes without dangling elements or in special equipment; It is better to choose high shoes, for example, boots or ankle boots, the toe of which is covered with a metal plate; We must not forget about gloves, mainly in the case of cultivating difficult soils, as well as safety glasses;
- During operation, it is necessary to keep your hands and feet away from rotating elements, and also maintain balance in relation to the forward and reverse handles; they cannot be raised at the same time, since one must always remain lowered;
- Vibrations occurring during operation signal the presence of breakdowns; in this case, the engine is stopped, cooled and the problems are eliminated if possible; most often the problem is a weakened fastening, which is easy to normalize;
- If you have a model with reverse gear, it is important to adhere to one simple rule: before changing direction, you should wait until the cutters come to a complete stop.
You can learn more about how to properly plow with a motor cultivator in the following video.
Types of plows
Over the thousand-year history of the use of the plow, it was often modified. Modern units are usually divided according to working bodies, their number and purpose.
- Based on their working elements, plows are divided into plowshare and disk.
- By the number of working bodies into one-, two-, three-body, etc.
- For special and general purposes.
A ploughshare plow is a unit whose body is equipped with a ploughshare (knife). The ploughshare cuts the soil, lifts it, and the blade turns it over. The plowshare unit is used for plowing land for sowing grain crops. The maximum plowing depth is 30 cm.
Disc plow - instead of a ploughshare, the device has discs that plow the ground. This unit is used on heavy rocky soils and fields that are located on the site of uprooted forests. The advantage of the disc is that if the plowshare hits a stone, it will break and the disc will roll over the obstacle. Disc devices are used only by powerful tractors on large fields.
A multi-body plow is a unit on which several bodies with shares are installed. The more powerful the tractor, the more bodies it can pull on one frame. Multi-body devices speed up field processing and increase productivity. Double-hull devices are installed on a heavy diesel walk-behind tractor.
Plows for special and general purposes. A general purpose unit is a plowshare device that is designed for plowing a field. Special purpose units are devices for difficult soil types, such as swampy, rocky, etc.
Preparing the walk-behind tractor for plowing
Tillage is a technological process that requires special training of motor vehicles and plows. First you need to transport the car to the field that needs to be processed. If you are using a lightweight walk-behind tractor, it can be transported in the back of a car. Before plowing, you need to perform daily maintenance of the machine and check its functionality.
During plowing, light and medium-class walk-behind tractors are equipped with lugs instead of wheels. They improve traction with the soil and increase the total weight of the equipment. Before installing the lugs, you need to transport the car to a level area, place a stop under the rear hitch and remove the wheels. If you can replace the hubs on a walk-behind tractor with longer ones to increase the track, then replace them. After this, the lugs are installed. Make sure that the tread pattern on the lugs is directed in one direction. The tapering of the pattern indicates the direction of movement.
After carrying out maintenance and replacing the wheels with lugs, you can begin connecting and adjusting the plow.
Installing a plow on a walk-behind tractor via a hitch
Before installing the unit, we install a beam under the left wheel of the walk-behind tractor to recreate the plowing process. Structurally, plows differ from each other, so you need to know the plowing depth in advance. Usually the recommended depth is indicated in the instructions for the device. In summer cottages and garden plots, the plowing depth is set from 10 to 20 cm.
The unit is hung on a single-point mount and secured with two bolts. If the walk-behind tractor is not equipped with a single-point system, then a hitch is attached to it, on which the plow is hung. When installing the device through the hitch, the main thing is that there is a slight play in the horizontal plane, no more than 5 degrees, because if you tighten the bolts as much as possible, you will have to make efforts to till the soil.
After preparing the machine for plowing and attaching the plow, you can begin setting up the device.
The advantages of homemade “gadgets”
When making a homemade plow, you can get advantages that are not available in factory models. By creating a plow with your own hands, you can adjust it to the required values necessary for cultivating a certain soil on the site, for example, hard or soft. Such parameters may be different: the angle of inclination of the ploughshare, the width and depth of plowing of the field, and the efficiency of loosening.
If the engine power is taken into account when creating, the resulting product will not produce additional load on the motor cultivator, the wheels will not slip during operation, and plowing efficiency will be optimal. Moreover, if you make single-body or rotary plows with your own hands, the material can be adjusted to the required quality, and thereby increase the service life of such a unit several times. By making the plow yourself, you can provide the possibility of attaching additional “gadgets” for plowing the land.
Adjusting the plow on a walk-behind tractor
To work on different types of soil, the unit must be configured differently. But the main adjustment occurs according to several criteria:
- plowing depth adjustment;
- angle of attack adjustment;
- cutting the first furrow.
Plowing depth. The further process of growing crops depends on the setting of plowing depth. If you set the depth to be insufficient, the roots of harmful plants will remain under the soil, and if the depth is too great, the fertile soil will be mixed and the plants will not receive the necessary nutrients.
Attack angle. Adjustment occurs using a field board. The performance of the unit depends on the angle of attack: if the angle of attack is greater than necessary, the device will get stuck in the ground and the walk-behind tractor will stall; and if the angle of attack is insufficient, the plow will not remove the required layer of soil.
First furrow. After all the settings have been made, you need to plow the first furrow. At this stage, it becomes clear whether the plow is configured correctly. During the next plowing, the machine is lowered with one wheel into the rut, and further adjustment takes place in the furrow.
Plowing depth adjustment
The plowing depth is set according to two parameters:
- type of land being cultivated;
- design features.
Before you start setting up, you need to find the most level area possible. If it is possible to make adjustments on asphalt, then move the car onto it. When the equipment plows the soil, the right wheel moves along the track, and the left wheel is on the uncultivated ground. To recreate this position of the machine, you need to install stands under the left wheel of the walk-behind tractor, the height of which should be equal to the plowing depth.
The plowing depth is adjusted using an adjustment wheel. The deeper the support wheel is lowered, the shallower the plowing depth will be and vice versa. The height of the support wheel should be equal to the height of the raised side.
Attack angle
The angle of attack is adjustable on the frame of the device. Adjust the horizontal position of the frame using the turnbuckle and lower the unit until the share touches the ground. Then you need to raise the body a little so that the back of the share is raised above the ground by a few centimeters.
If the angle of attack is too large, the walk-behind tractor will bury itself in the ground. If the angle of attack is small, the unit will not plunge to the required depth, but will plow only the top layer of soil.
First furrow and blade angle
The final adjustment is to cut the first furrow. After test plowing, it becomes clear whether the device is configured correctly. If the equipment does not slip and the unit goes deep easily, then the plow is adjusted.
After cutting the furrow, the machine lowers its right wheel into the rut. After this, check the plowing depth and adjust the unit. Now you can start full plowing.
Sharpening the share
The main working element of the plow is the ploughshare (knife). The ploughshare bears the main load when plowing, because it is this element that cuts through the layer of earth. Over time, the ploughshare becomes dull, which leads to a decrease in plowing productivity. The unit must be equipped with a removable share.
If the cutting edge is damaged, the device stops easily going deep into the ground, and the walk-behind tractor begins to slip. If the plowing process has worsened, then it’s time to make repairs. Correctly sharpening a plowshare can only be done using special equipment that heats the steel to make it ductile. After the steel is more ductile, it is straightened, cooled and sharpened. At home, you can use a tool sharpening machine. You need to sharpen the ploughshare at a slight angle, from the side where it cuts into the ground.
Adjustment on heavy walk-behind tractors
Setting up a plow on heavy diesel walk-behind tractors is no different from setting up on light-duty machines. The only thing is that heavy machines do not have lugs installed, because the weight of such equipment exceeds 200 kg. The main thing is to follow safety precautions when connecting the unit and plowing. After all, the more powerful the equipment, the more careful you need to be when working.
What attachments does the walk-behind tractor work with?
Any experienced farmer knows that with the help of a walk-behind tractor, cultivator or other motorized equipment, almost all agricultural work can be mechanized: starting with cultivating the land to prepare it for sowing and ending with transporting the harvested crop. Motor units have become universal due to the possibility of using a variety of attachments. In addition to moldboard and other plows, the following equipment has been created for processing plowed land and cultivating virgin lands:
Harrows are used to plow virgin soil, as well as for pre-sowing (spring) or post-harvest loosening (autumn) of arable soil to a depth of 7-14 cm. Using harrowing with a walk-behind tractor or cultivator, the surface is leveled, moisture is covered, and weeds are destroyed. The working parts of such agricultural implements are metal teeth or spherical disks. In this video you can clearly see how to properly plow with a walk-behind tractor and a homemade harrow. And also from there you can learn improvements for the harrow.
The hiller is used to hill up potatoes, cut furrows for sowing seeds, backfill planting material, and also sprinkle weeds directly in the row area. Hilling devices come in single-row and double-row, with fixed and adjustable working widths, distinguishable both by their design and their efficiency. Here is a video of how the Neva MB2 motor cultivator performs processing with a mounted two-row weeder-hiller.
With a rotary cutter you can plow virgin soil, carry out pre-sowing and basic cultivation of plowed land. This agricultural implement allows you to mill, cultivate the land and qualitatively prepare it for sowing. It is capable of not only plowing the soil, but also mixing it with fertilizer, crumbling large layers, crushing stubble particles, and leveling the sown area. Rotators for cultivation come in different types, depending on the number of cutting elements. This video shows how to actually plow a walk-behind tractor with a cutter installed on it, as well as cultivation.
A flat weeding cutter helps to trim weeds, split and cut grooves without turning the formation, plow and crush the soil. Flat cutters come in all possible working widths and processing depths, which allows you to choose them for specific processing conditions of agricultural plots and crops. This video demonstrates well how to carry out processing with a mounted flat cutter in practice (using the example of a Dnepr walk-behind tractor).
In addition to the listed removable tools designed to plow virgin soil and cultivate arable land, rakes, wood splitters, seeders, shredders, cultivators, rotary and segment mowers, shovels, sprayers, sweeping brushes, snow blowers, etc. are used with the motorized unit. Having a basic set of mounted agricultural implements, you can use a walk-behind tractor or a powerful cultivator to perform all kinds of economic tasks, in particular, pre-sowing plowing, sowing and planting crops, applying fertilizers, inter-row cultivation of crops, harvesting root crops, and seasonal harvesting of green fodder.
How to plow with a walk-behind tractor and plow
Before starting to plow the area, you need to carry out a test plowing to check the adjustment of the device. Check the depth your unit is designed for. When moving along the furrow, check the operation of the plow. If the device does not work correctly, adjust it directly in the ground. Assess the load on the walk-behind tractor when plowing and the correct movement.
If during test plowing you are convinced that the equipment is working correctly, then you can start plowing:
- We set the unit at the border of the desired area, turn on first gear and hold the clutch. Make sure that your steering wheel is parallel to the ground so that the car goes straight forward and does not dig into the ground.
- The plowing process should occur without effort on the part of the operator. With good setup, the equipment moves and plows the area on its own, and you only control it.
- After cutting the first furrow, measure the depth with a ruler or tape measure. If the depth matches the one you set the unit to, then you can continue working.
Preparatory work
Using a walk-behind tractor with a plow, plowing is carried out in dry weather. The soil should not stick to shoes and wheels.
In addition to the obvious preparation (filling with fuel, checking the oil level, tension and condition of the belts), the installation of wheels is necessary. If the kit includes metal lug wheels, install them. Another option is large-diameter wheels with “agricultural” tires (herringbone tread).
The ploughshare itself must be clean and smooth, the cutting edge must be sharp. If it is dirty or dull, clean it with sandpaper. Sharpening is carried out with abrasive wheels on a sharpening machine or with a monkey.
Test plowing is done. The depth is checked. If necessary, correct by raising or lowering the share.
When plowing the first row, the walk-behind tractor with the plow is strongly pulled to the side. The second furrow goes easier, since the wheel goes along the ditch. The first furrow is sometimes plowed along a cord stretched on pegs across the entire area. This makes it possible to navigate.
Common problems and their solutions
Remember that plows are structurally different from each other. The general adjustment process is similar, but the elements by which the adjustment occurs may differ. Before starting connection and setup, read the instructions that came with the device.
The same applies to the walk-behind tractor. Check the instructions to determine whether the wheels need to be replaced with lugs, and what diameter they should be. It is recommended to install weights on light and medium-class walk-behind tractors so that the unit sinks under the weight of the machine. If the plow is configured correctly, but the machine still slips, then the unit is too large for the walk-behind tractor of your power. This problem can be solved by installing weights.
When choosing a device, focus on the power of the walk-behind tractor. The heavier the machine, the larger the diameter of the plow you can install. Heavy diesel walk-behind tractors are equipped with two-body devices that increase the productivity of site processing.
The design of the plow is simple and understandable - the main thing is to pay attention to the unit itself and think sensibly when connecting it. Remember that the unit must be looked after in the same way as a walk-behind tractor. Clean your unit after plowing, try not to plow rocky soils and perform timely maintenance on your assistant.
Leveling the area using a walk-behind tractor and cultivator
This type of equipment is suitable not only for agricultural needs. A cultivator or walk-behind tractor can be used for landscaping work. You can level your dacha plot with improvised means, a shovel and a rake, as well as with the help of utility equipment, but if the area is hilly or replete with stumps and a developed root system, heavier equipment may be required.
Leveling the area with a cultivator is only possible if there are minor unevennesses that can be eliminated without resorting to additional technical means (a tractor with a bucket, etc.). The walk-behind tractor is capable of diving a little deeper, but on average, the diving area reaches 15-17 cm. Further leveling of the area occurs with the help of a rake. The loosened soil should be evenly distributed throughout the area.
If the soil on the site is too hard, rocky, or if there are stumps that have not been uprooted, etc., it would be better to resort to the services of a tractor. It would be better to dig up solid objects, such as a large stone buried a considerable distance into the soil, or an overgrown rosehip bush deeply rooted in the area, using a regular bayonet shovel. Only after removing parts that interfere with loosening and removing large debris can you begin to work using a walk-behind tractor.
It is important to remember that operating a walk-behind tractor and cultivator on hilly terrain and other uneven terrain is associated with an increased risk.
How to choose a plow for a walk-behind tractor
When choosing a plow, pay attention to the technical characteristics of your walk-behind tractor. For processing small areas, a single-body plowshare unit is suitable, and if you are the owner of a heavy diesel walk-behind tractor, then you can connect a double-body device, which will speed up the process of cultivating the land twice as much as a single-body unit.
Single-body mounted plow SCOUT PL-130
The SCOUT PL-130 single-body plow is connected to a single-point attachment to mini-tractors and walk-behind tractors with a power of 10 hp or more. With.
The unit is equipped with an enlarged steel ploughshare, and the design itself is made reliably - you can forget about sharpening the ploughshare. To regulate the plowing depth on uneven terrain, a limit wheel is installed. The plow is designed for processing heavy, loamy soils and virgin soil.
When working with the floating mode of the hydraulic distributor, the device must be weighted.
Single-body mounted plow SCOUT PL-130 HYD with scoring disc
The SCOUT PL-130 HYD single-furrow plow is equipped with a scoring disc for more efficient work on turf soil. The unit is connected to mini-tractors and walk-behind tractors with a single-point attachment mechanism. The working part is made of reliable steel.
The angle of attack of the plowshare is adjusted using turnbuckles. The limit wheel regulates the plowing depth. The trimming disc is designed to trim plant roots during plowing, which increases the productivity and quality of plowing.
To plow heavy soils and virgin lands, you need to install weights on the equipment: 80 kg in the front and 60 kg in the rear.
Double-furrow mounted plow SCOUT PL-225
The double-furrow plow SCOUT PL-130 is the only two-furrow device that is connected to a walk-behind tractor. The unit is secured using a single-point mechanism. But for work you need a walk-behind tractor or a mini-tractor with a power of 15 hp or more. With. The base of the plow is a triangular frame with turnbuckles that adjusts the horizontal and vertical position. The plowshare body is adjusted using a stand. The plowing depth is controlled by a limit wheel.
To work on loamy soils and previously uncultivated areas, you need to make the structure heavier.