- 25289
- 13-10-2020
- Author: Mysekret Team
- 0
Weaving figures from rubber bands is a very popular type of needlework among adults, and especially among children. The presence of a large number of multi-colored rubber bands, as well as a special slingshot, a large rainbow loom, a compact Monster Tail loom or even an ordinary fork allows you to weave the most unusual things, toys, figurines that will not only be useful in everyday life, but will also become a wonderful memorable gift . We have already examined in detail the methods of weaving bracelets of varying complexity from rubber bands . Another broad subsection of this art is weaving figures from rubber bands.
Here you can also enjoy a variety of knitting methods, try working with different tools and weaving patterns of varying complexity. A big advantage of this type of needlework is the ability to instantly immerse yourself in the process, because weaving from rubber bands does not require much experience or special knowledge, the main thing here is to follow the instructions and enjoy the process. Therefore, let’s try to understand in more detail each method of weaving figures from rubber bands, while simultaneously studying some popular methods and weaving patterns for free.
Benefits of crafts made from rubber bands
The popularity of this hobby is also due to the fact that the source material is inexpensive and accessible. In addition to the prevalence and low cost of rubber bands, it is worth noting the environmental safety of this material, which can be used even by young children.
Elastic bands are used not only to create original hairstyles and fix long hair. They are also used as a material for crafts in the form of jewelry and memorable souvenirs for family and friends.
The whole family often takes part in making crafts. Such collective leisure helps strengthen mutual understanding and family relationships. Such handicraft activities are also very useful for preschoolers. This leisure time develops the following qualities:
- Ability to accurately perform fine movements with hands and fingers.
- Creative imagination.
- Intelligence and patience
- The ability to achieve a goal.
- Determination, focus and concentration.
To achieve positive results, it is enough to master the initial skills of weaving products from rubber bands. If difficulties arise in your work, it is recommended that you familiarize yourself with the numerous photo and video master classes on making products from rubber bands posted on the world wide web.
Video master classes
There are many techniques for weaving from rubber bands, on the basis of which you can create very beautiful jewelry. We show here popular ideas for bracelets on a regular and mini loom, and invite you to familiarize yourself with the lessons provided. Try to repeat at least a few of them. We are sure that the result will please you!
Fishtail in a spiral shell
Using the simplest technique, you get a very beautiful, voluminous spiral bracelet that even a child can create. If you make the core bright and multi-colored, and choose monochrome shades for the spiral, the effect will be very interesting!
Crochet spider
It's called a spider for a reason: using only a crochet hook and having two colors of elastic bands in stock, you can easily make an unusual bracelet for a Halloween themed party. Jewelry made with luminous elastic bands will look especially impressive: both girls and boys can wear them. We invite you to watch the video below - even a beginner can do it!
Wide crochet bracelet
To create a four-layer bracelet with your own hands, you will need crocheting skills, but if you don’t have them, don’t rush to close the video or learn to knit! In appearance, circular knots are very similar to single crochets knitted from ordinary threads, and to weave you only need a set of elastic bands, a hook and your own patience. The number of rows can be any - a three-tiered bracelet using this technique looks very cool. You will learn how to knit a wide bracelet from the video tutorial.
Wide bracelet on the machine
The fabric of this bracelet is similar to a triple or quadruple knitted pattern. A spectacular and bright Rainbow Loom decoration will not require much time to create - make sure of this by reading the master class:
Wide rainbow ladder on the machine
A dense, bright ladder bracelet, the core of which is made of black, looks very original, like a real path. We advise you to repeat it, following the recommendations from the video lesson. The ladder will look better if you use bright colors for the side parts, and the tail for fixation can be made to fit any wrist size.
We hope that the weaving options given here for beginner girls and boys will help you learn how to weave jewelry from rubber bands at home and master this exciting area of needlework!
© text prepared by the website MirPozitiva
Practical use of crafts made from rubber bands
Gifts for family and friends
Self-made souvenirs made from rubber bands for relatives, friends and acquaintances will remind you of the person who gave them for many years. Any home craftsman with even a small income can buy the source material for such a craft.
Kids toys
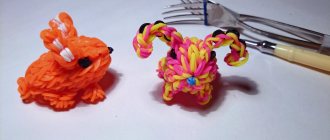
Experienced craftsmen use rubber bands to make not only dolls, characters from fairy tales, birds and animals, but also fantastic compositions and characters from famous cartoons.
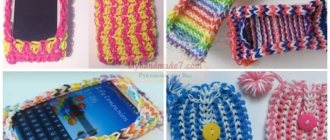
Interior Design
If such design elements are present, the room will acquire its own unforgettable original style and will be able to reflect the individuality of the owners.
The slingshot weaving technique will help you create various crafts, including toys and garlands, that can give the New Year tree an exquisite and unique look.
Materials, tools and accessories required for work
There are kits containing everything you need to weave elastic bands. You can also purchase a hook and multi-colored elastic bands separately.
After acquiring the necessary experience, to manufacture products that require skills and abilities, you will need additional tools:
Special machines for weaving.
Accessories and supplies for various weaving techniques.
Two-tone sidewalk
This cool friendship bracelet made from rubber bands is best made on a slingshot: it turns out fluffy and spectacular, and it’s quite quick to make, literally 5 minutes. At the same time, the essence of weaving is very simple, and the technique is no more complicated than the popular “fishtail”, and the outwardly thick sidewalk resembles a braid of spikelets.
To perform it you will need a slingshot (it can be replaced with two pencils with an eraser), rubber bands of two colors, one S-shaped clip and a hook.
The main difference from the “fishtail” is the number of elastic bands that need to be placed on the frame at a time - here there are not one, but two. You need to remove not from both sides, but only from one, and four elements at a time: you get a double braid. In short, look at the step-by-step photos of the process - and everything will be clear:
Step 1 . We put two yellow elastic bands on the frame, twisting them in a figure eight. Next we put on two green ones, without twisting them. We hook one of the lower yellow loops (double) and drag it to the center of the frame. We do this on one side only.
Step 2 . Throw on two yellow elastic bands without twisting. On the left side of the frame we have six loops: we hook four from below and drop them into the center of the frame.
Step 3 . We throw on two green elastic bands, hook four loops on the right, and throw them into the middle.
Alternating steps No. 2 and 3, we continue to increase the fabric to the desired length of the bracelet. In the end, all that remains is to manually secure the connector to complete the weaving. Here you can watch the video MK from the author of the master class:
Weaving techniques
During the learning period and in the initial stages, you can weave on your hands without special devices.
For this you only need a weaving pattern. After mastering the initial skills, you should purchase equipment and accessories for making more complex crafts - a hook or a machine.
Complex creative ideas can be realized using a weaving machine. In this way, elegant products can be made with the least amount of labor.
Practical and fun
Small molds of animals, ice cream or fruit will take their place on the keys to the apartment. Vehicle owners can hang them on the rear view glass or on the front panel.
Students will have fun during production, and then decorate the fountain pen with the resulting work of art. Parents will explain how to knit figures from elastic bands in the first stages, and after understanding the algorithm of actions, young masters will get to work themselves.
Some entertaining games or exciting trips around the apartment can easily be diversified by introducing such a plan with products. Favorite toys can be effectively decorated with cute keychains; to do this, you need to hang the created 3D figures from rubber bands on the hand of a doll or animal.
Making a fishtail bracelet from rubber bands on a machine
Stages of work:
- An elastic band is put on the machine and twisted in the shape of a figure eight.
- The next one is put on without twisting, and the third is twisted like the first.
- The bottom elastic band is pulled through the other two to the center.
- After this, the next elastic band is put on top without twisting.
- Both extreme parts of the lower elastic band are moved to the center.
- The next rows are woven similarly until the planned size is achieved.
The result should be a small flagellum resembling a fish tail. To connect the ends of the product into a closed shape, special fasteners are used, often included in craft kits.
The created products are complemented with decorative elements. The most successful examples of such crafts can be found on the Internet on special websites.
Benefits for everyone
By telling how to weave a figure out of rubber bands for their child, parents can become very close to their beloved child. And the young designer, in turn, will gain valuable skills in needlework. Children develop fine motor skills and attentiveness well. These qualities will be very useful to young people in the future, and they will be grateful for this to the closest people in the world.
Making a bracelet on a machine
Step-by-step instruction:
- choose elastic bands of 3 colors;
- Place the first rubber ring on the middle post, and then on the left one. In this case, the machine should be turned towards you with the arrow;
- Throw the next ring onto the left column, which already has the first elastic band, and pull it onto the central post, while the elastic bands should be arranged in a zigzag pattern;
- then work should continue with the column closest to you. Using a hook, grab the elastic band of the middle row located below and thread it through the top, swapping places with the adjacent loop;
- Pull the removed elastic band onto the adjacent row. You should get a figure 8 shape. The same actions must be done with all the elastic bands located below;
- you should adhere to the rule - always weave to the left;
- remove the loops from the posts with a crochet hook;
- to put a bracelet on your hand, special clips in the shape of the letter S are attached to its ends. They can be purchased at specialized retail outlets or complete with elastic bands for braiding;
- Connect the ends of the bracelet with a clasp.
Gift on an important day
On the eve of the New Year, it would be appropriate to design a Christmas tree. Once you receive an invitation to attend a birthday party, you won’t have to think twice about it. Having taken out a special set, you can safely begin new achievements.
A voluminous scarlet rose will definitely evoke positive emotions on the birthday boy. How to weave a 3D figurine from rubber bands is easy to understand from the available master classes and detailed instructions. After bringing one flower to life, you will definitely want to make a whole bouquet of beautiful bright plants.
Advice! A beautiful Easter egg made of harmoniously selected colors will diversify the basket and add even more joy to the church holiday.
When meeting a friend, you can easily exchange such souvenirs and appreciate each other’s imagination. The attributes of the celebration are painted in different colors, so there is something to experiment with.
The design called “monster tail” will perfectly help in creating a three-dimensional figure. The manipulations will be easy and relaxed, and the time will be required to a minimum.
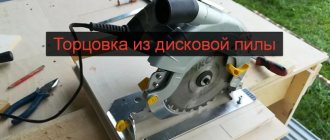
Making crafts from rubber bands using a fork
Few people realize that using a fork you can weave exclusive jewelry.
Step-by-step instruction:
- Take three elastic bands and put them on the fork according to the following pattern:
- Place the first elastic band on the three left teeth, twist it in the shape of a figure eight and pull it over the three right teeth.
- Place the second elastic band on 4 teeth, and put the remaining back part on the two middle ones.
- With the third rubber ring, do the same manipulations as with the second.
- Hook the left loop located at the bottom with your hook, remove it from the fork and thread it through the middle rows. Do the same manipulations with the second loop.
- Put on the new rubber band according to the following pattern:
- Place it on 4 teeth, and extend the back part to the two middle ones.
- Using a crochet hook, pull out the loops on both sides in sequence.
- Periodically remove the bracelet from the fork in order to hook the upper elastic bands and carefully pull them up.
- Remove the bracelet and return the two outer loops to their original position.
- Continue and complete the weaving.
- Attach the S-shaped fastener.
Without exception, all methods of weaving elastic bands are based on the principles of knitting or twisting. Therefore, having mastered several techniques for working with elastic bands, you can continue your creative search on your own, using the experience gained.
Types of material
As for the basic workpiece, thanks to the development of technology, quite interesting new items began to appear on the stationery market. Such innovations include the structure of stretchable parts.
All kinds of sparkles are added to them; visually, the presentation of keychains made from rubber bands looks very impressive. The use of transparent models adds elegance and style to the design. For those who like to experiment, the proposal with two-color rings will be interesting.
Note!
How to make candles with your own hands: instructions for making wax, gel, scented, homemade decorative candles with a wick
What you can make from foamiran with your own hands: we create flowers, Christmas tree decorations, snowflakes, three-dimensional paintings (photo + video)
DIY glass crafts: what can be made from glass bottles, liquid glass, broken glass (photo + video)
Thanks to the extensive selection of color variations, it's easy to bring your deepest desires to life. Bright and dull shades will harmoniously highlight any image if used in decoration. And the animals and molds look very natural and natural with such materials.
Little heart
We suggest you make a small toy in the shape of a heart. Your significant other will definitely appreciate such a cute souvenir. To create a craft, take:
- Rubber bands;
- Plastic fastener;
- Hook.
Twist the elastic band of the main color (red or pink) three times and put it on the hook.
Remove the resulting curl with two elastic bands. Their loops are put back on.
Now the heart needs to expand. To do this, pull one elastic band through the outer loops. Hang its right eye on the hook first, then one of the removed loops, then the left eye. It should look like this.
This operation must be repeated 7 times.
Insert another hook and remove all the loops on it.
Add one elastic band seven times, according to the pattern described above. It should turn out like this.
Next, you need to separate the apexes of the heart. To do this, take an elastic band of a different color, hang one of its ears on your finger, and remove six weaving loops from the other. Attach the second eyelet to your finger too.
The next six loops must be carefully passed through each other without removing them from the tool. This can be done with a second hook or just with your hands. Remove the first part (3 loops) with a hook and an elastic band attached to your finger.
Remove all the loops from the hook onto the second elastic band. The heart is ready.
Now you need to weave a pendant for it. Drop the loops from your fingers onto another elastic band. Adding one iris at a time and dropping the loops towards the center, weave a chain of the required length. Thread a clasp through the last pair of loops.
The keychain is ready to please your loved one.
Model "Owl"
To make a clear owl appear in 20 minutes, you should:
- Attach three elements to the first strip.
- Attach the sides on two lines, and install three more rings on top, going into other columns.
- From the point in the center, install a ring of a different size for the beak.
- Secure the fourth with edges from the fifth point.
- Then move the center and edges with rings 5 points forward.
- Wrap the ends, and add a couple of other colors for the legs on top of the edges.
- Then carefully touch the owl with the hook to firmly fix the object.
- Form the owl's eyes by attaching circles of a different color and gradually, starting from the head, remove the finished owl.
Why is it useful to weave?
What are the types of plastic chests of drawers for toys, pros and cons
Lessons in weaving products from rubber bands are most interesting and useful for children aged 7 to 12 years. You can weave even at an older age. It is not recommended to leave a child under 5 years old to weave alone, as children without adult supervision can swallow an item from the set or cause injury to themselves. Weaving classes allow you to develop:
fine motor skills; perseverance and attention; sense of taste; imagination and creativity.
Rubber band weaving classes are recommended for children who tend to be anxious and show feelings of aggression towards others.
What to pay attention to
The main source of danger comes from the quality of the purchased creative supplies. In pursuit of cheapness, manufacturers introduce unacceptable levels of phthalates, chemical substances dangerous to human health, into the material used to make rubber bands in order to make the product elastic and soft. In some countries, after identifying the danger in the form of released toxins, a ban was introduced on the sale of weaving kits. It is recommended not to make purchases in stores with a dubious reputation, markets, and when purchasing at retail outlets, request a certificate
You should pay attention to the following nuances:
- the presence of a pungent odor indicates the content of chemical additives;
- latex products can cause allergic reactions and preference should be given to silicone products.
Figurine "Cake"
Preparing cakes takes a lot of time, however, if you try to come up with an artificial cake in the form of a decoration or an amulet, you can spend an average of 20-30 minutes.
Instructions to make a beautiful miniature instant cake:
- You need to wrap a circle of one palette three times on the hook.
- We pass one more piece through the loops to make the second part.
- Then put this piece on the point and pull it through the loops.
- Repeat several times and a layer appears.
How to make a cake if the fastening clip is not installed? Install the clip and continue knitting until you can weave a loop.
Continuation of the cake craft:
- The third stripe consists of constant increments of circles from a different palette. First, two pieces are attached, then one, and finally two again.
- It is necessary to periodically bypass the clip.
- Then it is recommended to make the same circle, but of a different shade. As a filling.
- Add another layer to the first cake layer, pushing another piece through the bottom loops.
Now to connect the cakes, it is enough to thread one element through the layers from the inside and secure them to the outside.
Symbol of enlightenment
The owl is a wise bird that is a symbol of knowledge. Such a small gift can be presented to a student or student. A small keychain in the shape of an owl can be woven on a loom.
To work you will need:
- Rainbow Loom machine;
- Hook;
- Rubber bands.
Carefully follow the attached step-by-step instructions and you will succeed.
Pull out the middle row of the machine slightly. The notches of the posts should face you. Put on elastic bands, connecting the columns in pairs. There is one elastic band at the edges and two in the center. In the second row there is only one elastic band in the center, there are pairs everywhere. Look at the photo.
A pair of orange rubber bands will form the bird's beak. The crossed pairs of the primary color will be the shoulders.
Next are four pairs of white elastic bands. To make the paws, you need to twist the orange iris on the hook three times and remove the twist with a pair of elastic bands of the main color. Do the same with the bird's eyes. Strengthen the parts as in the photo.
Now you just need to remove the bottom row with a crochet hook around the entire craft. Then the middle row and the head are woven. Pull the last loops through each other and fasten. The keychain is ready.
If the photos did not help you understand the weaving technique on the machine, you can watch a video that clearly shows the process. This will allow you to easily complete this craft.
heart
Crocheted and knitted toys with patterns and descriptions master class
Wrap a red elastic band around the right post three times. Place two elastic bands on the posts. Using a crochet hook, place the wrapped elastic band over the middle of the two.
Put the pair back on and hook an elastic band over them using a crochet hook from the right post. So put on three more pairs one at a time, transferring only from the right column.
Then they transfer the pairs from the left column to the right and leave the bottom one. It is necessary to tightly compress the pairs on the right. Put on a pair of red ones and hook the bottom pair from the left column.
So three pairs are put on one at a time, intertwining only from the left column. Put on the fifth pair and lay all the pairs on it in turn from two columns. Place the woven heart into the slingshot so as not to interfere.
To secure it, make a loop. Put on an elastic band and move it from two columns of elastic bands. The hook is hooked and removed. One end of the elastic is crocheted through the other and the loop is tightened.
With the help of a magical activity, life becomes much more diverse and richer. Fashionable, delightful crafts made from rubber bands for weaving - a unique combination of imagination, craftsmanship, and individual creativity.
For creative people, this is an excellent opportunity to realize their potential. Create, make the world colorful and bright, give others your kindness and love!
Rose
You will need: red and green elastic bands, a hook, a ballpoint pen.
Master Class
- Start weaving a rose with a sepal, using its loops we will form six petals.
- Make the first row of the initial ring, which will consist of six loops. To do this, use green rubber bands.
- Double the number of loops in the second row, weave two elastic bands through each loop. After this row you should have 12 stitches.
- Weave red elastic bands, one at a time, through the loop, through any 6 sepal loops. Unfold and weave 5 more elastic bands along the red loops.
- Weave 4 more rows with reversible rows, there should be 6 in total - one regular, the rest reversible. One petal is ready.
- Weave the second petal in the same way using 6 green loops.
- Form the remaining petals from the inside by turning the petals inside out and finding a green loop in the center.
- Weave the third petal in the same way as the previous 2 - in six turning rows, this petal should be between the first two.
- Weave the fourth petal along the 6 remaining green loops. Place the hook in the center, but on the other side.
- Weave the fifth and sixth petals, like the previous 2. Fold the flower.
- Make a stem from a pen rod. To do this, place a green elastic band under the rod and pass the hook through both sides of the elastic, then pull the first part through the second.
- Take the next elastic band and pass it through the loop on the hook, put the second part of the elastic band on the hook, wrapping it around the rod. Pull the first one through the second one.
- Braid the entire rod with rubber bands in the same way. Wind the last knot onto the rod.
- Find the starting ring - the hole in the center of the sepal and insert the stem into it.
- Make 3 leaves this way: cast on a chain of 5 loops, and tie a knot with the sixth one. Weave one elastic band through the 5th loop, then weave one through the 2 left elastic bands on the hook, bring the first left elastic band through all the elastic bands on the hook. Weave through the fifth loop twice.
- Pull the elastic through the fourth loop and leave it on the hook. Pull one more elastic band through the 2 left loops and pull the outer one through all the remaining ones. Weave all the remaining loops in this way. Weave one elastic band through the last loop and tie a knot.
- Attach the leaves this way: attach the leaf to the stem, pull off the last knot of the leaf, wrap it around the stem once and insert the leaf into this knot.
The rubber band rose is ready!