Articles
All photos from the article
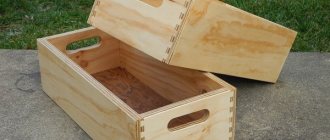
Very often it is necessary to make replicas of weapons or toys for children, and plywood as a material is excellent for these purposes. In this review we will talk about some types of products and figure out how to make them with your own hands. There are simpler and more complex models, but with some perseverance you can master any of the options described below.
In the photo: such products are often used in various productions and costume shows
How to make a weapon from wood? Homemade weapons made of wood - drawings
Today, toy stores offer such a large and colorful selection that parents are clutching their heads and children are drooling.
Unfortunately, the economic situation and one’s own capabilities do not always allow one to have enough income to please one’s own child with a good gift. Hands and head help us! You can always make some of the toys yourself. Many craftsmen cut cars, horses, whatever they want out of wood and sell them. Wood is a very convenient material; with minimal skill in handling it and the necessary tools, you can do a lot. For girls, you can cut out dolls, furniture, dishes from it, and for boys - a car, a gun, a sword. The question of how to make weapons from wood is of great interest to them!
Drawing for the “Bulldog Pistol” craft.
Try cutting a gun like this. The craft is complex. To make this craft you will need:
3 mm plywood, preferably without defects, a wooden ruler (in measurements it is more accurate), a copy, hard pencils, thin files for a hand jigsaw, sandpaper, needle files, a wrench for a jigsaw, an awl or a hand drill with a No. 3 drill. When cutting out the craft, take your time, try to cut exactly along the marked line. You need to cut it out carefully, because... many small details. Always try to cut straight lines straight; if there is a bevel, the work will not be beautiful. Do not forget to monitor your posture and the position of the jigsaw in your hand. You need to always hold the jigsaw straight. After you have cut out all the parts, try to thoroughly clean them, first with “Medium” sandpaper and then with “Fine” sandpaper. If necessary, clean parts using needle files. After you have cleaned all the parts, try to assemble them. Assembly should be given special attention because... This is the most difficult part of making the craft. When assembling, do not forget about the rule: part number 1 must be attached to another part number 1, part number 2 to 2 parts, part 1a to part 1a, etc. If the parts do not fit into the right places, file them down. If all the parts fit in without any problems, glue them together. Try putting together a craft. The parts must be glued using PVA or titan glue. You don't need to pour a lot of glue. Cover the craft with spray paint of any color, preferably “Black”.
miracle-lobzik.ru
Wooden weapon options
In fact, you can do a lot, the main thing is, why do you need a specific thing? For a child who will play in the yard, for using weapons for their intended purpose, for role-playing games, for hunting, or maybe for a costume? Homemade weapons made of wood will take the shape and appearance that you desire.
If the main purpose is a game, then the main thing in this case is durability. All paint and thin fragile parts will fall off in a few days, if not immediately. When schools hold military training camps, and schoolchildren are given wooden Kalashnikov assault rifles, 50% of the guys tear off magazines on the first or second day. But these machines are made in bulk, not really caring about beauty, painting them in one color and trying to make them stronger. How to make a weapon out of wood that won't break, you ask? No way, the item will remain intact only if you do not use your product.
For roleplayers, the situation is much more complicated; they need weapons that are both beautiful and durable, so they often use other materials. If it is wood, then they make two swords or knives, one beautiful, the other durable.
Drawing of the “Fighter” craft.
Try making a craft like this. The work is not easy. For sawing you will need: sawing tools.
To cut the craft perfectly you will need patience. The craft is not easy, but this should not scare you.
The selection of plywood depends on the size of the parts, in this case you will need a lot of plywood. Before transferring the drawing to plywood, sand with coarse-grain sandpaper and finish with fine-grain sandpaper. It is more convenient to sand with a wooden block wrapped in sandpaper. Sand the prepared plywood along the layers, not across. A well-polished surface should be flat, completely smooth, glossy-matte in the light and silky to the touch. Pay attention to grain placement, knots, dents and other imperfections. Quality and color.
You need to translate the drawing accurately and carefully: secure the drawing using buttons or simply hold it with your left hand. Check if the drawing fits the dimensions. Arrange the individual parts so that you can use the plywood sheet as economically as possible.
You will have to cut a lot in a straight line with a jigsaw, so try to always keep the jigsaw straight and cut exactly along the line you marked. Cut slowly, there is no need to rush here. When all the parts have been cut out, you need to sand the surface again, only with fine-grained sandpaper. If there are burrs or irregularities after cleaning, clean the parts with needle files.
After stripping, the parts need to be assembled according to the rule: part number 1 needs to be attached to another part with number 1, part number 2 to 2 parts, etc. Try to assemble the craft. If the parts don't fit into the right places, file them down. The strength of the product will depend on how tightly the individual parts are connected. When you assemble the craft, carefully look for any burrs; if there are no “jambs,” glue the craft together.
You need to glue it using PVA or titan glue. At the top of the craft, attach the lid to the shelf using thin rubber glued with Moment glue. There is no need to pour a lot of glue; if the glue is visible on the craft, it will not be beautiful. When the craft is glued, it is necessary to cover the product with “Gray” spray paint or decorate it with a brush. Read how best to decorate a craft.
miracle-lobzik.ru
Material selection and processing
The choice of material determines how much processing time will be required. Birch is a very strong and unyielding tree; it is good for making a club; without special treatment the product will be heavy. Aspen, poplar, and pine are softer and easy and pleasant to work with. Oak is rare in many regions of Russia, but if you decide to make a weapon with your own hands from wood, you are unlikely to find better material. It is easier to process than birch, lighter in weight and stronger than pine, and retains its quality well over time.
The wood for products must be free of knots, wood holes, rot, with a uniform direction of fibers, and without curvature. It is necessary to dry it, preferably in a dry room or under a canopy. It is necessary that the wood dries evenly without direct exposure to sunlight, otherwise it will begin to crack and bend.
Drawing of the “Motorcycle” craft.
Try cutting a motorcycle like this. The craft is not complicated. To cut this craft you will need:
3 mm plywood, preferably without defects, a wooden ruler (in measurements it is more accurate), a copy, hard pencils, thin files for a hand jigsaw, sandpaper, needle files, a wrench for a jigsaw, an awl or a hand drill with a No. 3 drill. Cutting out a craft is not difficult, which means it will take little time to make it. When cutting, do not forget about the position of the jigsaw in your hand. Watch your posture. If you want the craft to look beautiful, take your time. After cutting, clean each part first with “Medium” sandpaper and then with “Fine” sandpaper; some parts should be cleaned with needle files. Assemble the craft according to the rule: part number 1 must be attached to another part number 1, part number 2 to 2 parts, and so on. First, assemble the craft, then if all the parts fit well into the required parts, glue them together. You need to glue it using PVA glue. To make the craft beautiful, you can coat it with spray paint of any color you want or coat it with Wood Varnish.
miracle-lobzik.ru
Making a Club
The simplest wooden weapon is a club or stick. What could be simpler, break off a branch and you're done. But if you suddenly decide to take this issue seriously, you want to make a durable, light, comfortable product, then you are faced with the question “how”. Making a weapon out of wood according to all the rules is not easy.
For the club, choose a young tree of suitable size. They cut down closer to the root, since at the butt the fibers begin to intertwine, making the material even more durable. Then, carefully, so as not to damage the top layers, remove the bark, cut off the knots, give the desired shape to the handle, and if necessary, soak the workpiece in water or special brines for a day. Then the drying begins, a fire is lit and, using the smoke, protecting the future club from the flames, it is dried. As soon as the tree has turned black, the blackness is removed with fine sand or hard grass. This is repeated six times, the surface becomes smooth and dry. Even if birch was chosen, the final product will be light and durable. Such wood does not rot.
Carbine 15 craft drawing.
Try cutting out an automatic weapon like this.
The work is difficult.
Your loved ones will surely like this craft by placing it in a visible place, for example, on a shelf. To make this craft you will need the following:
Sawing tools.
Preparing your desktop
First of all, you need to prepare your table on which you will work. There should be no unnecessary things on it and every tool should be at hand. Not everyone has their own desktop and has probably already thought about creating one. Making a table is not difficult, but choosing a place for it in the house is difficult. The ideal option is an insulated balcony, on which you can do crafts at any time. I have already written about preparing the table in a separate article and tried to describe in as much detail as possible the entire process of creating it. If you don’t know how to prepare your workplace, then read the following Article. After you have completed the process of creating a table, try to start choosing your future craft.
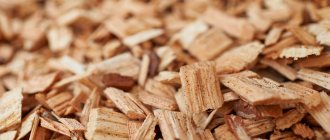
We choose quality material
The main material is plywood. The choice is always difficult. Each of us has probably encountered such a problem as delamination of plywood from the end part and asked the question, what causes this delamination? Well, of course, this is mainly due to low-quality plywood. If this is not the first time you have picked up a jigsaw, then you can select plywood from the remnants of a previous craft. If you are new to sawing and you don’t have plywood, then buy it at a hardware store. Choosing material for sawing is always difficult. You should always choose plywood carefully, often look at the defects of the wood (knots, cracks) and draw conclusions. The difficulty in choosing plywood lies in the fact that no matter how you guess at its defects and shelf life. For example, you bought plywood, cleaned it, translated the drawing and suddenly it began to delaminate. Of course, this has happened to almost everyone and it’s oh, how unpleasant. So it is better to pay attention when choosing and choose good plywood. I wrote a special Article in which all the principles of choosing plywood are described step by step.
Stripping plywood
We clean our plywood with sandpaper. As you already know, “Medium-grained” and “Fine-grained” sandpaper is used for cleaning plywood when sawing. You've probably seen sandpaper in hardware stores, and that's what we'll need. In your work you will need “Coarse-grained”, “Medium-grained” and “Fine-grained” sandpaper. Each of them has its own property, but a completely different coating, by which it is classified. “Coarse-grained” sandpaper is used for processing rough plywood, i.e. which has many defects, chips, and cracks. “Medium-grained” sandpaper is used for processing plywood after “Coarse” sandpaper and has a slight coating. “Fine-grained” or otherwise “Nulevka”. This sandpaper serves as the final process for stripping plywood. It gives the plywood smoothness, and therefore the plywood will be pleasant to the touch. Sand the prepared plywood in stages, starting with medium-grain sandpaper and ending with fine sandpaper. Sanding should be done along the layers, not across. A well-polished surface should be flat, completely smooth, glossy in the light and silky to the touch. How best to prepare plywood for sawing and which sandpaper is best to choose Read here. After stripping, check the plywood for burrs and small irregularities. If there are no visible defects, then you can proceed to the process of translating the drawing.
Translation of the drawing
For me, drawing translation has always been the main process in my work. I will tell you a couple of rules, as well as tips for high-quality translation of a drawing. Many people transfer the drawing onto plywood not only using a pencil and copying, but also using “Black Tape”, glue the drawing to the plywood, then wash off the drawing with water and the markings of the drawing remain on the plywood. In general, there are many ways, but I will tell you about the most common method. To transfer the drawing onto prepared plywood, you must use a copy, a ruler, a sharp pencil and a non-writing pen. Fasten the drawing in plywood using buttons or simply hold it with your left hand. Check if the drawing fits the dimensions. Arrange the clock drawing so that you can use a sheet of plywood as economically as possible. Translate the drawing using a non-writing pen and ruler. There is no need to rush, because your future craft depends on the drawing.
Drilling holes in the parts
As you have already noticed, the parts contain parts of the grooves that need to be cut out from the inside. To cut out such parts, you need to drill holes in them using a hand drill or, as in the old fashioned way, make holes with an awl. By the way, the diameter of the hole must be at least 1 mm, otherwise you can damage the elements of the drawing, which, alas, are sometimes difficult to restore. To avoid damaging your work table when drilling holes, you must place a board under the workpiece so as not to damage the work table. It is always difficult to drill holes alone, so ask a friend to help you in your task.
Sawing parts
There are many rules for cutting, but you need to stick to the most common ones. First of all, you need to cut out the internal parts, only then according to the external pattern. There is no need to rush when cutting. The main thing is to always keep the jigsaw straight at a 90-degree angle when cutting. Cut out the parts along the lines you accurately marked. The movements of the jigsaw should always be smooth up and down. Also, do not forget to monitor your posture. Try to avoid bevels and unevenness. If you go off the line while cutting, don't worry. Such bevels and irregularities can be removed using flat files or “coarse-grained” sandpaper.
Rest
When sawing, we often get tired. Fingers and eyes, which are always tense, often get tired. When working, of course, everyone gets tired. In order to reduce the load, you need to do a couple of exercises. You can view the exercises here. Do the exercises several times during work.
Cleaning Parts
You should always clean the parts of a future craft carefully. At the very beginning of the work, you already sanded the plywood with sandpaper. Now you have to do a small part of stripping the plywood. Using medium-grain sandpaper, sand the edges of the parts and the back of the plywood. “Fine-grained” sandpaper is considered the final stage of cleaning parts. It is better to clean the front part of the parts with fine sandpaper. When processing plywood, take your time. You can also use a rounded file, which is convenient for cleaning the inside of the holes. Try to ensure that the parts come out without burrs or irregularities.
Assembly of parts
Assembling the parts of our craft is not so difficult here. In order to correctly assemble the parts, you need to read the following Article, which describes in detail all the details of the assembly. After the parts are assembled into one common craft without any problems, then start gluing them.
Gluing the parts
The shelf parts must be glued using PVA or titan glue. You don't need to pour a lot of glue. It is better to tie the assembled craft with glue with a strong thread, tighten it and lay it out to dry. The craft glues together in about 10-15 minutes.
Burning out crafts
To decorate our craft with a pattern (for example, along the edges of the craft), you will need an electric burner. It can be very difficult to burn a pattern beautifully. To burn patterns, you must first draw the pattern with a pencil. You can read how to work with an electric burner and add patterns to a shelf here.
Varnishing crafts
If desired, you can transform our craft by covering it with Wood Varnish, preferably colorless. Read how best to varnish a craft. Try to choose a quality varnish. Varnishing is carried out using a special brush “For glue”. Take your time. Try not to leave visible marks or scratches on the craft.
miracle-lobzik.ru
Shield and sword
How to make weapons from wood for role-playing games and historical reconstructions? If for beauty and ambience, then it is very convenient to cut out a shape from plywood with a jigsaw, smooth the edge, varnish, paint, and insert decorations. If the paint is good, without holding the item in your hands, it will be difficult to determine what material it is made of. For combat, it is worth making a weapon from thick, durable wood, with a comfortable handle, so that the vibration from the impact is less transferred to the hand, otherwise you can damage the hand or simply drop the object during the first hard collision.
The shield can be made perfectly from plywood, but for combat it is better to use iron-bound or steel versions with a shock-absorbing lining. During reconstructions they usually show a wall-to-wall battle, in which it is extremely difficult to strike a strong blow to the shield. A good and durable one is needed for individual combat; for all other cases, plywood is suitable.
Drawing of the “Beretta Pistol” craft.
Try cutting a gun like this. Your loved ones will surely like this craft by placing it in a visible place, for example, on a shelf. To make such a craft you will need the following: Sawing tools.
First of all, you need to prepare your table on which you will work. There should be no unnecessary things on it and every tool should be at hand. Not everyone has their own desktop and has probably already thought about creating one. Making a table is not difficult, but choosing a place for it in the house is difficult. The ideal option is an insulated balcony, on which you can do crafts at any time. I have already written about preparing the table in a separate article and tried to describe in as much detail as possible the entire process of creating it. If you don’t know how to prepare your workplace, then read the following Article. After you have completed the process of creating a table, try to start choosing your future craft.
We choose quality material
The main material is plywood. The choice is always difficult. Each of us has probably encountered such a problem as delamination of plywood from the end part and asked the question, what causes this delamination? Well, of course, this is mainly due to low-quality plywood. If this is not the first time you have picked up a jigsaw, then you can select plywood from the remnants of a previous craft. If you are new to sawing and you don’t have plywood, then buy it at a hardware store. Choosing material for sawing is always difficult. You should always choose plywood carefully, often look at the defects of the wood (knots, cracks) and draw conclusions. The difficulty in choosing plywood lies in the fact that no matter how you guess at its defects and shelf life. For example, you bought plywood, cleaned it, translated the drawing and suddenly it began to delaminate. Of course, this has happened to almost everyone and it’s oh, how unpleasant. So it is better to pay attention when choosing and choose good plywood. I wrote a special Article in which all the principles of choosing plywood are described step by step.
Stripping plywood
We clean our plywood with sandpaper. As you already know, “Medium-grained” and “Fine-grained” sandpaper is used for cleaning plywood when sawing. You've probably seen sandpaper in hardware stores, and that's what we'll need. In your work you will need “Coarse-grained”, “Medium-grained” and “Fine-grained” sandpaper. Each of them has its own property, but a completely different coating, by which it is classified. “Coarse-grained” sandpaper is used for processing rough plywood, i.e. which has many defects, chips, and cracks. “Medium-grained” sandpaper is used for processing plywood after “Coarse” sandpaper and has a slight coating. “Fine-grained” or otherwise “Nulevka”. This sandpaper serves as the final process for stripping plywood. It gives the plywood smoothness, and therefore the plywood will be pleasant to the touch. Sand the prepared plywood in stages, starting with medium-grain sandpaper and ending with fine sandpaper. Sanding should be done along the layers, not across. A well-polished surface should be flat, completely smooth, glossy in the light and silky to the touch. How best to prepare plywood for sawing and which sandpaper is best to choose Read here. After stripping, check the plywood for burrs and small irregularities. If there are no visible defects, then you can proceed to the process of translating the drawing.
Translation of the drawing
For me, drawing translation has always been the main process in my work. I will tell you a couple of rules, as well as tips for high-quality translation of a drawing. Many people transfer the drawing onto plywood not only using a pencil and copying, but also using “Black Tape”, glue the drawing to the plywood, then wash off the drawing with water and the markings of the drawing remain on the plywood. In general, there are many ways, but I will tell you about the most common method. To transfer the drawing onto prepared plywood, you must use a copy, a ruler, a sharp pencil and a non-writing pen. Fasten the drawing in plywood using buttons or simply hold it with your left hand. Check if the drawing fits the dimensions. Arrange the clock drawing so that you can use a sheet of plywood as economically as possible. Translate the drawing using a non-writing pen and ruler. There is no need to rush, because your future craft depends on the drawing.
Drilling holes in the parts
As you have already noticed, the parts contain parts of the grooves that need to be cut out from the inside. To cut out such parts, you need to drill holes in them using a hand drill or, as in the old fashioned way, make holes with an awl. By the way, the diameter of the hole must be at least 1 mm, otherwise you can damage the elements of the drawing, which, alas, are sometimes difficult to restore. To avoid damaging your work table when drilling holes, you must place a board under the workpiece so as not to damage the work table. It is always difficult to drill holes alone, so ask a friend to help you in your task.
Sawing parts
There are many rules for cutting, but you need to stick to the most common ones. First of all, you need to cut out the internal parts, only then according to the external pattern. There is no need to rush when cutting. The main thing is to always keep the jigsaw straight at a 90-degree angle when cutting. Cut out the parts along the lines you accurately marked. The movements of the jigsaw should always be smooth up and down. Also, do not forget to monitor your posture. Try to avoid bevels and unevenness. If you go off the line while cutting, don't worry. Such bevels and irregularities can be removed using flat files or “coarse-grained” sandpaper.
Rest
When sawing, we often get tired. Fingers and eyes, which are always tense, often get tired. When working, of course, everyone gets tired. In order to reduce the load, you need to do a couple of exercises. You can view the exercises here. Do the exercises several times during work.
Cleaning Parts
You should always clean the parts of a future craft carefully. At the very beginning of the work, you already sanded the plywood with sandpaper. Now you have to do a small part of stripping the plywood. Using medium-grain sandpaper, sand the edges of the parts and the back of the plywood. “Fine-grained” sandpaper is considered the final stage of cleaning parts. It is better to clean the front part of the parts with fine sandpaper. When processing plywood, take your time. You can also use a rounded file, which is convenient for cleaning the inside of the holes. Try to ensure that the parts come out without burrs or irregularities.
Assembly of parts
Assembling the parts of our pistol is not that difficult here. In order to correctly assemble the parts, you need to read the following Article, which describes in detail all the details of the assembly. After the parts are assembled into one common craft without any problems, then start gluing them.
Gluing the parts
The shelf parts must be glued using PVA or titan glue. You don't need to pour a lot of glue. It is better to tie the assembled craft with glue with a strong thread, tighten it and lay it out to dry. The craft glues together in about 10-15 minutes.
Burning out crafts
To decorate our pistol with a pattern (for example, along the edges of the pistol), you will need an electric burner. It can be very difficult to burn a pattern beautifully. To burn patterns, you must first draw the pattern with a pencil. You can read how to work with an electric burner and add patterns to a shelf here.
Varnishing crafts
If desired, our pistol can be transformed by covering it with “Wood” varnish, preferably colorless. Read how best to varnish a craft. Try to choose a quality varnish. Varnishing is carried out using a special brush “For glue”. Take your time. Try not to leave visible marks or scratches on the craft.
miracle-lobzik.ru
Firearms mockups
No matter how much you would like to, it is impossible to make a homemade firearm out of wood that will shoot. Maybe for one or two shots, and it’s not a fact that the weapon won’t explode when the gunpowder explodes.
All self-propelled schemes come down to one algorithm. The tree is a frame to which the barrel is attached, a trigger with a striker, and sometimes a magazine is added. Inconvenient, short-lived, but cheap and cheerful.
Hunting weapon
Do you remember running around the yards with slingshots as a child? If you haven't run, be sure to try it, you will like it. Modern elastic materials impart such striking power to a small metal ball or pebble that, with proper skill, you can knock down targets from thirty paces. But the frame of a slingshot can be easily made from wood.
Drawings of weapons made of wood for hunting are quite common. This is how crossbows and bows are made. It's not that difficult to make a wooden frame; it requires sleight of hand and no magic. But there is an important detail that is necessary to make small arms lethal and effective over long distances. For this you need shoulders that are flexible and strong, as well as a bowstring. There are old technologies for making shoulders, but nowadays it is too labor-intensive and difficult to implement at home. It is easier to use modern materials such as plastic.
It is best to make the main frame from wood, and the shoulders from flexible, rot-resistant plastic; a synthetic cord will go to the bowstring. A little decoration and paint, and you’ll get a very attractive and effective bow.
Homemade pistol made of wood - how to make a wooden weapon that fires cartridges with your own hands
This toy gun fires spent 9mm pistol casings and is powered by rubber bands and springs. How to make a homemade shooting pistol from wood and scrap materials.
The pistol is automatic. It has a built-in magazine that is loaded with seven rounds that are automatically fed into the chamber during firing.
Any 9-10 mm copper or wooden blanks can be used as pistol bullets. Depending on the installed spring, bullets fly at a distance of 3 to 6 meters.