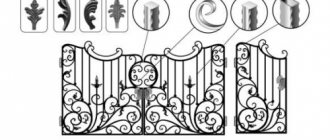
The applied symbolism gives the bracelet protective properties
The bracelet is the same talisman that is extremely popular today. Even despite the fact that many see it only as decoration. Certain symbolism can give protective and magical properties to an ordinary bracelet. We are talking here not only about signs or patterns. Just as important, for example, is the technique of tying knots.
We make pendants with our own hands. How to make pendants from different materials?
The female half of humanity, at least most of it, loves jewelry. This is typical for ladies of any age; everyone wants to look attractive. A pendant on a chain will help to gracefully highlight the curves of your neck. Nowadays, many people are interested in handicrafts, creating jewelry for sale, as a gift, or for their own use. How difficult is it to make pendants with your own hands? Let's look at some of the available options.
Preparatory work
Considering that you will be working with high temperatures, you need to carefully prepare. Remove flammable items from the workplace. Make sure in advance that nothing distracts from the process. You should have protective equipment (gloves, apron) and the necessary tools (forceps and tweezers) at hand. Work clothes made of dense materials should cover the entire body. It is better to work in special glasses with elastic that fit tightly to the face. Any accidentally ejected droplet of molten metal can cause a serious burn.
What are pendants made of?
Any woman can afford to wear such jewelry, which is why the variety of these accessories is amazing in the variety of shapes, sizes, colors and materials. What do you use to create your own pendants? There are many options: plastic, wood, paper, leather, feathers, fur, fabric, stones, metal, beads. The first pendants were made from fish vertebrae, beautiful shells, pieces of amber and even fresh flowers. Nowadays, modernity dictates its own trends, and on the necks of girls you can even see jewelry in the form of a computer motherboard or floppy disk. The imagination of those who make pendants with their own hands is truly limitless, which makes each of them an individual and original decoration.
Lost wax casting technology
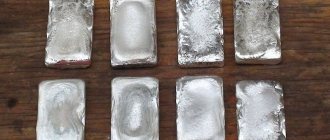
Lost wax silver casting equipment is relatively uncomplicated and available for home use. The essence of the method is that a model made of a low-melting material, upon contact with the liquid metal being poured, melts and is forced out of the mold through specially provided holes. The metal occupies the void formed in the place of the model and accurately repeats its spatial shape.
It is necessary to pour the metal in a thin stream to allow the material of the lost wax model to leave the mold, in order to avoid the formation of splashes of molten metal.
Making a heart pendant
We can say that heart-shaped pendants are the most popular; almost every girl has such jewelry. Moreover, they are easy to make even for a novice creator. The easiest way to make a heart pendant with your own hands is to weave it from beads or wire. This accessory will be a wonderful gift for Valentine's Day or any other holiday. To create such a bead decoration, you will need the beads themselves of different colors and sizes, a fishing line and a ring on which the chain will be attached. You can weave a simple red heart, a futuristic gold or silver one, the pattern can easily be found in a beading magazine. If you want to experiment, take a piece of felt and embroider a heart on it. You can fill the entire inner part, and not just the edging, sew or glue beads of different sizes, artificial pearls, Swarovski rhinestones. Let all the elements match each other in color; the combination of gold, yellow and white looks very beautiful. At the end of the embroidery, cut out the heart and carefully glue the cardboard behind it to hold the shape. Place a leather layer on top of the cardboard, stitch around the perimeter - and the pendant is ready.
Details
Lost wax casting
This casting method is the most accessible for beginners. For this, it is necessary to create a model from a material whose temperature is significantly lower than that of molten silver. A mold made of clay-sand mixture or plaster is poured around the selected model of the product. The simplest and most common materials for making models are paraffin or wax. Molten metal is poured into the mold, the modeling material melts, which displaces excess metal, which flows through specially prepared holes. Another option is to burn out a wax model of the product by heating the mold to a high temperature, and molten silver is poured into an empty mold.
Tools and devices for molding and pouring silver according to the model.
casting fixtures by model:
- Crucible for cleaning and melting metal,
- Gas burner or muffle furnace,
- Steel pliers,
- Stand made of fireproof material,
- Scales,
- Special wax for modeling,
- Mixtures for molding and containers for their dilution,
- Knives, scalpels, needle files for processing and finishing the finished product,
- Casting molds,
- The hammer that breaks the flask,
- Protective equipment – mittens, apron, glasses,
- Fire extinguisher,
- Dremel is a miniature version of a drill,
- Crossbars, vices and mandrels.
How to make silver jewelry?
How to make silver jewelry?
Jewelry made from this noble metal has always attracted close attention, especially in our time, when you can easily purchase a wide variety of products, from simple rings at jewelry stores to jewelry made by highly qualified craftsmen according to your own sketch.
On the other hand, if anyone who so desires can make jewelry from metal, polymer clay, threads, beads and other things, then, in fact, why not try to make jewelry from silver.
We would like to warn you right away that this activity is far from easy, it requires serious preparation, a lot of time and the availability of special tools if you really decide to become a self-taught jeweler. To do this, you will need at least a piece of silver (you can use old jewelry, broken or long out of fashion), a gasoline burner in which you are going to melt the silver, a container in which you will melt the metal, a soldering iron and much more. You cannot approach the matter without any preparation, and there is no point in starting right away with silver, since the first pancake, as they say, is lumpy. In the case of working with expensive metal, before trying yourself as a jeweler, practice on cheaper materials in order to gain at least a little experience.
There is another option for making jewelry. It is more expensive, but less labor intensive. Having drawn a sketch of the finished product, calculating the quantity and size of each element, you can go to a familiar jeweler who can bring your idea to life. Buying metal is very expensive, and therefore you can use silver jewelry that you bought a long time ago. But be prepared for the fact that you will have to pay a significant amount for individual work. But it’s worth it, because you’re unlikely to ever come across someone’s item that’s more original and interesting than the one where you were the designer.
Cleaning silver from alloys
Cleaning silver using nitrate
One of the common methods of purifying silver is melting using saltpeter. For this experiment you will need a crucible - a vessel that is used to heat, cook and melt various metals. A silver product is placed in the crucible, to which borax, saltpeter and soda are added. At the beginning of melting, the resulting mass actively boils due to the action of nitrate (gas is released). After the resulting composition has “calmed down,” the crucible can be removed from the forge. So what effect do the substances used have on the course of a chemical reaction? The fact is that saltpeter is capable of oxidizing base metals that make up silver, and soda and borax, when melted, can dissolve metal oxides, thereby cleaning the metal surface. As a result of chemical transformations, slag is formed in a liquid aggregate state.
Using this method of cleaning silver from unnecessary impurities, you can reduce the percentage of copper in the melt. The crucible is cooled and then broken. At its bottom you can see a silver ingot, above the surface of which there will be slag, which should be removed with a hammer. You just need to remember that if the silver contained a sufficiently large amount of metals and impurities, then the mass of substances used (saltpeter, soda, borax) should be greater.
Read also: Unipolar digital hall sensor
If there is very little silver in stock, then it is cleaned on clay. To do this, take a piece of linden coal with a depression, which is smeared with clay and dried. Then silver and borax are placed on the clay and cleaning is carried out using a soldering iron. Saltpeter is added to the molten silver.
Cleaning silver using lead
Due to its painstaking nature, another method of cleaning using lead is less common. To do this, silver is placed in a crucible, which is covered with borax on top. The crucible is placed in the molten furnace. If the silver is melted, lead is added to it. The resulting mass is mixed, and after complete melting, it is cleaned in containers with bone ash.
How to clean silver earrings at home
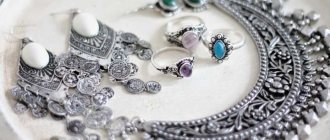
Silver is a noble precious metal to which the hearts of almost half of the inhabitants of our planet are given, regardless of their gender and age. The opinion that gold is a metal unsurpassed in popularity is erroneous. It is silver that stylish fashionistas often choose (you can buy silver earrings on this website). Thanks to its shade, this metal is ideal for any color of clothing, style and type of outfit.
Silver is most often preferred:
representatives of the fairer sex of a young age; girls who prefer informal style; lovers of large jewelry (for example, earrings), which are not produced in gold due to their high cost and, as a consequence, potential lack of sales; men who consider gold to be too flashy, “unmanly” metal.
Unfortunately, unlike gold, silver, when worn constantly, oxidizes due to contact with human skin due to chemical reactions that occur. This means that silver jewelry needs a good cleaning from time to time as it darkens over time. The extreme state of oxidation of silver gives it an almost black color. Often, in desperation, products are simply thrown away.
How to deal with tarnishing of silver? Hiring the services of a jewelry workshop means saying goodbye to some money. However, silver is actually quite easy to clean at home, and the money saved can be spent on delicious desserts to lift your spirits.
Making a pendant from scratch using plastic silver and mold
We present to your attention a simple jewelry master class on working with plastic silver - PMC (Precious Metal Clay) silver clay.
Brief information for those who have not heard about silver clay before. Silver clay is a material in its raw form consisting of 90% pure silver, crushed to nanoparticles, and 10% of an organic binder and water, which allows it to be given any shape before firing. Firing occurs at a temperature of 650-900C, during the process the water evaporates and the plasticizer burns out, and the silver is fused into a solid ingot, giving the purest 999 sample / 960 sample / sterling 925 sample (depending on the type of clay). The gold paste is applied to the silver surface after firing and then heat treated again to completely fuse the metals together.
For work we will need:
- PMC silver clay (the smallest package is enough, 6.3g - this is enough for a pendant and there will still be left for 1-2 small pendants);
- silicone or plastic mold (mold) at your discretion - for us these are doves;
— a thin artistic brush (number 1 or 2, the shape is not important, but, in our opinion, it is more convenient to work with a round one);
- a stack for work (for example, with an awl on one side and a knife on the other). You can replace it with a blade and a toothpick;
— SLIK hand and clay balm (you can replace it with olive oil);
— brush with steel bristles;
— abrasive sponge/block and sandpaper of different grain sizes;
- hair dryer;
- muffle furnace or ceramic pot for firing Hot Pot;
- cloth for polishing silver (optional);
- sulfur ointment for blackening (also optional);
- silver fittings - ring / pin / earrings (optional and depending on the purpose of the project).
Let's get to work!
Step 1. Take a silicone mold and lightly grease it with SLIK balm. Apply a little balm to your fingers to prevent the clay from sticking to them as you work.
Step 2. Open the package of silver clay and remove its contents. Try not to leave the opened package in the air, as... this will speed up the drying of the clay.
Step 3. Cut a piece of the required size (for one print in the mold), wrap the rest tightly in film and put it back into the package, not forgetting to close the zip fastener. Place it in the mold and press it with your fingers so that the clay fills all the recesses of the mold.
Step 4. Without removing the workpiece, trim off the excess clay around the edges and fold all the remains back into the film.
Step 5. Smooth the back of the piece using a damp brush, applying light pressure. This will make the surface smooth and uniform, and all microcracks will disappear. If desired, at this stage (while the clay is wet), you can apply initials, a signature or other marks of authorship to the back of the decoration using an awl. Then smooth the surface again with a brush.
Step 6. Dry the workpiece a little with a hair dryer, this will speed up the hardening process of the clay.
Step 7. Wait until the entire workpiece acquires an even milky color and carefully remove it from the mold, slightly bending its edges.
Step 8. Mark the location for the hole, lightly moisten it and wait until the clay returns to working condition. Take an awl and gently press, making a through hole. Using circular movements, expand it to the desired size (about 2mm in diameter), moistening the clay around it if necessary.
Step 9. Dry the workpiece again with a hairdryer. Take an abrasive sponge and carefully work the edges of the workpiece, moving along the decoration so that there are no sharp burrs or rough spots left on them. If necessary, sponge the area around the hole.
Step 10. Fire in a muffle furnace or Hot Pot according to the instructions (available on our blog)
Step 11. In front of you is 999 sterling silver, after firing it is covered with an oxide film, which must be removed with a steel bristle brush. Process the decoration on both sides, making sure that there are no white matte areas left anywhere.
Step 12. Next, using abrasive sandpaper, sand the surface to the desired shine: go from coarse to finer grains.
Step 13: The sides can be polished using the side of an awl: lightly rub your jewelry and it will sparkle!
Step 14: Finally, gently wipe the jewelry with a silver polishing cloth.
Step 15. If desired, you can blacken it: this will add expressiveness to the pendant and emphasize its texture. To do this, you can use regular Sulfur Ointment (sold in a pharmacy): apply it in a thin layer on the silver surface, and then heat it with a hairdryer or throw it into boiling water and watch the silver darken for 3-8 minutes. Cool the product and wash it thoroughly in soapy water to stop the reaction. Using a steel brush or abrasive sponge, remove excess blackening from the surface and wash again with soap.
Insert accessories: an expansion ring for a pendant or earrings for earrings.
Your decoration is ready!
Thank you for your attention, we will be happy to answer additional questions in the comments,
your ARGENTARIUM.
Popular methods
Foil
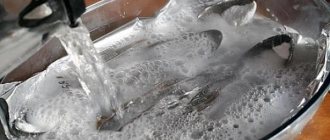
How to clean a silver chain - use food foil. The aluminum in its composition reacts with silver sulfide (sulfur compound) and destroys the black film.
Method No. 1
Line the bottom of the pan with a piece of foil. Pour water into it (to a height of 3-4 cm from the bottom). Add 2 tablespoons of baking soda (you can use citric acid instead of soda). Place the decoration in the pan. Place on the stove, boil and keep on fire for 3-5 minutes. If the chain has not brightened, the time can be increased.
Method number 2
Spread the foil on the table. Place the decoration on it, add 2 tablespoons of salt and pour in a little water. Fold everything into an envelope and place it on the bottom of the pan. Pour a soap solution of a glass of water and 1 teaspoon of laundry soap. Bring to a boil, remove from heat, wait 15 minutes.
Casting aluminum into sand and clay molds.
Good day, pikabushniks and pikabushnitsy. In this post I would like to talk about one of the methods for making metal castings. Specifically, address signs. These are the ones.
Furnace and crucible for melting metal. Since we use low-melting aluminum, we need a temperature of at least 660 degrees. We did all this in a cleared warehouse on a homemade stove and “by eye.” So, there was no specific temperature regime.
I didn’t photograph the stove itself, but its design was simple: an outer layer of refractory brick, inside a layer of kaolin wool. A gas burner is directed underneath the crucible. The crucible is roughly welded from a piece of metal pipe. They burned out often and cheerfully, regularly creating beautiful silvery puddles on the floor around the stove.
The aluminum itself. I bought it in the form of various scrap materials, from scraps of aluminum profiles for compartment doors to twisted cables (the coolest raw materials, by the way).
Model of our product. We made it from MDF on a milling machine and covered it with two layers of foam-filling primer.
Form. It consists of two metal frames into which the molding mixture is tightly compacted (consists of clay and sand in certain proportions, lightly moistened with water until the Easter cake is molded).
The flask is the same metal frame. It consists of two parts, the horizontal line in the figure along the upper edge of the “model” is the connector plane.
The vent is a channel for air outlet, the sprue is a channel for pouring metal. The black and gray in the molding mixture are voids, I painted it for clarity.
That is, we have such an Easter cake in a frame with a void in the shape of our product.
Here you can see a model of a sign about an angry dog, a metal frame of the first half of the form (the bottom one in the diagram). It all lies on the most even, flat thing we could find.
We coated the model with talcum powder to increase the chances that it would later be pulled out of our “little cake” without loss. They sprinkled the mixture on top through a sieve - this is done only for the first face layer, so that later the surface of the casting would be of better quality, since the molding mixture was mixed in a box with a drill, and there were a lot of lumps left in it from previous uses.
Then more molding mixture is poured on top in handfuls and buckets, and it is trampled down for a long time and carefully with a mallet, such and such a mother and other improvised objects.
Here I didn’t experience a sudden metamorphosis of one sign into another, I just didn’t photograph the Angry Dog at that stage. Here we see the same bottom part of the mold, but flipped over and ready for the top part to be molded. That is, with the surface that we see here, in the first and second photographs the half-form lay down.
Sprinkle generously with talcum powder, place a second metal frame on top, and insert pipe scraps. The latter is done so that in the upper half of the mold there are channels for the sprue and vents (air vents, remember?). And again we pour in the molding mixture, this time without sifting - this will be the back surface of the plate, here you can improve the quality of the surface.
When both halves are ready, the tubes are pulled out, the upper half of the mold is removed, and the product model is pulled out. A very important stage, at which it may turn out that a couple of hours of work are wasted: the upper half of the mold may crumble during transfer, the model will be pulled out along with a piece of the mixture, or something like that. So, all actions must be done slowly and sadly.
I didn’t take a photo of the assembled form, because there’s nothing interesting there - an Easter cake in a frame and that’s it. But in the photo below you can see a mold ready for casting, from which the model and tubes have already been pulled out.
Preparation
We would like to warn you that melting silver items in an apartment is unsafe. You can easily get burned and even start a fire. So prepare carefully for this procedure and remember to take precautions.
To melt silver you will need:
- metal spoon,
- sheet asbestos,
- borax,
- burner,
- tweezers,
- forceps,
- gypsum,
- white quartz sand.
Before you begin, place all the items and ingredients you need on your work surface. Try to remove everything unnecessary so that nothing interferes with you while working. Wear clothes made of thick material. Protect your hands with gloves and your eyes with special glasses with elastic that fit well to your face. It is advisable to leave as little surface of the skin as possible exposed to minimize the risk of accidental burns.
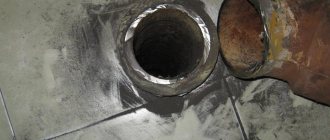
Prepare a mold for casting silver (ingus) in advance. To make it, you will need quartz sand and gypsum. If you know dentists, then with their help you can get a lithium mixture that is used in dentistry. In addition, beeswax will also come in handy. Use it to create a model of a future piece of jewelry. Place this model in a container with a mixture of gypsum and pure quartz sand. While the mixture has not completely hardened, make a narrow recess into which you will pour the melted silver.
Once the mixture has completely hardened, warm up the ingus. If you work inside, be sure to open the window and turn on the hood. When heated, the wax begins to evaporate, giving off a very unpleasant odor. The disappearance of the amber will be a signal that the form has already been completely cleared of wax and is suitable for use. Now you can begin the main process.
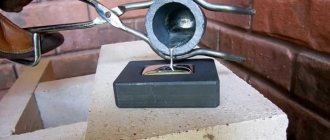
Silver smelting process
You need to prepare the form in advance. Quartz sand and gypsum are mixed in a ratio of 7:1. The finished mixture is diluted with water to the consistency of sour cream. Next, you should choose a box for the form. Its dimensions should not be very large, but sufficient to freely place the product. The box must have a voluminous lid into which the product can also fit. You can take 2 identical boxes. The prepared mixture is poured into one box. Carnations are installed in its corners. The pre-selected model of the product must be covered with soapy water and dried.
After this, the model is carefully immersed in the mixture to the middle of its height. You need to make sure that the nails remain pointing straight up. The hardened mixture must be coated with oil. The lid of the box is filled in the same way. Then the box with the layout must be connected to the lid, immersing the free part of the layout in the fresh mixture. When everything is thoroughly dry, the finished forms can be removed from the boxes. A small hole (up to 5 mm in diameter) is made in one of the molds for pouring metal. After this, the forms are carefully connected and secured in this position with a rope or elastic band.
After preparing the mold, the silver smelting process begins. Silver items are placed in a crucible. It is better to first break them into equal pieces. This way the metal will heat up evenly and the process will speed up a little. The crucible is heated on a gasoline or gas burner. Metal ready for casting looks like a drop of mercury. If this state is achieved, you can pour silver into the mold. To fill, you need to use a special funnel. After the molten metal is completely poured, the hole must be very quickly closed with a lid. On the inside of the lid you need to place a small piece of cotton wool in advance. Instantly burning from the high temperature, the cotton wool will create pressure in the closed container. Thanks to this pressure, the metal will evenly fill all the corners and bends of the form.