Wearing gold jewelry has been fashionable at all times. They add elegance to any look and style for both men and women. The only drawback is that such products are distinguished by their fragility. Their breakdown is far from uncommon. In order to repair a gold item, you need to contact jewelry craftsmen. However, it is not always possible to take your favorite chain to a jewelry workshop. Therefore, many people wonder whether it is possible to solder it at home? Many people mistakenly believe that soldering a chain at home requires a lot of knowledge and skills. In reality this is far from the case. In this article we will look at all the nuances of this procedure.
Why do silver chains break? Top 3 reasons
- Defective product. But the store will not simply accept a broken chain back: an examination must be carried out to prove a manufacturing defect. If the examination confirms that the manufacturer is at fault, then the buyer will return the money spent - both for the decoration and for the examination.
- Hollowness. Yes, chains are often made hollow - this is not very practical, but it reduces the cost of decoration. Heavy pendants cannot be hung on such chains, and they can also break from the slightest mechanical impact.
- Wearing heavy pendants. To avoid putting too much stress on the chain, consider the weight ratio of the chain to the pendant.
Chain repair
Using the described method, gold rings and chains with fairly large links can be soldered. To solder a gold chain with small links, there is another technology.
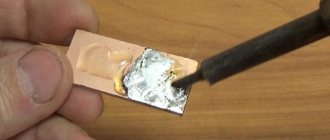
Gold sawdust is mixed in castor oil with the addition of phosphorus. In the damaged chain, all bent and torn areas are carefully aligned.
The work must be done with a very thin instrument using a magnifying glass. After this, the damaged section of the chain is moistened with the resulting solution.
As a result of this, tiny gold filings fill the places where the links break. If you now place this section of the chain in the flame of a burner, the gold particles will melt and fill the gaps.
And one last thing. Before starting soldering, especially if it is being done for the first time, you should assess the risks associated with possible damage to gold jewelry . Perhaps in this case it is preferable to use the services of a workshop.
What you need to know about silver soldering
- Silver melts at a temperature of 960 degrees. Of course, this indicator differs for different metals - for example, the melting point of copper is 1083 degrees. The melting point of the alloy will depend on how much pure silver it contains (exact values can be found in specialized literature).
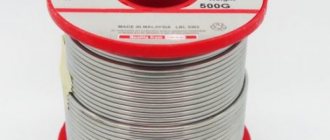
- To ensure high-quality soldering, it is important to carefully select silver solder. It is advisable to use refractory solder, which melts at temperatures above 240 degrees. All solders are marked for convenience; the number in the marking indicates the percentage of silver content. For example, in PSR-45 solder there is 45% silver, the rest is copper and zinc. In some cases, solders with a silver content of 70% are used. The higher the silver content, the stronger the connection.
Properly soldered seams are strong and resistant to corrosion. If the soldering is done well, the seam is not prone to deformation. To repair a silver chain, we recommend choosing solders with a high silver content: they give the best results. Ordinary tin should not be used for soldering silver: over time it will darken, the soldering area will become noticeable and unaesthetic.
Tools for repairing a silver chain at home:
- small soldering iron or gas torch;
- silver solder;
- flux;
- alcohol-containing liquid;
- acid solution;
- clips for fixing jewelry;
- wire cutters;
- small brush;
- sandpaper;
- asbestos sheet or brick (if using a gas burner).
Soldering and seam processing
Before starting soldering, you need to adjust the burner flame to the required thickness of the torch. Then uniform heating of gold begins in the joint zone.
It is necessary to accurately determine the moment when solder can be introduced into the joint area. Typically, this phase of soldering is marked by some change in the color of the heated area. The “sense of metal” comes with experience; the first attempts will most likely be unsuccessful.
After heating the product, a solder rod is applied to the joint. The solder must be oriented relative to the burner flame in such a way that the required amount melts.
Excess molten solder will either drain from the product, or after soldering it will have to be removed with a needle file or drill. Do not forget that gold predominates in the composition of solder!
The molten solder should wet the joint and fill the gap at the future seam. The consistency of the melt should be maintained in such a state that it does not flow off the part, being held by surface tension forces.
Heating does not stop until the solder matches the color of the product material. This is a signal that the cadmium contained in it has burned out and the soldering process can be completed.
After the gold has cooled, you can begin its final processing. Larger irregularities are smoothed out with a file; final finishing grinding is best done with a drill with the finest-grained attachment.
If the filler material was chosen correctly and the grinding was done efficiently, the soldering location should not be determined by eye.
How to repair a silver chain using a gas torch
Before starting work, the product must be cleaned and degreased - treated with an alcohol-containing solution. The next steps are:
- Secure the broken parts of the decoration to a fireproof base. An asbestos sheet or ordinary brick is suitable for this purpose.
- Coat the places where the chain breaks with a thin layer of flux (this is convenient to do with a small brush). Place a piece of solder between the broken parts of the chain (it is convenient to separate the alloy strips with wire cutters).
- Gently heat the joint with a gas torch, moving the torch from the side. Try to ensure even heating. When the flux is hot, increase the flame, continuing to weld the metal and forming a solder joint.
- Wait for the soldered decoration to cool down.
- Clean the surface of the product from flux, remove any remaining solder with sandpaper, and polish the soldered area.
- The final treatment is to lighten the surface using an acid solution.
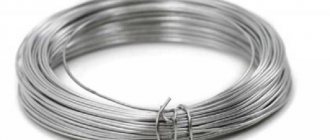
Solder making
First you need to make solder. To do this, we place gold, silver and copper in the crucible in a ratio of 585: 115:186. Don't be surprised: jewelry requires jeweler's precision in all proportions. This composition will require either 135 parts of brass or 112 parts of cadmium. We melt the first three ingredients using a gas burner. We introduce brass (cadmium) into the molten composition. We wait until the ingredients are completely mixed and pour the composition into the container. With the slightly cooled metal, we shape it into a plate or thin wire on an anvil (you can simply stretch the alloy to the required thickness, and the material itself will take a shape with an oval cross-section). Let the material cool and roll the resulting solder into a position convenient for storage.
How to fix a silver chain using a soldering iron
For jewelry work, use a soldering iron with a thin tip and POS-60 solder with a melting point of 180 degrees. This solder is produced in the form of thin tubes filled with resin, which acts as a flux (protects the metal surface from oxidation). The procedure is the same:
- the surface of the decoration must be cleaned of blackness and dirt;
- heat the joints to a temperature above the melting point;
- place a piece of solder with flux at the joints;
- heat the surface of the product with a soldering iron so that the solder begins to melt and distribute evenly;
- You should wait until the decoration has cooled, and then clean the remaining joints with sandpaper.
Soldering procedure
Soldering gold will require you to first prepare the surface. We clean the soldering area and treat it with flux. In this case, a protective film is formed on the surface of the gold, which will resist the appearance of oxides and subsequently allow the solder to spread evenly over the surface of the gold.
Brands and properties of solders.
Naturally, this procedure is performed immediately before soldering. Before this, the chain must be returned to normal condition: the links must be connected using the damaged part. As a rule, this is one of the links of a chain or clasp. It is at this point that the connection is made. The entire chain parts are put on the open link, we insert a metal cylinder of the appropriate diameter inside the damaged link and crimp the link using pliers (or tweezers).
The chain is connected, the soldering area is treated with flux - everything is ready for the final procedure. First, we prepare a small piece of solder of a suitable size to repair the damage. He should be in close proximity to the repairman.
You may be interested in: Website about sewerage.
Security measures
When repairing jewelry at home, be careful, the soldering process can be dangerous. In particular, when flux and solder are heated, toxic substances are released into the air, so you need to solder the chain in a well-ventilated area. An acid solution can cause a chemical burn (not only to the skin, but also to the respiratory tract), and a fire can occur from an open burner flame.
If you have never soldered anything before (we are not just talking about jewelry, but in principle about working with a soldering iron or torch), then think again before you start repairing the chain yourself. Maybe you should entrust the repair of your favorite jewelry to professionals?
Product preparation
Before jewelry soldering, the product should be secured in a vice or other suitable method. The damaged part of the decoration must be returned to its original shape.
You may have to tinker with this, but this is a mandatory procedure. This may require additional equipment. Selected cylindrical parts will help restore the original shape of a ring or chain link.
Such a part is inserted inside a deformed ring or chain link, after which the product is gently crimped from the outside with pliers until the desired result is achieved. Of course, the chain must be assembled, the damaged link or clasp connected to other links.
After the shape of the product is restored and it is securely fixed, the place of future soldering is cleaned, degreased and covered with a layer of flux. Flux creates a protective film on the surface of gold that prevents oxidation of the metal during the soldering process.
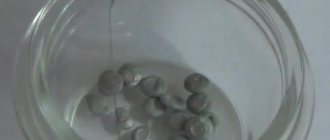
Now you can start the actual soldering. You can buy flux for soldering gold ready-made or make it yourself, taking 10 g of borax and boric acid per 100 g of distilled water.
The solution is boiled, and then the gold item is dipped into it and also boiled for several minutes. As a result, the gold is covered with a protective layer.
Processing the soldering area
Once you've finished and the piece has cooled, it needs to be processed to make it look nice. You need to clean the surface with a file. This work is complex and painstaking; you will have to deal with small details of gold, which is difficult to grind.
An engraver or drill would be good for this. It could also be used for surface polishing. If you work carefully and diligently, you can solder the product so that it does not differ from new.
With certain skills in working with a gas burner, soldering a gold product is not so difficult. Even if you don’t have such skills, you can cope quite successfully if you follow the instructions exactly.
Repair of lock in jewelry, Podol. Jewelry workshop in Kyiv “Ametist”, Center, Kyiv
Repairing a lock on a piece of jewelry , in particular repairing a lock on a chain in Kiev or repairing a lock on a bracelet in Kiev is one of the types of repairing jewelry chains or repairing bracelets, which is carried out in our jewelry workshop in Kiev “Ametist” . Jewelry chains and bracelets are the most common jewelry that each of us probably has. They can be gold, silver, jewelry, or consist of different metals. Also, jewelry chains and bracelets come in different weaves, and can be solid or hollow (they have become popular recently due to their low weight). Chains are usually worn every day. Therefore, they are prone to frequent breakdowns. One of the parts that is very often the first to break is the lock.
What defects can you fix yourself at home?
- Small cracks on the inside of the product. The location of the chip is especially important for wide chains, on which poor-quality seams after soldering are clearly visible.
- Break of one link in a multi-level weave. The chain did not break completely. One edge of the link has bent, which needs to be bent (soldered) so that it does not cling.
- The ring on the lock was bent and torn. You can solder it yourself, since it is located at the back of the decoration. And even if your gold seam is not the most beautiful, it will not be visible.
Complete breaks, defects on the outer side of the weaving, loss of several links - all these situations are best left to the shoulders of the master. A jeweler can not only solder a gold chain, but also add a little metal to recreate the original appearance of the threads.
Pin lock
Having heard such a name, it is difficult to imagine how the product is fixed. In fact, the lock looks almost the same as magnetic rectangles. The only difference is that on one side there is a small pin with a thread, and on the other there is an inlet hole.
At first, the lock closes and opens with effort, but after some use the process becomes noticeably easier. How to make a clasp on a pin bracelet? It is attached in the now familiar way: by gluing it to the base of the product. It is worth noting that this type of lock is most suitable for men's bracelets or those made in a classic style.
There is an even simpler version of the pin. A ring is attached to one side of the jewelry, and a horizontal pin is attached to the other. The lock is fastened by threading the second part into the hole.
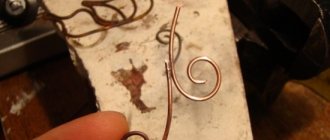
Design – Classic hook
Our next design is a very simple hook and ring clasp. This is the simplest design among the four - if you're a beginner, be sure to try this one first.
Bend a piece of wire using the largest diameter of step pliers or a marker as shown in Figure 2. Then bend the longer end into a small loop using the pliers and trim off the excess. Do the same for the other end, but make sure that these loops are not the same size and are slightly different lengths. Use a hammer to knock out the hole between the two loops; it should be very narrow.
We connect the hook with the ring - your classic hook is ready for use.
How to solder gold at home?
Soldering gold step by step will look like this:
- we prepare or buy solder suitable for the required gold standard;
- apply flux beyond the boundaries of the soldering area and wait until it spreads over the surface;
- you will need to get a fevka - a bent tube with a hole at the end to supply a narrow jet of flame from the burner;
- we join the parts to be soldered and after heating them, introduce solder;
- After cooling, remove excess solder using a needle file.
This type of soldering can be done independently. If the work is done carefully, no seam should be visible in a small area.