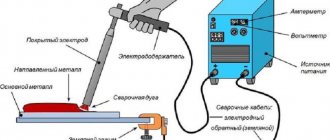
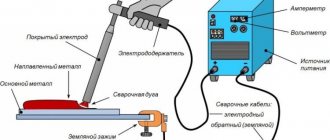
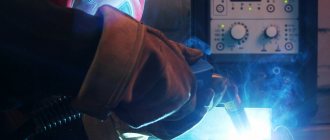
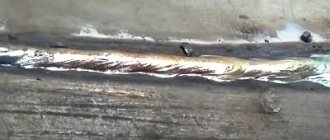
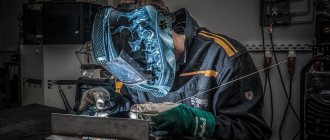
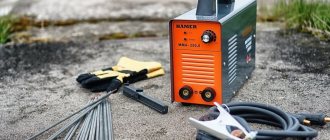
It is most convenient to weld thin metal using argon arc welding. With TIG inverters you can create narrow joints with minimal heat input. You can quickly weld thin metal with a semi-automatic MIG. But when you only have an RDS inverter at hand and you need to connect two sheet workpieces of small cross-section, difficulties may arise. Let's look at common mistakes beginner welders make when working with thin metal, as well as tips and MMA equipment that will help cope with this task.
Most new welders get corneal burns when welding thin metal because they try to grip the sides without a mask. The fact is that the lower the current, the less bright the electric arc. Under such conditions, it is difficult to see the connection line through a dark filter and accurately place the tacks. After welding without a mask, your eyes hurt a lot, you may feel a feeling of “sand” under your eyelids, and the blood vessels in the eyeball turn red.
Selecting a welding machine
To be able to weld two thin-walled sides of a product at home, a competent selection of an RDS inverter is required. Not every model is suitable for this task. When choosing an MMA machine, pay attention to the minimum value of the welding current. When purchasing, most people look only at the maximum threshold to determine how thick a workpiece the inverter can “cook.” When you have to frequently weld thin-sheet steel, the lower amperage range is important.
It is easier to weld thin metal with coated electrodes if you use an MMA inverter with the additional functions “Arc Force” and “Anti-stick”, as well as “Hot Start”. For example, BARSVELD Mini ARC-160, ideal for welding thin-sheet steel, is equipped with these three modes.
Additional functions
For example, to work with a cross-section of 0.8 mm, it is necessary to reduce the current to minimum values of 10-20 A. But not all RDS inverters are capable of this. For some, the lower threshold is limited to 30 A.
"Fast and Furious" (Arc Force) HideRead more
The function allows you to automatically change the strength of the welding current to prevent the attenuation of the electric arc. For example, you set the value to 40 A and are welding. Bringing the electrode tip too close may cause the arc to go out. At such a moment, the device “feels” the reduction in the air gap and briefly adds another 10 A (the total with the initial setting is 50 A).
This is enough so that the arc does not go out and the welder equalizes the distance between the electrode and the workpiece. As soon as the situation has stabilized, the inverter itself reduces the current to the base 40 A (or whatever you set on the strat). Therefore, burn-throughs are excluded. The function is useful both when welding thin steel and when working without a hand support, when it is more difficult to control the air gap.
"Antistick" HideRead more
This function helps save consumables when welding thin metal. Since the arc is short, sticking of the tip of the rod to the surface of the workpiece is inevitable. When this happens, the electrode must be wiggled sideways to disengage it from the workpiece. This will cause the coating to fall off. Afterwards, it is necessary to burn the tip on a rough workpiece, which slows down the work and leads to excessive consumption of electrodes.
When the tip is stuck, the inverter cuts off the welding current from the cables. The welder easily disconnects the electrode without destroying the coating. As soon as the circuit is open, the machine restores the current supply and you can continue welding without delay.
“Hot Start” HideRead more
It is more difficult to ignite an arc when welding thin metal with an electrode due to the low current. It is required to actively knock on the surface of the product and catch an electrical discharge of low height. The tip was slightly removed from the surface and the arc went out. To simplify the first ignition when the electrode is cold, the Hot Start function is useful. The mode gives increased voltage at start and reduces it to a safe voltage when the arc is lit. It saves time, it’s easier to cook, and you’re less irritated.
Important!
When choosing an MMA inverter for welding thin iron, pay attention to the presence of all three functions in the device.
It happens that the equipment has only one additional mode, for example “Anti-stick”. In this case, the model is much inferior to those that have all three auxiliary functions. Practice shows that welding of thin iron occurs with better quality when devices that produce direct current are used. The type of DC current must be specified in the characteristics of such equipment. AC/DC models that can switch between alternating and direct current are suitable.
Features and advantages of welding a car body with an inverter
Inverters are high-tech equipment, which, meanwhile, is quite simple to operate, for example, in terms of training in welding technologies (the training period does not exceed one week for beginners). These devices are also distinguished by high productivity, which makes this type of welding equipment especially common in welding work on automotive equipment.
Inverter welding machines themselves have a number of advantages, including:
- rapid heating of the metal being welded;
- no dependence of the device’s performance on the stability of the electrical network in terms of maintaining voltage;
- economical operation of the device in terms of electricity consumption (compared to a semi-automatic device, the inverter absorbs 20% less electricity);
- low values of molten and burned metal during the welding process;
- relative ease of use (compared to semi-automatic devices).
However, it should be understood that inverters are in the same price range as semi-automatic devices, and in some cases they can exceed it in cost (depending on the brand used).
Selecting Electrodes
First of all, we note that for welding thin sheet metal it is important to choose the correct electrode diameter. 4-5 mm rods will create excessive resistance and will not allow the arc to burn normally at low currents. Therefore, when welding thin sheet steel, electrodes with a diameter of 1.6-3 mm are used. The thinner the metal, the smaller the diameter of the rod.
Next, you should pay attention to the characteristics of the electrodes. Let's take for example Barsveld OZS-12 ⌀ 2.0 mm (Premium). They have a rutile coating, which provides:
- easy initial and re-ignition;
- absence of a dielectric tip at the end during attenuation (convenient for reuse after a while);
- beautiful seam;
- light welding on rusty or primed metal;
- low filler metal spatter;
- soft arc burning.
Having purchased OZS-12 ⌀ 2.0 mm (Premium), you will be able to weld thin metal with direct or alternating current in any spatial position. Slag after welding is removed very easily. Good electrodes for working with sheet iron are ANO-21 ⌀ 2.5 mm (Premium), belonging to the E46 type. From the ESAB brand, we recommend ESAB MP-3 electrodes ⌀ 3.0 mm if you are going to weld iron with a cross-section of 1.0-1.5 mm.
The listed electrodes have a rutile coating, so when the arc extinguishes, a “visor” does not form. Consumables with the main type of coating are prone to this effect. The presence of the visor makes it more difficult to re-ignite the arc, since more forceful tapping is required to break the tip of the coating and ensure contact of the conductive rod with the workpiece.
If more than 4 months have passed since the production date of the electrodes, we recommend calcining them first. At home, this can be done in an electric oven, heating it to a temperature of 170-200 degrees. Then excess moisture will be removed from the coating, during welding the arc will not crack much and splash the metal, the seam will be neater.
Galvanized welding
Galvanized steel is the same thin sheet, only coated with a layer of zinc. If you need to weld it, you will have to completely remove this coating on the edges for welding, until you get clean steel. There are several ways. The first is to remove it mechanically: with an abrasive wheel on a grinder or grinder, sandpaper and a metal brush. There is another way - burn it out by welding. In this case, they pass the electrode twice along the seam. In this case, zinc evaporates (it evaporates at 900°C), and its vapors are very toxic. So this work can be carried out either on the street, or if there is an exhaust hood at the workplace. After each pass, you need to knock off the flux.
It is better to weld galvanization outdoors: evaporating zinc is very harmful
After complete removal of zinc, the actual welding begins. When welding galvanized pipes, to obtain a good seam, two passes with different electrodes will be needed. The first seam is welded with rutile-coated electrodes, for example, MR-3, ANO-4, OZS-4. In this case, the vibrations have a very small amplitude. Make the top seam wider. It is approximately equal to three electrode diameters. Here it is important not to rush and cook well. This passage is used by electrodes with a basic coating (for example, UONI-13/55, UONI-13/45, DSK-50).
Read more about choosing electrodes for inverter welding here.
Machine settings for welding thin metal
Because the metal being welded is thin, it is important to set the manual arc welding inverter to reverse polarity. This means that the electrode holder cable connector is inserted into the socket with the “plus” sign, and the ground cable is connected to the “minus” socket. Due to reverse polarity, the heat of the electric arc is concentrated at the tip of the electrode, and not at the workpiece. This happens according to the laws of physics, since electrons move from “minus” to “plus”. With reverse polarity, the thin metal overheats less, which helps reduce the number of burns and thermal deformations.
A novice welder must be able to correctly set the current strength when welding thin metal with a coated electrode. We offer recommendations for setting up the inverter in the table.
| Thickness of welded metal, mm | Electrode diameter, mm | Current strength, A |
| 0.8 | 1.6 | 10-20 |
| 1.0 | 2.0-2.5 | 25-35 |
| 1.2 | 2.5 | 40-50 |
| 1.5 | 2.5-3.0 | 45-60 |
Technological process
Welding thin metal with an inverter.
Step-by-step instructions for the welding process will allow you to cope with the work without much difficulty. To begin with, it is necessary to ensure safety measures when carrying out work, which include the use of protective clothing - a welding mask, gloves, clothing made of thick, coarse fabric. Do not use rubber gloves.
You can then follow the following instructions:
- First, the current is adjusted and an electrical conductor is selected to work with the inverter. The current indicator is taken based on the characteristics of metal parts. The required diameter of the electrode is selected and inserted into the holder. The ground terminal is connected to the part; the electrical conductor should not be brought too sharply to avoid sticking.
- Ignition of the electric arc starts the operation of the inverter apparatus. To activate the arc, point the electrode at a slight angle to the welding line. The electrode should be held until a small red spot appears on the surface - this means that a drop of hot metal is located underneath it, which will facilitate further welding along the entire length of the seam.
The electrode is held from the welding site at a distance corresponding to its diameter.
- By following these steps and choosing a specific welding method, there is a great chance of getting a high-quality and even seam. Scale and scale formed at the welding site are removed with a small hammer.
Tips for welding thin metal with an electrode
So, let's look at the technique of welding thin metal in practice and give a number of useful tips from real welders. We use an RDS inverter welding machine with direct current and set the current strength according to the values given in our table. To prevent the sheet structure from moving, we recommend securing it with clamps. Edge cutting when welding thin iron up to 4 mm is not performed.
Place the sides of the parts to be joined as close to each other as possible. There is no need for a gap here. If an overlapping connection is structurally permissible, use this - there will be no burns or the roller falling down.
Next, follow our recommendations:
- Light the arc on the rough workpiece and only then start welding. This way you won’t have to knock on the product, and there will be no traces of arc contact on the front side of the structure.
- Keep the arc not strictly in the center of the joint, but on one side of the workpiece. This will help avoid burn-through at the very beginning of work.
- Move the electrode quickly with minimal lateral oscillatory movements.
- Try to keep the tip of the electrode as close to the surface of the workpiece as possible. The arc will be clearer, the filler metal will be transferred more easily, and there will be normal penetration. But a short arc requires skill (“a trained hand”), so practice on a rough product with a similar cross-section.
- To prevent the metal from falling through on the back side of the seam, use a backing. An iron table will not work - the product will stick. It is best to place a plate of graphite or copper.
- If burns occur despite the minimum welding current, weld the seam with an intermittent arc. We welded 5 mm and removed the tip of the electrode from the weld pool for a second. Then the arc was excited again and 5 mm was welded. This slows down the process, but allows the deposited metal to cool.
- Hold the electrode at an angle of 30-45 degrees. A right angle to the product increases heating and promotes burns.
When the settings of the RDS device do not allow you to reduce the current further, use a ballast rheostat. If the work is one-time and purchasing a ballast is unprofitable, connect a steel spring to the ground circuit, placing it between the clamp and the product. By rearranging the mass clamp along the coils of the spring, you can regulate the current strength due to resistance.
To minimize thermal deformation, follow the welding order of long seams. For example, when welding a large container (shower tank, car fuel tank), start welding from the end of the joint, leading the seam towards you. Boil 8-10 cm at a time and move forward. The new seam ends at the beginning of the previous one. Each short penetration will bend the surface inward, but due to the large number of seams, such “waves” will be barely noticeable than one large deflection of the plane when welding with a continuous seam from left to right.
Features of welding thin galvanized sheets
To weld galvanized steel, you will have to completely remove zinc from the edges being joined. To do this, you can use a sander or hand abrasives.
You can get rid of the galvanized layer by burning it out using a welding machine. But the welder needs to be especially careful. Zinc vapor is toxic to humans and can cause severe poisoning if ingested. You can only work in an open area or indoors, provided there is a powerful exhaust hood at the workplace.
Selecting a welding helmet
As we mentioned at the beginning, when welding at low currents, the light from the arc is less bright, so the joining line is difficult to see. Due to insufficient lighting, you can even put a stitch bypass. It is more convenient to weld thin metal with coated electrodes in chameleon masks with a darkening range of 4-8 DIN or 9-13 DIN.
Unlike a mask with a conventional light filter, in a chameleon you can precisely point the tip of the electrode at the junction. This reduces the number of “bunnies” and helps keep the front surface of the product clean. Adjustable darkening power from 4 to 8 DIN makes it easy to adjust to different low welding currents.
We recommend buying a BARSVELD MS 307 mask with ASF-707 with a range of 5-8 and 9-13 DIN, which has a large viewing window of 98x87 mm. Thanks to this, a good overview is maintained in all spatial positions. Full Color technology conveys everything in natural colors and it will be easier for a beginner to distinguish the molten slag of the electrode coating from the liquid metal. The price of the mask is a little more than 5,000 rubles, which makes it quite affordable even for household welding in a garage or country house.
Rules for processing the body after welding
After all welding seams have been completed in full, they must be cleaned using a grinder. The result of such cleaning will be a complete picture of the condition of the seams, as well as whether there are unchecked areas. If there are such unwelded areas, it is necessary to perform repeated welding work on them.
If there are no uncooked areas, the next step is to prepare the body for sandblasting and subsequent painting. Such preparation most often consists of puttying all body elements that require this type of treatment.
Welding techniques and methods
For welding thin sheets of metal, semi-automatic models of welding machines, as well as manual arc units, are suitable. It is much easier to work with a semi-automatic machine, since some of the welding processes are automated. This allows you to overcome some of the difficulties when working with thin sheet metal.
The advantage of semi-automatic machines is also the absence of the need to change electrodes during operation, because the wire is fed stably. This speeds up the work process, which is extremely important when carrying out large-scale projects.
On a note! For domestic purposes, for non-volume operations, craftsmen often use manual arc welding due to its low cost and the ability to make the unit with their own hands.
When welding thin sheets of metal, it is important not only to have good equipment, but also to understand how to weld such material.
Scheme of welding a thin sheet of metal.
There are different welding techniques and methods that are relevant for this case:
- When performing continuous welding of an entire seam, it is important to select the correct current. The optimal range is 40-60 A. It is equally important not to make a mistake with the speed of moving the electrode for welding thin metal. If you move too quickly, the root of the weld may not be welded through. And if you move too slowly, the metal surface can become covered with holes.
- Intermittent welding is also called spot welding. It is used more often than other technologies in the case of thin sheet metal. To implement this technology, thin electrodes are required, with one end of which dots are placed on the metal or short lines are drawn with equal spacing.
On a note! The peculiarity of intermittent welding is that even very thin metal sheets can be welded this way. The main thing is to set the welding current a little higher than usual, and to achieve rapid movements in order to prevent the material being welded from cooling down.
Experienced welders recommend adhering to the following rules when working with manual units and thin sheets of metal:
- High-quality welded joints can be obtained subject to constant monitoring of the parameters of the weld from all sides during the process of electric arc welding with an inverter.
- When working, it is important to keep the electrical conductor as close to the metal surface as possible until a red spot appears on it. It is direct evidence that there is a metal drop under the electrical conductor, due to which the metal sheets are connected.
Let's sum it up
Welding thin-walled metal structures has a number of features that are important for an inexperienced welder to understand: you need to know which electrodes should be used, and also understand how to properly weld metal with an inverter.
Electrodes used for welding thin metal must be moved along the weld quite quickly so as not to allow the surface to cool. But at the same time, the movements should not be overly rapid, otherwise failures in penetration, which reduce the strength of the connection, cannot be avoided.
How to weld a car body with a semi-automatic machine
Welding is carried out with short stitches or points (welding rivets). In the second case, a hole is drilled (usually at the site of the factory point), after which it is welded, both parts are fused and the gap is filled with metal.
If the metal is very thin, then there is no point in greatly reducing the welding current. You need to use short touches, quickly pressing the torch button, to throw the metal wire onto the sheets, not allowing them to burn out. After which it is more confident to melt the resulting thickened seam, giving it a marketable appearance and strength.
You cannot cook with glasses, especially without any protection at all, closing your eyes at the moment you press the button. It is necessary to use a “chameleon” type mask, which automatically shades when the arc is ignited and returns transparency immediately after the button is released. All processes will be perfectly visible, quality is guaranteed.
