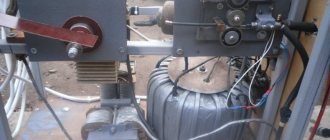
Pulsed welding is based on the traditional electric arc method, but the current is supplied to the poles in a pulsed mode. What is it from an applied point of view - a seam formed by even drops of melt. The pulse welding mode allows you to control the process of pool formation, significantly expands the capabilities of the traditional arc method, is used for dissimilar metals, and forms a diffuse joint.
DIY pulse welding machine
At home, you can make a welding machine with your own hands.
Spare parts for this device can be easily found on sale, but some subtleties must be taken into account. Particular attention must be paid to transistors, as they quickly fail. Therefore, it is better not to skimp on these details. A homemade welding inverter is equipped with four transistors, which are connected to insulated radiators.
In order to correctly assemble a pulse welding machine, it is necessary to calculate its power and current. Examples of calculations can be viewed on the Internet. The installed filter will help maintain a voltage of 220 V. To assemble your device, you will need tools and special devices, such as an oscilloscope, soldering iron, multimeter, voltmeter, etc. During assembly, safety precautions must be observed.
Technical nuances
Before starting work, the energy receiver must be connected to the power supply to charge it to the required level. Pulse welding itself takes very little time, since it uses the energy stored in the receiver. This kind of welding can be done with your own hands; it is not at all overly complicated.
With this method, the unpleasant phenomenon of splashing droplets of molten metal is perfectly controlled and minimized. There is an excellent opportunity to produce high-quality welds almost at home.
Seams are formed due to the melting of individual portions of metal followed by coating.
The most important point is the correct setting of the pulse and pilot arc modes. If the mode is correct, the process will go quickly, correctly and, most importantly, safely, without any craters in critical joint areas.
Pulsed DC welding
The rigidity of the regime is a technological feature of this method. It's all about the pulse duration. If you change it, all welding parameters will change.
One of the important advantages is the ability to control and minimize metal crystallization. You can change the shape of the weld pool. Additionally, the risk of weld deformation can be controlled and reduced.
This method is often used to join metal with edge thicknesses greater than 3 mm.
Micropulse welding
Pulse welding technology was developed in dentures in the form of arc microwelding. Its advantages lie in the feasibility of using this technology when welding such thin-sheet dental metal as titanium. The micropulse welding machine used has proven itself well in dental practice. This device is capable of joining any dental alloys, including titanium. In terms of the quality of the weld, it is not inferior to a laser machine, but at the same time it costs much less. Therefore, even small dental clinic owners can afford it.
The micropulse welding machine has a closed housing that protects against sparks and flashes, and is also equipped with a convenient tip and bright LEDs, which allows you to work with maximum convenience. To work with such a device, no welding skills are required.
Advantages and disadvantages
The pulse-arc welding method was developed as a more versatile and productive alternative to the arc method. Among its advantages are:
- eliminating possible defects in the form of burns and non-fusion;
- no metal spattering during the welding process;
- economical consumption of welding wire and electrodes;
- Possibility of welding metals of different compositions;
- Due to the small number of defects that occur, the processing of weld seams is significantly simplified.
Disadvantage of the pulse-arc welding method: this method is not applicable for large welding volumes.
Types of Welding Machines
The modern market is filled with a fairly wide variety of welding machines, but not everything is advisable to assemble with your own hands.
Depending on the operating parameters of the devices, the following types of devices are distinguished:
- on alternating current - delivering alternating voltage from the power transformer directly to the welding electrodes;
- on direct current - producing constant voltage at the output of the welding transformer;
- three-phase – connected to a three-phase network;
- inverter devices - delivering pulsed current to the work area.
The first version of the welding unit is the simplest; for the second, you will need to modify the classic transformer device with a rectifier unit and a smoothing filter. Three-phase welding machines are used in industry, so we will not consider the manufacture of such devices for domestic needs. An inverter or pulse transformer is a rather complex device, so to assemble a homemade inverter you must be able to read schematics and have basic skills in assembling electronic boards. Since the basis for creating welding equipment is a step-down transformer, we will consider the manufacturing order from the simplest to the more complex.
AC
Classic welding machines operate on this principle: the voltage from the primary winding of 220 V is reduced to 50 - 60 V on the secondary winding and is supplied to the welding electrode with the workpiece.
Before you start making, select all the necessary elements:
- Magnetic core - stacked cores with a sheet thickness of 0.35 - 0.5 mm are considered more profitable, since they provide the least losses in the iron of the welding machine. It is better to use a ready-made core made of transformer steel, since the tightness of the plates plays a fundamental role in the operation of the magnetic circuit.
- Wire for winding coils - the cross-section of the wires is selected depending on the magnitude of the currents flowing in them.
- Insulating materials - the main requirement for both sheet dielectrics and the native coating of wires is resistance to high temperatures. Otherwise, the insulation of the semi-automatic welding machine or transformer will melt and a short circuit will occur, which will lead to breakdown of the device.
The essence of the process
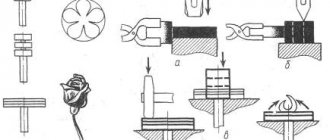
The principle of pulse welding.
In short, this is a process of sequential melting of the metal of the workpiece at certain points with the next stage in the form of coating.
The main element of this process is the so-called low-power pilot arc, which continues to operate in stops between repeating pulses and transmits the pulse current only partially.
This arc has virtually no effect on the metal between pulses; it burns perfectly and steadily in space. The second state of the same arc is pulsed, which melts the metal at the points of application.
The ratio of currents from the arc in different states - pulsed and standby - must be correct, which can speed up welding and improve the quality of the seam.
The possibilities of classical gas-shielded arc welding are greatly expanded if the metal is melted under the influence of a pulsed arc.
Its main feature is a special mode for turning on and off the arc, which is determined by the program depending on the nature of the metals of the workpieces being connected, the thickness of their edges and the position of the seams in space.
Short pulses are produced using the energy of a special battery, which is pre-charged from an electrical circuit. The main technological feature and advantage of the method is the ability of pulse welding to form permanent joints of metals with completely different compositions.
Equipment for pulse welding requires special equipment - this is a special specialized pulse welding machine with certain consumables. The pulse machine generates dosed welding pulses.
Consumable materials include various types of electrodes - consumable and non-consumable.
The pulse welder includes the following elements:
- low frequency rectifier;
- another high-frequency rectifier;
- welding inverter device;
- transformer;
- electronic control unit - plateau;
- working shunts.
Electrical diagram of a pulse welding device.
The two pulse welding methods are determined by the choice and use of electrodes:
- using non-consumable electrodes;
- using consumable electrodes, eliminating the disadvantage of the process in the form of splashing drops of molten metal.
One way or another, this is a controlled, repeating process of transferring molten consumable metal in a protective gas environment.
Here's how it happens:
- A drop of molten metal from the consumable wire is separated and moved to the workpiece under the influence of a powerful impulse.
- Immediately after this, the strength of the welding current drops to a level that can only support the arc - the arc becomes “standby”, of low power.
- The process of cooling the metal in the weld pool begins instantly.
- An exact repetition of the same cycle of droplet transfer under a pulse begins, with a drop in current, cooling, etc.
From the point of view of the electrical component of the pulse welding process, the device uses the transformation of mains voltage into rectified direct voltage, after which it turns into voltage with a high frequency.
DIY pulse welding
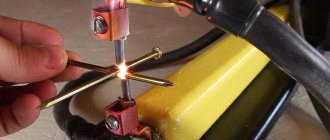
Pulse welding - what is it? In essence, this is ordinary electric arc welding, during which additional short-term pulses are applied. Please do not confuse this type of welding with spot welding. Pulsed spot welding and pulsed arc welding are two radically different methods of joining metals.
But what if you want to try this method of joining metals in your practice, but do not want to spend a lot of money on buying a high-quality welding machine? There is a solution! You can make homemade pulse welding. Pulse welding can be assembled on your own in one and a half to two hours, and all components are inexpensive. In this article we will tell you in detail how to make pulse welding with your own hands and what is our experience in using a homemade welding machine.
Pulse Welding Assembly
Converter
Let's start by assembling the converter. Which is also called the power part of the welding machine. Below you can see a detailed assembly diagram.
We have also provided several tables with specifications of the components used.
Control circuit
Below is a clear and working control diagram, and a small part of the device’s startup diagram is also visible.
As when assembling the converter, we have provided several tables with the specifications of the components used.
Pay
Below you can see a schematic image of the printed circuit board.
And here is the layout of all the elements on the board.
Please note that the “soft start” is located on the control board.
Complete device
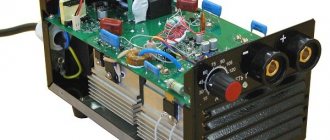
Below you can see the assembled device. This is its simplest form. What is missing is a housing with fans, a control board (it needs to be attached to the housing itself), a connector for welding current, as well as a surge protector and a circuit breaker (also attached to the housing).
Application experience
Our experience has shown that a device assembled according to these circuits works almost flawlessly. We were pleased with the functionality and quality of the resulting seams. Of course, with the help of such a unit you will not be able to perform professional welding work, but it is not necessary. This homemade welder is suitable for pulse welding of a fence or greenhouse. In a word, it will not let any home craftsman down, and its assembly will be very cheap.
The welder assembled according to these diagrams is designed to work on a 220V network. But in our memory there have been situations when the voltage was unstable, especially in the country. Nevertheless, the arc burned stably and was ignited quite simply. Yes, this is not professional micropulse welding, but still. By the way, we recommend using only consumable electrodes when working with such a homemade device. Welding with a consumable electrode is much more effective and stabilizes the arc quite well.
Naturally, we needed to spend our own time and effort to assemble it. But the final cost of a homemade pulse welding machine turned out to be several times lower than that of budget models from the store. At the same time, the homemade device copes with its functions perfectly.
Classification of species
Pulse welding is divided into four types:
- capacitor using devices with a huge range of current. Excellent for welding aluminum parts;
- rechargeable, which uses devices with alkaline batteries, copes well with short circuits in the network;
- inertial using the kinetic energy of a powerful flywheel;
- electromagnetic with the production of mechanical energy using a magnetic field. The elements are attached by magnetic forces combined with high pressure.
Advantages of a homemade device
In addition to the price, a homemade pulse welding machine has many other advantages over models sold in stores. The first advantage is low current consumption. If you plug an ordinary device from a store into a household outlet at your dacha and weld a gate, for example, you will soon receive electricity bills and be unpleasantly surprised. In addition, connecting such a device to a household outlet is simply dangerous; the machines may not withstand such power.
Don’t forget about the dimensions of purchased devices. It is simply impossible to calmly carry them in your hands from place to place. In factories, welders simply use very long wires so as not to move such a device around the workshop. However, the price for such wires is very high, and we don't think you'll want to spend an extra $100 on cables. But the homemade device weighs little and can be easily moved.
Also, purchased devices have their own production capabilities, and they rarely exceed 80%. And often they are at around 50%. This means that such a device simply cannot reveal its full potential. This happens because a large and technically complex welder gets very hot and takes a long time to cool down. For this reason, you will also not be able to cook for more than 2-3 minutes at a time.
A homemade welder assembled according to our diagrams does not have such disadvantages. There are no reactive currents in it, so almost all electrical energy is used. You can easily connect such a welder to a home outlet and not worry about electricity bills and possible operating time. After all, the power of our homemade device is only slightly greater than the power of a regular iron.
Using a homemade pulse welding machine, you can cook for more than 20 minutes, which is definitely longer than the allotted 2-3 minutes for the machine in their store. And the weight of such a homemade device does not exceed 10 kilograms. This is what the home handyman needs.
What other advantages are there? Well, you can reduce the cost of the design even more at the assembly stage. For example, to use wires with a smaller cross-section as welding cables, 12 square millimeters is enough. And to power the device, you can use wires from household extension cords.
Peculiarities
Do-it-yourself welding using a homemade welder has a number of features. We will talk about them below.
During work, the arc may burn unstably. To fix this you need to use a transformer with a high degree of inductance. But keep in mind that in this case the current value may decrease. This is, of course, a minus. After all, such welding machines often operate with alternating current and, by default, have a small current adjustment range, and at the same time a low efficiency.
But for devices operating on direct current, the current itself is stabilized thanks to a separate choke. Some models may have two throttles at once. Therefore, the arc recovery time is significantly reduced, and the value of the welding current increases.
The conclusion is obvious: the welder needs to operate on direct current. But keep in mind that you need to monitor the inductance of the inductor. If it is too large, then you will not be able to light the arc normally and the electrode will simply begin to stick to the metal. Is it possible to achieve fast arc ignition and stable welding current? Certainly. But to do this, you need to make sure that the inductance of the inductor is low, while the current frequency is high.
