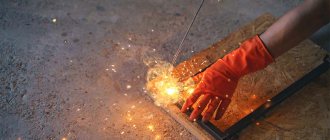
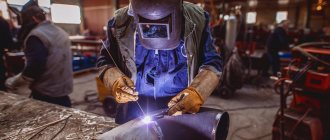
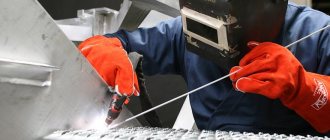
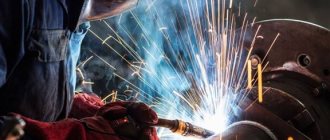
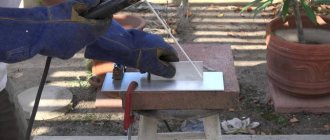
Ignition of the arc can be done in two ways:
- The electrode is touched to the metal being connected, and then held at a distance of 3-4 mm, maintaining the state of the arc . The contact time must be very short, otherwise the electrode will weld to the part;
- As when lighting a match, the electrode with a quick lateral movement (at an angle of about 15 degrees) comes into contact with the workpiece , and then is held at a distance of 2-3 mm.
To obtain a high-quality weld, it is recommended to work with a short arc.
If you bring the electrode at an angle of 90 degrees to the joint, then, when melted, it spreads well and evenly fills the entire weld pool.
It is necessary to maintain the optimal angle of inclination of the electrode. If you cook with a very sharp angle, you will not be able to heat the base metal. In this case, the seam will be small but high. The edges will be uncooked, which will reduce the strength of the resulting structure.
To achieve high joint strength, it is necessary to carry out all welding at the same speed and maintain the same angle of inclination. Then the filler material will evenly fill all the necessary voids, which will ensure high quality welds.
However, there are times when changing the inclination is necessary. An example would be pipe welding.
During the welding process, you do not need to strain too much, do not squeeze the handle of the holder too much, movements should be free.
At the end of the work, to prevent the formation of a crater, you need to lift the end of the electrode.
Types of welding
Different types of welding differ from each other in the way they influence the materials being joined.
- Dugovaya . The most commonly used method due to its simplicity. In arc welding, an electrode is used as a melting tool. With its help, the arc is excited and maintained throughout the welding process. The electrode is selected depending on the grade of metal, and its diameter - on the width of the weld.
- Gas . The heat source in gas welding is the torch. From it, under the influence of strong pressure, a flame emerges, which was formed during the combustion of a mixture consisting of a flammable gas such as acetylene and oxygen.
- Semi-automatic . A mechanical device is used - semi-automatic. The role of the electrode is performed by the wire during its automated feeding. Gas also enters there, the task of which is to protect the molten metal from the aggressive influence of the environment. It is possible to set various modes, which makes it possible to weld multi-pass seams with a semi-automatic machine.
- Automatic . Unlike semi-automation, the entire process is carried out using a welding machine. All you need to do is configure the machine for a specific operation.
- TIG welding . Popular with professionals. I am attracted by its versatility and the ability to weld metal of different thicknesses.
Regardless of what type of welding is used, the correct welding seam will be obtained as a result of compliance with the requirements of the technological process, carrying out preparatory work, and following recommendations.
Shape and extent
The shape of the seam can be convex, even (flat). Sometimes it becomes necessary to make a concave shape. Convex joints are designed for increased load.
The concave areas of the alloys withstand dynamic loads well. Flat seams, which are made most often, are characterized by versatility.
The length of the seams is continuous, without intervals between the fused joints. Sometimes interrupted stitches are sufficient.
An interesting industrial variation of the intermittent seam is the joint formed by resistance seam welding. It is done on special equipment equipped with rotating disk electrodes.
They are often called rollers, and this type of welding is called roller welding. Continuous connections can also be made using such equipment. The resulting seam is very strong and absolutely airtight. The method is used on an industrial scale for the manufacture of pipes, containers, and sealed modules.
Types of welds
How to properly make a weld largely depends on its type.
The geometric parameters of the seam include its width, length, depth, and convex size. Beautiful welds can only be obtained with a successful selection of its parameters for each specific case.
Butt welds are produced by the usual connection of metal surfaces or their ends. This process does not require much time. Metal consumption is also minimal. When connected using a T-joint, the result is a structure that looks like an inverted letter “T”.
The advantage of the method is that it can be used to connect elements that have a significant difference in width. Using a boat installation makes the welding process more convenient and reduces the likelihood of defects. Typically such a connection is made in one pass. Corner connections are usually made at right angles, but slight deviations from this value are possible. A stronger connection is obtained when welded on both sides. The overlap method is suitable for thin parts. When one part is placed on another, welding is carried out on both sides.
An important point in how to correctly lay a welding seam is the successful choice of bevel of the edges. There are various options. In addition, it is possible to join without bevel of the edges, for example, using the overlapping method.
Welding technology
Welding is the joining of metal parts by melting the edges and adding filler metal. As a result, a weld seam is formed, the edges are firmly connected.
Signs of a quality seam:
- Penetration. The weld metal must penetrate the entire thickness. During the welding process, the edges melt evenly; if you melt one side, the bead will turn out uneven.
- Uniformity. The joint must consist of solid metal, without inclusion of slag or shells. Skips and failures are not allowed.
- Strength. After the seam cools, microcracks may form.
- No undercuts. An arc that is too strong “cuts” the edges of the parts, weakening them.
- Convex uniform shape. Both an excessively thick roller and a concave roller are considered defective. This indicates an incorrectly selected current strength.
The seam should be uniform, without unnecessary “scales”, sagging, or bends. The width of the seam is determined from the thickness of the parts being welded. Too narrow will be fragile, too wide will weaken the product.
Before connecting the parts you need:
- Determine the type of connection - butt, overlap, corner, T-joint.
- Determine the spatial position - vertical, horizontal, ceiling.
- Assess the thickness of the parts to be welded.
- Select electrode. The thickness depends on the depth of the seam.
- Determine the current strength. The packs contain approximate recommended tables, but you should rely on your personal feelings. It is better to choose the maximum possible current strength, but do not burn through the metal. The current strength on ceiling connections is lower than on horizontal ones.
- We prepare the parts - we chamfer the thick parts and use tacks to set the gap. We clean parts from rust and paint.
Preparation
A significant point in how to make a beautiful seam when welding is the correct implementation of preparatory work. Since the process is accompanied by the appearance of fire, it is necessary to carefully prepare the workplace of the welder performing the work. Provide him with protective clothing and a mask. There should be no flammable objects or materials near the work site.
The product to be welded must be cleaned of dirt, dust, paint stains, grease and oil residues on its surface. In addition to mechanical impact, the use of solvents or alcohol is permissible.
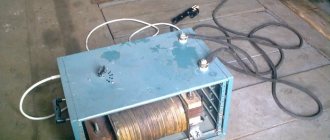
If welding equipment is used, you should first check its functionality. Then select a mode and set the necessary parameters. If the device malfunctions, its operation is strictly prohibited.
How to learn electric welding yourself?
If the goal is not to become a top-class professional, then it will be enough to master the key techniques and understand the basic concepts, and you can already experiment with welding work in the farmstead.
So where to start?
First of all, you will need a welding machine and electrodes. It is better to start with electrodes with a diameter of 3 mm - they are suitable for most tasks and do not put a very heavy load on the electrical network. The devices are divided into three categories based on their operating principle: transformer, rectifier, and inverter. Inverters are the most compact, lightweight and easy to use for beginners.
You need to choose a welding machine based on the purpose of the work.
Then you need to choose a few metal fragments to practice on. You will need a bucket of water, a hammer to knock down the slag, and a metal brush to clean the surface. In terms of overalls and protective equipment you will need:
- a mask to protect the face and neck with a special light filter (for example, a chameleon mask);
- gloves made of thick fabric;
- workwear made of durable fabric, with long sleeves.
Do not forget about safety precautions: there should be no flammable or flammable materials nearby, and the electrical network must be able to withstand the loads that arise during operation of the welding machine
Arc initiation
One of the main points on how to properly weld seams is the proper initiation of the arc. You should choose one of the known methods. The first of them is to hold the electrode in your hand, touch the metal with its tip and quickly move it back to a distance of 2-4 millimeters. Delay threatens the electrode sticking to the metal. The result will be the appearance of an arc. If this does not happen, you should try again.
Another way is to quickly move the electrode along the surface of the metal and immediately lift it a few millimeters. One of the secrets of how to properly apply a welding seam is to maintain a short arc throughout the welding process. This will ensure smooth welding and a high-quality weld with a good appearance. However, if the arc is too short, the process may be interrupted, which will cause a defect in the form of a crater. To continue working, the crater must be welded.
A non-contact method of arc initiation is possible using an oscillator. It serves as an addition to the main welding machine. To initiate an arc, the electrode should be brought closer to the metal surface at a distance of about 5 millimeters. Then you should press the corresponding button on the oscillator and wait for the welding arc to appear.
How to learn?
How to learn to cook with electric welding yourself? For training, you will need to properly prepare your workplace. It should be spacious, well lit and equipped with exhaust ventilation. Personal protective equipment for the welder will also be required:
- clothing and footwear made of non-flammable materials;
- split leather gaiters;
- a welder's mask with an adaptive light filter that protects the eyes from arc welding flashes;
- respirator for respiratory protection;
- Safety glasses or a clear face shield for stripping workpieces and seams.
Tools you will need are a wire brush, a hammer, and an angle grinder.
How to connect the electrode?
It is better to start mastering welding technology with electrodes with a diameter of 3 mm. The rod is inserted into the holder with the end cleared of coating and securely fixed with a screw or spring. The cable from the holder is connected to the inverter terminal. The second cable, which has a clamp at the end, is connected to the second terminal. Ferrous metals are welded using the so-called straight polarity - the positive wire is connected to the workpiece with a clamp, and the negative wire is connected to the electrode.
Two types of connection polarity.
Reverse polarity is used for welding stainless steel and other materials.
Beginning: lighting the arc
The arc is ignited using one of two main methods:
- striking with an electrode along the future seam;
- tapping the workpiece.
For beginners, the first method is recommended. If the electrode has already been welded, tapping helps knock off a thin layer of slag from the tip of the rod.
Electrode tilt
The angle of inclination of the rod to the vertical depends on the type of seam
The “backward angle” position is most often used. The working zone follows the tip of the rod, in this case the greatest heating of the metal is obtained. If you tilt the rod in the opposite direction, the heating decreases. This position is used at the end of the seam and when manually welding thin-sheet structures to avoid the appearance of burns and craters.
Movements
The welder must maintain the gap between the electrode tip and the workpiece within 2-3 mm. If it is necessary to ensure a seam width greater than the thickness of the electrode, complex trajectories for its guidance are used.
A novice master needs to master soft and even straight-line driving at a constant speed. After you begin to get even rollers, you can move on to more complex trajectories.
The main task at the training stage is to learn to “feel” and control the state of the weld pool, without overheating or cooling it excessively.
Trajectories of electrode guidance.
It is better to learn on workpieces with a thickness of 4-5 mm. After mastering the welding of beads on the plate, you can begin welding two parts.
Electrode position
Knowing how to place a weld begins with the ability to choose the desired position of the electrode. Otherwise, a situation may occur in which slagging of the seam occurs, which will not benefit its quality. There are three options for positioning the electrode when welding. The first two assume its inclination in different directions within the same limits, and the third occurs at a right angle.
The “forward angle” method involves moving forward from the welder. It is suitable for welding thin metals in vertical and horizontal positions. With a “backward angle” the movement is towards the welder. Convenient to use over short distances for welding butt and fillet welds. In hard-to-reach places, a 90-degree angle position is used. This is somewhat more complicated, but it solves the issue of welding the ceiling seam.
Electrode movements
An ideal welding seam, or rather an approach to it, is possible with a successful choice of the method of moving the electrode during welding. The most common movements are along the axis of the electrode and along the axis of the seam. But simply moving in a given direction will not bring the desired result. This will create a narrow thread-like seam. It can be used as the first seam in multi-pass welding.
To obtain the desired effect, movements must be oscillatory in nature. This will ensure that the seam is of the required width and ensures good heating of not only the root of the seam, but also its edges.
Trajectories along which oscillatory transverse movement occurs:
- zigzag;
- a loop;
- broken line;
- herringbone or triangles;
- crescent;
- sickle.
All movements are performed transverse to the direction of the weld.
A broken line is used when metal sheets are to be butt welded in the lower position. Crescent is chosen for butt and fillet welds. Before herringbone welding, it is necessary to first deposit a small surface on which it will be held. A simple technique for guiding the electrode in a herringbone pattern is to move it horizontally and then place it a little higher in the middle of the seam.
The crescent motion can be used in TIG welding. In this case, the width of the seam will be large, but it can be controlled during the welding process itself. Transverse movements with a crescent guarantee good welding of the edges of the parts.
The use of a loop provides beautiful connections when welding thin metals. The chain of loops must be continuous. The use of loop-like movements is justified when it is necessary to warm up the edges of the seam well. This is especially important when welding parts made of high-alloy steel. The amplitude of the reciprocating movements is selected depending on the required seam width.
The choice of motion pattern to solve the problem of how to make a beautiful weld depends on its position in space. Seams can be horizontal or vertical. The horizontal seam located at the top is called the ceiling seam. It is the most difficult to perform, since the welder must remain in an uncomfortable position for a long time. A horizontal seam can be performed in two ways - with movements to the left or to the right.
When welding in the vertical direction, the direction of movement of the seam is from bottom to top. Creating a vertical seam is more difficult than a horizontal one, since the molten metal flows down intensively. If you move from top to bottom, then the drops of metal, when solidified, form a solid barrier for the continuation of the seam. Welding a vertical seam should be carried out with a short arc.
Physical principles of the process
Before learning to weld independently at home, a novice electric welder must gain an understanding of the basic principles of electric arc welding (hereinafter referred to as ES) and master the theoretical basics of welding with an inverter or welding transformer, so as not to weld “blindly” without understanding the essence work being performed. Electric welding is one of the most common technologies for creating a permanent monolithic connection of metal parts by fusion.
A similar fusion method is currently widely used when joining polypropylene pipes. The only difference is in the melting temperatures of the metals being welded and polypropylene and the type of corresponding equipment, which is why welding of polypropylene elements is often called soldering, and the heating devices used are called soldering irons.
This technique is based on melting the edges of the elements being connected due to the temperature of the electric arc (hereinafter referred to as ED) igniting in the space between the electrode and the base metal. ED is a long-term high-power discharge in a gaseous environment between the electrode and the base metal. The combustion temperature of ED reaches 7000 degrees. C, which exceeds the melting parameters of existing structural metals and their alloys.
The initiation and combustion of ED proceed in the following sequence:
- When the welding electrode rod comes into contact with the prepared edge of the product under the influence of an electromagnetic field, a short circuit is created in the welding electrical circuit.
- When the electrode is removed from the edge of the product by 2-4 mm under the influence of an electromagnetic field, the ED is ignited. The burning arc ensures the conversion of electrical energy into thermal energy, the power of which is sufficient to melt the end of the electrode rod and the edge of the metal being welded.
- In a stable ED combustion mode, stable melting of the material of the electrode rod and the metal of the part/workpiece occurs. Drops of molten metals form a so-called weld pool in the melting zone, which is a layer of molten metal on the surface of the product.
- Together with the electrode rod, the electrode coating melts, creating a gas or gas-slag protective shell around the weld pool and the ED itself, isolating them from the effects of atmospheric nitrogen and oxygen.
- After hardening and crystallization of the weld pool, a strong permanent welded joint is formed.
Important! When welding two parts, the materials of both parts are mixed in the weld pool. This mixture is endowed with the same strength indicators as the metals of the products being joined, which creates a certain advantage of this method compared to other methods of joining products that prevent melting of the material.
- As the ED progresses and the weld pool crystallizes, a weld seam is formed that directly connects both parts.
- pos. 1 – electrode coating, providing gas protection of the weld pool;
- pos. 2 – welding electrode;
- pos. 3 – gas-protective shell formed during evaporation of the electrode coating;
- pos. 4 – local zone of melting of the electrode rod and the workpiece metal;
- pos. 5 – workpiece;
- pos. 6 and 7 – weld surfaces. Dark shade pos. 7 the solidifying, colder part of the weld is highlighted
In practice, electric welding for beginners is implemented as follows:
- the ED is ignited and subsequently maintained at a certain length;
- the electrode is manipulated to give the seam the desired shape;
- the electrode moves along the welding seam guide line;
- stopping the welding process.
Inclusions
Foreign inclusions are cavities inside a weld filled with slag, flux, oxide, or foreign metal.
When slag particles enter a weld seam, a defect called slag inclusions is formed. The welding seam slags when the edges and welding wire are not properly cleaned of contaminants and oxides. Other reasons why a weld seam slags include: welding with a long arc, low current value, or too high a speed of the welding process. If a multi-pass weld is carried out, then slag can get inside if the previous layers are not cleaned.
Slag sections reduce the cross-sectional area of the weld, which leads to a decrease in strength. Flux inclusions occur as a result of the fact that the flux granules did not have time to dissolve in the liquid metal and did not float to its surface. To prevent this situation, it is necessary to use high quality flux and prevent it from inadvertently entering the weld pool. Foreign bodies may enter the weld pool accidentally.
Inverter selection
The correct weld will be obtained by selecting equipment suitable for the specific welding conditions. The welding inverter is a reliable compact device that is easy to use. The characteristics make it possible to generate current of different magnitudes, which makes it possible to weld parts of different thicknesses and different grades of metals. There is an automatic shutdown system in case of power surges, overheating and too long operating time.
One of the important characteristics when choosing an inverter is its power. The operating instructions indicate the period of continuous operation of a particular model. Additional options make working with it more convenient.
Instructions for a beginner welder
Welding work can only be performed if appropriate equipment is used. Standard kit contains:
- Jacket, trousers, gloves, shoes made of fireproof, durable, strong materials.
- A headdress that completely covers the back of the head.
- A special protective mask for the face and eyes.
To carry out welding, you should use a working device, the electrical part of which is closed with a reliable housing. The electrical cables included in the device must have complete insulation and comply with the electrical characteristics of the device.
The welder's place must be equipped with a work table, light sources, a grounding bus, means of protection against electric shock and fire-fighting equipment.
Possible mistakes
Advice from professionals will help you learn how to get reliable and beautiful welds and how to weld them correctly. The main mistakes that prevent you from obtaining a high-quality seam include:
- Electrode movement too fast. As a result, the seam turns out uneven.
- Excessively low speed of electrode guidance. Burns form, which are a serious defect and are unacceptable in critical structures.
- Incorrect electrode angle . It should be between 30 and 60 degrees. If these values are exceeded, the evenness of the seam is disrupted.
- Welding metals of different grades that have very different characteristics, in particular melting point. When one metal has already melted, and the second has only slightly heated up, welding cannot occur. Cracks appear that need to be repaired.
- Working with wet electrodes. Before welding, they must be dried or even calcined. Humidity causes the arc to burn unevenly.
- Incorrectly selected welding mode, electrode type, current value.
- The arc length is too long or too short.
- Use of welding equipment with an expired verification period.
- Insufficient edge heating. To do this, it is necessary to select transverse oscillatory movements, the scope of which corresponds to the width of the seam.
- A large gap between parts can cause shrinkage cavities.
Beautiful welds cannot be obtained if they have pores. There are many reasons for their appearance in the weld:
- insufficient cleaning of the edges, leaving dirt, rust, and scale on them;
- high moisture content on the edges and electrode;
- presence of drafts in the welding area;
- poor quality electrodes;
- There is a big difference in the chemical composition of the base and filler materials.
Over time, experience comes in how to properly conduct a weld. This is the skill of a welder, whose profession is in demand and prestigious.
How to cook a vertical seam
Due to the fact that the seam is located vertically, and the force of gravity acts constantly, the molten metal rushes down. This is the main difficulty that prevents a novice welder from completing the job with more or less acceptable quality.
All actions of the specialist in this case (in addition to the main work) are aimed at keeping the molten mass within the working area of the joint. Stability in operation helps solve the problem: the electric arc must be constant. It should be kept at the minimum possible distance between the weld pool and the electrode.
Bottom-up welding technique
The most common method is welding in the direction from the lowest joint point to the highest. Thanks to this direction of movement, stable control of the melt is ensured, which is easier to keep within the bath. It is with this method of welding that it is possible to lay a high-quality seam and create a reliable connection.
Naturally, before starting the welding process, you need to prepare the edges of the parts to be welded. They are processed with abrasives in exact accordance with the requirements. The device is configured separately, the required resistance and current strength are set, and the most suitable electrode is selected.
At the first stage, the welder makes several clamps 1-2 cm long, which are evenly spaced along the entire length of the joint. This is necessary to avoid deformation of the surface of the parts being connected as a result of a sharp increase in temperature. When vertical welding, the angle between the electrode and the working surface is maintained in the range of 45-90 degrees.
According to the developed instructions, the welder’s actions consist of four points:
- Connect the electrode to the metal to strike an arc.
- Make several tacks from the middle to the edges. They are located at approximately the same distance, and the number depends on the length of the joint.
- Form a seam in the direction from the bottom point to the top.
- Make sure that the melt does not leak out of the working bath.
There is no need to move the electrode too quickly. In this case, it is impossible to achieve good heating of the workpieces. But you shouldn’t hesitate, since a large amount of melt will cause it to flow down. The speed of movement of the electrode should ensure the optimal amount of melt in the bath.
Along with the forward movement from bottom to top, the welder must also take care of the transverse movements of the electrode in a crescent, herringbone or other manner. It is worth considering that the technique of transverse movement of consumables is relevant only when the thickness of the workpieces being connected is more than 4 mm.
When welding vertically, it is important to go through the joint in one pass without stopping. This is precisely the main difficulty for novice welders.
With experience, the necessary skills are acquired, and vertical welding ceases to be a problem.
Welding technique from top to bottom
Over time, welders easily form vertical seams by moving the electrode from top to bottom. Here you need to know about a little trick, without which doing the work would be very problematic. When igniting an electric arc, the electrode must be placed at a right angle to the working surface. After starting the process, the holder should be lowered a little. Until the moment when the angle between the electrode and the metal is approximately 15-20 degrees.
The electrode is passed through the joint using transverse movements. They can be straight (rectangular), sawtooth or wavy. The choice of method is at the discretion of the welder
It is important that the payment is evenly distributed in the bath and does not leak out of it. This method of vertical welding is more difficult than when moving from bottom to top.
But it is popular with experienced professionals because the result is a higher quality and stronger seam.
