Here I will tell you why and how I made anvil No. 2 from a rail. Why didn’t you like the first version, what were its mistakes and shortcomings? This post will be useful to anyone who wants to make an anvil with their own hands. A few years ago I made my first homemade anvil from a rail and was very pleased with myself.
This is the anvil.
There is a short video with an old anvil in this post: How to make a forge.
But it had shortcomings and errors:
- rounded surface. This is very inconvenient, the forging turns out crooked,
- the welded square hole for the backing tool is held in place only by welding and may fall off under impact load,
- non-standard hole (my mistake),
- wrong base height (my mistake).
I talk more about this in the video below.
In view of the above shortcomings, I decided to turn the rail over and make a square hole in the base of the rail.
A “naked” forge - without a forge - is the height of indecency
To put it pompously, we can say that the forge is the heart of the forge, only there “the steel submits obediently,” turning almost into plasticine. The device is simple: coal burns in the furnace of such a furnace, and a metal billet is placed there, which is heated to the required temperature. The smallest forge can even be built from a tin can. And he will allow you to make forged things as successfully as his respectable “colleague” in the craft. True, their sizes will be appropriate.
The main task assigned to the operation of this equipment is to provide a fairly high temperature for heating the steel. The best option would be a solid fuel fireplace that uses coal. He also has a competitor - the Kuznetsk gas forge.
How I made an anvil with my own hands
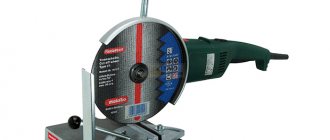
A smaller piece of about 70mm was cut from a piece of rail. The cutting of the rails was done with a large grinder, but some people manage to do it with a small grinder :unsure:
First, I tried to draw a cutting line with a marker on all sides, as evenly as possible, then the rail was pulled to the chair with clamps and the entertaining cutting process began :wacko:, which took about half an hour, because I did not have such experience and often stopped, re-clamped the rail for a more convenient cut, and watched how the cutting was progressing. Experienced craftsmen cut a rail with a grinder in just 15 minutes or less. The cutting process turned out to be not very difficult - first I cut through the top of the rail - the “sole”, then the base, but the most difficult thing was to cut off the middle - the “leg”, because The angle grinder began to jam due to the fact that the cuts on both sides did not match perfectly. In the end it turned out to be easier to make the last centimeter of the cut with a small grinder.
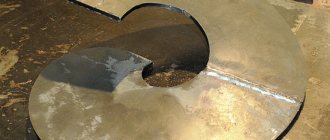
As a result, the rail was cut off, not perfectly straight, but a grinder with a cleaning disk helped - all surfaces were leveled, and the rust was cleared from all sides.
Refinement of the anvil
Also check out these articles
Chandeliers for the kitchen - what to look for when choosing
Advantages of renting a warm warehouse for storing personal belongings
Types of LED Rechargeable Flashlights
My grinding machine helped to bring the surfaces to a good condition, the power of which turned out to be not enough for such a task, but if you didn’t put too much pressure on it, it coped with this task quite well. There was only one problem - the rail got so hot that it burned my hands through the work gloves, and it took a long time to cool down - about half an hour, but I had enough other work to do, so I just left the rail to cool down and switched to other tasks - that’s how it was for me more interesting to work.
I did not bring the sole of the anvil to a perfectly straight state; it remained a little round in shape, because... Sanding it to a completely flat shape would take a lot of time; for myself, I decided that a little roundness of the sole would not hurt me.
After all the surfaces were level and the sharp corners were ground down a little, I drilled two holes for M8 bolts in the base of the rail to attach the anvil to the workbench (for larger anvils it is better to drill four holes for M10, for example).
Next, I covered the bottom of the anvil with masking tape and painted the entire anvil first with primer and then with two coats of spray paint.
How to make
The mass of the anvil must be at least 10 times greater than the mass of the hammer, otherwise unnecessary vibrations occur during forging, reducing the convenience of making deforming transitions. In order to increase the durability of its use, a do-it-yourself rail anvil should not have connecting parts, and therefore is made from a single piece of rail, taking into account the length of the horn (or horn and tail).
Work on obtaining a one-horned anvil is carried out in the following sequence:
- A horn is being made. To do this, one of the ends of the workpiece is sequentially peeled off on a cutting machine or “grinder” in order to obtain a sharp conical part. The final finishing is done with a file; however, for safety reasons, the top of the horn should be slightly rounded. Grinding the horn is mandatory: this will not only subsequently increase the accuracy of forging operations, but will also give the structure a marketable appearance (for example, a souvenir from a rail - an anvil, and a functioning one - will be a wonderful and original gift for a home craftsman).
- Volumes of metal are cut out from both sides of the workpiece in the middle part of the neck, and thus the anvil legs are formed. Four mounting holes are drilled in the legs for bolts or self-tapping screws (for a fixed connection) with a diameter of M16.
- The tool is mounted on a stump/shoe, after which the face is ground “flat” and a blind hole is drilled in it. If the anvil is used frequently, it is worth installing a thick (at least 10 mm) plate made of tool steel grade U12 or even X12M over the face. Dovetail grooves can be milled into the plate to make it easily removable. It is convenient to make 1-2 through holes of different diameters there.
- To make the rim, it is necessary to make three flat grooves on the face with a depth of at least 10 mm using a cutting wheel. The opposite ends of the rim must be strictly parallel to each other. The width of the rim is determined locally, but usually does not exceed 25...40 mm. The prepared surfaces are polished.
The homemade anvil is ready. All that remains is to maintain it in working condition, and during long breaks between regular forging works, lubricate the working surfaces with a conservation thick lubricant.
Step-by-step instructions for making an anvil from a rail
Prepare the work site. Place a piece of rail on the table, mark it with a marker and ruler as follows:
- Measure 40% of the total length of the rails, draw a line;
- Measure half the width of the rail, make a mark;
- Connect the lines and the mark so that you form a triangle or the so-called “anvil horn” on the rail site.
If you still have questions about the correct marking of the workpiece, look at the photos and videos on our website.
Secure the future forging anvil in a metal vice. Turn on the grinder and cut the horn according to the marking lines.
Important! When working with power tools, be extremely careful. The metal vice must be securely fastened to the table surface
The work table should not be loose. To protect your own health, wear a welding mask, protective apron and gloves.
After making deep cuts with a grinder, take a hammer. It will help you speed up the process: use it to beat off the left and right edges of the metal triangle. Be prepared for the edges to be uneven - there is nothing wrong with that, we will process them later.
Take the rail out of the vice, turn it on its side so that the broken triangle is “looking” at you. Use a marker to mark lines leading from the edge of the rail to the inner hole (closest to you). Beat them off with a hammer.
Stepping back an inch from each raw “back” end, draw lines with a marker. Your task is to mark the “tail” of the anvil. Use a grinder to make cuts on the metal, then beat the metal into pieces with a hammer. The "tail" is the functional part of the tool. But since we are creating a home, and not a professional, anvil, whether to carry it out or not is only your desire.
Requirements for a blacksmith's anvil
- Dimensions and weight. For small-sized forgings, you can get by with relatively small anvils that can be installed on a table or workbench. However, serious forging work will require a massive, securely fastened device. Factory devices have standard weights of 5, 10, 30, 50 and 100 kg.
- Parameter matches. Simple forging can be done even on an ordinary piece of channel. But, if the work includes forging operations such as piercing, bending, and reaming, the parameters and dimensions must be observed. In this case, the edges of the anvil should be kept at right angles, and the holes should be located at convenient points. The horns should be appropriately evenly rounded, the rim should be an exact rectangle.
At home, it will be difficult to make an exact copy of a factory-made product, but some conditions can be met. So, how and from what is a homemade anvil made?
How to make an anvil FROM RAIL with your own hands
Translated by SaorY for mozgochiny.ru
Greetings to all brain inventors! Today I’ll tell you how to create a very necessary craft from useless scrap, and if in more detail, make an anvil from a rusty piece of rails with your own hands.
Materials
- piece of rail, at least 30cm
- screws for wood (simply “wood grouse”)
- stump
Tools
- Angle grinder (“grinder”) and discs for it - cutting and grinding of various grain sizes
- burr or metal files
- gas cutting
- welding
!!! This brain guide assumes that you know how to handle all of the above tools! You take full responsibility when creating such a homemade product!
Step 1: Forming the Anvil
So, look at the presented photo, study brain design and, using all available tools, form an anvil blank from a piece of rail.
That is, we cut off the base a little from the front side, sharpen it in front, and make rounded notches on the jumper between the base and the anvil itself.
A good helper in all this is a cutting torch, or a friend with a cutting torch???? It also works well with a grinder, but it’s better with a cutter!
Step 2: Stripping
Next, we refine the craft - we clean up the cutting marks. And we use the same angle grinder for this, although it works well with a brain saw.
Step 3: Sanding
In principle, the anvil is ready for use, but like me, it can be polished. Using a “favorite” angle grinder with grinding wheels of grit from 40 to 120, we bring the homemade product to a shine.
Step 4: Installation
If desired, before grinding you can drill mounting holes for the screws, as well as a hole in the back of the anvil itself. And then we install the finished craft on the stump chosen for it and secure it with screws or another suitable method.
Having studied the topic of “anvils” on the Internet, I added an addition to the homemade product - another piece of rails, but installed vertically.
To do this, before installing the anvil on the stump, I selected a “quarter” of this stump, welded a metal “heel” onto an additional piece and drilled installation holes, and after all these manipulations installed both the anvil and the addition on the stump. The point of this whole modification is that the vertical piece “damps” the noise from hammer blows.
The homemade product is ready! I hope the brain guide was useful to you!
(Az Source)
Types and types of anvils
Types of anvils, their shape and weight can vary significantly.
They are divided into several categories according to the above criteria, namely:
- hornless – massive instruments with a large weight, the value of which is in the range of 96 – 210 kg;
- one-horned - have only one cone-shaped horn, their weight varies from 70 to 210 kg;
- two-horned anvil - a device weighing from 100 to 270 kg;
- single-horned cantilever;
- shperaks are mini anvils weighing up to thirty kilograms.
The choice of anvil for hand forging is made based on the work that is planned to be performed. Heavier models are perfect for working with large and massive workpieces. Simple, lighter options with one horn are a good choice when working with small-sized structures.
Lightweight models are suitable for small jobs at home. If you need to make any homemade product, there is no better option.
An important criterion is the type of work performed. Here you should decide which option is better: a two-horned or one-horned model. In addition, anvils may have additional elements, for example, a vice, which allows you to perform work alone.
It is worth paying attention to the presence of holes used to place hammers and sledgehammers. Shperaks, small in size and weight, are widely used in jewelry
In this area, products do not require serious impact processing, so they need an appropriate tool
Shperaks, small in size and weight, are widely used in jewelry. In this area, products do not require serious impact processing, so they need an appropriate tool.
Drawing of an anvil for making it yourself.
Quite often, devices for performing jewelry work are made to order. They have various functional elements necessary to solve certain problems.
Sometimes one anvil may not be enough. In large workshops, it is advisable to have two options for devices: one stationary and the other portable.
Don't forget about proper installation. The quality of work directly depends on this
Despite everything, this device is quite heavy, its installation should be given due attention
Falling and tipping over are common problems caused by improper installation. In addition, the stand must fulfill its direct functions: in addition to securely fixing the device, it must be able to absorb hammer blows.
A wooden block is the most commonly used type of stand. Its diameter usually ranges from 500 to 600 mm. Hard woods are used. These include oak, birch, ash, etc.
The installation height is determined by the height of the master. To prevent the wooden stand from creating additional unnecessary vibrations, it is buried in a hole more than half a meter deep. The bottom of the pit is compacted with a sand lining.
It is important that the chair is installed horizontally. This parameter can be easily checked using a level
If buying an anvil is not affordable, then you can replace it with a homemade device. It can be made, for example, from a rail, channel or I-beam.
Such devices, made with your own hands, will last for decades. However, you should not think that they can fully replace a real, professional instrument. Hand anvils will not produce the same quality work as production models.
In this case, it is important to understand: the factory version, produced using casting technology, will be significantly better than homemade ones. Its design contains all the necessary components with a hardened surface
In addition, in this model the horn has the correct shape, necessary, for example, in skillful figured forging. The factory model will last quite a long time.
Anvil elements
A blacksmith's anvil is a mandatory attribute of his workshop. With its help, a number of technological operations with metal are performed. This tool is used for forging, giving metal the required shape, hardening, etc.
This item is made of durable alloy steel, and its weight can exceed 300 kilograms, especially if we are talking about a stationary forging anvil.
It must be stable and durable, as it bears significant loads. Hitting the anvil with a hammer produces a smooth, clear sound. A dull ringing indicates the presence of cracks or voids in the instrument.
As noted earlier, there are one-horned and two-horned models. Why does the anvil have this shape? The point is this: the horn allows you to make bends with the necessary curvature, and the flat surface serves to do the main work.
Anvil mounting diagram.
The main elements of the device include:
- horn;
- shank;
- recess for forming holes;
- holes for installing tools and other forging equipment on the anvil;
- face;
- shoe;
- platform for cutting metal.
The protrusion on the side of the instrument is called a horn. Its shape varies depending on its purpose. In one-horned models it is cone-shaped. Used in forming metal bends and rolling out rounded parts.
The second horn is used in bending products at angles less than normal and is made in the shape of a truncated cone.
A face is a flat surface. It is on it that the main operations are performed.
The anvil should absorb the impulse from a blow to the front part. For these purposes, the device is installed on a durable wooden or sand cushion.
It is important that the face is positioned strictly horizontally. This will allow you to perform the work to the highest quality.
Many people are interested in the question of how to set the anvil in height. The height of the anvil from the floor is correct if the hammer strikes the casing horizontally
In addition, it is important that the blacksmith does not have to make additional efforts to adjust the blow, bend down or lift the tool too high
A basic set of tools needed for metal forging
The method of imparting plastic properties to metal by heating has been known to mankind since time immemorial. Unlike the so-called “cold forging”, in which the metal is not heated, during “hot” (and, as is considered, “real”) forging, the metal is heated in a forge.
A forge is an open-type furnace in which metal is heated to high temperatures for subsequent forging.
Due to its plasticity, heated metal can be given a wide variety of shapes, which is what masters of artistic forging use.
In addition to experience, which is accumulated over the years, forging requires the appropriate tool. These can be special pliers, mandrels, bending templates, etc., but the hammer and anvil remain the most important “assistants” of a blacksmith for many centuries.
Any person who is thinking about taking up blacksmithing is faced with the need to purchase the appropriate tools. A high-quality and heavy anvil weighing under 100 kg is not a cheap pleasure.
Vintik (FORUMHOUSE Member):
I bought my anvil by weight at a secondary metal shop.
From work experience, I can say: what I couldn’t flatten on a rail, I managed to do on a real anvil. Olger73 (FORUMHOUSE Member):
Although Vtorchermet is a “gold mine”, a lot depends on luck.
Our price for a used anvil is approaching the cost of a new one. Although I managed to acquire a powerful vice and anvil weighing about 30 kg in this way. Her “face” is, however, dented, but it can be fixed. So, what to do if you want to forge, but the family budget does not allow such expenses? Moreover, if it is unknown whether the business will be to your liking, or in a few months all the expensive equipment will begin to gather dust in the garage.
In this case, you should take advantage of the experience of FORUMHOUSE participants and acquire a mini-forge made from materials that are at hand. Moreover, even with this “dacha” option, you can make a lot of different things that are needed on the farm, and which you cannot buy in a store or on the construction market.
How to make
Initially, you need to select the appropriate material. In the factory, for the manufacture of such a forging device, grade 35L steel is used. This is one of the alloyed types of metal. But for a home workshop, you can use a piece of railroad rail.
A channel will also work as a temporary option, but such a device will not last long; it will inevitably become deformed.
How to make an anvil from a rail with your own hands? The entire manufacturing algorithm can be seen in the video provided:
- For manufacturing, you will need a piece of rail 200-300 millimeters long or more if you need a larger device.
- Initially, the workpiece is marked. On the surface they indicate where the horn and rim will be.
- Using a grinder, excess metal is cut off from the edge along the markings, forming a triangular shape for the future horn. After trimming, it is advisable to round it, for which a grinding machine is again used.
- You need to cut a notch under the triangle of the horn.
- On the opposite side, mark the location of the rim or heel. Excess metal is cut off exactly at right angles.
- The front part of the rail anvil must be smooth, so all protrusions on the upper part are carefully leveled with a file and ground.
- To securely fasten the device, you need to make holes in the base of the rail.
- Non-working side surfaces are cleaned of traces of corrosion and contamination, and then painted.
- The homemade anvil is ready, after which it needs to be securely fixed. You can watch the video on how to do this:
However, when making such an anvil, the result can be a narrow front part. To fix this, you can apply the same technology, but turning the rail the other way around, thus obtaining a wide base of the workpiece as a working surface.
Having made such a device from a rail with your own hands, we proceed to its installation, for which you can use additional channels as fasteners.
Rail anvil
Alternatively, a piece of a powerful I-beam can serve as the starting material for the anvil.
But, having thinner metal on its shelves, it is suitable for small forgings and will warp over time.
Such homemade products can temporarily replace a full-fledged factory product. However, over time, for normal and convenient work, it is better to purchase a real device, which is much more convenient and allows you to process metal using various techniques.
When tested with a blow, a high-quality anvil with a hardened surface rings at high tones, and the hammer bounces.
If you have experience in making homemade anvils, share it in the comments section for this material. What did you make such equipment from and how does it perform during use?
Homemade portable forge
A forge is necessary for heating metal workpieces. The fuel most often used is charcoal or coal. In order to reach high temperatures, air is supplied to the forge. To make the simplest open portable forge, you need a “hearth”, or, as it is also called, a “forge nest”, as well as a base and a device for forced air supply.
DIMDIM:
To understand how to make a forge, I started studying the Internet again.
The search turned up a bunch of ideas for making a homemade forge. As I understand it, everything comes into play. Most often, forges are made from auto parts from the chassis, sets of pipes, fittings and electric fans. In addition, forges are made from what is “underfoot.”
Construction hair dryers (heat guns) are often used as pressurization.
Having roughly decided on the design of the forge, the user again reached into the “bins” and dug out an adapter from a steel pipe to a cast iron one, which was used as a barbecue.
Inside, the adapter looks like a pipe with a shelf. Bye DIMDIM
I was thinking about what to insert into the pipe to make a real “forge nest”,
Movik
and brought a brake disc from an SUV that fit perfectly into the pipe.
Next came the components that are used to install the water supply system. This is a two-inch tee, a coupling and a piece of pipe cut from behind the barn. All the “wealth” was docked, and Movik
cooked.
At this stage, the homemade blacksmith's forge began to look like a finished object.
All that remains is to attach the ash pan. A bracket from a heated towel rail was used for this role, which was welded to the pipe in the form of a valve.
The user used an old hot air gun as a “bellows”. To do this, he disassembled it, inserted the air supply mechanism into the rubber coupling and connected it to the pipe.
You can also use an exhaust fan for ventilation.
At the end of the work, an opening was cut out in the wall of the furnace, where a heated workpiece, for example, a steel rod, was placed.
According to the user, he was eager to test the forge. Soon such an opportunity presented itself. On the weekend, after smoking fish, there was a grill full of burning charcoal. After quickly loading them into the forge with a shovel, the user turned on the hairdryer.
The air supply turned out to be so strong that a column of flame flew into the sky, and it became possible to approach the forge only when the coals had burned out a little.
To prevent coal from going to waste, DIMDIM
grabbed a steel rod with a diameter of 1.4 cm and stuck it into the forge. While the metal was heating up, the user took a hammer, an adjustable wrench instead of pliers, and forged a simple poker.
DIMDIM:
After testing the mini-forge, I made the following conclusions for myself: you need to forge with an open flame source away from buildings that could catch fire.
At the same time, just in case, you should have a fire extinguisher on hand. You also need to make a frame (base or “chair”) for the anvil. And most importantly, you need to come up with a way to regulate the air supply or install a less powerful fan. But the most important thing is that I liked the forging, I will continue! In the topic on FORUMHOUSE you can find out more about the mini-forge DIMDIM,
as well as further modernization of the forge and various options for air pressurization. We recommend a section on the portal where homemade machines and tools are collected that simplify work in the house, on the site and during construction.
The main stage of work
A grinder cuts off the top layer of the rail and creates the most even surface possible. It is advisable to install an alloy steel plate on it and polish it thoroughly. Use a triangle to check the evenness of the anvil corners. This is an important point. Next, the horn is welded on one side and the square shank on the other side.
To check the smoothness and quality of grinding of the working part of the anvil, you need to test it. To do this, you need to hit its surface with a hammer or mallet. If everything is done correctly, the hammer should bounce off it like a ball. At the same time, a characteristic ringing is heard that lasts for a long time. If the anvil has passed the test successfully, then you can proceed to the next stage of work, namely, correctly and securely fasten the anvil from the rail to the base.
Some details of the anvil manufacturing process in the photo
Having cut a hole as far as I could with a grinder, I then began to burn through it with welding. The maximum current on the inverter is 200. 3mm electrodes, I don’t know the brand, old, with chips on the coating, someone gave it to me once with the words: “hey, you do welding, this will come in handy for you.”
The hole is made, I check how the 30th square fits in. It fits in fine.
I weld the slots from the grinder.
I clean the weld beads.
I weld the rail to the base on which it will work.
- And here is the whole process on video.
- This is what happened.
Sections: Blacksmith's blog, Anvil
Source: https://kovka-svarka.net/2016/08/nakovalnia-iz-relsa/
Typical design
For extended functionality, this blacksmith tool must consist of the following parts:
- Faces. It is a flat surface in the center where you can process flat, wide workpieces. Often a blind hole is made in the left or right side of the face to make cavities and holes, as well as to fix a part of the workpiece, the opposite end of which must be bent.
- The horn is a cone-shaped process that is adjacent to one of the ends of the anvil. Designed for plastic rolling or rolling of strip metal into a body of rotation. Ideally, the anvil is equipped with two horns, then the second (sometimes called the tail) is made in the shape of a pyramid, and is used to obtain spatial bodies of more complex shapes.
- Paws - four supporting protrusions in the lower part of the body, with which the tool rests on the workbench. If the anvil is assumed to be stationary, then through holes are made in the paws for fastening.
- Rim - a rectangular or square area of the face, which is located closer to the horn, and is used for crimping sheet metal products.
Anvil device
In the simplest version of the anvil, the rim and/or tail, as well as holes in the paws, may be absent.
Methods for attaching anvils
What is better to make it from?
First of all, you need to decide on the location of the anvil. If a reliable workbench is not available, then you can use a strong, wide stump as a support (oak is the ideal solution: this wood is strong in compression and ideally dampens the vibrations that arise during the forging process). In this case, the diameter of the stump, freed from bark and surface defects, will determine the size of the anvil, in particular its length. It should not be less than 200 mm.
If there is no stump, you can use a high (not lower than 100 mm) wooden shoe, which is rigidly mounted on the end of a barrel filled with sand. The barrel must be buried halfway into the ground.
As a blank for the anvil, it is most advisable to take a suitable piece of a decommissioned crane rail KR-120 or (which is better) KR-140. Unlike railway rails, this option provides the following advantages:
- For the production of crane rails, a stronger metal is used in accordance with GOST 4121. This is high-carbon steel grade “steel 63”, which is characterized by a high manganese content and has a standard strength of at least 730 MPa, with a head hardness of 212 HB;
- The neck of the crane rails is wider, which will increase the stability of the anvil during forging work;
- The profile of the crane rails provides a smoother transition from the neck to the head, which prevents the occurrence of stress concentrators in the tool.
Fixed anvil
The only drawback of crane rails is that there are no mounting holes, and you will have to do them yourself.
How to make a reliable anvil for your forge - device and tips
These two concepts are inseparable.
There is no point in explaining that without an anvil it is impossible to process metals using the forging method. It is an indispensable attribute of any, even the smallest, forge. The design of this device is so simple that you will not need any special knowledge or equipment (tools) to make it yourself. In essence, it is an iron “monolith” of a special shape, with planes that must meet certain requirements.
But is there any point in making an anvil if it is not a scarce commodity and is easy to buy? (The only problem is the delivery if it is massive). The price of the simplest mini-device starts at approximately 2,250 rubles. It is clear that it is clearly not suitable for blacksmithing. But more massive models are, accordingly, more expensive.
For example, weighing 35 kg - about 22,000, 75 kg - 43,000, 125 kg - 70,000 (in rubles).
So it turns out that if you need an anvil for home crafts, then it still makes sense to make it yourself (like a blacksmith’s hammer). Even if the business is put into production, the fact that the anvil is of its own production is unlikely to affect the quality of the work.
It is worth making this argument in favor of self-production. High demands are placed on the working surface of the anvil. This is especially true for its edges, which should not be deformed (uneven), which is often observed during intensive use. It turns out that from time to time the anvil will have to be replaced (or reanimated). And although a lot depends on how often it is used and what metals the master works with, it is still more advisable to make an anvil than to spend money on purchasing it again. If only because if you made it yourself, it will not be difficult to repair it.
Now we can move on to the issue of its manufacture. We will not give examples of any specific standard sizes, since there can be any number of options - each master prepares an anvil “for himself.” The main thing is to understand the technology and the main nuances, and everything else will be prompted by your own ingenuity. How it works, what options there may be, is easy to understand from the photographs.
Support
First you need to decide on the installation of the anvil. If it is stationary, then you can use a massive stump or a heavy metal frame dug into the ground as a base. For a portable type of device, a frame is selected that is welded from corners. It should be taken into account that the “stand” will have to withstand serious shock loads, so stiffening ribs must be installed. Although there are other ways to strengthen the structure.
By the way, about the stump. Firstly, it must be securely tightened with metal hoops. Secondly, if you just dig it into the ground, then such an anvil will not last long. Even after treatment with antiseptics, taking into account the loads during the work, the wood will begin to deteriorate.
Therefore, it is advisable to place the stump inside a metal barrel installed in a hole, into which sand is first poured. How much of it is needed, the level of “backfilling” is at the discretion of the master. Naturally, the tree must be a “strong” species. (But this is only suitable for outdoor use).
Experts recommend selecting the height of the “stand” in such a way that at the moment the tool (hammer, mallet) hits the workpiece, the person’s hands are in a horizontal plane. In this case, the master will be less tired.
Material
Industrial production technology involves the use of 35L (alloy) steel. When making it yourself, you can take a piece of rail (railway or crane, KR120 or 140), one side of which will be the working one. So you need to “weld” on it (you will need a welding machine) a steel plate of the appropriate size.
You can do without it. But then you will have to carefully polish the “working” part of the rail. Naturally, you will have to put in a lot of effort to achieve a completely smooth surface.
How to evaluate the suitability of an anvil? It is not difficult. When you hit its surface, the hammer (hammer) should bounce back like a ball. In this case, a characteristic ringing sound should be heard. If so, then everything is done correctly, and you can get to work.
A few notes
- You should not use a channel to make an anvil, although it is much easier to process. It does not have sufficient strength, so it will not last long - it will become deformed.
- If the anvil should have a “horn”, then it can be obtained by processing the elongated part of the “sole” of the rails. But this process is quite labor-intensive and will require quite a lot of time and consumables (circles for the grinder). It’s easier to weld it, after giving the workpiece the desired shape.
Before you start making an anvil, you should decide for what specific tasks it is needed and with what intensity it will be used. Then the optimal decision regarding the choice of installation location, materials and design will come by itself.
Currently reading:
The most important blacksmith tool
Anvils are the most important tool that allows you to perform various forging works associated with cold and hot forging of metal. This element of the workshop is quite specific, but it is simply irreplaceable in the case of professional production of forged products.
Such a tool may vary depending on the type of problem being solved. It can have a variety of structural elements, sizes and shapes. There are mainly two types of forging anvils: one-horned and two-horned.
The first version of the device is in greatest demand. The horn is used in shaping the bends of metal products in figured forging.
What does the anvil consist of?
The sides allow you to make bends at right angles. The surface of the device itself is smooth and even, and also ground and hardened. This is the working part.
It contains two square and round holes, which are used when performing additional operations with products and when supporting the tool.
Based on weight, anvils are divided into small, medium and large. The best option is the heaviest models weighing 95 kg or more. Such devices allow you to work with large workpieces.
At home, such a tool is not one of the most necessary. However, its presence allows you to easily align various products, such as nails, wire or sheet metal.
Naturally, use for domestic purposes does not require the mandatory purchase of such a tool. However, if necessary, a homemade anvil can be made. It will easily allow you to perform all the simplest functions that are required of it.
Of course, it is extremely difficult to make a high-quality figured product using a homemade version.
In this case, it is better to pay attention to professional models. But for all other needs, hand tools will be the best choice.
Design features of the anvil
Of course, you don’t have to make an exact copy of such a device and simply do all the work on a flat metal plate. However, to simplify many operations, the anvil has its own design features. The device consists of the following parts.
The front part of the anvil is its flat upper part, on which the bulk of all blacksmithing and metalworking work is performed. To perform operations on stitching workpieces or bending them, there may be a blind hole in this part.
Horn - there can be one (on one side), or two (on both sides). This is a cone-shaped protrusion from the end of the anvil. The purpose of the horns is to bend, roll out or roll up blanks; in fact, they are used as mandrels. If the anvil has two horns, then usually the second one is shaped like a pyramid to give the products more complex configurations.
The paws are designed for installing the device. In the case of stationary installation of the anvil, holes are provided in the paws for rigid fixation.
The rim is a zone on the front surface near the horn, used for crimping sheet metal.
Also, some types of anvils may have a bench vice on the side opposite the horn. This is done for the convenience of performing many forging operations.
Depending on the presence or absence of these elements, anvils can be of different types: hornless, one-horned and two-horned.
Purpose of the anvil
This type of working tool is used in many areas of production. There are anvils for blacksmithing, metalworking, jewelry, even for medical purposes. Dental technicians use them, but naturally in a much smaller size. In the forge, all manual operations are performed on it: forging and hardening of parts after the forge, giving the workpiece the desired shape.
Craftsmen need a metalworking anvil for straightening work and for bending metal surfaces. Jewelry workshops use small steel anvils on which rings, earrings, bracelets are bent and straightened, holes are punched when decorating products, etc. In dentistry, craftsmen also use it when making crowns. In general, in every household and private home it is necessary to have an anvil, at least a small one, so that you can simply straighten a nail or bend a corner.
A basic set of tools needed for metal forging
The method of imparting plastic properties to metal by heating has been known to mankind since time immemorial. Unlike the so-called “cold forging”, in which the metal is not heated, during “hot” (and, as is considered, “real”) forging, the metal is heated in a forge.
Due to its plasticity, heated metal can be given a wide variety of shapes, which is what masters of artistic forging use.
In addition to experience, which is accumulated over the years, forging requires the appropriate tool. These can be special pliers, mandrels, bending templates, etc., but the hammer and anvil remain the most important “assistants” of a blacksmith for many centuries.
Any person who is thinking about taking up blacksmithing is faced with the need to purchase the appropriate tools. A high-quality and heavy anvil weighing under 100 kg is not a cheap pleasure.
I bought my anvil by weight at a secondary metal shop. From work experience, I can say: what I couldn’t flatten on a rail, I managed to do on a real anvil.
Vtorchermet may be a “gold mine,” but a lot depends on luck. Our price for a used anvil is approaching the cost of a new one. Although I managed to acquire a powerful vice and anvil weighing about 30 kg in this way. Her “face” is, however, dented, but it can be fixed.
So, what to do if you want to forge, but the family budget does not allow such expenses? Moreover, if it is unknown whether the business will be to your liking, or in a few months all the expensive equipment will begin to gather dust in the garage.
In this case, you should take advantage of the experience of FORUMHOUSE participants and acquire a mini-forge made from materials that are at hand. Moreover, even with this “dacha” option, you can make a lot of different things that are needed on the farm, and which you cannot buy in a store or on the construction market.
There are few good blacksmiths and, as a rule, they are loaded with orders, and the farm often needs specific products, for example, a forged nail or some kind of “tricky” rivet. In order not to rack your brains with finding a specialist and ordering, and also to save money, it’s easier to do everything yourself. After all, you can’t just buy nails like the ones in the photo below.
Do-it-yourself double-sided anvil made from rails
- Materials
- — A piece of rails — A sheet of plywood — Wood glue or PVA — Wood screws — Bolts with nuts and washers — Two studs and screws — A piece of steel strip — Two handles — wood — Oil for impregnating wood, primer.
- Tools used by the author
- - Sandpaper.
— Circular saw — Miter saw — Drilling machine, screwdriver — Nailer (aka nail gun) — Forstner drills — Router — Orbital sander — Hacksaw — Band saw — Welding machine — Tape measure, pencil — Clamps — Wrenches
Manufacturing process So, as usual, to begin with, the author begins his work with markings. In this case, he marks the future template from a piece of plywood. Moreover, he marks both sides of the rail profile on one template.
Using a band saw, cuts out unnecessary parts of the stencil according to the markings.
Then he checks the tightness of the template on the rail on both sides.
Having set the circular saw stop at the required distance, the sheet of plywood is unraveled into strips.
Then, according to the width of the template, the strips are cut into identical rectangular blanks.
Next, he marks each of the blanks according to the template.
Using a screwdriver with a Forstner drill, cuts 3 holes in the workpieces.
Now a “profile” is cut out in each piece of plywood on a band saw.
Then he combines the workpiece with the template and fixes it with nails using a nailer.
Turns the resulting “sandwich” over with the template facing down. Cuts off unnecessary material using a router using a straight cutter with a thrust bearing.
Then, having milled all the workpieces, he cleans the milled edges with sandpaper.
Places all the workpieces on the rail and checks the edges.
Use a miter saw to cut off the edges of workpieces, making them into a more convenient shape.
Coats the first piece with glue, lays the next one, and fixes it with nailer. Then strengthens the connection with self-tapping screws. Repeat until complete assembly along the length of the rails.
This is how the Napoleon cake turned out. Steve clamps it with clamps and waits for the glue to dry.
Sand the inner sides with sandpaper, placing it on a piece of round timber.
Everything fits tightly on both sides of the rails.
But, of course, there are irregularities on the edges. After all, it is very difficult to perfectly repeat each workpiece.
Steve solves the alignment problem in a very original way. To begin with, he fixes the workpiece between two bars using long clamps. It turns out something similar to a frame.
But here is an unexpected moment. The author doesn't seem to have a router table or jointer.
But it is not important. He straightens the edges of the anvil base using a circular saw.
Yes, like on a milling table.
It turned out very well to even out all the sides.
Grinds edges using an orbital machine.
Now we need to create the pressure plate. Cuts parts of the workpiece from a steel strip with a band saw.
Welds parts, aligns edges on a grinding machine.
Drills holes in steel workpieces.
In accordance with the holes of the plates, it also drills in the base.
The first plate is clamped with self-tapping screws on one side of the base.
On the other side, tighten two stud screws.
Impregnates base surfaces with primer.
After the protective coating has dried, install the rail in its place.
Places the pressure plate on the studs and clamps it with the wings.
That's it, the tool is ready!
Now you can use it for its intended purpose.
Thanks to the author for the original idea of the anvil and its execution. It is very convenient to have two different surfaces to work on. And the steel of such an anvil must withstand very serious tests. And the large surface area of the base will help distribute the impact energy.
Bottom line
A blacksmith's anvil is one of the most important and indispensable tools in the workshop of a true professional. It allows you to forge metal, give it the required shape, perform hardening and other technological operations.
Nevertheless, for home needs it is not necessary to buy an expensive factory model, because you can make it from a rail with your own hands.
In the practice of household work, it is often necessary to resort to such operations as flattening part of a rod, or bending it to a certain angle. For these purposes, an anvil is needed. It is not difficult to make it yourself, and in a convenient shape and size, and therefore your own tool is always more convenient.
Method for making a simple anvil
How to make an anvil without much effort and expense in your home workshop, what material to choose and what you need to take into account - this is discussed in our material.
Even in an ordinary workshop you need a surface that allows you to level, bend a rod, flatten a nail, or perform other similar operations. A home-made anvil or a purchased one is best suited for this kind of work, not to mention blacksmithing.
How to make such a device without much effort and expense in your home workshop, what material to choose and what needs to be taken into account - this is discussed in our material.