If I knew the shortcomings I would buy another model
13.03.2015
I bought a plane two years ago, it’s quite convenient to use, optimal weight, smooth start, the only problem is that very often during work you have to clean the chip ejection pipe and sometimes clean the electric motor of fine wood dust.
Behind:
smooth start, optimal weight, low price
Against:
The pipe and the electric motor are constantly clogged with chips
Not a bad model, but there are some shortcomings.
01.06.2014
My second review of this plane.
I have been using the model for more than a year and can give a more or less adequate assessment. Pros: a good set (a frame so that the plane can be fixed permanently, spare blades and a belt, a key for replacing blades and a side stop), width 110 mm.
This is what I need, even though I don’t have much experience with a plane, but it’s 82 mm. would be insufficient in almost all situations.
Plans well, evenly, no additional wood processing is required. And now about the bad: the pipe from where the sawdust comes out is located next to the air intake (for cooling) and periodically sawdust gets there and has to be cleaned. The second point is that if the plane is installed permanently on the table, then the channel with the pipe often becomes clogged, where sawdust comes out, you have to turn off the plane and clean it, but if you work manually (without a bed), then there is no such problem.
Behind:
Price, set, width and power of the tool.
Against:
Design flaws (see.
I bought it 4 years ago. A normal plane, the weight is appropriate for its size and power. I changed the bearings once, you have to do this in any tool, it is very easy and convenient to disassemble.
The brushes and belt are fine. Naturally, this is not a planer, and it should not be compared with 82 mm planes, it has its own purpose
Behind:
Price, power, reliability, simplicity
Against:
It’s heavy, of course, but you can’t run around the log house with it
I wanted to take a Makita 110mm, but the seller convinced me that this one was the same Makita, only cheaper.
Why did he do this? Both sets of knives became dull. I had to buy Makitov carbide ones. Planes crookedly! you need to place the knives in their “device for easy placement of knives” crookedly in order to plan evenly. And even after this, when clamping them on a plane, they manage to shift. An acquaintance bought the same plane several years ago - and the knives don’t get dull and plan smoothly.
Behind:
1. Planing width. 2. Planing depth 3. Soft start
Against:
1. The knives immediately became dull 2.
It is impossible to place the knives straight. Accordingly, it always planes crookedly.
It’s not worth taking, even though you want to.
05.08.2013
I worked for 3 weeks and was done. He has two small troubles and one big one.
Small: 1. The button is fixed by a plastic insert, which is stupidly inserted under the button. It’s terribly inconvenient, this thing is going to get lost in the grass and get under your feet. 2. If you are planing raw wood, you need to keep a wooden stick with you to pick out the chips.
It's annoying. By the way, these flying chips go straight to the engine grille and are sucked in there. The big problem: at the front adjustment platform, the leading edge is sharpened at 90 degrees, and along with poor fixation of this platform, the following happens: the plane runs into a knot with its end, the front platform warps, and falls under the knives at 16,000 rpm. The plane simply shattered into pieces. I'll buy the same one and rebuild it because of the heaps of spare parts I have in the shed.
Behind:
Plans everything.
Against:
Chip ejection. Engine blockage. Unfinished site.
I recommend it - great stuff.
27.04.2013
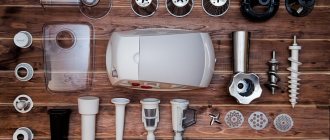
I spent a long time choosing a plane, and finally settled on this one. First the good stuff, in my opinion the price is reasonable. The set is very rich - two knives, a spare belt, a sharpening device, and most importantly a frame for placing the plane upside down and using it as a stationary one (this is simply unrealistically convenient.
Electric planer Interskol R-110/1100M
The power is more than enough for home work - even the “brutal” smolyak planes well. I consider its main advantage to be its width - 110 mm. After working with the tool, I came to the conclusion that if I had taken it to 82 mm.
— there’s a lot that the tool allows me to do that I technically couldn’t do, if you’re wondering whether to go for 110 mm. (and their choice is quite small) or take 82 mm. and, as they say, don’t suffer - think 10 times....my advice is only 110 mm.
And now about the shortcomings - during the work I discovered only one - the hole from where the sawdust comes out is in close proximity to the air intake (for cooling the tool) and sometimes it turns out that the sawdust is sucked back. I can’t say yet how critical this is, but after a long period of work I have to unscrew 2 bolts (of the same air intake mesh) and clean the inside a little.
Read also: Animals made from rubber bands on a slingshot
Behind:
Price, planing width, rich set, power.
Against:
There is a design flaw - if you plan in a limited space (in a corner or close to a wall), the chips are partially sucked inside.
I bought it a year ago for construction.
Planes the board well, you don’t need to press it, the plane is heavy enough, move it along the board and that’s it. The tool for stationary installation came in handy when I needed to plan small boards.
Behind:
Planing width 110, soft start, stationary installation, powerful
Against:
Not yet
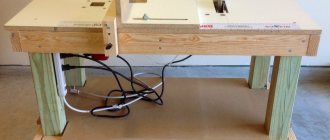
Making a machine yourself
To begin with, determine the number of functions of the future unit. It could be:
- just a planer with one planing operation;
- a combination of a jointer and a circular saw, which doubles the usefulness of the equipment;
- they add grinding, sharpening and drilling functions, but for your own workshop, making a complex set of equipment with your own hands is a difficult task.
Often, craftsmen independently make a jointing machine with a sawing function, while the torque is transmitted from one electric motor, which includes structural elements:
- The bed can support the weight of the work plane and installed electrical and mechanical equipment. In a workshop, a channel with a shelf thickness of at least 10 mm is used to make the frame. The structure can be made stationary (welded) or provided with bolted components for disassembly if necessary. The first option is more reliable and is used if a portable machine is not needed. Sometimes the desktop itself acts as a bed.
- Working tools include knives and saws; the work of processing and sawing workpieces depends on their quality. Reliable and strong steel is used for cutting blades; the saw teeth must be equipped with Pobedit tips.
- Without a rotor, to which all the tools are attached, not a single woodworking machine will function, so attention is paid to its selection. Most often it is made by a specialist turner according to the drawings offered to him.
- The design of a jointing unit with a sawing function provides three working surfaces - one serves as a table for the circular saw, the other two feed and receive the workpiece during the jointing process. Multilayer plywood, the thickness of which is at least 5 mm, or sheet metal, is used as a covering. Typically, the feed surface is made 2-3 mm below the receiving side to facilitate the process and reduce vibration load.
Electric drive of the machine
The operation of the jointer and saw is based on rotational functions, which is why the drive is called the heart of the unit. A three-phase motor is suitable as an electric motor; sometimes the wiring is re-equipped for this in the workshop. Three-phase units with a voltage of 380 V are characterized by high power and suitable torque. The minimum permissible engine power is 3 kW, the maximum is not limited. The transmission of rotation from the engine to the shaft is carried out by means of a belt drive. V-shaped double-ribbed belts work well in such conditions; they are reliable in operation. The electric motor is mounted using a console inside the frame structure of the bed; the installation method helps to regulate the tension of the belts. Another way is to mount it using a slide - this still allows for adjustment, but the engine itself is more firmly fixed.
More reviews
Customer reviews about Interskol R-82/710 710W, 14000 rpm, working width: 82 mm, planing depth: 0–2 mm
Customer reviews about Interskol R-82 TS-01 710 W, 14500 rpm, working width: 82 mm, planing depth: 0–2 mm, rip fence
Customer reviews about Interskol R-110-01 1100 W, 16000 rpm, working width: 110 mm, planing depth: 0–3 mm, rip fence
Customer reviews about Interskol R-102/1100M 1100 W, 11000 rpm, working width: 102 mm, planing depth: 0–2.5 mm
Home » Tools for working in the country.
Reviews about the main features of the model
You can purchase the above-mentioned electric plane for 5,000 rubles. It is equipment for leveling wood surfaces. The width of the workpiece can reach 110 mm. According to consumers, cast parts increase not only the service life, but also the strength of the tool.
The knives are made of high-speed steel. According to home craftsmen, it is very convenient to adjust the depth of processing thanks to the front handle. Its rotation ensures a change in the height of the sole. There are grooves in the front sole that make chamfering very easy. Customers like this feature.
Types of knives
Before you figure out how to install knives on an electric planer, you should choose the right one.
Knives with certain specifications can be used for various tasks:
- Straight – used for planing and selecting wood;
- Wavy - used for artistic processing, in particular to give the surface an aging effect;
- Rounded - allow you to make smooth transitions between planing lines, and are used when working on a wide surface.
In addition, knives can have different sizes.
Planer-thicknesser unit
It is a combined machine with a combination of thicknessing and jointing processing. After the initial sawing of the boards, they are sent to the final removal of all irregularities. It differs from a planing unit in that it allows planing to a selected depth. The knife shaft with blades is located between the receiving table, fastened to the frame, and the receiving surface; in some models, the cutting tool is installed under the table or on top of the plane. To set it to size and adjust it, use a ruler attached to the body.
Simultaneous jointing and surface planing allows the workpiece to be planed to a selected depth, which is why it is used in large production facilities. It works great on a construction site, where wood is delivered with primary processing, and subsequent planing to size is carried out on the site before installation in the structure.
Sources
- https://palitra21.ru/oborudovanie/kak-pravilno-otregulirovat-nozhi-na-derevoobrabatyvayushhem-stanke.html
- https://moy-instrument.ru/instrumenty/kak-pravilno-otregulirovat-nozhi-na-derevoobrabatyvayushhem-stanke.html
- https://BurForum.ru/tehprocessy/kak-otregulirovat-nozhi-na-strogalnom-stanke.html
- https://spk-kovka.ru/proizvodstvo/nastrojka-strogalnogo-stanka.html
- https://lanos-volgograd.ru/regulirovka-stolov-na-rubanke/
- https://mehmanxona.ru/osnastka/kak-vystavit-nozhi-na-fuganke.html
[collapse]
Replacing knives
Let's look at how to install knives on an electric planer:
- Turn off the power to the instrument.
- Remove any wood resin that has accumulated on the plane's working surface using a cotton swab soaked in solvent.
- The tool should include a key with which you need to loosen the bar that presses the knives in the drum.
You can also use a regular wrench if it is suitable, or pliers if there are no suitable wrenches.
- After this, remove the bar with the knife from the drum.
- The knife on the bar is usually secured with a conventional bolt connection and can be easily removed.
- After removing the old knife, a new one is attached to the bar.
- The bar is inserted into the drum and slightly fixed.
- After adjusting the position of the knife, we finally fix the bar.
Adjusting the electric planer blades is the most difficult part of the procedure (and the most important).
Estimating and setting the required inclination angle
By analyzing the characteristics of the marks left by the sharpening stone, it is possible to correctly assess the angle of inclination by selecting the desired proportions. Then a holder with a knife is installed on the fixed stop. Adjustment is carried out using the stop screws; you need to lower the holder until it touches the stone. Using the angle adjustment screws, select the required parameter in relation to the stone. When rotating manually, the marks on the painted blade determine the need to adjust the angle of the holder. And if necessary, such adjustments are very easy to make.
Operating angle range 30-45 degrees. Its exact degree is determined by the specific type of tree. Its quality will depend not only on the angle, but also on the reach of the knife and the diameter of the head. The classic parameter is considered to be 40 degrees. When choosing a specific number, do not forget that the cutters are designed according to a standard backing. If you increase the angle, there is a risk of the butt rubbing against the workpiece. And if you reduce it, the cutting edge will become weaker and thinner.
Adjustment
Now let’s take a closer look at how to adjust the knives on an electric planer:
The knife should be positioned so that the blade touches the ruler.
Having figured out how to set knives on an electric planer, keep in mind that this procedure is quite lengthy and requires care.
There is no need to rush here, since the efficiency of your work will depend on the quality of installation of the knife.
INTERSKOL R-110-01 is a popular model of electric planer, which is due to a number of design features: cast milled sole, increased planing width, high structural strength, ergonomic body and handle, powerful engine.
However, to work efficiently and achieve the best results, it is necessary to periodically change the equipment. Knives on the INTERSKOL electric planer are replaced as their cutting properties decrease. This article will tell you how to independently replace the knives and adjust them on the INTERSKOL R-110-01 electric planer.
Safety when working with an electric planer
When used correctly, an electric planer will help you quickly complete large amounts of work, but if handled carelessly, it can also cause serious injuries.
As mentioned above, the workpiece must be securely secured before starting work. Otherwise, there is a risk of it being pulled out and injuring the worker or other people nearby.
During any inspections of cutting edges or adjustments of knives, be sure to completely turn off the power to the electric planer by disconnecting the electrical cord from the network. Any accidental start can leave you without fingers.
Start processing the surface by first turning on the plane and allowing the knives to reach maximum speed until they touch the board.
If you put the electric planer aside to check the surface you are working on, place it only on its side.
The electrical cord should not have significant kinks or tangles during operation. The electrical insulation must not be damaged, all current-carrying structural elements must be reliably insulated.
In the video below you can watch tips on working with an electric planer (click on the triangle to view):
*** Now you know how to properly operate an electric planer in order to process wooden surfaces with the desired quality. Next time we’ll talk about how to properly sharpen knives for an electric planer if they have become dull and the cleanliness of the processing has decreased.
Knives for planes INTERSKOL
Knives installed on INTERSKOL planes have a number of differences from analogues produced by other manufacturers:
- Higher density plates.
- Thanks to the increased density, the plate of the INTERSKOL plane knife allows sharpening with emery.
- The dimensions of the knife depend on the specific model, and the numerical index in the model name indicates the length of the knives. Thus, the electric planer R-110-01 has a blade length of 110 mm. At the same time, the width of the knives for all models is the same and is 10 mm.
- Thanks to high-quality metal (high-speed steel), INTERSKOL planer knives will not break even when in contact with a nail driven into wood. The resulting jagged edges on the cutting edge can be removed using sandpaper.
Read also: What are cutters used for?
Replacing knives on an INTERSKOL electric planer should only be done with analogues that have strictly the same dimensions in length and width.
More about the chip breaker
The chip breaker must be adjusted with the working edge, placing it at a distance of 5 mm from the knife cutter. Next, fixation is carried out by screwing in the screw. The main task of a chip breaker is to break off chips. This saves the operator from such work with the surface being cleaned. If the equipment is equipped with such a channel, then uneven wood processing will no longer be a problem for you.
Looking at knives with chip breakers, you will see that they have a gap of 4 mm to the edge of the chip breaker. The minimum value is 1 mm. It all depends on the thickness of the chips and the properties of the wood. The plantar holes can be cleared of blockages yourself. This should be done by pushing a thin sliver or pulling the shavings upward. If these methods do not allow you to achieve the desired result, then the equipment can be disassembled.
How to replace knives on the INTERSKOL R-110-01 plane?
Replacing knives on an INTERSKOL electric planer does not require special tools. To do this, you only need two keys, which are included in the delivery package of the plane. Replacement and adjustment of knives on the INTERSKOL R-110-01 electric planer must be carried out in accordance with a clear procedure. If you encounter any difficulties, you can use the instructions for the tool.
- First you need to set the zero position on the planing depth regulator.
- Use the special wrench supplied to loosen the screws securing the blade.
- Using the second wrench from the kit, loosen the impulse screws. Now you can carefully remove the old blade.
- The new blade is placed in the mount, then the knives are adjusted on the INTERSKOL R-110-01 electric planer by tightening the pulse screws.
- Now all that remains is to tighten the mounting screws.
Ready! The new blade is installed and the tool is ready for use. All that remains is to carefully examine the removed blade and decide whether it can be sharpened or whether the knife has completely become unusable and must be disposed of.
SF-6 Single-sided jointing machine. Purpose, scope
The single-sided jointing machine SF-6 is designed for jointing (linear planing, longitudinal milling) of wood blanks of various species along a plane and at an angle.
The machine is used in enterprises of the furniture and woodworking industries (furniture, house-building, automobile and carriage building, etc.), model shops of machine-building plants, and construction organizations.
The bed is made of cast iron, solid cast, box-shaped, inside which an electric motor drives the knife shaft.
Rotation of the knife shaft is transmitted by V-belts. To tension the belts, vertical movement of the under-motor plate is provided. The belt drive is covered with a casing.
The knife shaft supports are mounted in a single block with detachable covers, which reduces mechanical noise and vibration from the rotation of the knife shaft. The blade shaft is braked via a belt drive by an electric motor.
Feeding of workpieces on the machine is carried out manually or mechanically using an automatic feeder. The front and rear tables are cast iron, polished plates with stiffening ribs along the lower plane. The front and rear tables of the machine are adjusted vertically by means of eccentric rollers through a system of levers and rods driven by a handle for the front table and a screw with a nut for the rear table.
Shields are installed on the sides of the table. Gouging depth indicator - the dial is placed in the dashboard window. The guide ruler is moved manually. The ruler can be moved across the table depending on the width of the material being planed and can be set to the required angle in the vertical plane (up to 45°).
The machine has a round two-knife shaft with wedge fastening of knives.
Planing width on the machine is 400 mm, the thickness of the removed layer is 6 mm, the diameter of the knife shaft is 125 mm, the cutting diameter is 128 mm, the number of knives on the shaft is 2, the power of the knife shaft electric motor is 2.8 kW, the number of revolutions of the knife shaft per minute is 5000, the weight of the machine is 620 kg.
How to adjust the knives?
Adjusting the position of the knife is the most important part of the installation process. This is done by tightening the impulse screws. To check the correct position of the knife, you need to apply a metal ruler to the back of the tool. The knife should touch the ruler with its blade evenly along its entire length. If on one side the blade touches the ruler more strongly, it is necessary to tighten the corresponding impulse screw.
Tighten the screws carefully, little by little. The adjustment procedure may not be as fast as we would like, but it is better not to rush here. An incorrectly installed knife will significantly reduce the quality of surfaces processed with this plane, so it is better to immediately spend a little more time on adjustments than to subsequently correct mistakes made.
A good intermediate branch between professional machines and hand planes is the electric plane. Some models have just several functions, starting with an ordinary plane and ending with a mini-machine. As an addition, such a tool may have an attachment, due to which the unit can be turned upside down and permanently fixed on the workbench.
Diagram of the electric planer.
But with frequent use, the cutting elements lose their former sharpness, as indicated by poor chip removal. Replacing the knives of the Interskol electric planer, as well as any other models, is carried out according to a similar principle. The only difference is that the tools may have different mounts.
Often, electric planer knives come with double sides, 2 pcs. in each set. Not all parts should be changed immediately; some brands of blades can be sharpened.
Tools
An electric plane serves as an indispensable tool in the construction and repair of a house, as with any power tool, it contains consumables. The consumables of an electric planer are knives, with which the wood is processed. As a rule, knives are double-sided, in a set of 2 pieces. Remember: if the plane doesn’t remove shavings well and your knives are dull, then it’s time to change them. But in this case it is worth mentioning that some of them simply need to be sharpened. To do this, you need to know how to position the knives of the electric planer after sharpening, and how to carry out the procedure for sharpening the knives.
Content:
Electric planer knives
The knives are mounted on a rotating drum of an electric planer and are intended for removing the top layer of material during the planing procedure of wooden products. If this equipment has 1 cutting edge or 2. The latter blades are called rotary blades because their position can easily be changed if one side becomes dull. Electric planer knives are made of tool steel or tungsten carbide. The first of them can be sharpened again.
Blades are shaped like: straight - used for cutting quarters and planing narrow parts; rounded - intended for processing wide areas, because they make transitions between planing lines more neat; wavy – shaped knives for electric planers are suitable for simulating “aged” surfaces.
Before using the electric planer, it is recommended to check each time whether the knives are installed correctly. Their cutting edge should barely protrude outwards and should be parallel to the sole of the plane. To determine how the knife is adjusted, lift the tool to eye level with the sole up.
The cutting edge of the knife should protrude on average 0.5 millimeters above the sole. For Scherhebel, which is intended for initial rough planing, the cutting edge must be released by at least 1 millimeter. Adjusting the position of the knife is very simple. Turn the small and large adjusting screws, which are located behind the platform for the electric planer knife, sequentially left and right until the cutting edge is in the desired position.
After this, install the knife into the electric planer and fix the position using the centering lever and screw on the top plate. A new electric planer, as a rule, already has the position of the knife adjusted. However, after prolonged use, the setting will become lost. Therefore, if you are using a plane after a long break, you need to first check that everything is fine. Do not immediately start working on parts with a newly adjusted electric plane without testing it on an unnecessary board.
Classification of knives for electric planers
Also, knives for electric planers are divided by size. If you have an imported plane, for example, from Black & Dekker or Skil, then there are traditional 82 mm knives, they are popularly called “plates”. Among inexpensive and high-quality knives, we can recommend carbon steel knives. These knives are suitable for most foreign planes, even for professional electric tools from Bosch and Makita.
Main types of knives
The cutting elements are fastened to the rotating drum of the tool. Their main task is to remove the top layers of the working material during planing. A knife may have one or two cutting edges. The latest products are called rotary, since it is possible to change their position from a dull blade to a sharp one. There are knives that are made of tool steel, and they can be sharpened, and there are those that are made of tungsten carbide, and then a new installation of knives is required.
The shape of the blade is divided into:
- Direct. Used for working with narrow parts, if necessary, and for removing quarters.
- Rounded. Used in the processing of wide parts.
- Wavy. They are used when the surface needs to be “aged”. Such knives are also called figured knives.
Before turning on the electric planer, you should carefully check the correct installation of the cutting elements. With proper fastening, the blade should protrude outward just a little (by 0.5 mm), and the position itself should be parallel to the sole. This moment can also be determined visually by turning the tool upside down.
To adjust the position of the knife, turn the small and large adjusting screw first in one direction and then in the other. They are located behind the platform under the knife.
Next, the element is installed in the electric planer and fixed with a centering lever and a screw located on the top plate. If you have to work with a new tool, then, most likely, all the adjustments were made in advance, but it doesn’t hurt to be on the safe side. In addition, during constant use of technology, the settings tend to get lost. In order to make sure that the adjustment is correct, it is best to test the electric planer on some unnecessary boards.
Plane blade sharpening angle diagram.
A knife for a tool has not only a certain shape, but also a size. Depending on the manufacturer, whether imported or domestic, the sizes of knives may vary. For example, among foreign analogues the standard length is considered to be 8.2 cm and is called “plate”. Depending on the manufacturer, the price of such components will also vary. produces knives that are suitable not only for domestic units, but also for foreign equipment. But here it is immediately worth mentioning that the cheaper the manufacturer, the lower the quality and strength of this element.
Certain models of power tools may have a set of specific knives. This applies to Interskol and Baikal planes; they require knives with a wider and thicker blade. Their strength is somewhat higher, so they are not afraid of “rough” work. The standard width is 1 cm, the length can vary between 82 and 102 cm, they are quite easy to sharpen using sandpaper, although this will still require some experience.
Read also: The most durable metal alloys
Wide and thick knives with special holes for fasteners are considered more rare in demand. Most often they are installed on powerful units (2000 W). The width of such blades can be 11 cm.
Installation recommendations
The blades are located on the rotating drum of the tool. Their purpose is to remove the top coating of wood during processing. The planer design can be equipped with one or a pair of knives. The last cutting parts are rotatable.
If any side becomes dull, the position of the blade can be easily changed. These parts are typically made from tool steel alloy or tungsten carbide. Steel knives can be sharpened repeatedly on a manual or automatic sharpening wheel.
Knives for electric planes are classified according to their shape:
- Rounded - used for processing wide surfaces, because the transitions should be as smooth as possible.
- Direct ones are designed for processing small products and in the process of selecting quarters.
- Wavy (curly). Such blades are used to age the material.
Before working at home, you should make sure that the knives are installed and adjusted correctly. If there are any errors, then certain actions should be taken. The cutting edge of the part should be positioned strictly parallel to the bottom of the electric planer and protrude slightly upward. Correct adjustments can be determined by visual inspection of the instrument.
As a rule, the cutting edge of the blade should protrude about half a millimeter above the sole of the device. Sherhebel, which is used for roughing, should be produced no less than one millimeter. In this case, there will be no problems with adjusting the knives of the electric planer. To do this, you simply need to turn the large and small screw in different directions until the working part is in its intended place. The screws are located on the back of the platform.
After all the necessary manipulations have been performed, the blade is placed in the plane and secured with fasteners. If the tool is completely new, then its blades are already adjusted, but after using it the settings become a little off. Therefore, even if you have not worked with the tool much, it is still advisable to adjust it in advance. It should also be remembered that after adjustment, the operation of the plane should be checked on some unnecessary part.
How to change the knife on an electric planer?
To perform high-quality work, the sharpness of the knife must be at a good level.
Layout of the drum with blades.
If you hold the chamfer to the light and turn it around the cutting edge, a shiny strip shaped like a thread will appear, which means the knife has become dull and requires sharpening or replacement. Electric planer knives are sharpened at an angle of 30°.
As noted above, today you can choose a tool that has double blades. In this case, when one side becomes unusable, the knife is turned to the other and the work continues. But after the second blade has become dull, the electric planer is equipped with a new knife.
There are three nuts in the body transverse groove, which are designed to fix the cutting parts. The knife is installed in them, after which the height is adjusted using two screws that are located at the edges. In order to remove the old blade, you need to loosen the nuts while screwing the screws in until the very end. This will allow the knife holder to slide out of the groove.
The drift is selected to match the thickness of the knife. Using it, the cutting element is knocked out of the latch. After which the new knife is driven into place of the old one. At this stage, special attention is paid to keeping the blade parallel to the knife holder.
And again, we should not forget that the new cutting tool should be adjusted in height using screws, and then secured with nuts. To avoid shaft imbalance, the blades are set to the same clearance.
The entire procedure for replacing knives should only take place with the electric planer turned off.
Safety requirements
If you use the tool correctly, you can quickly and efficiently complete a fairly large amount of work. However, if you do not adhere to safety requirements, you can suffer significant injuries.
- Before work, the workpiece must be securely fixed, otherwise it may move or even fly off during work.
- During the technical inspection of the blades and their adjustment, the electric planer must be de-energized by unplugging the cord and plug from the socket, because accidental starting can lead to very unfavorable consequences.
- You need to start processing only after the knives have started and warmed up, that is, the cutting elements must accelerate to the required speed.
- The instrument must be placed exclusively on its side.
When working, avoid bending or tangling the cord that supplies power. Electrical insulation and integrity are also required.
Editing on the touchstone: recommendations
Electric planer knives are mounted on the top of the tool’s rotating drum.
The quality of planing directly depends on the sharpness of the knife used. But this does not mean that if the blade is slightly dull, it should be changed immediately. After all, such parts are not so cheap that you have to buy new ones after each job. The way out of this situation is to edit the edge. A grinding wheel is used for this purpose.
Sanding is a fairly simple process. To do this, the knife is placed on the flat surface of the grinding wheel, and during the grinding process you need to move it from one side to the other. During this action, the parts will heat up, so you should not use excessive force. Otherwise, it may cause the edge to lose hardness or turn blue.
After the blade is polished, it needs to be straightened. For the manual process, whetstones are usually used. They are artificial or natural bars. If you use the machine method, then in this case a finishing disk is used.
When dressing Belgian donkeys, you must use water, and for Arkansas ones, a mixture of oil and kerosene. In turn, bars made of artificial materials can differ in grain size: coarse and fine. The first side carries out a rougher edit, while the second requires a more “jewelry” approach. If you use whetstones without lubrication, it will ruin the knife as it will lose its hardening. In addition, the bar should be washed well after each procedure, otherwise it will become greasy.
The edge of the blade must be rested against the block and moved in a cross-shaped motion until its surface acquires a shine similar to a mirror. In addition, there should be no burrs left on the electric planer knife. The front side is straightened with up and down movements.
The machine finishing disc is made of artificial materials, as a result of which its surface becomes abrasive. Mechanical straightening takes much less time than manual straightening, but purchasing the appropriate equipment will be somewhat more expensive.
Features of the work
Before you start sharpening, you need to select the sharpening angle of the plane knife. This indicator is influenced by various factors:
- Properties of the tree that will be processed. To work with soft wood (larch, linden, pine, aspen), the optimal angle range is from 40 to 50 degrees. For hard wood (oak, hornbeam, maple, pear), set the angle to 55–65 degrees.
- Setting the tool at a certain angle. The quality of planing also depends on this indicator. For soft wood - about 40 degrees, for hard wood - about 25.
- The material from which the cutting edge is made.
After thoroughly studying the tool and selecting the materials to be processed, you can begin resharpening the plane at home.
Hand planes
Step-by-step instructions for sharpening a hand plane:
- Determine the sharpening angle.
- Unscrew the clamping bolts and remove the blade.
- Place a coarse-grit whetstone in a vice.
- Use the chamfer of the blade to make circular movements on the abrasive material.
Movements should be slow. When sharpening, the metal is moistened with water. After processing with large grains, a fine-grained stone is used. Sharpening of a plane, which is intended for manual planing, can be carried out on a special machine.
Electric planers
The main difference between electric planer blades and hand tools is double-sided sharpening. When one side becomes dull, the knife is turned over to continue planing. Their sharpening is carried out using sharpening machines. Step-by-step instructions for sharpening planer knives:
- Unscrew the blade from the tool.
- Moisten the abrasive stone with water and set the speed to low.
- Start the engine.
Minor damage and unevenness can be restored using sandpaper. We must not forget that blades for electric tools can be made of hard alloys. If such a cutting edge is dull on both sides, the element will have to be replaced.
Knives for electric planers become dull faster than those for hand tools. This is due to high planing speeds. To sharpen them, it is necessary to use specialized equipment, accurately set the angles and the number of revolutions of the abrasive wheel. Exceeding the speed will lead to loss of hardness and destruction of the cutting edge.