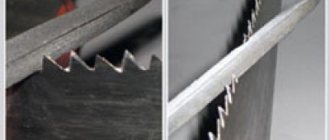
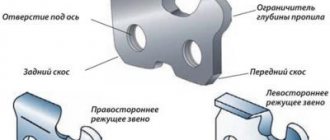
Cutting part shapes and sharpening angle
At the first stage, the type of band saw is determined.
The main indicator is the shape of the teeth. Depending on this parameter, they are divided into dividing, carpentry or intended for sawing logs. The initial geometry and routing angle are determined by the manufacturer. It is recommended to find out this data at the stage of purchasing components. They are needed to determine the machine parameters. For hardwoods, the rake angle should be kept to a minimum. This ensures optimal contact between the processing material and the metal. If you plan to process soft varieties, you can use models with a larger rake angle to increase processing speed.
The determining parameters for self-updating the cutting edge are:
- tooth pitch. This is the distance between the cutting elements of the structure. Common values are 19, 22 and 25 mm;
- tooth height. The size from its base to its top;
- corner. The main value that you need to know to form the cutting plane. For carpentry models it is 35°. In dividing saws, the angle is from 18° to 22°. In structures for processing timber – 10°-15°;
- divorce. Determines the deviation of the tooth from the general plane of the blade.
In order to eliminate resonance, some types of cutting tools use a variable pitch of the teeth. This does not affect manual sharpening, but requires careful setting of parameters during automated sharpening.
What you need to know about tooth sharpening angles
The geometry of band saw teeth can vary depending on the characteristics of the material being processed. This is expressed in the shape of the tooth and the distance between the individual elements of the cutting edge.
The profile of the band saw is determined by the markings applied by the manufacturer. It looks like this:
- WM is a universal option designed for sawing soft and hard wood;
- AV – used for longitudinal cutting and sawing of hard materials, such as frozen wood;
- NV – has a narrow blade width, therefore ideal for figure cutting;
- NU – cutting edge with a wide tooth pitch, which ensures high performance when sawing soft wood;
- PV is almost a complete analogue of the previous blade, but has a flattened tooth shape;
- KV – profile is used for wide band saws intended for soft wood;
- PU – wide saw for sawing hardwood.
The tooth pitch is selected individually, depending on the material. For example, only fine-tooth blades are used to cut hardwood and metal to avoid damaging the cutting edge. Soft raw materials and thick-walled materials are processed with saws with a large distance between the teeth, which speeds up the production process.
Band saw routing
Geometric parameters of the band saw
Before forming the cutting edge, the teeth must be set correctly. During the entire period of operation, due to constant loads, their location may change. Therefore, the geometry is adjusted first, and then sharpening occurs.
The setting is a bend of the teeth relative to the plane of the main blade. This procedure is performed only on a special machine. In case of large discrepancies along the entire length of the belt, premature damage or breakage of the web may occur. Therefore, before this you should decide on the type of wiring.
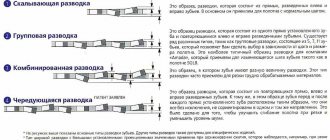
The angle of inclination must correspond to the original one. The type of wiring is also taken into account, which can be as follows:
- classical. Alternate bending of the teeth relative to the blade to the right and left sides;
- cleaning The first and second teeth deviate to the right and left, but the third remains unchanged. This technique is used for saws that are intended for processing hard rocks;
- wavy. The setting angle for each tooth is individual. As a result, they form a cutting edge that resembles a wave. The most complex type of wiring.
During bending, not the entire tooth is subject to deformation, but only part of it. Often the deviation occurs by 2/3 of the total height.
Sharpening blades in winter
If everything is clear about sharpening blades under normal conditions, then sharpening in the cold season needs to be said separately. There is a difference in sharpening tape blades in summer and winter cold. It consists of changing the degree of sharpening. The angle that applies to blades in winter should be 90 degrees, in contrast to summer, when the sharpening angle is 120 degrees.
Recommendations from experts.
When sharpening a blade using a machine, before starting the process, you need to ensure the accuracy of the location of the grinding wheel in relation to the tool.
It is extremely important to remove such a volume of metal from the recesses so that all microcracks are reliably eliminated. If the blade has operated without normal maintenance for a longer time than the manufacturer allowed, the volume of metal removed in one pass must be increased. To test the effects of sharpening, always use a new blade as a sample.
- The tooth configuration of the blade is an indicator that has been worked out and adjusted over the years. Therefore, relying on the device to cut “without a hitch,” no matter what you do with the teeth, is a huge mistake.
- If operating standards are followed, the belt web will work conscientiously until the width is reduced to a value equal to 65% of the initial parameters. The width decreases, of course, during sharpening.
- There is absolutely incorrect advice that there is no particular need to remove burrs after sharpening. If you take this into account, then the occurrence of microcracks in the saw is guaranteed.
- Upon completion of the work, the tape blade must be cleaned of chips and resin without shelving, and carefully inspected before sharpening. Otherwise, the risk of contamination of the sharpening discs is very high. And this will certainly lead to a poor-quality sharpening process.
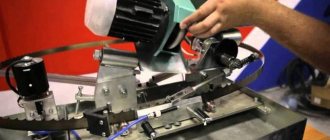
Features of the configuration and principles of operation of the machine.
The TL-30/60 control system is simple and convenient. The control unit contains:
- saw feed speed control button
- coolant flow control button
- Buttons for separate on/off switching of the feed mechanism and the electric motor of the grinding wheel
- emergency stop button
Profile CBN grinding wheel Sharpening is carried out with a profile CBN grinding wheel that follows the profile of the tooth, which guarantees the unchanged profile of the saw after re-sharpening.
Feed system The saw feed system is designed to eliminate backlash and allows the saw tooth to be brought into the zone of interaction with the stone with an accuracy of 0.1 mm
Design features of the feed system: The cam adjusts the tooth pitch without affecting the profile of the saw being sharpened
Beam guides allow you to easily and quickly adjust the machine to the length and width of the saw
The saw fastening mechanism has spring-screw clamps and allows you to quickly remove/install the saw on the machine.
Additional roller guides perform a basic function, turning each saw tooth to a given depth.
How to sharpen a band saw correctly
Let us immediately note that if you do not have the experience and skills to perform such work, it is better to entrust saw sharpening to professionals. Violation of the geometry of the teeth of the cutting edge, the appearance of scale on the metal or incorrect routing significantly reduces the service life of the blade.
Having decided to sharpen a band saw with your own hands, it would be useful to first familiarize yourself with the key definitions, the knowledge of which may be required during the work process. So, for the correct formation of the cutting edge you will need:
- setting - deviation of the teeth from the plane of the main saw blade;
- tooth height - the distance between the top point and the base;
- pitch - the distance between the teeth, usually varies between 19-25 mm.
- sharpening angle – depends on the intended purpose of the tool; for example, the recommended sharpening angle for carpenter saws is 35°, for dividing saws – 18-22, for sawing timber – no more than 15°.
The sharpening angle is determined by the manufacturer, so when you edit the saw yourself, it is recommended to adhere to these parameters.
We provide detailed instructions that will help you sharpen a closed saw correctly without resorting to the services of specialists.
Wiring
Setting up band saws for wood is the first stage of restoring the profile of the cutting edge. During operation, the arrangement of the teeth may change, so until the correct geometry is achieved, there is no point in sharpening the saw part.
There are 3 ways to split the saw:
- classic - the teeth alternately deviate to the right and left;
- stripping - the 1st and 2nd teeth deviate in different directions, the third remains straight. This profile is created for sawing hard materials;
- wavy - the most complex option, resembling a wave in shape. Here, each tooth is given an individual shape, and this type of setting is usually performed only in specialized workshops.
It should be noted that when setting, not the entire tooth is bent around, but about 2/3 of the upper part. The procedure is performed on a special machine for setting band saws. The cost of such a tool is quite high, so it is bought if you need to set up several tools. Its presence can become the basis of a sharpening business.
Of course, it may not be possible to do everything correctly the first time, even on an adjusting machine, so at a minimum the profile geometry should remain the same as before the work began.
Sharpening
This is the main stage of cutting edge dressing and can be done in two ways.
Full-profile sharpening of saws is performed with a CBN wheel installed in a special sharpening machine.
This is a fully automated operation used by professionals. The operation of the machine for sharpening band saws for wood is controlled electronically, and the grinding wheel processes the entire band in one pass. The disadvantage of this method is that the CBN wheel is selected individually to the profile of the saw, so in order to edit different tools, the sharpening element must be included in the range.
Sharpening of teeth is done manually or using specialized equipment.
In the first case, you can restore the sharpness of the teeth in the shortest possible time, but the work requires certain skills. In the second - painstaking work: 4-5 movements along the edge of each tooth.
Diamond, CBN and corundum wheels are used for automatic sharpening
It is important to understand that when performing this procedure, only sharpness is given to the teeth; the geometry created after setting the blade must remain unchanged
Divorce Devices
For divorce, there are special divorce devices that are distinguished by great variety and functionality. Today, many experts appreciate the KEDR saw setting device for its reliability, simplicity and ease of use, as well as its low price.
It is a manual machine that provides a layout accuracy of 5 microns. The machine is equipped with special support stands to facilitate its use. The presence of a dial indicator on the machine maximizes the accuracy of the layout.
The carefully thought-out design of the KEDR adjusting device ensures productive and efficient use of the entire resource of the saw specified by the manufacturer. It can be easily adjusted to the required setting parameters to ensure the optimal cutting width. As a result, you can get by with less engine power, since the friction forces during sawing are reduced.
This setting machine easily and simply provides setting with minimum sawing resistance.
Each type of wood has a characteristic hardness. Depending on this characteristic, the pitch of the saw teeth should vary. For hard breeds the step should be smaller.
Despite the obvious advantages of this machine over other devices of similar purposes, it has an affordable price, which also contributes to its increasing recognition throughout Russia.
The machine for setting up band saws “KEDR” has the following technical characteristics:
- overall dimensions – 28.5x12.1x36 cm;
- Width of cutting saws – up to 5 cm;
- the pitch of the saw blades is 2.2 cm;
- weighing 5.2 kg.
Let us also remind you about simpler devices for setting up hacksaw saws. Their use for band saws is associated with low accuracy and high labor intensity. Their use is justified only in the absence of special devices.
Wiring
Installation of a band sawmill.
Before installing the band sawmill, it is necessary to prepare the site. The site must be selected on a solid and horizontal place with differences of no more than 3 cm. It is best to install the sawmill on a concrete pad with a thickness of at least 10cm and, upon completion of installation, secure the sawmill frame with anchor bolts with a diameter of 24 mm or more. Before installing the band sawmill, it is necessary to prepare the site. The site must be selected on a solid and horizontal place with differences of no more than 3 cm. It is best to install the sawmill on a concrete pad with a thickness of at least 10cm and, upon completion of installation, secure the sawmill frame with anchor bolts with a diameter of 24 mm or more. To align the band sawmill frame horizontally, there are adjusting bolts located in the corners of the frame halves. The remaining bolts with which the frame rests on the surface of the platform are support bolts. The support bolts are unscrewed after installation is completed and the level is checked. If the surface of the site is soft, it is necessary to place metal plates with a thickness of at least 10 mm under the adjusting bolts. The first stage of installing a band sawmill is quite simple. The sawmill frame consists of two halves, which must be bolted together. When joining and tightening the halves, the guide rails must match and there should be no gaps between them! Then mark the drilling locations for the anchor bolts. Slide the band saw frame, drill holes and return the frame to its place, aligning the mounting holes on the frame with the holes in the concrete. If necessary, place metal plates under the adjusting bolts. You can proceed to the next stage of installing the band sawmill: aligning the frame horizontally. When installing the band sawmill frame horizontally, it is best to use a hydraulic level. A hydraulic level is a flexible transparent hose a couple of meters longer than the length of the frame and with a diameter of 15mm. If you couldn’t find a transparent hose, then insert transparent sleeves with divisions into the ends of the hose; you can use medical syringes of a suitable diameter. There should be no air bubbles in the water hose, otherwise it will be difficult to level, almost impossible. When moving with a hydraulic level, clamp/plug the ends of the hose with your fingers so as not to spill water, but at the time of measurement the ends should be open. First, using a hydraulic level, we determine which of the ends of the band sawmill frame is higher, then which of the edges of the end is higher. We will align it relative to this highest angle of the bed. Alignment should be done only along the top edge of the guide. For convenience, across the frame, at the joint, you can place a flat block or a building level, along the bottom edge of which we set the level. So, the most important stage of installing a band sawmill has been completed. Check the joints of the guides. By unscrewing, lower the support bolts to the surface of the platform, if necessary, placing metal plates. It is better to unscrew the support bolts by hand until they stop, using a wrench; there is a danger of lifting the frame at the location of the support bolt and disturbing the horizontal level. When setting the levels, make sure that the hydraulic level hose does not overlap the frame. For example, if you place the hose around the perimeter when checking corners diagonally, the hose may not be long enough. In this case, drag the hose under the frame of the band sawmill; when setting the levels, the hose should not lie on the frame. We install the stops and log clamps into place. Before installing the saw carriage, it is necessary to clean the guides from preservation. The guides are lubricated with lithol before painting, and the paint will not be difficult to remove. If this is not done, then the paint film applied on top of the lithol will collapse under the pressure of the carriage, stick to the carriage rollers and interfere with the movement of the carriage along the guides. We install the saw carriage with the rollers on the guides and check the smooth running along the guides.
Machining tooth tips
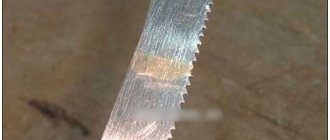
Thorough filing of the tops of the teeth with a file is absolutely necessary to level them in height if the saw has been damaged or improperly sharpened. This operation, in a simplified form, before sharpening, creates a small shiny spot on the tip of each tooth, which will be an invaluable aid to uniform sharpening. Make the jig by placing a personal file into a slightly converging groove in a block of hardwood and secure it with a wedge. Move this clamping block along the side of the blade so that the file moves along the tops of the teeth. Two or three light strokes should be enough to prepare you to sharpen the saw teeth in good condition. If your saw requires extensive machining to ensure all the teeth have a shiny speck, contact a professional who will shape them before setting and sharpening.
Recommendations for sharpening
During operation of the canvas, its rupture is very often observed. This is explained by the fact that its sharpening is poorly carried out. This is explained by the concentration of stress in the profile of the blade if sharpening is carried out at a poor level. The need for the procedure is determined by the condition of the band saws. If the roughness of the cut surface increases, this leads to dulling of the tool.
Tool sharpening is carried out using diamond, electrocorundum, and CBN discs. Their choice directly depends on the characteristics of the material being processed. Sharpening of blades, the production material of which is tool steel, is carried out with corundum wheels. The procedure for bimetallic tools is carried out correctly if a diamond or CBN wheel is used. The instructions will tell you how to carry out this procedure. The most important thing is that the angle does not change during the process.
Wheels of various diameters can be used for sharpening. The choice of one of them is determined by the parameters of the device. For this purpose, profile, flat, dish-shaped, cup circles are most often used. Sharpening is carried out correctly if the peripheral speed is from 20 to 25 meters per second.
The principle of sharpening belt blades
If there are jagged edges on the fixture, chipping will occur on the edge of the workpiece. That is why it is necessary that sharpening is carried out correctly. During this process, it is necessary to work not only with the front, but also with the back of the canvas. Sharpening of devices can be carried out using different circles. In this case, it is necessary to take into account the angle of the canvas. If you want to carry out the procedure correctly, then you need to learn it from a specialist.
Sharpening the saw
In order for band saw equipment to work efficiently, it is necessary not only to select it correctly, but also to sharpen it in a timely manner. For this purpose, special circles are most often used. This procedure is as simple as possible, which allows it to be easily performed by a master without relevant experience.
Recommendations
For clarity, you can combine these sheets. Please note that a data discrepancy of just 0.5° already leads to inaccurate profile grinding. And an inaccurate connection of the left straight line also leads to a change in the pitch of the saw. Now imagine that the sharpener should do all this not on paper, but on a rotating circle, where it is even more difficult to maintain the exact dimensions.
But it is not enough to form it once. It is necessary that when re-sharpening after sawing, the profile of the end of the wheel should be exactly the same as during the previous sharpening, which is practically impossible.
Therefore, it is not so important what quality you sharpen around. Even if you have a very good wheel and you can sharpen a set of band saws for an entire shift without additional profiling, you will almost never be able to repeat exactly the same profile of the end of the wheel the next time you sharpen it, which means you will not be able to accurately sharpen the profile of the saw teeth after its dullness. Now you understand why accurately shaping the end of a circle profile is not just difficult, but an extremely difficult task.
To somehow make its solution easier, you can sharpen with bakelite reinforced circles 3-4 mm thick. But they are difficult to find in the required quality.
Therefore, the profile of the circle must be monitored very carefully. Otherwise, this leads to the following changes in the body of the band saw: A change in the radius at the base of the tooth, which entails a change in the pitch and the impossibility of normal sharpening of the saw on the next pass. The circle begins to unevenly cut into the front edge without touching the back, or vice versa, that is, it becomes impossible to grind the full profile of the saw at once.
The sharpener tries to sharpen at least the cutting edges of the teeth in just two or three passes, but at the transition point a microhump or microcavity appears, which leads to the appearance of microcracks, and microcracks that have already arisen during sawing are not removed, which leads to premature rupture of the saw along the body. Changing the sharpening angle, tooth height, cavity shape, which affect performance
Band saw alignment and sharpening table.
Rules for sharpening band saws for wood
This can significantly reduce the friction of the blade and prevent it from jamming. To ensure free movement of the blade on the walls of the material being cut, its width must be greater than the thickness of this material.
Types of band saw wiring The wiring can have several varieties. It may have different names from different manufacturers.
Most often it can be: Standard, which is characterized by the opposite bending of the cutting elements in various directions. It is most often used for band saws that cut hard materials. Wavy, which belongs to the category of complex structures.
Divorce in this case has a variable meaning.
In this case, a kind of wave is formed. The unraveling consists in bending not the entire canvas, but only a certain part of its top.
The parameters are determined strictly by the tool manufacturers. Their range is from 0.3 to 0.7 millimeters. Protective. Setting consists of bending two teeth.
At the same time, the third one remains in place. Intended for band saws for processing particularly hard materials.
Every third tooth is shaped like a trapezoid. The location is the center of the canvas.
With its help, the most correct direction of the saw blade is ensured.
Woodworking machines are characterized by the universal design of the sawing tool. The setting for processing soft rocks should be characterized than in equipment for processing hard rocks. But the spread should not be such that there is a wedge in the center without a cutout.
The spread must be characterized by the same arrangement of all cutting elements. The teeth must be set so that the deviation is no more than 0.1 millimeters.
If the saws are unevenly positioned, this will cause the band saw equipment to move to the side during operation.
During operation of the canvas, its rupture is very often observed. This is explained by the fact that its sharpening is poorly carried out.
Recommendations from experts
- If a machine is used to sharpen a tool, you should inspect it before starting the operation to determine whether the wheel is in the correct position in relation to the saw.
- It is necessary to remove such a layer of steel from the sinuses so that all microscopic cracks are guaranteed to be removed.
- If the saw has been operated without maintenance for longer than the period allowed by the manufacturer, the volume of metal removed per sharpening must be increased.
- To control the results of the operation, always use a new product as a standard.
The result of incorrect operation is that the teeth of the tool are burnt.
- The shape of the teeth is a characteristic developed and verified by specialists. If you change it, you will not be able to process workpieces efficiently. Based on this, sharpening must be done so that the shape of the teeth and the profile of the blade remain the original factory ones.
- If you follow all the rules of operation and maintenance, the tape tool will serve you faithfully until its width is ground down to 65 percent of its original value.
After completing the work, the belt device must be immediately cleaned of tree sap, sawdust, and resin. Before starting maintenance, the tool should be carefully inspected, otherwise you will clog the wheel. This will lead to a significant reduction in sharpening efficiency.
Common Mistakes
- Burnt saw blades. This happens due to the application of excessive force when working with the sharpening disc. This defect leads to the teeth becoming dull very quickly.
- Non-optimal tooth angle and irregular, angular shape of the sinuses.
This sharpening result is possible due to several errors:
- demolition of the eccentric of the grinding machine;
- incorrectly set angle of inclination of the machine head.
- improperly selected grinding wheel profile.
Recommendations
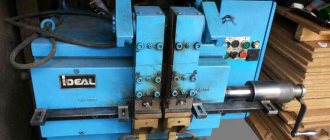
Machines that produce adjustment of two teeth at once are manufactured in the following types:• together with a sharpening machine;• separately only an adjustable machine powered by an engine;• separately only an adjustable machine with manual feed in the form of a wheel (photo 1) or lever.
Photo 1.
Adjustable machine with manual feed in the form of a wheel Machines for this option are most strongly advertised by sellers, because they supposedly should make the work of the sharpener easier by setting two teeth at once on both sides of the band saw. This is a very good advertising “noodle” for the ears of those who have never set up band saws themselves.
Those who have at least once prepared a saw for work know very well that each tooth on the saw is set individually. The tooth is always retracted by the pusher by an amount greater than the required setback.
When the pusher is pulled back, the tooth always springs back a certain amount.
Moreover, even for one saw, the springing back of each specific tooth can fluctuate between 5 and 25 indicator units. Therefore, the sharpener almost always has to make two or three presses, often to different indicator values each (that is, with different force), to obtain the required setting value.
There are also teeth that spring worse than others and even with one or two presses before the indicator reads, as on well-spring teeth, they remain at values greater than the required set, and they have to be specially bent back. Now it should be clear to you that one It is simply impossible to separate two teeth by pressing well at once.
There are also teeth that spring worse than others and even with one or two presses before the indicator reads, as on well-spring teeth, they remain at values greater than the required set, and they have to be specially bent back. Now it should be clear to you that one It is simply impossible to separate two teeth by pressing well at once. But the machines sell well, and some are even happy with the results.
When setting the saw on such a machine, you should always know: you will never get a guaranteed good setting of the band saw.
Divorce will always be unpredictable. With small feeds of the carriage, a random batch of saws with more or less equally spring-backed teeth, sometimes it is possible to saw normally with a new clean mechanism. But problems inevitably arise later.
But they begin to look for the cause of these problems anywhere, but not in the divorce, believing that it is very good. Manufacturers don’t even put indicators on almost all of these adjustable ones. Explaining this by saying that you install everything once, and then just move it apart: the hammers always hit the same way and there is no need to check.
And you check and see for yourself how large the spread in the adjustment values actually is. In addition, the accuracy of the resulting adjustment in these machines is strongly influenced by the same reasons as in classic ones: dirt getting into the mechanism, risks on the pusher stop and support plates . The height of the part of the tooth being set has a particularly strong effect.
The sharpening angle of band saws in winter.
Do-it-yourself cutting and sharpening of wood band saws
Despite numerous attempts to use saws from other manufacturers, Wood-Mizer was unable to find a saw that could produce a quality cut.
Then it was decided to invest in the development and creation of an innovative product - a bandsaw blade designed specifically for wood.
It was experimentally discovered that the best alloy is not the cheap steel used by other saw manufacturers, but the more expensive alloy from which the famous Wood-Mizer DoubleHard series saws are now produced. Also during the research, an optimal 10/30 tooth profile was developed, which today is the standard in the woodworking industry. Despite its apparent simplicity, in reality the Wood-Mizer band saw is an intellectually capacious product that has been tested on millions of sawn cubic meters of wood.
The geometric parameters of the saw are strictly balanced and optimally match the type of wood being cut, engine power and a number of other factors. Wood-Mizer's engineering team is continually working to develop and improve this product.
If previously Wood had one tooth profile, now there are four options available. Previously, saws with a width of 32 mm and 38 mm were manufactured - now saws with a width of 35 mm, 45 mm and 50 mm have been added to them. That is why the Wood-Mizer saw is copied - after all, only the best is always counterfeited. Today, the Wood-Mizer band saw is a product used in 220 countries, on more than 50,000 band saw machines.
Today, the Wood-Mizer band saw is a product used in 220 countries, on more than 50,000 band saw machines.
And everywhere in the world, this saw cuts wood consistently and with high quality, and its service life provides users with minimal tool costs per volume of sawn products.
Tooth Profile A - Tooth Pitch
Types of band saw wiring
Like any other tool, a band saw undergoes wear and tear after each cutting cycle. This is a natural and inevitable process. That is why every band saw needs regular and qualified maintenance - setting and sharpening. Such maintenance allows not only to maintain the cutting blade in working condition, but also to significantly increase its service life.
Correct routing allows you to increase the service life of the cutting blade and significantly improve its functionality. The meaning of this operation is as follows: the cutting teeth of the saw are bent in different directions, which reduces the friction force during the cutting process, as well as minimizes the risk of the blade being pinched by the workpiece. The layout of the band saw can be carried out according to three schemes, the choice of which depends on the type of material being processed.
- With the so-called stripping type of setting, the teeth are bent in such a way that every third of them remains intact. This scheme is used if the cutting blade will be used for cutting particularly hard metals and alloys.
- The classic type of setting involves bending each cutting tooth in turn.
- With a wavy setting, each cutting tooth is bent to a certain angle. It is clear that this type of wiring is the most complex of all others.
Band saw setting machine
To bend the teeth of a band saw, special equipment is used, which makes it possible to perform such a technological operation quickly and as accurately as possible. According to generally accepted standards, the maximum tooth set value should not exceed 0.7 mm, but usually its value is in the range of 0.3–0.6 mm
It is important not only to choose the type of setting, focusing on the characteristics of the material to be sawed, but also to do it correctly, bending the teeth only 1/3 or 2/3 of their height
After setting, you can send the cutting blade to a machine for sharpening band saws. Statistics show that band saws most often lose their functionality due to the fact that their sharpening was carried out incorrectly or at the wrong time. An indicator that the band saw needs setting and further sharpening on the machine is the increased roughness of the cut surface. The need for such a procedure can also be determined by the appearance of the cutting teeth.
The main elements of any sharpening machines are wheels, the choice of which, first of all, depends on the hardness of the material used to make the cutting teeth. In order to sharpen hard materials, it is necessary to use appropriate wheels. Thus, for sharpening bimetallic blades, sharpening tools consisting of borazon or diamond elements are chosen, and for sharpening saws made of tool steels, corundum wheels are quite suitable.
Tools for sharpening band saws are selected based on both composition and design. For blades of different designs and sizes, the following types of circles can be used in machines:
- disc configuration;
- cup-shaped;
- profile;
- flat.
Set of Wood-Mizer devices for sharpening and setting band saws
According to the instructions, when sharpening a band saw on a machine, you should ensure that the following requirements are met.
- There should be no burrs left on the surface of the tooth when sharpening it.
- The grinding wheel should remove an equal layer of metal over the entire tooth profile.
- To avoid overheating of the teeth when turning them on a machine, be sure to use a special cooling liquid.
- When sharpening, the profile and height of the teeth being processed should not change.
- It is imperative to monitor the pressure that the grinding machine wheel exerts on the tooth being processed. If this requirement is neglected, the pressure may be too high, which can lead to annealing of the teeth.
Sharpening band saws with your own hands has some features. In such cases, as a rule, the back surface of the teeth is sharpened, although if you use the manufacturer’s instructions or watch a thematic video, you can also sharpen their front surface.
Proper cutting and sharpening of the band saw is half the success!
The most important factor in the success of a lumber business is the type of saws used in production. The size of the saw, the material from which it is made, and the technology used to produce it all matter. But even using optimally sized saws manufactured to the latest standards will not allow you to make the profit you expect if those saws are not sharpened and set correctly. Improper cutting and sharpening of the saw lead to the appearance of defects on the lumber, which means its value drops significantly. Proper sharpening and cutting of saws is especially important when working on a band sawmill. Unfortunately, in practice, many people even confuse the sequence of these procedures: first they cut the saw, then they sharpen it. As a result, the spread of the saw tooth “goes away”, and the saw needs to be set again, or, if this is not done, the quality of the finished product will leave much to be desired. If we talk about the machines on which saws are sharpened and set, then every detail is truly important here. contributed to the development of high-quality adjusting and sharpening devices. Sharpening machineThe production sharpening machine is distinguished by fine adjustments, which allows you to adjust the feed size with an accuracy of 0.1 mm. Almost all sharpening machines on the market today sharpen one specific pitch of the band saw blade. The machine allows you to sharpen 19, 22, 25 steps, which is its significant advantage. Another distinctive feature of the machine is that it does not harden the tip of the saw tooth, because otherwise the tip of the tooth will fall off when entering the log, resulting in a wave appearing on the board. The machine allows you to sharpen saws up to 7 m. In case of failure of any electric motors, mechanisms, buttons, components can easily be purchased at a car store. Modern band saws are durable and yet flexible. Despite these undoubted advantages, the importance of correct saw setting is difficult to overestimate, because the quality of the saw tooth setting directly affects the quality of the resulting lumber. The adjusting machine has the correct geometry: when installing the saw in the adjusting machine, the tooth root is located between the cheeks that clamp the saw. In many other machines, including from a number of well-known manufacturers, this condition is not met. Therefore, when a tooth is bent, both the tooth and the saw body are deflected. Technically, correct saw alignment means something else: the pusher rests on 1/3 of the tooth and bends only its tip. When making an adjusting machine, two clamping stops are used, which, when lightly pressing on the handle, press the tooth against the indicator head. The pusher, not reaching the tip of the tooth, shows the actual groove on the band saw. If it is insufficient, the operator presses the tooth until it is moved apart to the required size. We consider it very important to pay attention to one point: the tooth of a band saw has such a property as metal memory. Because of this, under the influence of inertia, the tooth tends to return to its original position. Therefore, for correct alignment, it is not enough to apply one pressure on each tooth: it is necessary to act on the tooth several times so that it remembers its position. If someone tells you that it is enough to press once on each tooth, know that you are being misled. Two clamping stops with powerful springs used in the machine show the actual saw tooth set, which is very convenient: you don’t need to endlessly unscrew and reconnect the pusher to find out how the saw tooth is actually set. Adjusting machine Another strong point of the adjusting machine produced by the company is the ease and safety of the operator’s work: the tooth is adjusted not by pressing the pusher forward by the operator, as in a number of analogues, but by the operator’s own weight and with the help of an eccentric. As a result, the operator does not experience sprains in his hands. So, high-quality adjustable and sharpening machines are something that, undoubtedly, should be in the arsenal of every sawmill owner. But by themselves they do not guarantee the quality of lumber and will not allow the saw to serve for a long time if sawmills with serious technical shortcomings are used in production. For example, if the rollers are made with a cone, or they became conical because the saw sharpened them, then even with proper sharpening and setting, the saw begins to look for its place in the log. This will happen because the rollers are at an angle. If the pulleys on the sawmill are spread apart and are not in the same plane, then the saw does not flare clearly in the middle, but from the sides, and then the tension goes to the edge of the band blade. This also reduces the life of the saw. So the role of correct saw setting and sharpening is, of course, great, but these factors do not determine 90% of high-quality sawing, as is commonly believed. It’s just that the saw itself will not be able to cut perfectly smoothly and not break down for a long time if, for example, a rigid tension is used at the sawmill. https://www.ecotmn.ru/rekomendacii/shest-pravil-pilenija https://www.bibliotekar.ru/spravochnik-182-razrezka/23.htm https://www.pilorama54.ru/pokupatelyam/lentochnye- pily/pravilniy_razvod_i_zatochka/
