Oxidizing aluminum at home
Anodizing aluminum at home with your own hands is necessary if you want the material to be protected from corrosion and last as long as possible.
Aluminum is very often used in home production and everyday life, so knowing how to protect it yourself without resorting to the help of specialists will be useful for everyone.
Thanks to anodization, a dense and thick oxide film appears on the metal surface, which protects it from corrosion and other negative factors of the natural environment.
Thin-layer anodizing technology, which you will learn about in this article, will help you create the most durable and resistant film.
- Preparation for anodizing
- Stages of work
Preparation for anodizing
Anyone can do anodizing with their own hands, but you need to take minimal precautions before starting work. It is best for the process to take place outdoors: on the street or at least on the balcony.
You also need to think about self-defense, because...
During anodizing, you will be dealing with acid, and this is a chemical that can cause unpleasant itching if it comes into contact with the skin, and much more serious injuries if it gets on the mucous membrane of the eyes.
You can see the anodizing process with your own hands in the photo.
It is best to do anodizing while wearing safety glasses and prepare water or a weak soda solution in advance so that, if anything happens, you can immediately rinse the area where the acid has come into contact.
Anodizing should never be carried out indoors, because... you will be dealing with oxygen and hydrogen emissions that appear at the anode and cathode.
The result will be an electrochemical compound with properties similar to dynamite.
If you create such an electrochemical compound in a closed space, then one spark generated by the electrochemical compound will be enough to cause serious injury and even death.
Before starting work, consider the size of the parts: after the anodizing process they will increase in size by at least 0.5 mm - this is the thickness of the protective layer that is created during the process.
If before anodizing the parts are tightly screwed, then after it is finished they most likely will not be screwed at all and all the work will be in vain.
Therefore, make sure that the materials move freely before starting anodizing, so that later you do not have to start the whole work again, because. Sanding an anodized surface is practically useless.
However, you can polish the parts using a buffing wheel until they have a mirror finish. This can be done with your own hands.
Thanks to this process, the products will look better and will also reduce the likelihood of burnout, which is not uncommon during anodizing.
In addition, the anodizing technology does not in any way affect the defects of parts - if they exist, they will remain noticeable even after the work is completed.
Galvanization is a necessary stage preceding the main work. Before doing this, the metal must be thoroughly degreased. To do this, it is better to use laundry soap and a brush.
Some people advise soaking the metal in sodium or potassium, but this can cause the surface to deteriorate. It is necessary to rinse the products alternately, first in hot and then in cold water.
:
You need to add washing powder to a plastic container and dissolve it in hot water, and then pour the parts into it and shake them. After washing, you need to dry the solid body of the parts under hot air.
To carry out anodizing, you will need an electrolyte, which you can make yourself. For home production, sulfuric acid is most often used, which is diluted in distilled water.
You can buy both water and acid at any auto parts store so as not to waste time making them yourself.
You just need to take into account that in stores the acid is sold diluted, so the proportions for mixing the liquid should be 1:1. The anodizing process requires about 10 liters of electrolyte for small parts and 20 for large ones.
You need to pour water into the acid gradually, in a thin stream, because...
the liquid instantly heats up and with a large flow it will simply boil and begin to splash.
Don't forget to stir the mixture with a glass rod and put on your glasses before working.
If acid gets on your skin or clothing, it must be removed with water, and then rinse the area with a soda solution.
Stages of work
When anodizing parts, the temperature should remain in the following range: from -10 to + 10 degrees.
If it is lower, then the voltage of the power supply will not be enough to maintain the required current strength, and if it is higher, then a hard protective coating will not form - it will be soft and colorless and will not be able to protect the metal.
It is best to finish anodizing when the temperature has reached +5 degrees, because... There will be different temperatures in the corners of the bath and on the surface of the object, and the anodizing procedure allows you to generate a sufficient amount of heat.
In addition, the process of moving the electrolyte must be constant: it can be stirred with air, a spoon or a pump so that the temperature on the surface of the workpiece and the aluminum is approximately the same.
The temperature difference will lead to the fact that some areas of the part will overheat, and then breakdowns will appear on them or the product will be damaged.
To perform hard gold anodizing, you will need special equipment. Most often, these are several baths, in one of which aluminum parts will be processed, and the other - a small container.
You can use food containers or plastic pots for this. The walls and bottom of the bathtubs need to be covered with aluminum sheets, or a special pattern should be made from them and bent to form a container.
This is necessary to create a uniform current density on each side of the product.
The bath body must have good thermal insulation, otherwise the electrolyte will heat up too quickly, and the liquid will have to be constantly changed.
The easiest way is to create a thermal insulation layer by covering the walls with foam plastic 2-4 cm thick, or filling the gaps with construction foam.
After you have poured the electrolyte into the bath, you need to install a power supply generating current at the output. To regulate the amount of current supplied, attach a resistor to the circuit.
If the contact is good, you will see oxygen bubbles that will appear over the entire surface of the product. They are small in diameter and flow like streams of smoke.
The duration of this process depends on the speed of painting the parts - gold or another color. Painting the color will be visually noticeable, so no other devices are required.
The speed of painting gold, black and other shades depends on the size of the part: for small objects it is about 20-30 minutes, for large objects it is 60-90 minutes.
After the entire part has acquired the desired color, remove it from the container and rinse it under cold water, and then wipe it with a cotton swab dipped in a solution of potassium permanganate - this will help remove excess trace elements resulting from the reaction, but will help maintain the color gold or another.
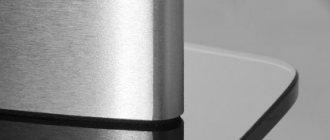
After removing the part, it should have a light gray color, be smooth and shiny.
:
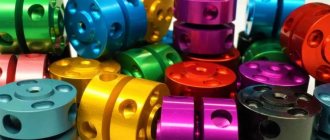
Depending on the anodizing modes, products can acquire different colors: gray, dark matte, gold, etc.
To further color the parts, you need to place them in an aniline dye, which will heat the part to 50-60 degrees.
Before starting color anodizing, you need to filter the solution so that stains that appear from remaining small grains of dye do not form on the surface of the parts.
To dye the products and get the desired color, 15-20 minutes is usually enough.
After the required color (black, gold, etc.) and the protective layer of the correct consistency (hard and shiny) have been obtained, you need to further fix it so that it does not peel off over time.
Since gold anodizing creates a porous structure of the material, which is not resistant to chemical influences, although it is carefully protected from mechanical influences.
The technology for closing micropores on metal can be different.
The easiest way is to boil anodized parts in water on the stove for 30 minutes.
For cooking, it is best to use distilled water, because... it will give the material more protective properties.
Another way: make a steam bath for the parts, in which they should also remain for at least half an hour.
The technology for working with aluminum may differ slightly, depending on the type of part and material, but in general, all stages of anodizing a material look similar.
:
There may be differences in the temperature of the electrolyte, however, it is recommended to follow the given figures, because otherwise, the protective properties of the material will be insufficient, or you will not get the color you needed.
Preparatory process
To obtain a smooth surface, the workpiece must be polished at the preparation stage. Using a felt or other polishing wheel, scratches are removed and large pores are tightened. The absence of micro-irregularities reduces the likelihood of burnouts. The anodic film is not able to hide external defects.
Before anodizing aluminum, it is necessary to determine the dimensions of the parts to be processed. The resulting layer is 50 microns thick, so it will be impossible to screw a nut onto the treated thread. If the parts are connected using a fit, then do not forget that after anodizing the parts cannot be ground.
Carrying out anodizing at home
To carry out the process, containers are needed. Containers for anodizing must correspond to the dimensions of the parts, and be slightly larger. Therefore, they usually use several baths. The material of the containers is aluminum. But if the products are small, then plastic containers are suitable. Only aluminum sheets need to be laid on the bottom and along the walls. This is necessary to create a current of uniform density throughout the entire volume.
The electrolyte needs to be insulated from external heat. When heating it will have to be changed. To prevent heating, the outside of the container is covered with a layer of thermal insulation. It can be covered with polystyrene foam up to 50 mm thick or, placed in a box, the free space can be filled with polyurethane foam.
A sulfuric acid solution is prepared by diluting the electrolyte for car batteries with distilled water in proportions of one to one. By purchasing a canister with a capacity of 5 liters, you can get 10 liters of solution.
Mixing, when water is added to the acid, is accompanied by abundant heat, and it literally boils and splashes. Therefore, for safety reasons, sulfuric acid is poured into a container of water.
Before anodizing aluminum begins, it is subjected to chemical preparation. Chemical preparation is a degreasing process. In industrial conditions, treatment is carried out with caustic soda or potassium. But at home it is better to use laundry soap. A toothbrush and soap solution can easily remove dirt from the surface. After that, the workpieces are first washed with warm water, and then with cold water.
An alternative to laundry soap is washing powder. After dissolving it in a closed plastic container and placing the parts to be processed there, shake vigorously. Then the parts are washed and dried with a stream of hot air. The active oxygen contained in the washing powder protects fat-free products, even if handled with bare hands.
Anodizing aluminum at home technology - All about insulation and energy efficiency
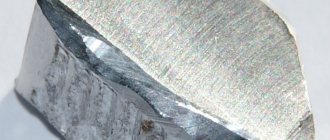
Aluminum is a low-melting, ductile and soft metal, which is why it is often used by craftsmen to make various parts at home. But aluminum has a drawback.
It has a very unpresentable appearance due to the protective film formed on its surface. In other words, aluminum darkens in air, and when used, it gets your hands dirty, because... the film is unstable. To remedy the situation, aluminum is anodized.
We'll talk about how to do this at home in our article.
Anodizing aluminum: what is it?
As already mentioned at the very beginning, aluminum, when interacting with oxygen in the air, oxidizes. An oxide film forms on its surface, which is very unstable to mechanical damage. To secure this film and protect it from abrasion, the aluminum is anodized.
How does the property of aluminum parts change after anodizing? That's how:
- the top layer of metal is strengthened;
- visual and tactile alignment of small errors in the metal surface (scratches, pinhole damage, etc.) occurs;
- the process of applying coloring matter to an aluminum workpiece is improved;
- the part takes on a more presentable appearance;
- it becomes possible to imitate various metals (silver, platinum, gold and even pearls).
Hard anodizing of aluminum: advantages and disadvantages
Anodizing aluminum at home can be done in two ways: hard (cold) and warm. The latter, due to its complexity, is practically not used at home, but hard anodizing has become widespread among craftsmen.
This process has its advantages and disadvantages. The first include such as obtaining a thick protective layer that has good strength characteristics, as well as the formation of a high-strength anti-corrosion film on the metal surface.
Among the shortcomings, one is noted: the inability to retain a uniform layer of organic-based dye on its surface.
The dye applies unevenly and is not durable.
However, during the process of hard anodizing, the workpiece itself is painted in natural colors from greenish, through yellowish-brown to deep gray.
What is needed for hard anodizing
Materials and equipment you will need:
Anodizing to color change
The entire process of anodizing at home can be divided into several stages.
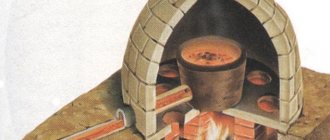
But first I would like to dwell on the process of industrial cold anodization, which occurs using a solution of sulfuric acid.
As a result of this process, active gas evolution occurs, and volatile gases are explosive. That is why it is not recommended to carry out a similar process at home.
Home anodizing technology is safer. Let's talk about its main stages in more detail.
- Preparing the necessary solutions For hard anodizing, two types of solution are prepared in different containers: one is saline, the other is soda, the basis for which is drinking distilled water of medium temperature (40-50 degrees). You will need nine times more soda solution than saline solution, and therefore an appropriate container is selected for it. Salt is added to warm water with constant stirring (to another soda). Saturated solutions are prepared, i.e. salt and soda are added until a precipitate begins to form. After this, the solutions must be filtered several times. Remember that the quality of anodization depends on the quality of the solutions (their transparency and purity). Before the hard anodizing process itself, the solutions are mixed in a ratio of 1 part salt and 9 parts soda.
- We prepare the workpiece for anodizing. Well, everything is simple here. The workpiece must be thoroughly sanded and degreased.
- We anodize. So, let's start anodizing. The parts must be placed in the bath so that they are completely immersed in the solution and do not touch the bottom or walls of the bath. Then an electric current is applied: to the bath “minus”, to the workpiece “plus”. The workpieces remain under the influence of tension in the bath until they change color. Then the current is turned off, the workpieces are removed and thoroughly washed in running water. Afterwards, the part is placed in a manganese solution, where traces of the salt-soda solution are finally removed from the surface of the part. Then we wash it again. Do you see any stains or streaks on the workpiece? So everything went well.
- We fix the surface layer. As a result of anodization, a film was formed with a large number of pores that need to be closed. This is done by simply boiling in distilled water for half an hour.
- Varnish or paint. To do this, place the anodized workpiece in a container with varnish or aniline paint (10%). That's it, the part is ready.
As you can see, the anodizing process at home is simple and accessible to everyone.
Author angor58
Anodizing aluminum - methods of performing the technology
Paint guru➣Special materials➣Other coatings➣
Anodizing aluminum (anodic oxidation) is a process that results in the formation of an oxide coating on the surface of the metal.
The main task of the oxide coating is to protect the surface of aluminum from oxidation that occurs due to the interaction of this metal with air. Anodizing is not intended to destroy the film formed during oxidation (it performs a protective function), but to make it more durable.
In this respect, anodizing is similar to a method such as oxidation bluing.
Anodic oxidation technology is used to strengthen not only aluminum and its alloys, but also other metals. For example, oxide coatings are used to protect titanium and magnesium.
In addition to strengthening the surface layer, anodizing has the following goals:
- smoothing of various surface defects (chips, scratches, etc.);
- increasing the adhesive qualities of the material (paint adheres much better to the oxide film than to bare metal);
- improving the appearance of metal;
- giving the metal various decorative effects (for example, you can create an imitation of gold, silver, pearls).
Anodizing technology
The anodizing process can be divided into three parts:
- preparatory process;
- chemical treatment;
- consolidation
Preparatory process
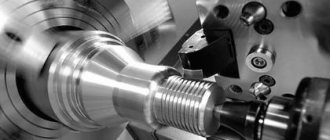
At this stage, the aluminum profile is subjected to mechanical and electrochemical processing. Mechanical processing refers to metal cleaning, grinding and degreasing.
Next, the product is first placed in an alkaline solution for etching, and then transferred to an acid solution for brightening. Preparation is completed by washing the surface.
Moreover, washing is carried out several times to completely remove acidic substances from the metal.
Chemical treatment
Chemical oxidation of aluminum is the treatment of metal in an electrolyte. Solutions of various acids (sulfuric, chromic, oxalic, sulfosalicylic) are used as electrolytes. Sometimes salt or organic acid is added to solutions.
The most common electrolyte is sulfuric acid. Yet this electrolyte is not used for processing products of complex shapes that have small holes or gaps. In such cases, chromic acid is preferred. But oxalic acid can significantly improve multi-colored insulating coatings.
Chemical oxidation of aluminum
The quality of the process depends on several components, including concentration, temperature and current density.
High temperatures speed up anodization. Moreover, the film formed is soft and highly porous.
Consolidation
After oxidation, the metal looks like a porous surface (even when using cold mode). In order for the surface to be strong enough, these pores must be blocked. This is done in one of three ways:
- dipping the product in hot fresh water;
- steam treatment;
- placing the metal in the so-called “cold solution”.
Note! If the product will be painted, the fixing process is not necessary, since the paint material will naturally fill the existing pores.
There are three types of equipment for aluminum oxidation:
- basic (baths);
- servicing (providing work);
- auxiliary (feeding products into the bath, preparing, storing, etc.).
Other Anodizing Methods
In addition to the classic method described above, hard anodizing, micro-arc and color anodizing can also be used. These methods of metal processing will be briefly discussed below.
The goal of hard anodization is to obtain a particularly strong microfilm. The technique is widely used in aircraft, automotive and construction industries. The peculiarity of the technology is that not one, but several electrolytes are used at once.
For example, oxalic, sulfuric, citric, tartaric and boric acids can be used in one process. During anodization, the current density gradually increases, and due to structural changes in the cells, the film acquires increased strength.
Micro-arc oxidation scheme
Microarc oxidation is an electrochemical process in which the surface of aluminum is oxidized, and at the same time electric charging phenomena occur between the anode and the electrolyte. The technique makes it possible to obtain particularly high-quality coatings with a high level of wear resistance and adhesion.
Another method of anodizing is color. As the name suggests, the main task of the process is to change the color of the part.
There are four methods of color anodizing:
- Coloring by adsorption method. It is carried out by immersing the product in an electrolyte bath. It is also possible to dip the part into a solution with a dye heated to a given temperature.
- Electrolytic painting (another name is black anodizing). First, a colorless film is obtained, and then the metal is dipped into an acidic saline solution. The final color of the product can vary from black to a faint bronze tint. Black tones of aluminum are especially in demand in the construction industry.
- Interference staining. The technology is similar to electrolytic dyeing, but due to the creation of a special reflective layer, the color shades are much more varied.
- Integral coloring. The technology involves mixing an electrolyte with organic salts.
Anodizing at home
Self-anodizing is almost always carried out using the cold method. Most companies providing similar services adhere to the same technology. The cold method is called because there is no need for high temperatures during the film creation process: the operating temperature range ranges between -10 and +10 degrees Celsius.
Advantages of cold anodizing:
- The surface layer is quite thick due to the fact that the rate of growth and dissolution of the oxide film on its outer and inner sides differs.
- The film comes out very durable.
- The treated metal is highly resistant to corrosion.
The only drawback of the technique is the difficulty of further painting the metal with organic-based materials. However, the metal, regardless of its characteristics, in any case receives color naturally. Color can vary from olive to black or grayish.
To carry out the work you will need the following:
- baths (aluminum containers for anodizing, as well as a couple of glass or plastic ones for making solutions);
- aluminum connecting wires;
- 12 Volt voltage source;
- rheostat;
- ammeter.
Preparation of the solution
As mentioned above, the main electrolyte for anodizing is sulfuric acid. However, outside the production premises, the use of such an electrolyte is dangerous. Therefore, at home, soda is usually used.
Preparation of the solution:
- We prepare 2 solutions - soda and salt. We pour the components into containers with distilled warm water in a ratio of 1 to 9.
- Mix the solution well and let it brew.
- Pour the solution into another container so that no soda sediment gets into it. The result of anodization largely depends on the purity of the solution.
Anodizing
First of all, you need to prepare the part. The task of the preparatory process is to clean, sand and degrease the surface before anodizing. If visible defects are not removed from the product, the resulting film will not be able to hide them, since its thickness does not exceed 1/20 of a millimeter. Just before anodizing, mix both solutions in one container.
The anodizing container must be large enough to completely immerse the part in it. In addition, the part must be fixed so as not to touch the bottom of the dish. To do this, you can use a stand or any other option - at your personal discretion. You also need to carefully approach the issue of fastening the part, since after anodizing there will be traces in the places of fixation.
The current is applied for at least 30 minutes. The need to complete anodizing is indicated by a change in the color of the part. When the part is ready, turn off the voltage and remove the metal from the bath.
After removal, thoroughly wash the workpiece. To ensure high quality results, place the metal in a manganese solution for 15 minutes. Then we rinse the part again, first in warm and then in cold water.
Next, dry the metal. If the technology is not broken, the product will acquire a light gray tone. A well-done job is indicated by a uniform surface color and the absence of drips and stains.
The final stage of anodizing is film consolidation. It is necessary to close the microscopic pores present in the film coating. To do this, put the metal in a container with distilled water and boil for half an hour.
If desired, you can also paint or varnish the metal surface. The paint layer is applied by immersion.
So, anodizing aluminum can be done in different ways. However, only cold metal processing with soda and salt solutions is available at home. It is also worth noting that if the technological requirements are met, regardless of the type of solution, there is no significant difference in the quality of the resulting surfaces.
Anodizing aluminum at home
Aluminum is a low-melting, ductile and soft metal, which is why it is often used by craftsmen to make various parts at home. But aluminum has a drawback.
Anodizing aluminum at home technology
Anodizing aluminum (anodic oxidation) is a process that results in the formation of an oxide coating on the surface of the metal.
The main task of the oxide coating is to protect the surface of aluminum from oxidation that occurs due to the interaction of this metal with air.
Anodizing is not intended to destroy the film formed during oxidation (it performs a protective function), but to make it more durable. In this respect, anodizing is similar to a method such as oxidation bluing.
Anodic oxidation technology is used to strengthen not only aluminum and its alloys, but also other metals. For example, oxide coatings are used to protect titanium and magnesium.
In addition to strengthening the surface layer, anodizing has the following goals:
- smoothing of various surface defects (chips, scratches, etc.);
- increasing the adhesive qualities of the material (paint adheres much better to the oxide film than to bare metal);
- improving the appearance of metal;
- giving the metal various decorative effects (for example, you can create an imitation of gold, silver, pearls).
General information about anodizing technology
Aluminum anodizing technology is similar to galvanic processing. The deposition of solution oxide ions on the workpiece occurs in a liquid electrolyte at high or low temperatures. The use of a heated solution is possible in industrial installations, where it is possible to carefully control and regulate voltage and current in automatic mode.
At home, they usually use the cold method. This method is quite simple, does not require constant monitoring, and the equipment and consumables are available. To prepare the solution, you can use the electrolyte used in lead car batteries. It is sold in every auto store.
The high strength of the protective oxide film depends on its thickness, which is obtained at home by processing in a cold solution. The increase is made by stepwise regulation of the operating current.
Oxidizing aluminum black is referred to as color anodizing. Black color is obtained in two stages. First, a colorless film is applied electrolytically, and then the workpiece is placed in a saline solution of acids. Depending on the acid, the color can range from pale brass to deep black. Black aluminum is widely used in construction and decoration.
Electrolyte preparation
Acid solutions are considered unsafe reagents, so to anodize aluminum at home, they resort to a different type of solution. To prepare it, use salt and soda, which you always have on hand.
To prepare the electrolyte, take two plastic containers. They are filled with salt and soda compositions, observing the proportion: per serving of salt or soda 9 servings of distilled water.
Anodizing at home
After dissolving the components, the solution is kept to allow undissolved particles to settle to the bottom. When pouring into a container for anodizing, it must be strained.
Aluminum anodizing methods
Several methods have been developed for processing aluminum alloys, but the chemical method in an electrolyte environment has found widespread use. Acids are used to obtain a solution:
To impart additional properties, salts or organic acids are added to the solution. At home, sulfuric acid is mainly used, but when processing parts with complex configurations, it is preferable to use chromic acid.
The process occurs at temperatures from 0°C to 50°C. At low temperatures, a hard coating forms on the surface of aluminum. As the temperature rises, the process proceeds much faster, but the coating is highly soft and porous.
Aluminum hard anodizing technology
In addition to the chemical method, in some cases the following methods of aluminum anodization are used:
- microarc;
- color:
- adsorption;
- immersion in electrolyte;
- dipping into a dye solution;
- electroplating;
- interference;
- integral.
Warm anodizing
The warm anodizing method is used to obtain a base for painting. The coating is porous, but due to this it has high adhesion. Epoxy paint applied on top will reliably protect the aluminum from external influences.
The disadvantage is the low mechanical strength and corrosion resistance of the coating. It is destroyed upon contact with sea water and active metals. This method can be done at home.
The process takes place at room temperature or higher (no more than 50°C).
After degreasing, the workpieces are mounted on a suspension that holds them in an electrolyte solution. Anodizing continues until a milky coating appears on the surface. After removing the stress, the workpieces are washed in cold water. The parts are then painted. They are dyed by placing them in a container of hot dye. After that, the obtained result is consolidated for 1 hour.
Any ways
There are two options for carrying out the process of oxidizing steel treatment at home. Each of them has its own advantages and disadvantages.
Warm way
A much less difficult process to carry out with your own hands. It flows successfully at a temperature of 20 degrees when using organic paint, providing an excellent opportunity to create extraordinarily beautiful things. For this purpose, you can use both ready-made paints and pharmacy dyes (brilliant green, iodine, manganese).
Hard anodizing cannot be achieved using this technology; the oxide foam is fragile, provides poor protection against rust, and is easily damaged. However, if you paint the surface after this technique, the adhesion (adhesion) of the coating to the base will be too high, nitro enamels or other paints will stick firmly, will not peel off, and provide a greater degree of protection against rust.
Cold way
This technique, when performed in a domestic environment, requires careful control of temperature, allowing it to fluctuate from –10 to +10°C (comfortable temperature for the purpose of conducting an electrochemical reaction according to the equation – 0°C). It is at this temperature regime that the anodic and cathodic surface treatment proceeds very fully, slowly creating a durable protective oxide film. This allows the home craftsman to carry out hard anodizing with his own hands, providing the steel with the greatest protection against rust.
Using this technique, you can create electroplating by applying copper, chromium or gold to the product, calculating the current strength using special equations. After such finishing it is very difficult to damage the steel part or discs. Rust protection effectively lasts for a long time even when in contact with sea water, and can be used to increase the service life of underwater equipment.
A small disadvantage is that the paint does not stick to this surface. To give the metal color, the sputtering method (copper, gold) or electrochemical color change under the influence of electric current is used (the current strength and electrolyte density are calculated using a specialized equation).