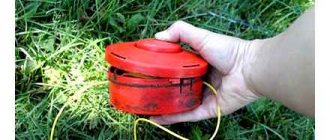
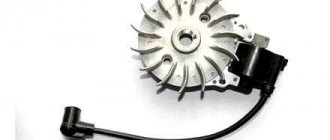
Trimmer line - which one to choose?
Immediately after purchasing a weed trimmer, we are faced with a lot of questions - how to use it correctly, how to refuel it (if we are talking about a gasoline tool), and it’s clear which fishing line is better to choose. You can find the answer to the last question in the text of the article.
How to quickly remove a stump without uprooting it?
Some gardeners at some point are faced with the need to cut down trees growing in this area. As a result, stumps remain; if the trees were of significant size, uprooting them is very problematic. The text of the article tells about other methods of getting rid of stumps.
Flooded lawnmower engine.
If on a wet spark plug it is still possible for at least some spark discharge to appear on the electrodes, then on a “flooded” plug a spark discharge will no longer be possible. We hear about “flooded” spark plugs more often than about “flooded” engines. It’s even hard for many to imagine such an engine until they experience it personally.
A wet spark plug or a flooded spark plug is the main sign of either a non-functioning spark plug, a lack of high-voltage voltage at the spark plug electrodes, or an over-enrichment of the fuel mixture supplied to the engine working chamber.
Additionally, this includes cases with low-quality fuel, low high-voltage voltage and low compression ratio. As a rule, one thing entails some other manifestations and one can easily get confused in determining the main, underlying cause of the malfunction.
Spark plug. Another lawn mower or gas trimmer fell into our hands and they could not start the engine. Even no recommendations from observers and “friendly” neighbors helped. The spark plugs were also replaced with new ones, but there was no result, and each successive spark plug came out wet.
Lawnmower engine air filter. The gas trimmer engine was opened in stages. The air filter ring was completely wetted with fuel. There was a large amount of fuel in the compartment where the filter element is installed.
The throughput of the wet filter decreased, and even with a dry spark plug, the engine could not start due to the wet filter element blocking the supply of the required amount of air. The spark plug electrodes immediately flooded with fuel during the first attempt to start the engine.
Muffler for lawn mower. An oil stain was clearly visible through the muffler mounting holes on one of the mounting studs. Traces of oil can appear when the fastening nuts are loosely tightened, when waste oil vapors along with exhaust gases leak through weak seals, but on this lawn mower the nuts were tightened to the required force.
The Chinese lawn mower will not start. The candle is wet.
And in the muffler itself we found about 50...60 ml of fuel. Not oil, but the same fuel that was in the fuel tank.
The Chinese lawn mower will not start. The candle is wet.
Petrol mower engine. When opening the engine, we expected to find some surprise, and this was not in vain. There was a certain amount of dense soot deposits on the piston. Loaded piston rings and a layer of carbon deposits on the piston indicated that when working with a lawn mower, the temperature of the engine, which was running on an over-enriched mixture, was exceeded.
Many manufacturers write directly on the container that the oil has good anti-wear, lubricating, anti-corrosion and temperature properties. But none of them will write: “Don’t overheat the engine!” or “Follow our recommendations strictly!” It’s hard to say what they poured in instead of oil, or whether they poured in too much oil.
Crankcase. What surprised us most was the engine crankcase, which turned out to be filled to the brim with fuel. It happens when a certain amount of fuel collects in the engine crankcase, but it is rare for us that the crankcase is completely filled with fuel.
The engine worked 'by the sweat of its brow', and the operator did not pay attention to fuel consumption, increased smoke, and decreased engine speed. The lawnmower engine was flooded to the very edges of the crankcase.
Lawn mower carburetor. There were no difficulties when disassembling the carburetor. The outside of the lawn mower's carburetor was wet and dirty, which indicated a fuel leak, but we did not find the leakage itself during an external inspection.
And inside the carburetor there were dense deposits located along the edge of the seat hole of one of the membrane valves, which indicated poor performance of this valve when its petal was not pressed tightly against the seat.
One reason for a flooded lawnmower engine.
After inspecting the main elements of the engine and interviewing the owner of the lawn mower, we finally identified the reason that led to such consequences.
Inattention of the operator, who may have accidentally touched the choke control lever and switched it to the “OFF” operating state, in which the air supply was limited, implying the opening of the damper.
It is possible that the operator did not sufficiently understand the meaning of the ON and OFF damper position indicators and became confused.
In a word, the human factor is present in all unpleasant situations that occur during the operation of equipment.
Cleaning the breather
Often, the engine of branded trimmer models stalls as a result of a clogged breather. The main task of this component is to equalize the pressure in the fuel
Troubleshooting strategy
Where to start diagnosing faults if the trimmer does not start? In situations where the tool stalls immediately after starting, it is worth inspecting the following components of the unit:
- fuel tank;
- spark plug;
- fuel and air filter;
- exhaust channel;
- breather.
It is the breakdown of the above locations that most often leads to the fact that the trimmer does not start well. Let's look at how to eliminate such troubles.
Reliability of built-in filters
It is these devices that often become an obstacle that prevents the classic trimmer from starting. The filter provided by the manufacturers is responsible for high-quality cleaning of the air entering the carburetor. A clogged cleaning unit can lead to the fact that oxygen enters the internal compartment of the unit in smaller quantities or its supply stops altogether. You can determine if the air filter is faulty in a fairly simple and accessible way:
- Dismantle the device and carefully inspect it.
- If no blockages are detected with the naked eye, then try starting the lawn mower without a filter. This part needs to be replaced only if the trimmer starts up successfully.
- You can use a stream of compressed air to clean the air filter. But if the cleaning device has been in use for a long time, then it is more advisable to replace it.
It is worth noting that trimmers do not start due to a clogged air filter in the rarest cases. Most often, this device affects the stability of the engine. A more real reason lies in a clogged fuel filter. This unit is located in the unit tank. If the trimmer has been used for more than two years, then it is imperative to check the filter, which may impede the flow of fuel to the carburetor.
If the user is sure that the main problem lies in the fuel cleaning element, then the following steps must be performed:
- Carefully remove the filter.
- Try to start the lawn mower.
If the device starts up quickly enough, then the problem lies in the fuel filter.
The service life of this unit can be significantly reduced by long-term storage of fuel in the tool’s engaged tank, as well as by accidental entry of small debris and dust into the trimmer’s tank. But if the filter is working properly and the lawn mower still won’t start, then you need to check the fuel hose. Situations often occur when the hose together with the filter are disconnected from the main pipe, which inevitably leads to the inability to start the engine.
Candle Making: Things NOT to Do
The start of a new year always inspires people to start new projects, stick to their New Year's resolutions, and build on what they may have already started. If you're new, we hope your New Year's resolution was to make quality candles. If you've just started learning about candle making, you've probably discovered that it can be overwhelming at times.
READ Which Heads Are Suitable for Texas Trimmer
In this episode, we'll take an unconventional approach and highlight some things you should NEVER do when making candles if you plan on making the best candles possible. Some of these bad practices can result in a dangerous candle, while others will to getting not the best possible candle. Some of the information we're going to cover may seem like common sense if you have some experience making candles, but for beginners it may not be or they haven't encountered our site yet.
Heating of the spark plug is facilitated by the use of heat-resistant motor oils for 4-stroke engines, high wear on the compression rings or the entire piston group as a whole.
Troubleshooting strategy
Where to start diagnosing faults if the trimmer does not start? In situations where the tool stalls immediately after starting, it is worth inspecting the following components of the unit:
- fuel tank;
- spark plug;
- fuel and air filter;
- exhaust channel;
- breather.
It is the breakdown of the above locations that most often leads to the fact that the trimmer does not start well. If you don't start when you find out the reason why not her trimmer right away. Let's look at how to eliminate such troubles.
How to properly store a lawn mower and eliminate problems with starting it
Its launch depends on the correct approach to storing the trimmer. Moreover, this applies not only to long-term winter storage. How to properly store a gasoline trimmer, in order to protect yourself from problems with difficulty starting it, you need to take into account a number of the following recommendations:
- Before putting the tool away for winter storage, you should drain the fuel from the tank. In addition, remaining fuel also needs to be removed, and this can be done by starting the engine, letting it run for a while until it stalls
- It is advisable to store the instrument in a dry place
- Before starting the engine after a long pause of more than 2-3 months, it is necessary to first inspect the spark plug electrodes, as well as check the main components - the air filter, high-voltage wire, etc.
- When using the tool, you need to take into account that overheating of the motor negatively affects the service life, so you need to take breaks while working, especially if a trimmer with a two-stroke engine is used for work. Units with four-stroke engines are not only more powerful, but also more durable
- After winter, the first thing you need to do is pour a little oil into the spark plug hole, first moving the piston to its dead center. This is necessary in order to lubricate the CPG parts when starting the engine, thereby preventing their rapid wear.
https://youtube.com/watch?v=pYZ4nfr0D_A%3F
Only with the right approach to finding the reasons why the trimmer does not start can you find and fix the problem yourself. Moreover, for this you do not need to be a specialist or thoroughly understand the design of gasoline units. Proceed in order in the sequence presented in the material, and restoring the functionality of the lawn mower will be as easy as shelling pears.
Publications on the topic
Features of the correct choice of chainsaws
When you press the gas, the chainsaw starts to stall - causes and solutions to the problem
Cleaning a chainsaw carburetor and how to do it correctly
How to choose a chain for a chainsaw and what you need to know
Why won't a Chinese lawn mower or chainsaw start? Practice
Practical troubleshooting tips. From personal experience.
Even if in this case the trimmer does not start, it is worth assessing the quality of the contact between the high-voltage wire and the spark plug. If there is no spark (even if there is a reliable connection between these elements), most likely the problem is caused by a breakdown of the ignition unit. In this situation, you will have to turn to the services of specialists who will reinstall the unit.
Why the trimmer won't start - reasons
To determine why a gasoline trimmer has difficulty starting or constantly stalls, you need to consistently check the operation of all the main components of the unit. It is especially important to do this after long-term storage of the lawn mower. So, the main reasons for this behavior of the trimmer are as follows:
- The culprit that the lawn mower does not start may be a poor-quality oil-gasoline fuel mixture. It must be prepared strictly according to the instructions. Saving here is not at all appropriate, since it can lead to failure of the entire piston group of the trimmer. You should not prepare too much fuel mixture, as excess gasoline will lose its quality over time.
- You should know that gasoline trimmers of brands such as STIHL, Husgvarna and some others will not start if they are filled with cheap gasoline with a low octane number. Therefore, for such units it is necessary to use only high-quality high-octane fuel.
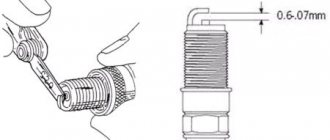
- If the trimmer stalls immediately upon startup, then it may have a flooded spark plug. In this case, you need to unscrew it and dry it thoroughly for half an hour. Then drain the excess fuel that is in the chamber, clean the spark plug from carbon deposits, put it in place and try to start the lawn mower.
- If your new gas trimmer won't start, it may be due to a lack of spark. This happens because the socket where the spark plug is located is dry and the fuel does not ignite. Lightly moisten the threaded connection of the spark plug with a few drops of gasoline.
- A gasoline trimmer may stall due to clogged air or fuel filters. It is best to replace such elements with new ones.
- The exhaust duct and breather can also become clogged. By cleaning these trimmer elements, you can start the unit without any problems.
- Another reason why a gasoline trimmer does not start, even when there is a spark, may be a clogged carburetor. To clean the channels and jets, you need to blow them with compressed air using a compressor. You can use a special flush to clean the carburetor.
- If the carburetor gaskets are worn out, they need to be replaced. And if the tightness of this device is broken, you will have to identify the faulty carburetor part and replace it.
- The trimmer may not start due to wear on the piston group. However, it is better to change such parts of the lawn mower at a service center.
pours a candle on a lawn mower
A trimmer, both electric and with an internal combustion engine (ICE), is an indispensable tool in the summer and autumn for owners of dachas and private houses. With its help, weeds, small bushes are easily removed and the lawn is trimmed. But, like any equipment, trimmers fail at the most inopportune moment. To troubleshoot problems with your own hands, the user of this equipment first needs to determine the cause of their occurrence.
For gas trimmers and electric trimmers, if we do not consider breakdowns associated with the bar and mowing head, malfunctions mainly occur in the engine area.
Electric trimmer vibrates
Many users of mowers have noticed that after some time after the device starts operating, it begins to vibrate strongly. Some trimmers, mainly more expensive models, have an anti-vibration system in the form of shock absorbers located between the engine and the rod. But in some cases, even this cannot save you from strong vibration. The reason that strong vibration appears in the trimmer may be a small amount or complete absence of lubricant on the rigid or flexible shaft located inside the device’s rod.
Replacing the hard shaft lubricant
happens as follows:
- unscrew the gearbox located at the bottom of the rod;
- after removing the gearbox, you will see the end of the shaft, which you need to pull to remove the part;
- after removing the shaft, it must be generously lubricated with special grease “Shrus-4” or regular grease “Litol-24”;
- Apply a small amount of lubricant to the shaft and spread it evenly along the entire length of the part, including the splines at the ends of the rod (if they are worn out, the shaft will have to be replaced);
- After lubrication, insert the shaft back into the rod and put the gearbox in its original place.
Flexible shaft lubrication
is done as follows:
- unscrew and remove the mowing head;
- remove the rod from the electric motor by unscrewing a couple of bolts;
- pull out the flexible cable from the rod;
- Lubricate the cable along its entire length.
This is done like this: first you need to lubricate the end of the cable, and then insert it into the rod, after which, as it moves inside the pipe, you should apply lubricant to the part and distribute it evenly over the surface. Then insert the flexible shaft rod into the electric motor and secure it.
If lubrication does not help and vibration continues to appear, you will need to change the flexible shaft.
Eliminating the causes of the malfunction
If after performing the manipulations the scooter starts, that’s good, but you shouldn’t relax. Be sure to check for possible faults. What to do to prevent this situation from happening again:
- Clean or replace the air filter. You can make sure that this is the reason by simply trying to start the engine with the filter installed and without it.
Advice! If the condition of your engine is far from new, then cleaning or even replacing the spark plug should be done more often.
The petrol mower is overflowing, what should I do?
- Adjust the quality of the mixture. Set the carburetor mixture quality screw to the optimal position (where the quality screw is located, see this article), clean the carburetor on the moped. If you have a scooter with an injector, monitor the condition of the injectors. Use an injector or carburetor cleaner.
- If you have a 4-stroke engine, pay attention to the valve adjustment. Incorrect release timing can also cause dirty spark plugs.
- The battery should always be well charged and the starter in good working order. After all, candles are often filled in in winter, and in cold weather a reliable battery is required.
- The quality of oil in the frosty season also affects the success of starting a scooter. The oil must be fresh and of the required viscosity for your local temperature.
READ How long can you use an Electric Trimmer without stopping?
Advice from experienced motorcyclists! If a spark plug is flooded, you should load the engine at high speeds at least once a week. This ensures that the cylinder and spark plug are purged from accumulated carbon deposits.
Causes of malfunction
Due to a flooded spark plug, the scooter may not start at all or may be unstable. So, what could be the reason:
- Clogged air filter. Insufficient air supplied to the carburetor enriches the fuel mixture. As a result, a large volume of fuel does not have time to burn in the chamber, and the spark plug becomes dirty.
- Incorrect carburetor adjustment. A tightened mixture quality screw on the carburetor has almost the same effect as a clogged air filter.
- Faulty ignition system. There are several faults at this point: faulty spark plugs - bad wires - problems with the ignition coil - incorrect timing (on old equipment, for example).
- Poor quality fuel. Gasoline diluted with another liquid greatly affects the contamination of the spark plug.
pours a candle on a lawn mower
Oddly enough, the spark plug on the injector can also flood . This usually happens in winter on worn-out engines. Since the quality of the mixture is regulated by an electronic control unit (ECU), it would seem that the spark plugs should not be flooded .
However, poor compression, a discharged battery, a bad starter, an insufficiently powerful spark and incorrect electrode gaps do not allow the scooter to start at subzero temperatures. In cold weather, the ECU supplies more fuel to the cylinder, since cold air contains more oxygen than hot air.
For a number of reasons described above, the scooter does not start and the spark plug is flooded.
Perform a cold start correctly!
Often gas trimmers
do not start after they are tried to be “put into operation” after long-term storage. Launch failures in this case are often caused by incorrect user actions.
KEY-DOP
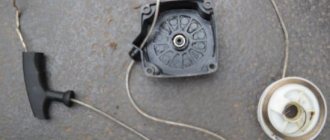
If you are faced with this particular phenomenon, then during a cold start you need to close the damper, and then pump a small amount of the fuel mixture into the carburetor. Then pull out the starting handle until you feel resistance, then start the trimmer with sharp and vigorous movements.
We are trying to start the engine
So, we figured out why the spark plug on the scooter floods. The repair methods and starting methods below apply to scooters with 2T and 4T engines.
- The method is suitable if there is no tool. If you flooded the spark plug while trying to start the scooter, then give it time to stand for about 5 minutes. Then turn the gas handle all the way and turn the engine with the starter for about 10 seconds. You can use the foot several times if the starter is faulty. Release the throttle and try to start the engine again - it should work.
- If you have a spark plug wrench, you should unscrew the spark plug and warm it up over a fire, after cleaning it from carbon deposits. With the spark plug removed, you should “blow out” the cylinder by rotating the engine with the starter or foot. Screw in the spark plug and try to start. If unsuccessful, the spark plugs should be replaced.
Advice! Although the first method is faster, it is still recommended to use the second. This cleaning of the ignition system will help avoid such problems for some time.
After reading this article, the described problem will no longer be scary for you. Monitor the condition of the components and assemblies of your vehicle, carry out repairs on time, refuel with high-quality fuel, and your scooter will definitely be your reliable travel companion!
Reasons why the spark plugs on the injector or carburetor fill up
In principle, the culprit for flooding the injector spark plugs is elementary. And it lies in the specifics of the operation of the “electronic brain” of your scooter.
At subzero temperatures, mixing the air-fuel mixture requires some effort: more oxygen in cool air urgently requires more fuel. Therefore, the ECU instructs the injector nozzle to increase the fuel supply, which they do, okay.
And the following happens in the motor, especially if your scooter no longer has a new battery. The injectors supply gasoline to the combustion chamber, the starter tries to create sufficient compression in the cylinder, while at the same time trying to produce a spark to generate a flash. Do not forget about the quality of gasoline, which does not have perfect parameters.
As a result, with exemplary compression, the injector spark plugs have every chance of starting even with the smallest impulse, but only a new scooter has perfect compression. In practice, this is why, as a rule, the injector spark plugs of a new scooter do not flood.
The spark is weak, compression in cold weather does not meet the specifications, and the injectors continue to deliver fuel to the combustion chamber. Which, in turn, floods the candles and they simply stop giving symptoms of fiery life.
Main. fuel mixture!
In this case, the remnants of plastic dissolved in an aggressive environment do such terrible things in the combustion chamber that you will definitely not be able to do without a complete overhaul of the mechanism. But you will definitely forever remember how to properly store fuel.
Related Posts
What to do when the fuel was definitely normal, there was a spark, but the gasoline trimmer did not start? It is possible that you simply filled the candle with gasoline. In this case, it must be turned out, wiped with a clean rag and dried. By the way, it wouldn’t be a bad idea to check the spark plug itself for functionality.
What to do if the candles are flooded with gasoline
There are 2 options to solve the problem. As a rule, a “reasonable” operating manual says: if the injector spark plugs are filled with fuel, you need to unscrew them and dry them. With the spark plugs removed, crank the starter for 10-15 seconds. Put the spark plugs back in and start the engine.
Reliable folk method. If you have filled your spark plugs with gasoline, before unscrewing and drying them, try starting the engine using the following method: purge mode.
The gas handle is turned all the way to the floor. Use the starter to turn the engine for 10-12 seconds, then release the gas handle. The engine should start. The fact is that in this way, when you close the fuel supply, you blow air through the spark plug.
If the engine does not start, then try to dry the spark plugs. Spark plugs for an injector are no different from an engine with a carburetor. Therefore, we again use the “old” method: we unscrew the candles, clean them of carbon deposits with a brush, dry them with a hairdryer, or on a gas stove or in the oven. We control the gap and screw the spark plugs into place. The motor should start.
For used scooters, professional advice is to clean the spark plugs more often, or, more correctly, change them.
If the spark plugs continue to be constantly filled with gasoline, it is necessary to carry out diagnostics of the spark plugs for quality of spark supply, cleanliness of injectors, spark output from the ignition coil, Hall sensor.
Why the spark plug on a scooter floods and what to do
Although not all, but many scooter riders encounter a similar problem: they arrived the day before, put the scooter in the garage, everything was fine. Then I started to start the engine, but it wouldn’t start.
There can be many reasons for this. However, in this article we will look at the main reason why the spark plug is flooded with fuel, it doesn’t matter whether you have an injector or a carburetor. Fills the spark plugs with gasoline regardless of the type of fuel system of the scooter.
It is typical that the spark plugs are filled with gasoline less often in the warm season, and more often in winter temperatures. So we’ll try to understand in order: why the spark plug in the injector is flooded, what to do to start the engine, specifically when the spark plug is flooded, and how to prevent the spark plugs from flooding with gasoline.
READ Why Patriot Trimmer Won't Start After Winter
What resource does a Chinese lawn mower have?
A Chinese or Russian brush cutter can work for about 500 hours. But this is with the right mixture, good oil, good factory assembly. If a person fills with gasoline from one good gas station, accurately measures the same oil using a beaker, adjusts the carburetor to the same mixture, and the fuel burns correctly, then the coveted five thousand hours of service life is quite an affordable bar.
But here we must not forget about Chinese marriage. They even balance the shafts on a knee, install the cheapest bearings, and stamp carburetors with clogged channels. If a person understands the principle of operation of a two-stroke engine and carburetor, and understands how to rebuild it, then he can eventually assemble an almost perfect trimmer.
Circumstances under which the spark plugs will not fill with gasoline
Of course, these are exemplary conditions, but you can check many of them so that you don’t have to face the morning in a minibus or metro while going about your business.
So, the key criteria are:
- well charged battery and working starter
- high-quality oil with appropriate parameters for the frosty season
- spark plugs and high voltage cable are of high quality and trouble-free
- The injector nozzles were cleaned and adjusted in a timely manner. Preferably not with the help of various additives in the tank, but with the use of equipment for cleaning injectors
- high quality gasoline
People's advice: if you want the engine to start perfectly in cold weather and the spark plugs not to be filled with fuel, the engine must be “twisted” periodically, once a month. Distance 50-100 km at above average speed and on good fuel.
Or once every two days, while moving, give the motor a load at increased speed for 10 seconds so that self-cleaning of carbon deposits and deposits in the chamber occurs.
These conditions are easy to control on your own, without the help of car service professionals.
Cleaning the crankcase ventilation system
The procedure is demonstrated using the example of a LADA Granta car:
- It is necessary to loosen the clamp and disconnect the crankcase ventilation system pipe from the air supply line. Disconnect the second end of the pipe from the fitting located on the cylinder head cover; the hose can then be removed. Carry out the dismantling of the small branch pipe in the same way; to do this, you need to disconnect it from the cylinder head and the fitting of the injection module. At this stage, you need to disconnect the supply pipe of the ventilation system, disconnecting it from the BC and cylinder head fittings.
- All pipes must be washed with kerosene or fuel, then blown with air and dried. It would be a good idea to clean the fitting holes.
- Remove the cylinder head cover.
- Unscrew the screws securing the oil separator device on the inside of the cylinder head cover and remove the washers. The oil separator housing must be removed.
- Then all the screens are removed from the cylinder head and must be washed with kerosene along with the cylinder head cover and the oil separating element.
- All system components are assembled in reverse order.
Wind the cord tightly and tightly into the grooves on the reel. Direction...
Page 14
- Image
- Text
14
Wind the cord tightly and tightly into the grooves on the reel. Winding direction shown
arrows on the reel (Fig. 16A). After winding, cut the cord and secure it in the connectors on
coil (Fig. 15B).
A
B
Fig.16
Install the spring into the coil (Fig. 16A). Install the cord reel into the housing and fix it
cut in special grooves. The ends of the cord must be against the guides installed
stored in the coil body (Fig. 16B)
A
B
Fig.17
Release the cord from the grooves. To do this, press the reel from above and pull strongly first
one end of the cord, then the other (Fig. 17A). Place the ends of the cord into the guides on the reel.
Install the coil cover and secure it with latches (Fig. 17B)
Causes of the problem
The appearance of oil on the spark plugs is accompanied by engine vibration during the first time after starting, as well as a bluish tint of the exhaust gases. When the engine warms up, these symptoms disappear. With such a problem, the power unit will consume more lubricant; these symptoms indicate incorrect temperature in the engine cylinders. The appearance of oily soot indicates that the heating value SZ is too high.
The problem may be due to wear on the oil seals, piston rings or valve liners. The pistons or cylinders could be worn out; if the crankcase ventilation system is clogged, excess lubricant will enter the combustion chamber.
The layer of soot on the SZ may vary depending on the degree of neglect of the power unit. Usually the problem lies in the valve stem seals, if carbon deposits appear on the top of the threads, and if at the bottom or on the electrode, then the piston rings are to blame. Such problems are accompanied by a decrease in engine power, an increase in gasoline consumption, difficult starting, and unstable engine idle speed.
If there is a layer of lubricant on the SZ with the remains of unburned fuel, this indicates the inoperability of the cylinder as a result of wear of the valve or the partition between the rings. In this case, the internal combustion engine will constantly triple, and gasoline consumption may double.
The petrol mower is overflowing, what should I do?
Sometimes it happens that a dismantled SZ has neither an electrode nor an insulator - this is a consequence:
- regular engine operation with detonation;
- use of low quality fuel;
- factory defects;
- incorrect ignition setting.
If this is the case, then the “best” option for the car owner would be if the remains of the insulator and electrode get into the exhaust system without getting stuck or remaining between the seat and the valve. Otherwise, you will have to carry out repairs or completely replace the cylinder head. To accurately identify the cause of the problem, it is necessary to measure the compression in the engine cylinders. If the situation is not advanced, perhaps decoking the piston rings will solve the problem; sometimes it is advisable to clean the crankcase ventilation system. In the worst case scenario, the engine will have to be overhauled.
How to fix the problem?
To ensure normal operation of the motor, there are several options to avoid the problem. Let's look at each of them.
Engine decarbonization
For candles that are filled with oil, there are not many options for solving the problem. You can try to decarbonize the power unit, which is done as follows:
- High-voltage cables are dismantled and all protective equipment is removed. At this stage, it is advisable to remember their location. After this, unscrew the high-voltage cables from the reels.
- The consumables are drained from the motor and the drain plug is put in place. A special decarbonizing agent must be poured into the engine. The best option would be to decarbonize all cylinders of the internal combustion engine.
- After this, the SZ must be slightly tightened, this will prevent the evaporation of the product. So the car should be left for 6-12 hours, depending on what is written in the instructions for use of the cleaner. After waiting the appropriate time, unscrew the lock, but do it carefully, otherwise the cleaner, along with carbon residues, may splash throughout the engine compartment.
- Afterwards, the drain plug is unscrewed and all consumables are drained along with the remaining carbon deposits. You can pour oil into the engine and spin it on the starter for 10 seconds; this must be done without installed SZ and a connected coil. Such actions will prevent water hammer when starting the internal combustion engine. When you are sure that there is no more carbon deposits in the cylinders, the SZ must be screwed into place.
Sources:
https://xn80ahdapmtfjjlo4bl.xnp1ai/raznoe/%D0%BD%D0%B0-%D1%82%D1%80%D0%B8%D0%BC%D0%BC%D0%B5%D1%80%D0% B5-%D0%B7%D0%B0%D0%BB%D0%B8%D0%B2%D0%B0%D0%B5%D1%82-%D1%81%D0%B2%D0%B5%D1% 87%D1%83-%D1%87%D1%82%D0%BE-%D0%B4%D0%B5%D0%BB%D0%B0%D1%82%D1%8C.html https://valenteshop .ru/ne-zapuskaetsya-trimmer-patriot-kak-i-pochemu-zalivaet-svechu-na/ https://proscootera.ru/masterskaya/remont/pochemu-zalivaet-svechu-na-skutere-i-kak-eto -ispravit https://skuterov.ru/remont/zalivaet-svechu-na-skutere https://avtozam.com/elektronika/pusk/svechi-zazhiganiya-v-masle/
Replacing the cutting cord in the mowing head
Page 13
- Image
- Text
13
REPLACING THE CUTTING CORD
IN THE MOWING HEAD
To replace the cord, turn off the trimmer engine.
A
Fig.13
While holding the stopper (A), unscrew the mowing head (Fig. 13). Check the head for missing
mechanical damage. Release the latches and remove the reel cover. Remove any leftovers
cord from a reel.
A
B
Fig.14
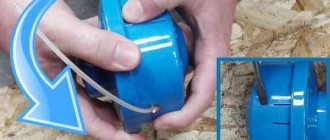
Cut the cord approximately 3.5 m long. Fold it in half and align the ends (Fig. 14A).
Insert the free ends of the cord into the holes in the reel (Fig. 14B).
A
B
Fig.15
