17.03.2020
- Signs that a tool is dull
- Features of drills and what the sharpening angle depends on
- Basic equipment elements
- Features: at what angle are different types of drills sharpened?
- How to choose the correct sharpening angle for a drill for steel or other metal
- Tools and equipment for sharpening
- Sharpening rules
- Performing an operation
- Security measures
- Quality control
- General recommendations on video
During metalworking, regardless of the machine and the skill of the turner, any tool begins to become dull. Dulling of cutting edges can lead to heating of the workpieces, as well as sloppy workmanship. But it is not necessary to buy new, sharp equipment every time; you can correct the situation yourself, at home. In the article we will tell you what the correct sharpening angle for a metal drill corresponds to GOST, and we will provide a table of values.
Signs that the drill is dull
Before sharpening the drills, you need to make sure that they are actually dull. What signs does this show:
- the cutting tool gets very hot;
- metal shavings flying out from under the edge have a fine fraction;
- the noise of operations increases.
We especially note the last sign, because the friction force between the dull edge of the drill and the plane of the workpiece increases. Therefore, as soon as there is an increase in noise during drilling, work must be stopped immediately. If work is not stopped, the cutting tool will overheat greatly, the structure of the metal will change, which will lead to the complete loss of the tool. After which there is no point in sharpening it.
Edges and rear planes of an overheated drill Source podshipnik-servis.ru
Sharpening machine and its modifications
So, the basic piece of equipment is a sharpening machine.
One of the simplest options is a grinder mounted on a base with a suitable grinding wheel.
Using a special holder, the power tool is fixed on a table or workbench so that when the chuck rotates there is no displacement and vibration is damped. Using such a device, you can not only sharpen a tool, but also grind parts. Depending on how convenient it is to work, the axis of rotation is directed horizontally or vertically.
The next option is a simple sharpening machine, for example, a Soviet-made IE-9703 (the so-called sharpener).
There is space here to install only one circle.
A more “advanced” version of the same type is the 3K634 roughening and sharpening machine and its analogues. For a home, such equipment is usually not needed; this is an industrial option. As a last resort - for an actively used workshop.
Among the more modern and compact universal products, I would like to name the following:
- ELITECH CT600C. Practical, you can sharpen anything - from drills to chains and axes. For working with small tools there is a magnifying glass and a lamp. There is a spark arrester and a fairly powerful drive;
- BISON ZTSHM-150/686L. The design is similar to the previous one, but simpler and cheaper;
- Energomash TS-6010S. A very convenient thing, with separate blocks for sharpening different tools, with the ability to rigidly fix the item being sharpened to obtain the desired sharpening angle.
Specialized machines for sharpening drills for metal (and not only) have a narrower functionality. They differ in the number of simultaneously sharpened tools, their minimum/maximum diameter and possible sharpening angle.
For example, the OPTIgrind GQ-D13 and OPTIgrind DG 20 Vario machines differ in angle, drill diameter, and size/power. What they have in common, perhaps, is only the number of simultaneously processed products - one at a time.
OPTIgrind GQ-D13 OPTIgrind DG 20 Vario
Machines with a grinding wheel and a special drill holder are convenient. By changing the position of the holder, you can adjust the sharpening angle. For such professional machines you can buy sets of collets for sharpening, additional templates and other useful devices that make your work much easier.
For home use, professional machines are still a little overkill. You can get by with simplified machines designed only for drills and not upsetting customers with exorbitant prices.
In addition, there are special drill attachments that allow you to sharpen drills relatively quickly and with good accuracy. The last parameter, of course, depends on the quality of the nozzle. Alas, such attachments usually have a fixed sharpening angle – most often the standard 118 degrees.
Both of the latter options work on the same principle - the drill is inserted with the working part down into the corresponding diameter hole on the nozzle and pressed. The device turns on, sharpening occurs.
How to choose a drill
Before deciding how to sharpen a drill correctly, I would like to dwell a little on the cutting tool itself.
Let's start with the fact that drills on the construction tools market are presented in a fairly wide range. Since we are only interested in metal equipment, it should be noted that there is a choice here too.
First, you can select by tool color:
- Black is an oxide film, the function of which is to protect the base of the drill from corrosion and high temperatures. Therefore, this variety has high strength and wear resistance.
- Gray – this tool can easily be classified as low quality equipment.
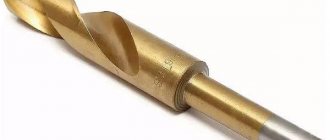
- Bright golden. This color indicates only one thing – the steel from which the tool is made contains titanium.
- Dark golden. The same as the previous option, only there are no internal stresses inside the steel rod. Hence its high qualities.
Types of metal drills Source rozetka.com.ua
It should be noted that most metal drills are rods made of tool steel. But to increase their cutting performance, you need to strengthen the cutting edge. Therefore, today you can buy four types of equipment with different coatings:
- Still the same black oxide film.
- TiCN is titanium carbonitride.
- TiAIN is titanium aluminum nitride.
- Titanium nitride itself.
- Ceramics.
Attention! The last two coatings cannot be re-sharpened.
Mainly in everyday life, and many craftsmen use twist drills to drill holes in metal. This is a steel cylindrical rod in which grooves are cut in the form of a spiral. Hence, in principle, the name.
The smaller part of this tool is occupied by the shank, which is clamped in the chuck of drilling equipment or in a drill or hammer drill. The main part is occupied by a cylinder with grooves. Grooves are cut for one purpose - to create a space through which metal shavings will leave the drilling site without interfering with the main process.
Twist drill: its parts and elements Source studfile.net
Spiral equipment also has a small classification, where there are three positions:
- Classic drill.
- Left-handed. It is used when it is necessary to drill out a broken fastening element from a hole: a bolt, a screw, etc.
- High precision. If the task is to drill a hole with minimal errors, then use it.
So, having sorted out the assortment of equipment, we move directly to the main question - how to sharpen a drill for metal.
How to extend the life of a drill
To ensure less wear on the drill, you must follow some operating rules.
- Do not overheat the drill. To do this, work at intervals and use coolant.
- Set the correct rotation speed. It is set taking into account the type and diameter of the drill, as well as the material.
- Remove the chips. Periodically remove the drill from the hole and remove the chips so that it does not get stuck in the workpiece.
- Drill holes in several approaches. If you need to make a hole with a diameter of more than 6 mm, use drills of different sizes (from larger to smaller), this will guarantee higher accuracy.
Rules for sharpening drills
Firstly, to carry out this process you will need either special equipment or special devices in the form of attachments for drills or hammer drills. The first group includes a sharpening machine on which a sharpening stone is mounted. A thrifty owner will always have such a small machine in his garage or shed.
It should be noted right away that the sharpening technology depends on the type of drill. It can be conical, helical, cylindrical, or one- or two-plane. But you need to understand that in any case only the rear edges of the tool need to be sharpened. In this case, each edge must be sharpened equally. It is clear that it is almost impossible to do this manually. But craftsmen sharpen small-sized drills by hand, which requires some experience in carrying out this type of work.
Screw drill for metal Source besplatka.ua
See also: Catalog of companies that specialize in the installation of metal structures and utility networks
There are some differences in sharpening different types of drills. For example, a single-plane drill differs from others in that its back wall of the pen has only one plane. And the angle of inclination of this plane varies in the range of 28-30°. It is this plane that needs to be sharpened. Here it is important to bring the drill to the rotating sharpening stone parallel to this back plane. In this case, the tool cannot be rotated; even a slight deviation will lead to an incorrect operation.
Double-plane drills are sharpened in the same way. You just have to sharpen two planes separately. The same requirements apply here.
As for conical models, the main task is not to disturb the taper of the structure of the edge being sharpened. Therefore, the tool is brought to a rotating grindstone, the drill is pressed and oscillating movements are made along the cone. The important thing here is not to tear the rig away from the stone. That is, the process is carried out in one touch.
And one more wish - to strictly adhere to the shape of the edge. It is clear that this is not always possible, especially if the drill is up to 10 mm in diameter. But for this variety you can only maintain the back angle. And that's enough. As for large-diameter drills, experts recommend, in addition to sharpening the edges along planes and accurately maintaining the angle, sharpening the front plane, thereby improving the design. These drills are more efficient when drilling.
Sharpening should be done with one touch Source novate.ru
Why is it necessary to sharpen the front plane? The thing is that by decreasing the angle of inclination of the front plane, the angle of the cutting edge increases. And this increases the resistance of the tool to chipping of metal from the plane of the cutting edge. In addition, it should be added that the length of the transverse edge decreases sharply. That is, it turns out that the edge of the cross member does not cut, but scrapes the metal workpiece. Or rather, the central part of the drilled area.
After sharpening the drill, it is also recommended to carry out fine-tuning. That is, the nicks left by the grindstone are removed. This is a mandatory procedure in factory conditions. This is what allows you to increase the wear resistance of the tool. If it is possible to carry out fine-tuning at home, then it must be done.
Usually other stones are used for finishing:
- made of silicon carbide, it is green, grade 63C, and it is better to use a wheel with a grain size of 5-6 and a hardness of M3-SM1;
- from CBN, a grit size of 6-8 is required here.
Please note that these stones must be made in a Bakelite bond.
Stone for sharpening drills Source i.ytimg.com
Sharpening methods for removing the rear plane
There are several types of sharpening drills for metal, which differ in the method of bringing out the back plane. These are single-plane, two-plane and conical sharpening. The last method is the most common, so we will focus on its description.
Methods for removing the rear plane when sharpening a drill
With conical sharpening, the relief angle gradually increases from the cutting edge and along the entire rear surface. In this case, the rear surface acquires a curved shape. The cutting edge angle should be 7–17°. Conical sharpening is more difficult to perform. During operation, the drill shank must be slightly twisted from top to bottom, as a result of which the rear surface takes on the appearance of a cone.
Devices for turning drills on a machine
It is difficult to hold a drill in your hands and sharpen it on a machine on which the stone is spinning at high speed. You need to have a lot of experience so as not to screw up the instrument. Therefore, there are special devices on sale that make this operation easier.
Simple devices can be purchased on the market. There are also quite complex ones with electric motors that not only hold the drill in the required position, but also feed the tool to the grindstone automatically. The latter are more often used for sharpening twist drills. But such devices cost a lot of money, so they are purchased by professional sharpeners.
How to optimally grind the back surfaces with your own hands and straighten the drill in 3 steps
Let me remind you of two requirements for the condition of the peripheral surface of the emery wheel:
- the width must exceed the length of the RC by a margin in order to process it in one go;
- and the grinding surface of the stone should have a perfectly straight line.
Next, we will need to consistently ensure the three conditions for correct sharpening discussed above.
Step #1. How to easily form a clearance cutting angle
The drill axis must be directed at 60 degrees to the generatrix of the circle’s periphery.
To do this, it is enough to mark a clearly visible line at 60° on the tool rest with a marker.
An alternative to this method is to mark lines on the glass of the protective shield with a marker.
The drill is placed on the index finger or fingers, which rest on the side surface of the tool rest so that its side surface (axis) is parallel to the marked line.
It is pressed from above with the thumb, and the fingers of the other hand hold the shank and ensure its movement up and down, movement to the right and left, rotation along the axis and fixation in the desired position.
In the initial position, the drill body is located strictly along the horizontal plane. If you look at the sandpaper from the side in this position, you can see that the circle is ready to give the back surface the desired slope.
The cutting edge must remain stable relative to the rotating stone throughout the entire period of processing the back surface. This is ensured by maintaining the axial position of the drill relative to the line and plane drawn by the marker.
The movements of the drill when sharpening are as follows:
- Carefully bring the cutting edge to the abrasive wheel until it touches, lightly press it and immediately begin to smoothly change the inclination of the drill. We lower the shank a little down, maintaining the same pressure until the end of the passage.
- Next, you should return the drill to its starting position and rotate it 180 degrees to machine the second cutting edge. In this case, it is important to maintain the stability of the position of the center line relative to the control line on the tool rest.
The hands and fingers should not change their position. It is necessary to ensure uniformity of the clamping force of the RC when turning both rear surfaces. The shank is held freely in its original position, without tension, and the elbows of the hands are pressed to the belt.
The horizontally aligned cutting edge is brought to the surface of the circle until it touches lightly (the same pressure is ensured), and then the drill is moved up and retracted back to its original position.
To change the sharpening of the drill bit, keep the drill motionless with your right hand, and rotate it 180 degrees with your left fingers, maintaining the axial position along the marker line.
If you notice that one side needs to be ground off more, then it should be processed several rows in a row, without changing the amount of pressing force.
Do not forget to periodically cool the entry tip by lowering it into a jar of water, and then check the created geometry visually using the prepared template.
Step #2. Features of the formation of symmetrical angles at the apex
A homemade device made from a piece of corner provides uniform symmetry of the corners.
It is attached to the sandpaper rest with a clamp and placed parallel to the line drawn with a marker. It allows you to maintain the set rear cutting angle.
The drill is placed on the index finger located on the tool rest and pressed along its length to the reference plane of the angle.
Please note that at least two contact points on the side strips must be in contact with the surface of the base.
Any of the cutting edges is always set strictly horizontally when sharpening in the starting position of either side.
Next, the back surfaces are ground down according to the same rules as described above. Pay attention to the uniform force of pressing the drill against the corner and stone.
The second RC is processed similarly after rotating the tip 180 degrees. In this case, the symmetry of the angle is ensured automatically.
Step #3. How to easily ensure equality of cutting edge lengths
First, you will need to visually evaluate the created geometry and location of the RC. Reflections of light that interfere with observation can be blocked with the palm of your hand.
A more accurate assessment of the equality of lengths allows them to be measured with a caliper.
The most accurate measurement method is based on the use of a special device.
Its rotary ruler is set along the square perpendicular to the fixed ruler so that the indentation of the control tip is spaced from it by the radius of the drill.
After this, the sharpened sample is placed on the device and the position of the cutting center formed on it is compared.
The shorter cutting side is subject to additional sharpening. Moreover, at this final stage you should not process the entire back surface. It is enough to form a thin ribbon of the cutting edge at a slight angle.
It is created by lightly touching the rotating circle with the drill axis in a horizontal position.
Video description
The video shows how the master made a device that helps to properly sharpen a drill for metal:
How to sharpen a drill using a drill
If a sharpening machine is not available, you can adapt a drill with a grinding wheel mounted on the shaft. There are two options for the process:
- hold the drill in a vice and bring the drill to the stone with your hands;
- Clamp the cutting tool in a vice and bring the stone with the drill manually.
Both options are not easy, but the second is easier than the first.
How to sharpen a drill correctly in this case:
- the cutting tool must be installed in a vice in a vertical position;
- using a circle mounted on a drill, the trailing edge is removed, the goal is to remove signs of wear;
- then sharpening is carried out at the required angle - usually 120°.
Attention! To prevent the edge from overheating, the sharpening process should be carried out for no more than two seconds. That is, the metal is removed in layers.
But there is an easier way. To do this, you need to purchase a special nozzle. It is installed on a drill and a drill is inserted into a special groove. The latter, relative to the rotating sharpening tool, is located at a certain angle equal to the sharpening angle. This can be clearly seen in the photo below.
Sharpening a drill using a drill and a special attachment Source yandex.net
Scheme of sharpening a drill for metal on a grinding machine (sharpener)
To sharpen twist drills for metal, household grinding and grinding machines, otherwise called a sharpener, are most often used. To work, you will need a straight profile abrasive wheel of grade 14A (A) or 25A (WA). They are suitable for grinding products and tools made of carbon, alloy, high-speed and stainless steels.
Machine for sharpening drills for metal with accessories
The working surface of the abrasive wheel must be smooth, without potholes or depressions. If you find any defects on the surface, correct them before work. During dressing, the grinding wheel must acquire the required flat shape. To edit grinding wheels, diamond and CBN pencils, diamond dressing combs, and, less commonly, cutters and improvised materials are used.
A tool rest must be installed on the machine; it is necessary for high-quality sharpening of a metal drill. The tool rest is a metal adjustable platform that is installed in front of the disk and is used as a support and guide when working with sandpaper.
The tool rest is positioned horizontally so that its upper plane is flush with the axis of rotation of the abrasive wheel. The gap between the circle and the tool rest is kept minimal, 1 mm is enough.
As an example, let's look at a single conical sharpening with a cutting edge, since it is one of the most common and is used to restore the sharpness of drills with a diameter of 3 mm or more.
Important!
For safety reasons, it is prohibited to work with a grinding machine while wearing gloves, as the rotating parts pose a risk of material being wound and body parts being pulled in.
Progress
- Check that the abrasive wheel is installed on the sharpener, and the tool rest is flush with the axis of rotation of the abrasive wheel, at a distance of 1 mm from its surface.
- Work through all the steps with the machine turned off. Draw a line on the tool rest at an angle of 60° to the plane of the end of the sanding wheel. This will allow the vertex angle to be 120°.
Draw a line on the tool rest at an angle of 60°
- Take the drill with both hands: fix the working part with one, and the shank with the other. Then place the drill on the tool rest so that the side edge, when viewed from above, coincides with the line on the tool rest.
Take the drill in your hands and place it on the tool rest
- Place your index finger between the tool rest and the drill; it will act as a swing when sharpening conically. When the drill rests on your finger, an angle of 7–12° is formed between it and the emery wheel. This value must be maintained at the cutting edge.
- Practice the movements you will use for conical sharpening. Lightly press the leading edge against the sandpaper, making sure that the edge is in a horizontal plane. Slowly lower the shank without releasing pressure until the back of the back surface is on the plane of the circle. The circle should turn around.
We practice the movements for sharpening with the sharpener turned off.
- Move the drill back from the circle, turn it over with the other cutting edge forward and again attach it to the circle in a similar position. Repeat the oscillating motion with the shank so that the sandpaper rotates again. Practice this movement of turning the sandpaper several times to sharpen the metal drill automatically.
- Turn on the sharpener and start sharpening. Follow the same sequence:
- align the drill with the mark on the tool rest;
- attach the leading edge to the sharpener, making sure that it maintains a horizontal position;
- lower the shank to completely machine the back edge;
- retract and turn the shank 180° around the axis;
- repeat the whole process.
Sharpening accessories
It is difficult for beginners to carry out the sharpening procedure efficiently. Therefore, manufacturers of construction tools have been producing special attachments for drills for a long time. This is actually a nozzle. It must be installed on a drill, insert a drill into the hole from the end and turn on the power tool.
Then the drill is pulled out, rotated 180°, reinserted into the drill sharpener, and the drill is turned on again. That is, the second plane of the cutting edge is sharpened.
Device for sharpening a drill mounted on a drill Source yandex.net
Purpose and design features of the tool
Metal drills, for the manufacture of which high-speed steel alloys are used, are used to create both through and blind holes in metal parts. The most common are twist drills, the design of which includes the following elements:
- cutting part;
- working fluid;
- shank;
- paw
Structural elements of a twist drill
If the shank, which can be either cylindrical or conical, is designed to securely fix the tool in the chuck of the equipment used, then the working part simultaneously performs several important functions at once. It is the geometry of the drill that determines its performance and cutting properties.
The most important elements of the working part of a metal drill are screw grooves. Their task is to remove chips from the processing zone. The geometry of a spiral drill for metal provides that the front side of the spiral groove is made at a certain angle, the value of which changes in the direction from the axis of the tool to its peripheral part. During the manufacturing process of a metal drill, narrow ribbons are formed on the side area of its spiral elements, slightly protruding above the main surface. The purpose of such ribbons is to reduce the amount of friction between the tool and the walls of the hole being formed.
Sharpening small drills
Unfortunately, it is impossible to sharpen a tool with a diameter of less than 4 mm using an attachment or on a machine. Therefore, such drills are sharpened by hand using a file or needle file. As for the latter, it is better to choose one with diamond coating. Even if a file was used, the edges must be finished with a file.
The complexity of the operation lies in the fact that the cutting tool has a small plane and edge. Therefore, it is recommended to purchase glasses with four times magnification for this, and also use a lamp with a good luminous flux.
The principle of sharpening is exactly the same. But there are some recommendations:
- grinding off a layer of more than 1 mm is not recommended;
- The sharpening angle of the metal drill is standard, but is maintained by eye;
- As practice shows, you will definitely ruin the first drill, don’t despair, skill comes with experience.
Parameters of drills that need to be restored when sharpening
Proper sharpening of a metal drill allows you to restore the following operating parameters.
The main parameters that are restored when sharpening a drill
- Apex angle. Formed by the cutting edges when crossing the bridge. This parameter should be 116–118°. The exact numbers depend on the hardness and viscosity of the material being processed and in particular cases can be equal to either 60 or 180°.
- The angle between the cutting edge and the axis. Equal to half the apex angle, that is, approximately 58–59°. It must be identical for each of the cutting edges, since with asymmetry only one of them will work and the drill will wear unevenly.
- Shape and length of cutting edges. The lengths of the cutting edges must match, otherwise there may be runout during drilling, and the hole diameter will exceed the nominal one indicated on the drill.
- Rear cutting angle. Should be 7–17° depending on the material being processed. The clearance angle of cutting is one of the main parameters when sharpening a drill for metal; if it is not observed, the work productivity can decrease several times.
Types of sharpening
Some types of sharpening have already been mentioned above, but we will repeat it again. So, there are five types of sharpening, which are selected based on the type of material and the specifics of the work associated with drilling.
The first of them is normal under the title “N”. This variety is universal, but is used only if it is necessary to sharpen a drill with a diameter of no more than 12 mm. Essentially, two cutting edges and one transverse edge are formed on the tool. To do this, you have to maintain an angle within 118-120°.
And the rest:
- NP – sharpening is done with a short crossbar to reduce the load on it;
- NPL - in addition to the transverse edge, the width of the ribbon is also reduced, the goal is to reduce the friction force that is created between the drill and the workpiece;
- DP is the so-called double sharpening, where in addition to the transverse edge, four more edges are formed, which are broken lines;
- DPL is the same previous version, only the ribbon is additionally sharpened.
Attention! Why are four edges needed? This is an opportunity to reduce the angle between sections of the peripheral planes of the edges. Thus, an increase in heat removal from the drilling site is achieved. And this increases the service life of the tool itself.
Correctly carried out sharpening of a drill Source tehnomuza.ru
Sharpening methods according to the number of bevels on the cutting edge
They differ in the number of cutting edges formed. The angle at the apex changes in steps from greater at the central apex to smaller at the side apexes. This method of sharpening reduces the heating of the tool as the diameter increases, since the cutting edge in the center heats up less than at the edges.
There are single and double sharpening. Since the first one is used more often, we will only talk about it. During normal sharpening, the geometry of the cutting edge remains smooth throughout.
Types of sharpening according to the number of angles at the tip
Sharpening angle
As mentioned above, before properly sharpening a drill for metal, you need to choose the right sharpening angle. Firstly, this parameter is tabular. Secondly, it depends on what kind of metal needs to be drilled. If this:
- cast iron or steel workpiece, then the angle should vary from 116° to 118°;
- if it is brass or bronze, then from 120° to 130°;
- if the workpiece is made of copper, then 125°;
- aluminum – 140°.
An incorrectly sharpened drill leads to overheating of the tool itself. But, as practice shows, it is the incorrectly chosen sharpening angle that leads to a decrease in the quality of the process.
Selecting a drill sharpening angle depending on the material being processed
The apex angle is selected based on the hardness of the material being processed. The harder the material, the greater this value.
For convenience, we provide a table that shows the sharpening angles for metal drills recommended when working with different materials.
| Processed material | Vertex angles, ° | Rear cutting angle, ° |
| Malleable cast iron, bakelite | 90 | 12–15 |
| Heat-resistant steels and their alloys, stainless steel | 127 | 12–14 |
| Tool steel | 118–150 | 7–15 |
| Copper | 100–118 | 12–15 |
| Copper alloys | 118–150 | 12–15 |
| Aluminum alloys | 90–140 | 12–17 |
| Magnesium alloys | 70–118 | 12 |
| Titanium alloys | 135–140 | 12 |
An apex angle of 118–120° with a clearance angle of 7–12° is considered universal. This is what they mean when they talk about a twist drill for metal without reference to the processing material. And it is these degrees that we will consider as standard when talking about sharpening drills for metal.
Briefly about the main thing
You can sharpen a dull drill using different devices: a sharpening machine, a drill on which a whetstone is installed, or a drill attachment.
Small drills are sharpened by hand with a file or needle file.
The main sharpening parameter is the angle that forms the edges. The sharpening angle is selected taking into account the metal that is to be drilled. This parameter is tabular.
To increase the wear resistance of the drill, the sharpening configuration is changed, using five options for edge formation as a basis.
Ratings 0
Which drill is better to use
List of drills for stainless steel that are definitely suitable for drilling metal:
- Any tool that contains cobalt in its alloy. The higher the percentage of this component, the better. Cobalt products differ from ordinary ones in a yellowish tint. Do not confuse the cobalt alloy with the application of this metal only to the outer part of the drill by electroplating. In the latter case, it will not be possible to drill through stainless steel.
- Expensive specialized tool. Such pobedit drills can drill through stainless steel, not just concrete. They have a certain sharpening angle.
- For thin stainless steel, you can use a feather-shaped drill bit for ceramic tiles. This is not the best option, but it will help to drill the workpiece once.
Application of cobalt drill
Of the old Soviet drills for stainless steel, the most suitable tool would be the one with the brand R6M5K5. This type of equipment contains up to 5% cobalt in the alloy. Due to this element, the tool acquires high strength, and the heating temperature can reach 135 degrees Celsius, which does not entail destruction of the material. Products of this quality can only be found in markets where old Soviet equipment is sold, and even then not always. An alternative to a domestically produced cobalt drill is a foreign analogue under the HSS-Co brand.
To drill stainless steel with a cobalt drill, you should also use lubricants and do not use high speed power tools.
Helpful tips for drilling
To properly drill through stainless steel, you need to use a few simple techniques:
- It is most convenient to drill a surface that is horizontal. To do this, the part is placed on a workbench or table and the location of the future hole is marked with a core. Next, take a piece of plastic or thick-walled rubber tube with a length of 20 mm and a diameter exceeding the diameter of the drill, and install it at the drilling site. A special coolant is poured into the tube, which has lubricating properties. You need to drill through the stainless steel through this tray.
- If the workpiece is located horizontally, then there is a way out of this situation. The place to be drilled is also marked with a core and a paraffin ball is attached to this point. Drilling is carried out through paraffin. As a result of heating the surfaces, the paraffin will melt and gradually lubricate the treatment area.
- It is best to use a drill whose shaft rotation speed can be adjusted. It will be very difficult to drill through stainless steel at high speeds. The optimal rotation speed of the tool should be in the range of 100–600 rpm.
In the case when a home drill does not have a rotation speed regulator, and the rated speed is high, you can drill stainless metal, including electrical equipment, pulsed for 1-2 seconds after the same period of time.
Dear site visitors, share in the comments how else you can drill stainless steel at home.
How to sharpen a twist drill
At the edges of the cutting tool, the cutting speed is minimal, but the heating of the cutting edges occurs to a maximum value. It is quite problematic to provide for heat removal from the corners of the edges. In this regard, the corners of the device begin to become blunt first, and then the entire cutting edge. Subsequently, abrasion of the rear part occurs, and streaks and scratches appear that come from the cutting edge. With gradual wear, the strokes merge, forming one strip that runs along the entire length of the edge, tapering towards the center of the drill. When the wear resistance threshold is exceeded, the transverse edges can simply crumple.
If the drill becomes dull, it immediately begins to make a creaking sound. If you do not sharpen the cutting part of the tool in a timely manner, increased overheating will occur, which will lead to wear of the structure in the shortest possible time.
To make it easier to control the geometry of the fixture, you should work on creating a template. Thanks to it, you can easily find out which part of the tool requires additional metal removal. To maintain symmetry, it is important to sharpen each section of the drill with equal pressure to the surface of the sharpener.
To operate, you must provide the following components:
- grinding wheel;
- bushings;
- water;
- soda;
- aluminum, copper or steel sheets.
Sharpening drills for stainless steel
In our age of high technology, purchasing the most complex and expensive tools is no longer considered something extraordinary.
In many apartments, not to mention private houses, the presence of electrified drilling machines is taken for granted.
Therefore, many will need information on how to properly sharpen a metal drill in order to extend its service life and not spend money on a new one.
A metal drill, oddly enough, is an ideal tool for training and honing sharpening skills. The result of your efforts can be seen immediately, even if it is negative. To sharpen such a drill, as a rule, a special electric sharpener is used. It is equipped with disc wheels, the runout of which must be equalized before starting work.
For these purposes, you can use a stronger metal, for example, a heavy old file. If the working surface of the abrasive wheel is not perfectly smooth, even experienced specialists will not be able to cope with the sharpening work. Particular difficulties usually arise with small-sized drills, which are most often used in everyday life.
It is also necessary to prepare a bowl with water, since the drill being sharpened needs periodic cooling as a result of the heat generated during operation.
How to drill a hole in stainless steel?
» Welding work at the dacha.
Stainless steel is used in many household items. Elements of furniture, cutlery, dishes - it’s hard to imagine a comfortable life without these items. What can we say about industry, where stainless steel is used everywhere.
What kind of metal is this? Most people think of a plate or piece of iron that does not rust in water.
In fact, stainless steel combines a whole class of alloys with many useful properties, including corrosion resistance. It is obtained by adding metals that are resistant to aggressive environments.
Depending on the amount of material, an alloy with different characteristics is produced.
Today, the most popular in industry is the so-called “food grade stainless steel”. It has found its application in factories producing cutlery, water, milk and other food products.
Metal is processed quite simply. On an industrial scale, it is easily bent, extruded, and cut into various shapes. At home, it is better to use an angle grinder for this.
How to drill stainless steel?
Let's look at a few important rules that should be followed when drilling stainless steel. They are also true for other types of carbon steel:
What tool to use for drilling?
First, the type of tool that can be used to perform such an operation efficiently and safely is determined. If we are not talking about production, where the use of a drilling machine would be quite justified, then the choice will be between a drill and a hammer drill. Of course, the eye of an inexperienced user will immediately fall on the hammer drill as a more powerful unit. But not everything is so obvious.
How to drill stainless steel with a hammer drill? You will have to work in initially uncomfortable conditions, since the massive structure will not provide room for maneuverability, and this is the key to successful processing of solid alloys. The emphasis will have to be on the physical stabilization of the tool, which will not be possible without an additional side handle.
As for the drill, then, of course, the emphasis should be on professional models with sufficient power reserves - at least 1500 W in the case of network devices, and from 18 V if you need a cordless tool for remote work.
But in both cases, the design of the drill is optimal for working with stainless steel.
By the way, in addition, it would not be amiss to provide a useful set of functions - electronic speed control, a switch lock button and reverse movement.
Choosing the right drill
It is advisable to give preference to cobalt drills made from high-speed steel alloys of the grades HSS (M35), HSSCo5, P6MK5, etc. The intended purpose of such equipment is to make holes in difficult-to-cut and stainless workpieces.
For example, the R6M5K5 drill contains 5% cobalt, which significantly increases the red resistance of the product.
In other words, the glow of a drill with critical overheating can occur only if the established standards for the working session time are exceeded, but not in the usual normal drilling mode.
Moreover, even intensive use of the element will not reduce its wear resistance and hardness. These qualities can be explained by the special production technology using the grinding method, which eliminates the internal stress of the metal.
The working part of the drill can be performed in different ways, depending on the required cutting technique. For example, spiral models have a rod with helical edges and grooves that remove chips. This is a universal option for household work, characterized by reliability and decent drilling quality.
As an alternative, a step drill can be offered, but it is more suitable for production where it is necessary to make several holes of different formats in short periods of time without changing equipment.
You should also pay attention to the sharpening angle of the stainless steel drill, which can range from 100° to 140°. Which angle would be preferable? For steels, it is better to choose models at 130-140°. Lowering this indicator makes the drill suitable for soft materials such as duralumin and brass.
Selecting a drill by shank type
Since the equipment will experience increased mechanical loads due to vibrations during operation, it is important to consider the type of connection to the chuck. The most common is the cylindrical key type hitch.
In particular, HSS metal drills from Inforce are designed for it, with a tensile strength reserve of up to 900 N/mm2.
As experts note, the transmission of torque in this design is not the most successful, but you don’t have to worry about the risks of jamming.
Another shank option is hexagonal. In this case, fixation is ensured by a three-jaw chuck with rigid positioning of each face. The fastening is reliable, but the mechanics of handling such equipment are quite difficult. If you need to perform serial drilling, then manipulating the replacement of the nozzle will cause a lot of trouble.
Preparation of lubricants and cooling materials
High-performance mechanical processing of metal alloys is accompanied by increased loads with temperatures brought to critical values. To minimize such effects, lubricants and coolants are used for drilling under load. In this part, it is necessary to provide for two points - the very mechanics of supplying the composition and its recipe.
As for the first, in one-time events you can wet the work area manually as it heats up.
Automatic systems are usually implemented in the form of a pump connection - for example, from a car pump. The optimal composition of the mixture will include a combination of machine oil and sulfur.
Technical additives that increase the viscosity of the oil can also be used as an additional modifier.
Drilling process
The tool is immediately adjusted to low or medium speeds, since stainless steel does not tolerate high speeds well - this can damage the edges or drill.
The workpiece is installed on a firmly fixed base. It is advisable to use a metal workbench with a vice.
Direct mechanical contact is made only when the optimal drill speed is reached. Then they start cutting.
The cobalt drill on stainless steel is directed strictly perpendicularly under light pressure. No deviations or jerks should be allowed.
Moreover, even stopping is not advisable, since a failure in the pace of movement will, in principle, negatively affect the structure of the hole. The process ends with support for initial revolutions.
The speed is reduced and the device is turned off only after removing the drill from the hole.
Features of working with hardened stainless steel
There are often situations when hardened metal is not amenable to even cobalt-based HSS drills. This usually applies to sheets with a thickness of more than 6-7 mm. How to drill through stainless steel in this situation?
The solution will be either to use diamond bits for cutting glass, or to use a nozzle with a fine-grained alloy and soldering. The second option is offered in the Bosch line.
German developers produce a unique Multi Construction line with a distinctive feature in the form of a blue belt on spirals.
Thanks to the centering tip and AWB soldering, this type of drill can even cope with hardened stainless steel.
Features of working with stainless steel railings
The difficulties of working with such a structure are determined by the round shape of the handrails, and sometimes by the presence of special chrome coatings, which make alignment difficult. The master’s task will be to securely fix the pipe using a vice, as well as special drilling tactics.
How to work with stainless steel railings? First of all, the cutting point is designated. This is done by punching and hammering. With a light blow, a hole is marked from which the material will be processed. Then take any small-format drill.
At this stage, it is important to only slightly deepen the point at low speeds. Moreover, the end of the drill must be lubricated with machine oil. Then, using a full-size cobalt nozzle, a hole of the required size is formed in two passes.
Coolants and lubricants
Lubricating the area to be drilled in stainless steel is essential to successfully obtaining a hole.
The easiest and most affordable way is to purchase machine oil and colloidal sulfur (as an alternative, you can take sulfur for fumigation). Large pieces of sulfur are crushed to a powder and mixed with oil. The solution must be constantly supplied to the treatment area - the wrong approach would be to periodically dip the cutting edges of the drill into the lubricant. For drilling holes in stainless steel, there are more effective lubricating solutions that can be prepared at home. This applies, for example, to a solution based on sulfur and fatty acids. Cooking method:
- Laundry soap is ground by rubbing on a medium grater.
- The resulting material is dissolved in a container with hot water until it becomes a saturated soap composition.
- Take technical hydrochloric acid and slowly pour it into the same container. As a result of the chemical reaction, fatty acids will rise to the upper layers of the solution.
- After the process is completed, cold water is poured in to solidify the fatty acids, then they are mechanically separated from the total mass.
- Sulfur and lubricant are mixed in a ratio of 1:6.
How to drill
Firstly, you need to remember that stainless steel does not like high speeds. This is a hard, durable material and is best drilled at low or medium speed drills.
At high speeds, the drill will, at best, quickly become dull.
If you do not stop drilling when heated to red, the entire drill will heat up very quickly and simply begin to bend - after which you can safely throw it away, even sharpening will not extend its service life.
Secondly, when drilling, you should use a lubricant to reduce friction; any motor oils, non-mineral oils and even water will do, if nothing else is available.
All means are good, as they say, in the case of such a durable material as stainless steel.
When drilling takes place with force, is accompanied by heating of the workpiece and can quickly use up the working life of the drill - anything that can reduce friction and simplify the passage of metal with a drill will come in handy.
Well, don’t forget about such obvious points as securely securing the workpiece to the working surface and marking the location of the intended hole.
We figured out how, now let's see what you can use to drill a hole in stainless steel
The easiest way is to take drills specifically designed for this purpose. Such drills contain cobalt and are designated HSS-Co; they are easy to find in any store, although they are more expensive than usual.
Usually, a drill of small diameter is first taken, the first hole is made with it, then the diameter of the drill is gradually increased until the desired hole diameter is reached. Cobalt drills are the easiest to drill into stainless steel, they are stronger due to their composition and dull slower than usual, they can even drill at high speeds.
This will shorten the life of the drill, but in everyday life, if you need to drill just a few holes, you most likely won’t even notice it.
What to do if you don’t have a cobalt drill at hand? You can drill through stainless steel with a regular ground metal drill bit HSS-G. (You can read more about metal drills and their designations in our article Types of equipment: everything about metal drills).
In this case, the drilling process should consist of a quiet sequential switching on and off of the drill: switching on occurs literally for 1.5-2 seconds, until the drill reaches full speed - and immediately switching off until the drill stops.
We assure you, this is enough to heat up the stainless steel so much that any flying chips could leave a burn on the skin - so be sure to wear gloves! In this case, you need to be patient, drilling will take longer - but the main thing is the result.
With the most common, inexpensive drill, you can drill through stainless steel - a material of great strength, on which drills of lesser quality have broken!
Stainless steel is also sometimes drilled with glass and ceramic drills. The tip of this drill is hard, but fragile, so such drills should not be overheated - the tip will quickly break under the influence of temperature. The principle of drilling is similar to the previous method - it should consist of short “approaches” of the drill to the stainless steel at intervals, while dripping oil onto the drilling site as often as possible.
There is another little trick for drilling parts made of thick stainless steel. The part must first be heated a little with a gas burner - a little, this is not to the point of red or blue, but simply heated for a short time on the fire, and then start drilling without waiting for the metal to cool.
If you still define it in numbers, then it is worth heating no more than 150-200 degrees. During the drilling process, if the metal has cooled or the drill is very tight, the workpiece can be heated again.
After such preliminary preparation, a thick stainless steel part can be drilled with almost any drill, even not a very expensive one.
November 25, 2018
How to replace the shield of a protective mask yourself?
Any master knows that the weakest point of a protective mask is the shield. Do you want real armor 4 or even 5 mm thick? Let's do it ourselves!
The shield of a protective mask quickly becomes covered with scratches, even just from rubbing. And the thickness of the plexiglass itself, with which inexpensive protective masks are sold, leaves much to be desired.
We offer you to see the simplest way to make a replacement shield for a mask from a regular sheet of plexiglass of the required thickness.
Such a shield can withstand not only shavings, but a direct hit with a hammer! In the same way, plexiglass of a large area can be bent for any other purpose. And after watching the video below, you can read a couple of tips and notes on the process.
The first thing I would like to note is that if you have a hair dryer, it is better to use it to heat the glass. There is a risk of overheating the glass with a burner, and then it will become cloudy. On the other hand... The master did it in the video - you just need to do everything carefully and slowly, evenly heat the plexiglass to a plastic state.
For thinner plexiglass, you can use the simplest known method - simply heat it in hot water. But why do we need thin polycarbonate if we can make something truly reliable.
And we never tire of reminding you that any work with power tools must be carried out with protection - at least with gloves and safety glasses!
Other interesting articles and videos on the Tool Station channel:
We are not afraid of the cold - everything about heat guns Why a boiler can break in cold weather and how to avoid it A screwdriver of the future or just a funny invention - it's up to you to decide The moon and the level
Link to an article on our website: How to drill stainless steel
When using the material or part of it, a link to the Tool Station website www.toolpoint.ru is required.
What to consider
When drilling metal, only sharp tools must be used. The dullness of drills depends on the speed at which the work is performed, the hardness of the metal being processed, the force with which the drill is pressed, whether cooling is present, etc. Depending on this, the frequency of sharpening the tool is determined. For each specific case and drill, everything is individual.
The types of sharpening are completely different; they are determined by the degree of dullness of the drilling tool, its diameter, design and specific purpose. There are standard recommendations that indicate how to sharpen drills correctly. They are not basic, but following them minimizes the risk of damage to the instrument and the formation of any defects on it:
- when working, the edge of the device must be held so that it is parallel to the grindstone;
- observe gradual sharpening, without sudden movements with the drill;
- avoid excessive pressure of the drill on the surface of the grinding wheel;
- if there are no reflective highlights on the treated surfaces, this indicates the completion of the work.
It is also necessary to adhere to technologically recommended sharpening angles for a certain type of material.
Please note that there are no universal values. The specified sharpening angles should be selected for each type of metal being processed. An example of technological quantities is shown in the figure.