mark_kr
11494 0 2
mark_kr August 9, 2016Specialization: professional in the field of construction and repair (full cycle of finishing work, both internal and external, from sewerage to electrical and finishing work), installation of window structures. Hobbies: see the column “SPECIALIZATION AND SKILLS”
If you have straight arms, bending tin and making pipes out of it is quite simple!
Making a pipe from tin with your own hands is an excellent alternative to buying an expensive drain or ventilation casing. In practice, the savings turn out to be colossal, and if you consider that having mastered the technology, you can literally “stamp” pipes of any (okay, almost any) diameter - then it’s definitely worth reading my tips and at least trying to implement them in practice!
Below I will talk about what we need to form the pipe, and also describe the algorithm by which I have been successfully bending tin products for five years.
Which tin should you choose?
How to make a pipe out of tin? What kind of tin is best suited for this type of work?
Thin tin is an excellent material for homemade bathhouses and smokehouses. Tin is a thin sheet of steel that is susceptible to corrosion. To make beautiful drainpipes, as well as weather vanes, canopies over chimney pipes, do-it-yourself covers over chimneys, or original filigree lace, galvanized roofing iron is used.
Tip: tin pipes can also be used as samovars; they increase draft well and also remove smoke.
What tools are needed?
Before you start making a tin pipe with your own hands, you need to take care of the tools and materials that you will need.
Making tin pipes with your own hands involves using the following:
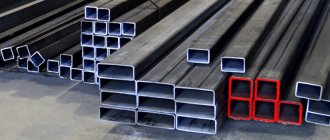
- sheet of thin galvanized iron roofing (thickness 0.5-0.7 mm);
- scissors for cutting metal;
- metal strip;
- wooden hammer (mallet);
- simple hammer;
- pliers.
Metal cutting scissors
Advice: in order for a tin pipe to turn out beautiful and even, it is necessary to take a sheet of iron with a smooth and even surface, and also so that the corners are straight, and not torn or unevenly cut.
Tough as it is
Tin is a type of sheet steel, up to 0.36 mm thick, coated with tin, zinc, chromium, varnish or other substances.
Cans or beer cans can be a source of material for DIY crafts made from tin. Interesting household or decorative items are easy to make at home.
Beer can animals
Tin can be cut well with scissors or a stationery knife, so you can create openwork crafts. By cutting off the bottom of a tin can and cutting out designs on its walls with a knife, you will get a lampshade for a lamp. It can be painted and a cartridge mounted.
A simpler lamp would be the same cut-out lampshade, but with one bottom. Tin candlesticks will create the mood and ensure the safety of using an open fire.
Tin lamps
Tin candlesticks
If a beer can with smooth walls is cut to form a rectangular sheet, then various shapes can be cut out of it. Flocks of tin birds, butterflies, and fish will complement the interior design motifs.
Instructions for making a tin pipe
How to make a pipe out of tin? Where to begin?
- Making pipes from tin begins with drawing up a drawing. Draw an unfolded pattern of the future pipe on an iron sheet.
Tip: the pipe pattern can be drawn with chalk or any sharp object.
- When marking a pattern, the following points must be taken into account:
- the width of the workpiece should be equal to the diameter of the pipe plus an additional one and a half centimeters;
- the length of the workpiece is slightly longer than the straight section of the pipe.
Scheme of blank for pipe seam
- Using metal scissors, cut off the drawn pipe blank.
- Place the workpiece on the edge of the workbench.
- Along the length of the iron sheet, draw a fold line on one side; it should be half a centimeter.
- Align the line drawn with the edge of the corner on the layout.
- Using a mallet, bend the edge of the sheet of iron down.
- Turn the sheet over and, with light blows of a mallet, bend the edge to the sheet.
- Turn the workpiece over and on the other side bend the edge 1 centimeter wide, but in the other direction.
- Fold the edge again, so in profile this bend will look like the letter L.
- Insert the workpiece into the mandrel, carefully bend the edges of the pipe towards each other.
Tip: you can use a mandrel - this is a sector or template of a pipe of the required diameter, but you can do without it.
- Connect the edges into a lock so that the smaller edge hooks onto the larger edge.
- Seal the edge using pliers.
- Using a hammer and an iron bar, lay the edge on the sheet and tap it well.
Bend the fold on the pipe
The edges of a tin pipe can also be fastened using steel, aluminum or tin rivets.
- Drill holes for the rivets at a distance of three centimeters.
- Bend the edges at right angles towards each other.
- Bend the sheet of tin blank in the opposite direction so that the edges are located on the outside of the pipe.
- secure the edges with rivets.
Tip: a DIY tin pipe fastened in this way is not very convenient to use. The result is a not very attractive external seam, which has to be hidden when installing the pipe.
Do-it-yourself tinsmithing - Metalworker's Guide
When working with tin, two main tools are used. Metal shears and sheet bending machine.
Of course, when making a gutter for the roof of a barn, you can use the old-fashioned method - tap a galvanized sheet with a mallet on the edge of a workbench, or using a metal corner.
Examples of such work can be seen on roofing in the private sector. However, the quality of the product leaves much to be desired, and the metal is damaged at the point of impact.
In addition, artisanal bending of metal is suitable only for simple structures. If the bending profile has several multidirectional edges, you cannot do without a professional tool.
For example, the correct ridge for a roof “on the knee” cannot be bent, and its appearance will always remind you of the owner’s negligence.
Buying an industrial sheet bending machine is an unforgivable luxury. The craftsman is afraid of the work - we will tell you how to make such a useful device in a private household with your own hands.
Roller
The second name is three-roll.
The machine is used to create smooth bent surfaces - large-diameter pipes, semicircular drains and other structures without sharp corners.
It works on the principle of a rolling machine. The sheet is profiled between two support rollers and one thrust roller, the movement of which sets the bending radius of the workpiece.
Press brake
The workpiece is placed between two punches (templates), under great pressure they close, giving the required shape to the sheet of metal. Typically used for working with thick workpieces. Useless for household use.
Traverse mechanism
The principle of operation of the design is that the workpiece is clamped with a clamping ruler, and a movable traverse bends the edge to the desired angle. Perhaps the most popular type of sheet bending machine.
There are both industrial stationary machines and manual tabletop devices. In fact, it has no restrictions on the bend angle - from 0 to 180 degrees. The width of the processed sheet is determined by the length of the traverse.
This is the only design flaw. It will be problematic to bend a single rolled strip several meters long at home. But you can quickly make a composite structure of any length with bends for merging the ends.
Popular: The sharpening angle of a knife is its most important characteristic
With traverse structures, a bending knife is often used, which is included in the delivery package.
Roller-type end knives are designed for high-quality alignment of the edge of the workpiece.
Roller bending machine
It would be more correct to call it a manual end bender. Although, using a roller mechanism, you can bend workpieces far from the edge. The process is simply too inconvenient. Mainly used as an auxiliary device.
How to make a homemade sheet bender
The simplest design is to clamp the edge of the sheet between a steel corner and a rule (or two corners) using a clamp, and bend the workpiece by hand. This is how the simplest roofing elements are usually created.
However, it is quite possible to make a traverse sheet bending machine yourself. Precision markings and patience are required.
The design and operating principle are visible in the drawings.
Let's look at the assembly step by step.
To make a traverse sheet bender we will need:
- 4 meters of steel angle, side – 50 mm;
- Ball joint for car, with mounting bracket;
- The stabilizer rod is from the same, with a diameter of 10 mm;
- Grinder, drill, electric welding.
We cut the corner with a grinder into 1 meter pieces.
If there is a need to work with metal of a larger width, the length of the corners increases. At least 100 mm must be added to the width of the working surface. Using an angle grinder, we cut out two eyes from the ball joint bracket. These will be the working loops of the movable traverse.
From the stabilizer strut we make an axis on which the hinges will rest.
We carefully measure and mark a sample on the corner for attaching the axle.
We grind the flats strictly to size to install the axle shafts. This must be done as accurately as possible so as not to waste time and material on subsequent adjustments.
We apply the markings exactly in the center of the axis, and combine it with the top of the corner - the traverse. This point is important. because if the alignment is incorrect, the quality of the workpiece bending on the machine will deteriorate, or the sheet bender will be unsuitable for work.
Popular: Let's look at several ways to sharpen a ceramic knife at home
We weld the axle shafts to the samples, maintaining parallelism to the top of the angle. To increase accuracy, you should use a jig when welding. For example, a vice and a clamp. The length of the protruding part of the axis does not exceed 1 cm.
The result should be a structure with perfect alignment at the ends.
Place the corners next to each other.
We mark the sample on the second corner strictly opposite the axes of the first corner.
The angles relative to each other should be located as follows:
We fold both traverses, keeping them flat, and fix them for welding. We weld the loops onto the second corner on both sides.
The corners should rotate freely relative to each other on their hinges. When turning 180 degrees there should be no snags or wedging. In this case, the gap between the traverses should be minimal.
The clamping angle will be positioned as follows:
Having previously marked, we use a grinder to cut out a sample around the axis on the clamping angle.
The lower side of the clamping angle is ground at an angle of 45 degrees.
Opposite the axes, mark and drill holes for 10 mm bolts. We weld the bolts with the threads up to the lower fixed cross-beam.
We also make a hole in the center of the traverse, but do not weld the bolt. This will be a removable element, so we weld the short axle to it in a T-shape.
Bolts are needed to press the workpiece to the crossbeam when bending. The central bolt is used when the workpiece has a width that is half that of the traverse. When working with wide workpieces, the bolt is removed.
From a 15-20 mm circle we cut two handles 30 cm long. A thinner rod will not work, since the force on the handles can be significant, and you can simply bend them.
We weld the handles from the bottom of the turning angle (traverse).
Next, we make a bed for the sheet bending machine. We weld the fourth corner to the lower fixed cross-beam on both sides for strength. We drill holes in the frame. The entire structure must be fixed on a stable surface, for example, on a steel workbench.
We screw the sheet bender to the workbench and check the free movement of the movable traverse.
The design allows you to work with iron sheets up to 2 mm thick and 92 cm wide. Bend angles can be selected to any size; the workpiece can be bent either in one direction or in steps. When working with a thick workpiece, the handle is extended with a metal pipe; the strength of the angle is always sufficient.
Working with standard galvanized sheeting is not difficult; the device bends it with the ease of cardboard.
Additional accessories
For ease of operation, the clamping angle can be spring-loaded, and wing nuts can be used instead of conventional nuts. It is convenient to work with such a device with a roller knife, using the upper clamp as a guide.
Temporary structure according to a simplified scheme
The considered version of the sheet bender is made for regular work, and is actually a stationary device. If you urgently need to do one-time work on making tin products, you can create a simpler device.
For production you will need:
- Three corners 40-50 mm, width according to your needs;
- A pair of door hinges;
- Two powerful clamps;
- Two rods (circles) as handles.
The two corners are fastened together with loops as tightly as possible.
The third, shorter corner, using clamps, presses the workpiece and the lower crossbeam to the workbench. This machine is not very convenient, but this is compensated by its ease of manufacture. The manufacturing option is up to you to choose.
instructions for making a homemade sheet bender
An interesting article on the topic of how to assemble a pipe bender with your own hands. Available diagrams and drawings, as well as a video and a detailed description of the assembly.
Tin pipe - making it yourself in 3 steps
Despite the many different tin blanks that are sold in construction supermarkets, sometimes when installing drains, ventilation or other similar engineering systems, it becomes necessary to install parts of a non-standard configuration or size. That’s why many home craftsmen are interested in how to make a pipe from tin with their own hands.
Features of working with tin
- To give the sheet metal material the required pipe shape, you need to bend it using pliers or a hammer around an object of the appropriate cylindrical shape. You can make your own tin pipes using a metal or wooden cylinder.
Advice: the bend of the sheet metal should be even along its entire length; this can be achieved by lightly tapping with a hammer, and the blows should be as close to each other as possible.
- Making tin pipes is impossible without using metal shears. It will be much easier to work with such a tool if you attach a leather loop to its handle. The metal is cut with one hand, putting a leather loop on the fingers.
- The edge of a sheet of iron after cutting with scissors can be cleaned with a plow made from a small old piece of hacksaw blade.
- A drainpipe made of tin, which is already ready for installation, in some cases needs to be cut (for example, when it is necessary to make a curved edge of the pipe for drainage). To do this, it will be convenient to cut the pipe with a knife, which is intended for opening canned food.
Read also: Characteristics of a charger for a car battery
Tin drain pipe
Advice: in order for the pipe to be cut well with a knife, you first need to cut it with a hacksaw, and only then use the knife.
Tin pipe cutting process
- When working with tin, you sometimes have to use a file. Very often it becomes clogged with metal filings and quickly fails. In order to clean it, you can use a copper spatula or a soft metal tube, while flattening its end.
It is not very difficult to make tin pipes with your own hands, the main thing is to follow these recommendations and be extremely careful, as you can get injured by the sharp edges of the tin sheet cut off.
Home builders try to select the most budget-friendly options to solve problems. Therefore, the question of how to make a pipe from tin with your own hands is relevant for many amateur craftsmen. After all, a homemade pipe product made from tin can be compared with gutters or casings that are on the shelves in specialized stores.
Therefore, you need to learn in more detail the process of manufacturing a tin pipe that has characteristics similar to factory products.
DIY tinsmith products
Tinplate is a material that belongs to rolled products.
This is a type of sheet steel. After rolling, the sheet is treated with anti-corrosion substances. In order to make such a pipe you will need only 2-3 tools
For heating equipment, you can make tin pipes for the chimney yourself.
This material is elastic, so it is processed manually.
In addition, steel is characterized by rigidity and strength, so tin products of special strength are made from it.
Which tin to choose
Before making a pipe from tin, a suitable piece of steel is selected. For chimneys, thin sheet metal coated with a special compound is recommended.
The tin pipe removes smoke and increases draft.
Tin comes in black and white. The black type of material is thin sheet and cold rolled steel. Products are made from steel of various grades. The material is offered by manufacturers in sheets or rolls.
Tinplate is a material coated with tin on both sides, which is processed using electrolytic and hot tinning methods. This material is a low-carbon and thin sheet.
The processing method gives the steel rust resistance and ductility.
Production is accompanied by control of the composition of substances. The processing method and content influence the production of different grades of material.
The white type of sheet metal is treated to improve the surface's adhesion to varnish coatings.
Lacquered sheet metal is used. The varnishing process is used to protect surfaces from external factors.
Black and white type of material comes in the following types:
- single-rolled sheet is a product of low-carbon steel that is processed by cold rolling to the desired thickness;
- metal double-rolled after the first rolling procedure is subject to the second rolling and special lubricant, which reduces the thickness of the product.
The material is classified according to its degree of hardness and the amount of tin used.
Tin pipes have technically universal qualities.
What tools are needed?
Before you do tin work with your own hands, you should select a set of materials and tools. You will need equipment for tin work.
You will need a sheet of thin tin. To make the pipe even, a material with a smooth structure and clear corners is taken. Do not use sheets with torn edges.
Cutting the material does not require effort, but before starting work, it is worth preparing the following tinsmith tools:
- Metal cutting scissors are used to cut the piece into blanks.
- Use a mallet or rubber hammer that does not leave dents. The weight of the tool is selected to be heavy, but the impact force is controlled.
- To make bends, use pliers or pliers.
- Machines for sheet metal work are recommended. A workbench is suitable that allows you to evenly position the sheet and mark it.
- For calibration, a tube with thick walls and an angle are used, which is mounted to the edge of the workbench. The corner is chosen to be massive, since the metal is bent on it. The pipe helps in making the longitudinal seam of the main line.
- A thin steel rod is used as a marker. It is made independently. To do this, sharpen the nail.
- A measuring tool is recommended. Tape measures and squares are suitable for this.
You will need a round piece to assemble the product. For this, we recommend a pipe with a cross-section of 90 mm and not too long.
Instructions for making a tin pipe for ventilation with a do-it-yourself hood
Making a pipe from a sheet of iron means performing a sequence of actions. The work consists of simple steps. First, preparation takes place, which consists of marking parts and cutting out blanks.
At the stage of forming the body of the structure, an element of circular cross-section is created. When connecting, it is necessary to secure the elements into one product.
Adapters for connecting sheet metal pipes
You can make markings and preparations in several stages:
- The tin sheet is placed on the surface without joints. A floor covering or workbench is suitable for this.
- A segment is marked from the top edge, which is equal in size to the future highway. The marking is carried out by a marking device. The manufacture of drainpipes also takes place.
- A line is drawn through the mark. In this case, a square is used.
- The width of the segment is marked from the line, which is equal to the cross-section of the pipe. 15 mm per joint is added to the obtained value.
- The resulting markings are connected, and the workpiece is cut out.
When making markings, it is worth considering the dimensions of the product. Width is the diameter plus one and a half additional centimeters. The length of the workpiece must be greater than the straight section of the structure.
Next, tinsmithing work consists of forming a round profile of the structure.
Working with tin with your own hands is done as follows:
- The folds are bent to the sheet surface at right angles. A line is first marked for them. A mallet is used for bending. The sheet is placed on the edge of the table with a descent to the desired length and a bend is made using a rubber hammer. The work is carried out along the entire length of the product.
- A do-it-yourself tin pipe requires one more bend on the seam. In this case, marking is performed.
- A round element is used to construct the pipe. On it there is a galvanized sheet, which is given a rounded shape. In this case, the bent ends of the pipe are connected.
The bends are made so that the mallet fits exactly on the surface of the corner. The blows are made precise and clear, but not strong, otherwise the seam will flatten.
The production of tin products is completed by joining. In this case, the edges are aligned, and
the seam is attached. In this case, the horizontal section bends down and covers the edge.
The protruding seam is bent to the surface using a mallet. The bend is made away from the L-shaped fold.
If you do otherwise, water will penetrate inside.
You need to connect tin products with your own hands. The edges are secured with aluminum or steel rivets.
- Holes for rivets are made every three centimeters.
- The edges bend towards each other.
- The workpiece is bent back so that the edges are on the outside of the structure.
- The edges are mounted using rivets.
To facilitate the connection of the structure, the element on the wide side should be slightly flared.
To ensure rigidity, rings are rolled from the edges of the product.
Correct markings facilitate ease of joining with other elements, even factory-made ones.
Similar products are used for gutters, ventilation systems and chimney structures.
Features of working with tin: how to bend a sheet of iron and cut it
To create products from tin with your own hands, it is worth familiarizing yourself with some of the nuances of working with this material. Recommendations will help facilitate installation and create a structure in the shortest possible time.
- An element of the appropriate configuration will allow you to give the sheet of tin the required shape. Bending involves tapping using a hammer.
- To ensure an even fold, tapping is done close to each other.
- A special leather loop will help make cutting out a steel workpiece easier. This element is mounted on scissors and put on the fingers.
- After cutting, the edge is processed with a planer, which prepares the hacksaw material.
- Products made of tin sometimes need to be cut. This is done to give the product a shaped shape. This procedure is performed with a can opener.
In order for the material to be cut well with a knife, it is cut with a hacksaw, and then a knife or scissors is used.
Tin work is simple and can be done independently. The ability to make such a design will be useful in everyday life. A tin pipe is made simply; the main thing is to know certain nuances of the process.
Aspiration. — Product patterns
If this page loads slowly, its main images can be opened and viewed in the “Drawings, diagrams, site images” catalogue.
Cap - a cap made of galvanized sheet metal for a brick pillar
Choose any height “h”, or taking into account the dimensions of the finished pillar.
It is sometimes useful to increase the planting dimensions “a” and “b” by 5 - 10 mm, depending on the quality of the masonry.
The size “d” can be “estimated” with a tape measure directly on the pole, or calculated using the formula below.
* Place the pattern face up. Drill a hole Ф3.5 mm. Bend the stiffeners (15mm) down almost 90°. Bend all dotted lines at an angle of 90°.
The bending of the lines should be done in a sheet bending machine, at least in a homemade one of two corners (it doesn’t take long to do). Then the bend lines will be straight, clear, without dents, and the product will ultimately have an aesthetic appearance.
If there is no sheet bender, then bend lines “a” and “b” as usual; bend lines “A” and “B” on a piece of angle No. 50 - 63 fixed on the edge of the workbench with the shelf facing up.
To bend plane A or B all at once, or almost all of it, use a 25x45 mm block (picket) 30-40 cm long.
Bend the edges along the lines “d” to the correct rectangular shape of the cap or umbrella. To do this, have a narrow mandrel: a 50mm corner with a cut flange, or a metal strip 1.5-2 mm thick attached to it, or even better, a saw blade.
Features of the source material
Before you start making a pipe from a sheet of metal, you should become more familiar with the material from which the pipe will be made and its features. To begin with, it is worth saying that this is a rolling type product, in other words, tin is a sheet of steel that has passed through the rollers of a rolling mill and has a thickness of 0.1-0.7 mm.
In addition to rolling operations, the technology for producing tin plates involves processing the finished rolled products to prevent the formation of corrosive processes. To do this, a layer of material is applied to the steel after rolling, which is not susceptible to corrosion.
The result of the performed actions is a steel sheet, the width of which can vary from 512 to 1000 mm, with a chrome or zinc coating. The finished product is flexible, so tin can be easily processed by hand. At the same time, rolled stiffeners can be compared in strength to steel products. This allows the use of tin in the manufacture of products of complex designs.
Do-it-yourself tinsmithing - Metals, equipment, instructions
Tinplate is a material that belongs to rolled products. This is a type of sheet steel. After rolling, the sheet is treated with anti-corrosion substances.
In order to make such a pipe you will need only 2-3 tools
For heating equipment, you can make tin pipes for the chimney yourself . This material is elastic, so it is processed manually. In addition, steel is characterized by rigidity and strength, so tin products of special strength are made from it.
Required Tools
The list of tools and devices necessary for making a galvanized chimney pipe with your own hands is determined by the properties of tin, in particular softness and ductility. Processing this type of material does not require the special efforts required to work with sheet materials.
Therefore, when producing tin chimney pipes, the following set of tools is required:
- Scissors for cutting metal. This tool helps to cut sheet material into the required pieces without much difficulty, since the largest thickness of the sheet reaches 0.7 mm.
- Hammer with a soft striker. You can also use a wooden hammer, mallet, or a steel tool with a soft rubber grip. However, the latter option is used very carefully or not at all, since it can cause deformation of a thin sheet of tin and ruin the entire work.
- Pliers. With the help of this tool they solve the problem of how to bend a pipe made of tin, because it is steel, although thin, therefore it is impossible to bend it with your hands.
- Crafting table. This device is necessary when cutting material and when applying markings.
- Calibrating element. This can be a pipe product with a diameter of more than 10 centimeters, as well as a corner with edges of 7.5 centimeters. These elements must be well secured, since the joining seam will be riveted on their surface.
In addition to these tools, you should prepare a ruler or tape measure and a marker, which is a steel rod with a sharp sharpening.
What do we need to work?
Tough as it is
So, let's start our review of the technology with an analysis of the material. We will bend a pipe from tin:
- The basis of the tin sheet is steel that has been processed in a rolling mill. As a rule, sheets with a thickness of 0.1 to 0.7 mm are found on sale - the thicker, the higher the price.
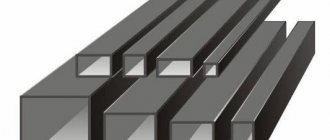
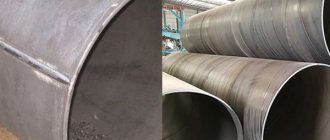
Rolled products from which sheet metal is cut
- To protect against corrosion, the steel base of the tin blank is coated with a material that prevents oxidation of the metal. Most often, compounds of chromium, tin and zinc are used for this.
- At the final stage, the product is cut in accordance with standard sizes. Most often, construction stores sell tin blanks with a width of 512 mm to 2 m, but if necessary, you can find or order wider parts.
Blanks for work
This metal has obvious advantages:
- The small thickness ensures a reduction in the weight of tin products.
- Surface treatment quite effectively protects the steel base from corrosion upon contact with environmental factors.
- Thin metal is cut well, and very powerful tools are not required for processing - hand scissors are quite sufficient.
- Rolling and heat treatment of blanks during the production of sheet metal provide them with high ductility. Thanks to this, sheets and strips bend perfectly along a minimum radius without the risk of cracking.
The downside of the flexibility of sheet metal is low bending strength, therefore, when manufacturing open parts, stiffeners must be added to their design. However, this does not concern our situation: the pipe itself holds its shape perfectly.
Tinsmith's tools
As I already noted, tin is a soft and plastic material that is processed quite simply. But this simplicity also has a drawback: a metal tool not only leaves marks on the surface of the sheet metal, but can also damage the protective layer upon impact, causing the development of corrosion.
That is why the following tools are used to work with tin and thin galvanized steel:
- metal scissors. I use the most common, spring-loaded ones with not very long handles - with relatively little effort they cut 0.7 mm steel perfectly;
It is very important that the blades of the scissors are sharp, otherwise the edges of the workpieces will turn out uneven, and we will have to spend time and effort removing the “fringe”.
Shears for galvanized steel
- hammer with a rubber/rubber-coated striker. Why rubber is needed is already clear - to prevent metal from hitting metal;
- mallet - in principle, performs the function of a hammer with a rubber attachment. Both tools are interchangeable, which does not prevent me from having both a mallet and a hammer at my disposal;
"Gentle" hammer
- pliers (several pieces, different sizes). They are used for bending metal, since it is impossible to grasp the short edges of a sheet or strip with your fingers, despite all its plasticity;
Photo of a standard mallet
- calibrating blanks - steel pipes (I have two, with a diameter of 50 and 100 mm) and angles. Used as templates for bending round and rectangular parts, respectively;
- measuring instruments - ruler, tape measure, level and compass;
- Marker - A sharpened steel rod that is used to mark tin sheets. You can buy or sharpen a two-hundred nail.
You can use a center punch for marking
- a workbench is the most necessary thing. The workbench functions as a place for marking the cutting stand, a work table - in general, it is on it that we will perform all the work.
Of course, this set will only be enough for us to make several pipes - up to two or three dozen. If the work is large-scale, then you cannot do without at least a sheet bender - a device that allows you to bend large metal blanks evenly.
Preparatory stage
First, markings are applied to the sheet of tin, according to which the semi-finished product will be cut. In other words, the necessary part is cut from a certain sheet of tin, from which the contour of the future pipe will be formed. The marking process is carried out as follows: the sheet metal is laid out on a workbench and a segment equal to the length of the pipe is measured from the top edge. A mark is placed here with a marker.
Then, using a square, draw a line along this mark perpendicular to the side edge. Now along this line the circumference of the pipe, the same is done along the upper edge. In this case, about 1.5 cm is added on both edges to form the joining edges. The upper and lower marks are connected and the workpiece is cut out.
To determine the circumference, you can use a tape measure, or you can remember your school geometry course.
Art welding
A new movement that originated at the Institute named after E.O. Paton, brought technical welding to a new level - a fine art. This is no longer crude crafts made from scrap metal at a summer cottage, but a way to create masterpieces using welding.
Small life-size figurines of insects or animals, as well as gates, are all works of art welding.
To work at home using this technique you need:
- welding machine and consumables;
- iron blanks;
- inspiration and sleight of hand.
Art welding
The main material is titanium, but craftsmen talk about the possibility of working with zirconium and stainless steel.
How to make a pipe body from tin
The purpose of this stage is to form the pipe profile. A line is drawn along the length of the workpiece at the bottom and top along which the folds will be folded. In this case, 5 mm are measured on one side, and 10 mm on the other. The folds must be bent at an angle of 90 0. To do this, the workpiece is laid on a steel corner, aligning the fold line with the edge of the corner. Hitting the edge with a mallet, bend it to the perpendicular side of the corner.
Read also: Bosch 18 volt screwdriver circuit
It is recommended to bend the product gradually, passing the hammer along the entire length. In this case, you can start bending using pliers.
Now, on the fold, the size of which is 10 mm, another fold of the fold is made to form a kind of letter G. In the process of bending the fold, you need to ensure that the upper bend is parallel to the workpiece, and its length is 5 millimeters. Therefore, when drawing a fold line, measure 0.5 cm once on one side, and 0.5 cm twice on the other side.
Having completed the molding of the folds, you can proceed to the formation of the pipe body. To do this, the workpiece sheet is placed on the calibrating element and begins to be tapped with a mallet or other suitable tool to obtain a profile of a certain shape. The workpiece first takes on a U-shape and then becomes round. In this case, the folds should join together.
Processing the seam joint
The final stage involves processing the joining seam, that is, crimping it. To do this, the upper part of the L-shaped fold is folded down, wrapping the edge of the other fold. The result should be a kind of sandwich located perpendicular to the pipe. To obtain a joining seam, you need to press the sandwich to the product.
For greater reliability, the joining seam is strengthened using rivets. However, do-it-yourself tin pipes using this joining method do not require additional reinforcement.
We manufacture and install products of any complexity from tin and other sheet materials (copper, titanium, aluminum, tin with polymer coatings pural, polyester, etc.). We produce drainage systems, chimneys from stainless steel. steel, ventilation systems, caps (vanes) for brick chimneys and pillars, exhaust hoods, additional elements (ebblets, cornices, junctions, transitions, wind strips, drips, etc.), chimney sections, various ducts, ventilation outlets and any other non-standard products made of tin in combination with welded structures. All parts are usually assembled on a fold - a guarantor of the mechanical density and waterproofness of the product. Products assembled with rivets are a sign of low quality.
We manufacture and install the following sheet metal products:
- Additional elements;
- Non-standard elements (according to the Customer’s sizes);
- Window sills;
- Vanes for chimneys and ventilation shafts;
- Caps for fence posts and parapets;
- Gutters;
- Drainpipes;
- Elbows for drainpipes;
- Fastening for a gutter;
- Fastening for drainpipes;
- Ventilation ducts
- and etc.
Cold forging
It includes two main methods of influencing metal: pressing and bending. The first is the impact action, leading to compaction of the top layer and mobility of the inner metal workpiece. The second is bending it along certain lines, creating waves, curls, spirals, zigzags.
Metal products created by cold forging are beautiful and easy to make if the craftsman has all the necessary equipment. The industry offers machines for cold forging, however, you can make them yourself, which will reduce the cost of the product.
The disadvantage of cold forging is the inability to correct mistakes. Such a workpiece will be considered damaged.
Drainage systems
We offer two types of drainage systems:
- semicircular drainage system (prices and e-catalog here)
- profiled drainage system
We make drainage systems from galvanized sheet metal, sheet metal with polymer coatings polyester (PE) and pural (colors according to the RR catalogue), and it is also possible to make it from copper and titanium zinc. Material thickness 0.5mm. We manufacture and assemble drainage systems to order according to your data, and we calculate the necessary equipment according to your drawings.
Profiled drainage system
The advantages of a profiled drainage system are relatively easy and quick installation, good price. We make gutters to order according to your dimensions (lengths, maximum length is 5 m), thereby reducing the number of scraps to a minimum, resulting in improved installation quality and increased service life, because the number of connections is reduced to a minimum.
Prices. Profiled drainage system
Semicircular drainage system
We manufacture and install round drainage systems - a classic, time-tested option. To order, we can produce various non-standard bends, transitions from circle to square, etc.
We make drainage systems from galvanized sheet metal, sheet metal with polymer coatings polyester (PE) and pural (colors according to the RR catalogue), and it is also possible to make it from copper and titanium zinc. Material thickness 0.5mm. We manufacture and assemble drainage systems to order according to your data, and we calculate the necessary equipment according to your drawings.
Prices. Round drainage system
Caps (vanes, caps, chimneys) for a brick chimney
Prices. Caps for a brick chimney
We make chimney caps to order according to your sizes. All connections are assembled on a fold, the legs of the cap are made from a 4 mm metal strip. This cap will reliably protect the brick chimney from precipitation.
Read also: Brushless motor for screwdriver
Smoke vanes are called smoke boxes, or caps, which are installed on pipes, ventilation outlets, flues, in a word - on any air outlets from the house through the roof to prevent precipitation from entering them.
The materials from which weather vanes are made are copper or polymer-coated metal (for example, polyester). There are weather vanes made of galvanized iron or stainless steel - also very reliable materials that do not require special care or painting.
The weathercocks must be securely attached to the pipe. To do this, drill holes in the weathervane skirt and inter-brickwork and insert dowels into the holes and secure them with special roofing screws. To ensure reliability, the dowels are dipped in cement mortar immediately before inserting them into the holes. The second mounting option is with anchors, intended for very heavy weather vanes. This method is possible if the brick on the pipe is not hollow
The customer can choose a hat with straight or curved legs (see photo). To order, we make non-standard hats according to your drawings. We produce simpler and cheaper models designed for installation in large quantities on multi-apartment residential buildings, shopping centers, and large industrial facilities.
Caps (caps) for poles
Prices. Caps for poles
To protect and decorate the fence, the cap is a very constructive solution. If the fence is not protected, over time, cracking and destruction of the masonry will appear on it. Fence caps used for posts are not only a magnificent decorative element, but also provide excellent protection from all kinds of precipitation. For greater use of the fence, fence strips are used together with fence caps . This combination provides protection for the fence and preserves it from mechanical damage.
The material and color of the caps on the posts and on the fence are chosen similar to the roofing material of the main building. It is absolutely unacceptable to use horizontal flat elements to cover the fence. This is necessary to prevent water leakage in the overlaps, thereby preventing corrosion and preventing water from stagnating.
We make custom caps for posts and fence slats.
Hot forging
Allows you to obtain a variety of items made of ductile metal. Heating imparts high plasticity to the material and the ability to shape it by force. A variety of hot forging methods create a range of products to suit every taste.
When choosing this technology, you need to consider:
- availability of a forge and provision of fire safety equipment;
- the final result depends on the properties of the metals; not all of them can be forged and welded;
- high cost of equipment and materials;
- influence of heating temperature on the properties of the workpiece.
Despite the disadvantages, the advantages of classical forging lie in the variety and beauty of the products.
Cutting a brick chimney
Prices. Cutting a brick chimney
With the relative ease of installation of modern roofing materials, the most difficult place is the correct cutting of a brick chimney. As a rule, a non-professional roofer finds it difficult to properly cut a chimney. In this case, you can resort to our services and order the “chimney cutting” part from us. To order, you need to know the angle of the roof, the dimensions of the chimney, the material (color) of the roof.
The chimney section ordered from us consists of two parts and is easy to install.