Granite drill
How to start drilling granite correctly?
The first method of drilling a granite slab, granite stone.
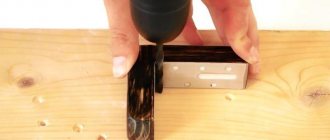
We start drilling at a slight angle. This is necessary because the material is hard and not completely smooth, so it will be easier for the drill to catch on the protrusion to start drilling. It is impossible to core the drilling site, as the granite may crack or break off at the core site. Next, when the drill catches on the surface and the formation of a hole begins, we level our drill. If you have a special machine that allows you to rigidly fix the drill and the surface when drilling, you do not need such a procedure, and you can safely start drilling at a right angle. Those who have drilled on the surface of smooth metal know that if the drill is not fixed or caught, the drilling site begins to wander, both from the density of the material and from the vibrations and movement of the drill.
Another option is to use an invoice template. This can be a piece of wood, you can use or buy a granite slab in which a hole has already been made. Or use a piece of metal with a pre-drilled hole. This template needs to be fixed on the surface of the granite stone; this can be done with a vice, clamps or other fixing tool. A cooling-lubricating emulsion can be applied to the same surface of the template.
A quick guide to drilling granite slab or granite stone.
- For drilling, you need a drill with a low number of revolutions, ideally up to 600 revolutions per minute, with a power of 1.5 -2 kW, you can use a drill with adjustable speed. We only recommend checking whether your drill can operate for a long enough time at the minimum number of revolutions.
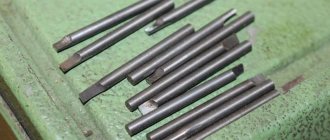
You will need diamond-coated drills or bits made from hard tool HSS alloy. You can also try drilling with drills with a Pobedit tip (like those used in rotary hammers). Remember that drill bits with pobedit leave a rougher drill mark and may chip or partially chip the granite when drilling.
How to drill into granite?
Such qualities of granite as high hardness combined with fragility make its processing very difficult. At the same time, granite countertops, flooring and various home decor items are becoming increasingly popular among homeowners.
Due to the beauty of the pattern, the variety of colors and its durability, this natural material is very much in demand in high-end and high-class buildings, as well as in renovation projects of old buildings. Therefore, the issue of processing natural stone, including drilling granite, is relevant when carrying out construction and repair work.
Drilling natural stone requires knowledge, skills and special tools. An incorrectly selected drill or a violation of operating technology most often leads to, at a minimum, damaged drills, and in the worst case, to cracked material.
Before you start drilling into granite, think carefully and answer the following questions:
- how much do you need this hole and whether you can do without it;
- what should be the exact dimensions of the hole;
- how many holes are needed in total;
- What is the best tool to do this?
Work related to drilling granite must be carried out very carefully, without haste and only after accurate, verified markings. In this case, it is necessary to follow certain rules for performing such work. Correcting and redoing the mistake will then be very difficult or even impossible.
Diamond coated drill bit.
Where to cut the hole?
Each method has a number of pros and cons:
- In the first case, the edges on the front side will be much smoother, but there is a possibility of damaging the front side of the sink with a drill, and if it has a narrow side, then splitting the edge.
- In the second option, the risk of damaging the bowl is much lower, but there is a possibility of getting a sloppy edge of the hole on the front side. In most cases, this is not critical, since the edges of the hole are closed by the mixer. When turning over, there is a possibility of unintentionally making a hole on the wrong side, so it is advisable to mark the side on which you want to install the faucet .
Acrylic stone
If the sink is made as one piece with the countertop and the same color as it, then it is an acrylic artificial stone. Of the above materials, this one has the lowest density, so it is the easiest to work with. If the purchased sink is made of acrylic stone, then you can drill it with ordinary drills for working on metal or wood.
The hole for a standard mixer, in most cases, has a diameter of 35 mm. In a product made of acrylic stone, it can be easily drilled with a feather drill for woodworking or a forstner cutter of a similar diameter. It is necessary to work at low or medium speeds. When drilling this material, a large amount of chips is formed, and the plastic contained in the acrylic stone emits an unpleasant odor, somewhat reminiscent of epoxy glue.
Acrylic stone is the most pliable of all types of artificial stone, which is why most countertops are made from it. If there is a need to make a hole in it for a sink or hob, it is better to first practice in the middle of the cut part so as not to spoil the entire countertop. Despite the fact that acrylic stone can be sawed with a jigsaw without any problems, it is not advisable to make cuts with it. When working with a jigsaw, so-called stress concentrators often arise (sharp transitions, sharp corners, microcracks), which will affect the service life of the product.
In this case, it is permissible to cut a hole 5 mm smaller than required with a jigsaw. After the work with the jigsaw is completed, bring it to a clean size using a cutter. It is imperative to make an R3 chamfer along the edges; it will also reduce stress and increase the service life of the tabletop.
More information in this video.
Four important rules
The rotation speed of the drill or bit should be minimal and selected depending on the diameter of the tool. The larger the diameter, the lower the number of revolutions of the drill should be. So, for example, with a drill diameter of 12 mm, the maximum permissible rotation speed is 950 rpm, and with 20 mm - 700 rpm.
It is necessary to supply water to the drilling site, which will cool the cutting tool and wash away the slag formed during operation. Using water prevents the drill from jamming and increases its service life. In addition, the water will cool the granite, resulting in smooth and neat edges of the hole.
The stone to be drilled must be pressed against a flat surface. To securely fasten it, it is necessary to use clamps or other clamping devices. No part should be suspended.
Be sure to make markings before starting drilling. To do this, stick paper masking tape on the surface, draw the contours of the hole and its center. The tape will prevent the drill from going sideways and leaving scratches on the surface of the stone outside the hole.
If you've never done this kind of work before, try drilling a hole in an unwanted piece of stone. If the trial attempt was successful, then this fragment can be used as a guide template. To do this, secure it with a clamp at the drilling site and guide the cutting tool according to the template. The drill will not slip, and the water supply will become easier if you pour it inside.
Punching a hole in the sink
Some artificial stone sinks have cast plugs that are knocked out during installation. They are usually color coded on the front. First of all, the sink is installed in place in the countertop, but is not fixed.
Then you need to choose the right tool and beat off the plugs with a strong blow with a hammer. A punch with a diameter of 8 mm is suitable for this role, but not a screwdriver. You only need to knock out the cork from the top: that is, from the front side. Use a rasp to smooth out the uneven edges of the hole.
Using this method you can make a hole for the mixer .
- The center is outlined and the circle is drawn.
- Using a drill, holes are drilled along the circumference, the distance between which is 4 mm.
- To prevent cracks from appearing when knocked out, firmly fix the sink.
If there is a need to increase the radius of the hole, you need to draw another circle of the required size. All cuts are made from the same front side along the circumference at a distance of 4 mm. Using a punch or chisel, remove unnecessary parts.
Instructions for drilling granite
To drill natural stone, you must use a drill with the ability to change the speed of rotation. It is best to use a diamond bit of the diameter you need as a cutting tool. In addition, you need to prepare 2-3 clamps, masking paper tape, a marker and water in a plastic bottle with a hole.
Place the granite workpiece on a flat surface and secure it securely with clamps, and to prevent the clamps from scratching the polished stone, place wooden planks under them. Apply paper tape to the drilling site and mark the center and outline of the hole.
Scratch the center mark with a drill or tap so you can start drilling from that point.
Attach the diamond bit to the electric drill and install the center guide into the scratched center of the hole. If the design of the crown does not provide a guide, then make a template of the required diameter from a wooden plank, secure it to the surface, and use it as a guide during work.
Drill at low speeds corresponding to the diameter of the cutting tool used. The larger the diameter, the smaller the crown rotation should be. Use a bottle of water regularly to cool and lubricate the diamond bit.
Do not press too hard on the drill while working as this may cause the granite to crack prematurely. The process must continue until the crown has penetrated the entire thickness of the slab. Only then can the crown be removed from the hole.
Punching a hole in the sink
Some artificial stone sinks have cast plugs that are knocked out during installation. They are usually color coded on the front. First of all, the sink is installed in place in the countertop, but is not fixed.
Then you need to choose the right tool and beat off the plugs with a strong blow with a hammer. A punch with a diameter of 8 mm is suitable for this role, but not a screwdriver. You only need to knock out the cork from the top: that is, from the front side. Use a rasp to smooth out the uneven edges of the hole.
Using this method, you can make a hole for the mixer.
- The center is outlined and the circle is drawn.
- Using a drill, holes are drilled along the circumference, the distance between which is 4 mm.
- To prevent cracks from appearing when knocked out, firmly fix the sink.
If there is a need to increase the radius of the hole, you need to draw another circle of the required size. All cuts are made from the same front side along the circumference at a distance of 4 mm. Using a punch or chisel, remove unnecessary parts.
Standard errors
You need to be careful when creating a hole when using a drill with a router bit. Many experts try to make a hole at the moment when the countertop is already installed. There are also advantages to this method. For example, the edge of the front part can be made as smooth as possible. But this method has many more disadvantages. In this case, not only the stone , but also the sink can be damaged; the edges may break off, scratches may appear, and much more.
It is most reliable and safe to carry out all work from the rear sides. Of course, the hole that goes out may have an uneven appearance. But the entire structure will remain intact and unharmed. Also in this hole the mixer , capable of covering any unevenness. The front part of the sink will be safe and sound. You can work in two ways: using a drill, or knocking out loose cast plugs.
READ Volma layer plaster that does not require priming
Drill hole method
- Initially, for work you need a drill with a diameter of 35 millimeters. The sink is located on the back side, and it is better to put paper or a board under it.
- Afterwards, the location of the mixer is noted in order to avoid making mistakes during operation.
- To do this, mark the center of the mixer nut. This point will be the center of the hole. It is better to make the hole further from the center, but without touching the bowl.
- During operation, the drill blow must be turned off. The work is performed at medium speed. This is necessary so that the cutter moves in the other direction.
- Initially, it is better to prepare a special box for chips, which will be collected during the work process. When the plastic is heated due to the cutter, an unpleasant odor appears. Therefore, you can wear a protective mask to avoid getting sick.
- Afterwards the hole must be cleaned of chips, dirt and dust. The irregularities should be small, a few millimeters in size. Then we can say that the job was done right.
If there is no diamond tool
In addition to diamond cutting tools, pobedit drills, diamond dust or corundum can be used to make holes. These methods are less effective and take longer, but still allow you to achieve the desired result.
Drilling holes in granite using a Pobedit drill is performed at high rotation speed and a constant supply of water. If the process begins to slow down, the drill must be removed and sharpened.
To make a hole in granite using corundum, diamond dust or ground pobedite, you will need a copper or brass tube, which will need to be fixed in a drill. On the granite surface, around the diameter of the marked hole, make a rim of plasticine or quick-drying putty 4-5 mm high.
Pour abrasive material inside the fence and drill with a tube at the lowest possible speed of the drill. During operation, do not forget to periodically add water for cooling.
What you will need
When asked how to drill granite, many say that this will require some complex specialized tool, but this is not so. A regular electric drill is suitable for the job; it is only important that it has the option of adjusting the speed of revolutions per minute.
In addition to the drill, you will also need:
First of all, you need to fix the granite slab as carefully as possible, making sure that the surface on which it is installed is as flat as possible. Before starting work, you should use a drill to mark the center of the future hole: this will help prevent the tool from sliding along the polishing surface. Install a diamond-coated bit into the drill (remember that using a non-coated bit will not allow you to make a hole).
Drilling should be carried out exclusively at low tool speed without using the punching option. When you turn on the perforation mode, the granite may crack. Regularly rinse the stone and drill with water: as already mentioned, this helps to cool, clean, and neaten the hole itself. In order to add water, you can invite an assistant. Or fill a plastic bottle with water, make a hole in the lid and use such a “sprinkler” to water the drill and hole yourself.
What to do if there is no diamond crown
If you don’t have a diamond bit and you don’t know how to drill granite in this situation, you can carefully stick a plasticine ring 3-5 mm high around the entire circumference of the future hole. Place a little corundum, pobedite powder or diamond dust inside the ring and add water. Attach a copper tube to the drill (you can use a tube from any other non-ferrous metal). Now you can drill granite - also at low tool speeds, without using a hammer drill. You will certainly need water here: first of all, in order to regularly cool the metal tube.
If there is neither a crown nor a tube, what to do?
In this case, craftsmen suggest using an emergency and risky drilling method - using a Pobedit drill, at high speed with a constant supply of water. During this process, you will need to constantly sharpen the drill because it will stop from time to time. Sharpen the drill with a semicircular file, very carefully, without overheating its teeth. Otherwise, the drill will soften and become dull even faster.
Helpful advice: if you are processing granite with a pobedite drill, it should be sharpened at least every 20-40 seconds of work.
Drilling on granite is a very difficult and painstaking job. It requires certain knowledge and skills. But if you wish, you can always purchase them by seeking advice from more experienced craftsmen. In order to practice, first use fragments of stone: this will help both “get your hands on” and prevent damage to a high-quality new workpiece.
Source
How to drill stone. Master Class
Greetings
They recently scolded me that there were no new releases in the Video Magazine.
I agree, there was a long break, but I will raise the topic.
Today I won’t write much, I’ll just post another video - “How to drill a stone. Master Class"
There was already a post on my blog called “How to drill a hole in a stone?”, but this is a dry and not very interesting description.
The post was written more than 2 years ago, not very exciting but... as best I could
In this video, we tried to show several ways how you can drill a hole in marble.
You will also learn how to use a small diamond crown to make a hole of a larger diameter (In emergency cases)
This story was filmed more than a year ago, so I will be very grateful for your constructive criticism. Please advise what and how can be done better to make the next videos more interesting to watch.
And also suggest topics for future video stories - Let's make stone processing more visual!
By the way, I am announcing the release of a small series of 30 mini-episodes called “Making a Fireplace.” We tried to film the entire process of making the fireplace surround, as well as its installation.
If you are not yet receiving announcements of new posts to your e-mail, it's time to subscribe to updates
Cool, I also want to buy a crown, but for a drill, so as not to cut the stone again.
Cool, I also want to buy a bit, but for a drill
The tool is good
so as not to cut the stone again.
I don’t quite understand how a crown is related to sawing stone?
This is Roman from contact. Have you seen such plastics there? Well, I take a small stone and saw into the plates, and then I use a cup of diamond edge to round it and all that to make everything a little easier, we take a stone and gnaw it with a crown of a certain diameter , and then we saw this stump into plates
This is Roman from contact. Have you seen such plastics on me there?
Roman, I recognized you right away :))
then I round the edge with a cup of diamond and all that, so that everything is a little easier, we take a pebble and gnaw it with a crown of a certain diameter, and then we saw this stump into plates
Now I understand everything
I’m also looking for 0.8-1mm drills, there aren’t any in the city, I’d like to touch them before I buy them))))))
To be honest, I had nothing to do with them. The diameter is not mine.
If I get a chance in the store, I’ll see if they have something like this in their assortment.
I have it on the Internet, but I want to touch it, otherwise I bought it from dentists, and they are disposable, of course they chew the stone with a bang, but they also wash off right away
Making a hole in an artificial stone sink: step-by-step instructions
Sinks made of artificial stone do not always have a special cutout, so there is a need to make a hole in the sink yourself. A common obstacle is the fear of damaging or crumbling the sink. Although artificial stone is close in properties to natural stone, in essence it is more like plastic: or, better said, like a polymer mass mixed with stone chips.
Drilling granite: technology and subtleties
Perhaps these resources will also be useful to you:
1.Technology of granite drilling process
1.1. Workplace equipment
1.2. Tools and Components
1.3 Water use
1.4. Step-by-step technology
2. An alternative option is to use a tube made of non-ferrous metals.
3. The old fashioned way: will he win?
Granite is the hardest natural material used in construction, and at the same time it is quite fragile, so drilling it is associated with certain difficulties. Many people believe that it is impossible to drill a hole in granite at home and that special machines must be used.
Let's figure it out - is it possible to drill granite on your own? Yes! You just need to know what tool to use and how to equip the workplace.
Granite drilling process technology
1.1 Workplace equipment
The following requirements are imposed on the place of work: it must be absolutely level, strong and stable. The dimensions of the workplace are determined from the following conditions: they should not be smaller than the size of the granite stone, the edges of the stone should not hang in any direction.
1.2. Tools and Components
The first point is how to drill into granite?
To drill granite we need:
- electric drill;
- drill bit with a diamond edge of the required diameter;
- plain water.
When choosing an electric drill, please note that its power must be sufficient to work with a crown.
Before starting drilling, it is necessary to tilt the drilling site either with a solid core or a metal drill.
This is necessary so that when drilling begins, the crown does not slide off the intended drilling site, since, as a rule, the surface of granite is polished and slides.
1.3. Water use
Drilling a hole in granite without using water is an activity for enthusiasts and those who like to breathe granite dust, so water, ordinary tap water, must be prepared in advance.
The water container should be large enough to supply water to the drilling area, such as a plastic bottle with a hole in the lid. There are many options, the main thing is to be comfortable. By the way, on a horizontal surface you can use the middle of a plastic bottle, making it like a bathtub and securing it with tape on the granite. You need to add water to this bath as needed. Let us make a reservation once again - this method is only suitable for horizontal surfaces.
It is better if you have an assistant to water the water, in which case you can work with both hands. If you are alone, you will have to manage alone.
Remember: water must be present continuously and constantly during the drilling process.
1.4. Step-by-step technology
The first thing you need to know is that you absolutely cannot use the hammer drill mode on the drill during the drilling process, as this can lead to splitting the stone.
It is necessary to start drilling at low speeds and with little pressure on the drill.
First, a small circular groove is drilled, and the drilling occurs at a significant angle, otherwise the crown will simply slide over the surface, then the crown is gradually leveled.
To avoid slipping during the initial drilling phase, you can use jigs - special stencils with pre-drilled holes of different diameters. Such a stencil is applied with the desired hole to the location of the future hole in the granite, fixed on it and drilling is done through it.
Making a hole in an artificial stone sink: instructions
When purchasing a sink made of artificial stone, the client is often faced with a problem such as the lack of a hole for the faucet. Naturally, you should turn to experts, but this issue can be resolved without the help of others.
In order to understand how to drill a sink made of artificial stone, you must first understand what it is made of. There is no exact definition of “artificial stone”, which is why different manufacturers use this term to refer to different materials that differ in density and properties.
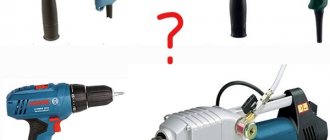
The most common are:
- porcelain stoneware;
- agglomerate (fragranite, silgranite and their analogues);
- acrylic stone.
Working with any of these materials has its own characteristics. In order to decide which drill to use to drill a stone sink, you must first understand what exactly was purchased.
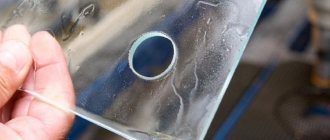
The photo shows a porcelain stoneware countertop
Porcelain stoneware is the strongest and most durable of the materials listed above. It is not afraid of temperature and chemical influences, and is resistant to mechanical damage. It stands out due to its booming “glass” sound.
Other types of artificial stone produce a duller sound due to the addition of plastic and polymer materials. Despite the fact that making a hole in other materials is easier than drilling a porcelain stoneware sink, very often the choice of clients falls specifically on it. Taking into account the extraordinary density of the material, ordinary drills will be powerless here.
Only a crown or a carbide-tipped drill, ideally diamond, can handle porcelain stoneware. Sintered ring drills will also be able to work with it, but their price is even higher, so they are chosen occasionally, only if there is a need for a larger volume of work. Due to its high strength, when working with this material, you need to cool the drill and working surface with water. It is necessary to work with porcelain stoneware at low speeds (300-400 less).
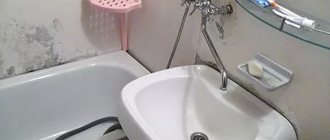
Where to cut the hole?
Another important question that will arise regardless of what material the sink was purchased from: should I cut a hole in it from the front after installation? Or should I do this before installation and from the back?
Each method has a number of pros and cons:
- In the first case, the edges on the front side will be even smoother, but there is a possibility of damaging the front side of the sink with a drill, and if it has a narrow side, then splitting the edge.
- In the 2nd option, the risk of destroying the bowl is even lower, but with all this there is the possibility of getting a sloppy edge of the hole on the front side. Almost always this is not critical, because the edges of the hole are blocked by the mixer. When turning over, there is a possibility of unintentionally making a hole on the wrong side, so it is better to mark the side on which you want to install the faucet.
In any of the methods, it is better to place the hole away from the edge of the product, but at the same time without touching the bowl. To do this, before work, you need to attach the lower nut of the mixer to the sink and mark its center.
An alternative option is to use a tube made of non-ferrous metals
If you do not have a diamond crown, you can use another method, which is more complex and requires an assistant.
The essence of the method is this: make a ring of plasticine around the circumference of the proposed hole in the granite. Its height must be at least five millimeters. A small amount of corundum, diamond dust or victoria must be poured inside the ring. You need to attach a small tube made of copper or any other non-ferrous metal to the drill socket. After this, they begin drilling at low speeds and with the perforation mode turned off. During drilling, it is necessary to continuously supply water into the ring in a small amount; in this situation, the water will cool the tube.
How and how to attach a sign with a photo to a granite monument in a cemetery (there is no electricity nearby)?
There is a lot of advice given on this issue, but all the advice to one degree or another boils down to the fact that the glue with which the photo is glued soon lags behind either the plate with the photo or the granite slab.
This reason is the biggest problem; about once every 5 years the whole process has to be redone, i.e. tear the sign off the monument if it has not yet completely fallen off, clean the surface and re-glue everything.
My father suffered like this twice, as he said, but 4 years ago we took a different path, which I will describe below, we were at the cemetery this spring and our sign was still there, glued to death.
_________________________
Gluing a ceramic plaque with a photo to a granite monument
===========================
The first thing to do with the monument is to outline where the plaque will be located. To do this, simply apply it to the surface of the monument and draw an outline with a pencil.
Inside this outline it is necessary to make many small notches. We take a chisel or core and hammer the notches. Just don’t make strong impacts, these shouldn’t be holes, you just need to make the surface rough enough and get rid of the polish.
There is no need to drill anything, as the monument (not all of it, of course) can simply crack!
Now about the plate with the photo, depending on which surface (material) you choose, choose this method of degreasing. In my case it was ceramics, and that's what I did.
Using a file, I made marks on the ceramic on the back side of the plate, making a cage, and treated the surface with coarse sandpaper.
When this procedure is completed with the plaque and monument, take Feri or similar detergent and plain water and thoroughly wash the mounting surfaces of both the monument and plaque.
Be sure to wait until it dries completely!
Next, we do the following - we first buy gasket sealant for the car engine, I bought German Wuerth (see photo below), it was recommended to me in the store, it can withstand decent temperatures.
- So, we apply a thin layer of this sealant first on the sign, and after a minute on the monument.
- We hold it until the sealant is covered with a film, but not until it hardens.
- We spread another layer of sealant on the plate and immediately press it to the monument without interruption.
Now all that remains is to figure out how to press this sign to the monument for a while, preferably for a day. I did the following:
- First I found a piece of polystyrene foam and cut it out a little smaller in shape than the photo.
- I also cut out a piece of plywood and glued it to the foam.
- When I glued the sign to the monument, I immediately pressed it with this structure, foam plastic, to the photo.
- An assistant removed the squeezed out sealant along the contour.
- Next, I tied a sign with foam plastic around the monument with two ropes at the top and bottom.
- Now you need to pull the rope to firmly press the sign; to do this, insert a large nail under the rope above the plywood and twist the rope. This must be done with two ropes.
- When the string is stretched, we simply tie the two nails together.
You have to wait at least 24 hours, but it took us a week because the cemetery is far away.
__________________
There may be better quality sealants, but I used this one (note the numbers 300 - it can withstand a larger temperature range):