Hi all. I want to share an interesting selection of designs for forging. I am constantly in search of all kinds of patterns and ornaments. And then one day I came across such a collection. I don’t do much ironwork myself, but I also liked the designs and solutions for various products. Please note that the pictures and drawings are in vector format, that is, you can’t just look at them; to view and work you need a vector program, a vector graphics editor such as CorelDRAW, Adobe Illustrator. It’s more convenient and easier for me to work in Korel. The fact that the drawings are vector makes it possible to work with them and change anything. You can also enlarge the drawing to real size without losing quality and print elements in natural size. You can download it from this link from Yandex disk
There are about two dozen folders in this folder and each contains a hundred pictures, a total of 212 MB.
A few pictures to understand what is there...
There are about two dozen folders in this folder and each contains a hundred drawings. 212 MB. You can download it from this link from the Yandex disk yadi.sk/d/4FTfpT3-3R54xG
This collection was found on the Internet without copyright and is posted “as is”
A beautiful entrance to the yard will emphasize the good taste of the owner, and the site will become recognizable. Patterns on metal gates will make the fence elegant and unique. They are applied in various ways, from paintings on self-adhesive film to drawings with a brush. Craftsmen working with metal use forging elements and turn the gate into a masterpiece. Any pattern made by yourself will look unique.
Drawings on the gate leaf
A picture or drawing will help make the entrance to the site bright and unforgettable. Decor is applied using different techniques:
- Graffiti using spray cans.
- Paint drawings.
- Stenciled ornaments.
- Self-adhesive film with 3D images.
Forged patterns on metal doors
You can apply an image to any metal profile. The relief of the leaf will give it mystery. At the dacha, it is advisable to practice on the fence, depict cartoon characters, nature, flowers. Then create the best design on the gate.
Dacha owners who do not know how to draw use a plastic or cardboard stencil.
The pattern is applied with a brush or paint using a spray can.
The photo shows metal doors.
Metal patterns on the doors
How to build a curl?
There are plenty of sketches of curls for artistic forging on the Internet, but when you try to adjust their sizes to those required for yourself, it often turns out that the product loses spectacularly due to a seemingly insignificant violation of the proportions. Therefore, it is also desirable to be able to construct forging patterns of curls that obviously have aesthetic advantages.
Templates for cold forging of artistic curls - volutes - are built on the basis of mathematical spirals. The most commonly used is the logarithmic spiral; it is one of the widespread natural forms expressing the fundamental laws of nature. The logarithmic spiral is found in the shell of a snail, in our hearing aids, and in the form of a treble clef in musical notation; in the neck of the violin itself too.
Construction of forming templates for cold forging based on spirals
The principle of constructing a logarithmic spiral by points is that when the radius that forms it is rotated, starting from a certain initial R0, by a fixed angle φ, its length is multiplied by the divergence index of the spiral p. For volutes p, as a rule, take no more than 1.2, because a logarithmic spiral diverges (unwinds) very quickly; on pos. In Fig. a logarithmic spiral with p = 1.25 is shown as an example. To make it easier to build a spiral at points with sufficient accuracy for forging work, take φ = 45 degrees.
In the case when a denser arithmetic spiral is required, when the radius forming it is rotated by the same 45 degrees, 1/8 of the spiral pitch S is added to the previous radius, pos. B. In both cases, R0 is taken equal to or greater than the diameter d of a workpiece of uniform cross-section, pos. A. If the initial end of the workpiece is pointed, R0 may be less than d, up to the plasticity limit of the metal.
It remains to decide how to lay a visually harmonious spiral with a given opening size a. To solve this problem analytically, i.e. using formulas with any precision specified in advance, you will have to solve cubic and higher-order equations. There are no computer programs for numerical technical calculation of volutes on the Internet, so we will use an approximate method that allows us to get by with one working and, possibly, one test graphical construction. It is based on the assumption that for small p the sums R2+R6 and R4+R8 do not differ much. The step-by-step algorithm for constructing a volute for a forging template follows from here:
- Based on the available material, we determine R0;
- we take the number of turns of the volute w according to the principle: as God puts it on the soul of the left hind paw of a beloved cat;
- Using the data from the table in Fig., we calculate the diameter of the volute b such that it is slightly smaller than the width of the opening under it a, see pos. G;
- We calculate the working initial radius R using the formula for pos. G;
- we build a volute profile on a scale point by point;
- if necessary, we accurately adjust R using the same formula and build the profile of the working template completely.
Note: if you calculate intermediate values from the table, do not forget - they must be taken in geometric proportion!
Ornament on gates made of metal profiles
Patterns on metal gates, made from rolled sheets and iron rods, look original and strengthen the gates. Such ornaments increase the inaccessibility of the fence.
Corrugated sheet construction
The openwork ornament installed above and below the metal profile creates the illusion of airiness of the heavy metal structure. Elements of a contrasting tone against a background of colored fabric add volume and an aesthetic appearance. You can decorate the entrance to the site entirely or partially with your own hands. Artistic forging is mainly used:
Patterns on metal profile doors
For land owners who do not have a forging workshop, stores sell ready-made decoration elements. First, you should familiarize yourself with their assortment, and then draw up a life-size drawing of the ornament. After which you need to divide everything into simple elements and perform each one twice, if the gate is swinging and there are two leaves.
Read also: Do-it-yourself snow blower at MTZ
The pattern is laid out and welded on the ground, then attached to the canvas or to the frame. When decorating with metal ornaments, the age of the gate does not matter.
The photo shows a metal entrance group.
Decorative embossed sheet metal decoration
Decorating with forged elements made of sheet metal allows you to create three-dimensional images and even paintings. Beginners are recommended to assemble a pattern from simple elements.
For example, make a border around the perimeter of small flowers, leaves and curved stems. The petals are formed in a special die and made by embossing. The elements are connected to each other by welding and attached to the leaf panel.
Using three-dimensional forging from sheets, specialists create entire paintings that depict:
Forged patterns and embossing
Painted in golden or silver on a dark background, forged designs turn the area into a fairy tale and give the fence a luxurious look.
Photos of patterns on metal gates demonstrate the unlimited number of options and beauty of the entrance to the yard.
Leaf ornaments
A thin sheet 0.8–1 mm thick turns into an ornament in skillful hands. Small fragments of the pattern are attached in the area of loops and locks, strengthening the panel. Two-color designs create a beautiful look. The background is the gate material. The image is cut out from the sheet.
Sheet metal and forging patterns
A design is applied to thin metal, the dimensions of which coincide with the gate leaves. The holes must have a closed contour. Then everything is cut out and cleaned with a grinder and other tools. The finished decoration, made by yourself, is attached to the frame of the doors by welding or bolts.
The topic can be anything. The gates look original, decorated with trees, fantastic plants, and complex patterns. Drawings made from sheets that protrude beyond the metal profile at the top look especially unforgettable.
They make an openwork arch and a simply airy, original finish. The number of small elements depends on the owner’s ability to work with metal. The less experience the performer has, the larger the holes and the larger the radius of the part.
Gate compositions that include volumetric elements make them unforgettable.
For example, the crown of a tree, assembled from individual leaves, slightly curved near the stem. Purchased flowers and buds are suitable. The main thing is to place them correctly on the finished canvas.
The photo below shows metal doors on a summer cottage.
Metal doors with patterns
You can cut out an ornament from the strips and decorate with it individual parts of the doors, for example the bottom, or create vertical patterns on metal gates with your own hands. Located along the edge of a thin metal sheet, they will strengthen it around the perimeter.
Cold forging patterns
Forged gates are durable and beautiful. Rolled lace seems airy and light. Disadvantages of such gates:
- heavy weight;
- high price;
- transparency.
Metal doors
To prevent curious passers-by from looking into the yard, a background made of polycarbonate, plastic or metal profile is installed behind the forged ornament.
Patterns created from rods using artistic forging will decorate gates and the entire metal fence. Fragments that partially cover the canvas will reduce the cost of the fence while increasing strength.
Options for partial and complete decoration of gates can be seen in the photo below.
On metal gates in a rustic and historical style, hinges with decorative plates are appropriate. Large, with curls and rivets, they will strengthen the canvas in weak places and create an antique look.
Sketches of metal sections for DIY production
Read also: How to drill for confirmation
The doors look original with openwork at the bottom and top. A solid metal sheet, cut into shapes, complements the composition, while simultaneously shielding the house and yard from the curious. Separate elements are located against the background of the metal profile. The ornament outside the background demonstrates its openwork.
Metal fence with polycarbonate
The luxurious image of the gate is created from three-dimensional ornaments painted in different tones. The main interweaving of black vines and golden flowers will not leave anyone passing by indifferent. Photography is not able to convey the volume and play of shapes of such patterns, their charm.
In addition to the contrast of colors, the play of shadows from the relief elements of the decor is very organic.
Sketch for making sashes with your own hands
Not only a blacksmith can create fairy-tale gates by decorating them with ornaments from forged fragments. It is enough to buy all the necessary elements. The parts, laid out in the drawing in full size, are welded at the points of contact. After cleaning and painting, the ornament is attached to the canvas or sash frame.
The photo shows a metal structure with patterns.
At the summer cottage
History of the forge: description of cold forging
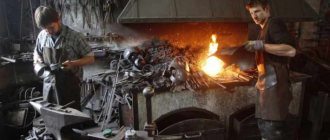
Forging is a process of processing metal to give it the desired shape, turning a blank (blank) into a product. For people who are unfamiliar with the peculiarities of metal work, the word “forged” is associated with a forge, where a blank is heated from 800 to 1000 ° C and processed with a hammer to give shape. But in everyday life, items made by cold forging are more often used. Pots, teapots, patterns on gates and doors, metal stands are made by deforming metal under pressure without preheating.
Beautiful forged elements can be created even at home without the presence of special expensive equipment
Cold forging is an easier, safer and more ergonomic processing method than hot forging. Main advantages:
- equipment for cold metal forging is cheap and ergonomic;
- low labor intensity;
- quick job training, low qualification requirements;
- the ability to create a unique ornament from basic elements.
The downside is the limited working surfaces and materials: rods, sheets and plates.
Cold forging is one of the ancient methods of metal processing
Hand-made cold forging is historically older than hot forging. The first products were discovered in Egypt and Mesopotamia and date back to the 4th-3rd millennium BC. Initially, ore was used, which was deformable after being hit by a stone. Cold forging was used to make gold jewelry. Soft metal was easy to process with stone hammers. The oldest product was found in Egypt, it was made 8 thousand years ago.
Several centuries later, by observing volcanoes, people learned that high temperatures made it much easier to shape metals. They began to build blast furnaces and the profession of a blacksmith appeared. The Stone Age gave way to the Iron Age, and not only jewelry, but also dishes, weapons, and garden tools entered people’s lives. The principle of operation of the forge is still preserved, but the equipment for cold forging has been modernized.
Using modern equipment you can create products with a large number of forged elements
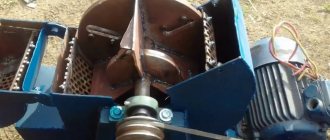
Basic tools for cold forging at home
The creation of a unique product always begins with material calculations and the development of a detailed work plan. The easiest way to think through the moves is to create scale sketches of forged products, write down the dimensions and select the necessary tools. The choice of material deserves special attention. The metal should be strong, but bend easily.
Important! Hardened sheets or rods cannot be used. Under the influence of temperature changes, the structure of the metal changes, it becomes brittle and can break under pressure.
There are two types of do-it-yourself metal forging - rolling (working with rods) and stamping (extruding sheets under a press). At home, the first option is more often used. To press sheets, you need to make a special blank for deformation. Common rolling tools: bender, snail, twister, wave and flashlight.
Cold forged elements can be used to decorate stairs
A bender is a basic tool used for bending rods at different angles. The spiral elements of cold forging are twisted using a snail. For shaping, it is best to choose rods with a diameter of 10-12 mm. Choosing a material that is too thick can significantly complicate the work of the master.
A twister machine is used to twist rods along the longitudinal axis. The wave, accordingly, is intended to create wave-like elements. The flashlight tool is used to work with several rods at once. They are installed on the equipment and bent by rotating the lever.
Patterns on the gate
The gate is a mandatory element of the fence. The gate will look unfinished without decoration with similar patterns, using the same technology.
Patterns on the gate
The same details are used to design a metal gate. They repeat the main fragments of the pattern on the doors, only in a reduced form, taking into account the size of the canvas. All elements of the entry group should look like a single whole.
When decorating a fence with cold forging, the ornament is laid out from parts according to the size of the gate frame. With structures rounded at the top, a semi-arch is made, with the high side directed towards the gate.
The sheet metal pattern has its own characteristics. The gate has its own image, to which a design is added on the doors. For example, there is a large oak tree on the gate, and a small one next to it.
The paint and graffiti done on the gate continues on the gate. The fence in which the fence is a continuation or repetition of the picture of the entrance group looks original.
Film with a 3D image is glued in the same way. Designers advise taking a wide film, cutting it and gluing it in fragments to each element of the entrance group.
The photo shows a metal profile gate.
Metal gates with patterns and pictures of various types create an atmosphere of comfort on the site. They emphasize the good taste of the owner and his wealth.
Builder 4th category
The profession of a blacksmith is one of the most ancient. As soon as a person learned to mine iron, he immediately began to process it with the help of fire and a hammer. Nobody knows when the first forged patterns appeared. Fabulous iron ornaments on the facades of houses and their fences have enchanted the eye for many centuries. The modern history of artistic forging continues to develop rapidly. Metal products are still in demand.
There are several types of such forging
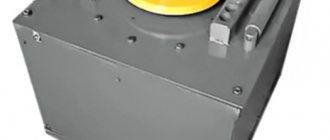
Equipment for rolling at home
You can buy devices for cold forging yourself or make them yourself from available materials. Initially, you need to create 2-3 basic workbenches to process one rod. The design and complexity of manufacturing depend on the type of work performed. A thorough study of the process will allow you to make the equipment yourself.
To create complex forged products you will need more than one workbench
Gnutik: what products can be created with its help
It is not necessary to create bending drawings for cold forging yourself. It is enough to look at the principle of operation once to make the tool yourself. The machine is a steel tooling, which is divided into three parts. The middle element (lead) is movable; a central roller (wedge) is attached to it, which bends the rod. On the side plates, the rollers are made replaceable and inserted into the groove. By choosing different diameters, you can vary the bending angle of the rod or plate. A lever is attached to the top of the leash, which sets the structure in motion.
Note! Bending a rod requires a lot of force, so attaching the workbench to a movable support will lead to incorrect bending and make work difficult.
The rollers should rotate freely in the holes, which will reduce the force required to bend the plate. Grooves for the rollers can be drilled in several places symmetrically to each other. This will allow you to quickly move the parts, varying the desired bending angle.
The bender helps bend metal rods at any angle
Mechanism for bending metal with a bend:
- a plate or rod is installed between the rollers;
- using a vice, the central roller is pressed against the metal;
- By rotating the lever, the plate moves along the roller, acquiring the desired bend.
For convenience, a dial (a tape with divisions showing the height of the angle) is placed under the central roller. It is used to produce parts with high precision that must fit together perfectly.
The bending tool is quite easy to use.
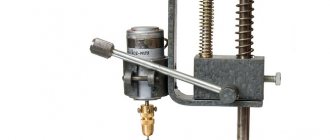
Snail: a simple tool for creating curls
The second name is a do-it-yourself conductor for cold forging. For manufacturing, you need to familiarize yourself with the bending process, for example, watch a forging video. Then the design itself will not raise questions and will be easy to repeat. The workbench is a frame on which the main matrix or spiral module stands. A rod is driven into the snail and moved around with a metal roller, pressing against the arc. The frame must be made of metal, since wood quickly collapses after prolonged stress. A metal corner, thick-walled pipe or channel are suitable for this purpose.
The machine is designed for two tabletops. One serves as a support and takes on most of the pressure, and the second holds the shape of the snail. Two circles with a thickness of at least 5 mm are cut out. The first part is installed on the frame. The center of the circle is marked on top, and a three- or four-leaf leg is welded to distribute the load.
The upper part of the volute, on which the metal is bent, is called a module. It can be static or typesetting.
The snail tool allows you to create curls from forged metal
A static module is a device for cold forging, designed for bending pattern parts of the same type. The bend radius or angle cannot be changed. Before starting to form the module, markings are drawn on the tabletop. A snail is assembled from metal plates (at least 0.6 mm thick) and welded.
The typesetting module consists of several parts. Its use is the most common for do-it-yourself artistic forging, as it allows you to create elements of different radii. Initially, parts are marked on the tabletop and the grooves are calculated. Removable parts of the snail are cut out of thick metal. Holes for fixing to the tabletop need to be cut only in the middle. Otherwise, the stress is distributed unevenly and the groove breaks faster.
The module for forging with your own hands can be made replaceable. A structure of the required radius is welded onto a metal circle. It is attached to the tabletop with grooves or bolts. To produce elements of different diameters, several modules are made that can be used on one machine.
The typesetting module will allow you to create curls of various radii from forged metal
A rotating shaft and lever need to be secured between the tabletops. It is necessary that the distance between the roller and the module be at least 2 cm, and the shaft stroke must extend beyond the tabletop. A movable element is installed on the lever handle to adjust the radius of the roller stroke.
Wave: how to create and use this tool
Wave is a tool for forging lines like a sine wave. Two rollers are machined to the specified dimensions. The first roller is static (the rod will bend around it), it is fixed on a support. The second is the leading one, it is mounted on a lever and rotates when it comes into contact with the surface. Pressure is generated between the shafts, which acts on the metal and causes it to bend.
The static roller can be machined into the shape of a stepped pyramid. Thus, the radius of the wave can be changed by moving the lever and rod higher by a division. When using such a machine, one side must always be held in order to avoid damaging the bend. To more accurately repeat the wave shape, two static rollers are machined, one of which holds the rod in the desired position, preventing further deformation, and the second is used for bending.
The “Wave” tool will help you make the rod wavy.
Flashlight and twister: features of these machines
A flashlight is a cold forging equipment for working with several rods and creating three-dimensional baskets. To avoid constructing a frame, you can use a regular vice to secure the tool. The tool consists of three parts: two dies and a roller. The matrix can be made of strong, preferably hardened metal 4-5 cm wide.
In each matrix, a central hole is machined into which the roller is mounted. Grooves are made on the sides for installing rods. The second matrix must move freely along the lever, since during deformation the distance between the working surfaces decreases. When the lever is rotated, the rods bend in a spiral, forming a structure similar to a flashlight. Do-it-yourself metal products, which consist of several rods, are secured by welding.
The twister machine has a similar design. However, instead of a shaft, a rod is inserted into the matrix, which is pressed with a plate or bolts. Between them you need to install a movable element that moves forward when the shaft rotates. The rod twists along the longitudinal axis, forming a symmetrical spiral.
You can create forged elements using the flashlight and twister tools
Important! The running matrix should approach static with each rotation. If it is fixed in one position, the master will have to make more efforts to bend the rods.
Types of artistic forging
There are two main methods of metal processing:
The classic method of metal processing is, of course, hot forging. It has long been noted that when heated, iron becomes soft and easily deformed, but when cooled it retains its given shape.
The undoubted advantage of this method is the great possibilities of forming the material . The disadvantages include high energy consumption and the practical impossibility of doing this business without a specially equipped forge.
In this video you will learn more about the types of forging:
Cold forging has recently become very popular. The main advantage of this method is its accessibility and the ability to practice at minimal financial cost. To do this, it is enough to have good tools and a small workshop or space in the garage.
Cold processing also requires less time. There is practically no need to finalize the product to a marketable state, but with hot forging this procedure takes a lot of time and effort.
Read also: How to make a saber from wood
Disadvantages include limited decorative and artistic techniques and the fact that this method requires good physical training and the acquisition or manufacture of special tools.
Products produced by cold forging
We invite you to familiarize yourself with the options for products that you can make using the cold forging method:
- The fence element is completely made using the cold forging method. Clamps are used to connect the parts. The following machines were used for manufacturing: “snail”, torsion bar, “bend” and “flashlight”.
- Soda bench - made by cold forging and covered with wood. Welding and clamps are used to connect the elements. Machines used in production were “snail”, torsion bar, and press.
- Balcony railings - production method - cold forging. The railing elements are connected using welding and clamps. The machines used in production are “wave”, “snail”, press.
- Stair railings are produced using the cold artistic forging method. The parts are connected by welding. The machines used in production are torsion bar, flashlight, and snail.
- Visor - the frame of the visor is made using cold forging. The parts are connected by welding. In the manufacturing process, machines were used - “snail”, “wave”, press.
- The grill is a simple design made using the cold forging method. Clamps and welding are used to connect the parts. The barbecue elements were produced on machines - torsion bar, "snail".
- Double bed - cold forging method is used for the backrests. Connections are made by welding and clamps. In the manufacturing process, machines were used - “snail”, “wave” and press.
As can be seen from all of the above, the cold forging method does not require large financial costs and is quite easy to learn, so if you decide to start learning blacksmithing with this method, then you did the right thing.
Basic patterns
Since iron can change shape during heat and physical treatment, there are various examples of forged patterns. All of them can be divided into three main groups:
Undoubtedly, the most popular of them are floral forged ornaments. The artful interweaving of branches, flowers and leaves has always inspired artists to create fantastic works. Blacksmiths are no exception in this series. They also often use plant motifs in their work.
For cold working, metal rods are most often used as the main material. They are bent, twisted, flattened, minted, milled and forged. The end result is magnificent works. Here are the main elements and techniques for this type of metal work:
- Curls. The most popular element. It has a huge number of different options and modifications.
- Spirals. Single, double, spatial and others. This is also a very popular technique that makes patterns for forged products memorable and original.
- Cool. Twisting iron bars can be the most incredible experience. The imagination of some authors is amazing.
- Top. A decorative insert or special atypical treatment of the ends of the rods can greatly diversify and decorate any ornament.
- Coinage. The use of chisels and hammers for decorative inserts in forging patterns is a long-proven and often used way to add creativity to a future creation.
- Headings. Cylindrical, cone-shaped, spherical elements made of rolled metal, attached to the end of a rod.
These are not all the techniques in the arsenal of a good master. By skillfully combining them, craftsmen create real masterpieces from ordinary iron.
Do-it-yourself cold forging under pressure: creating blanks for forming products
On wrought-iron fences you can often notice not only geometric patterns, but also flowers, butterflies, leaves and other decorative elements. They are also made using cold forging techniques, but by rolling rather than stamping.
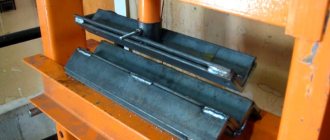
Do-it-yourself volumetric forged products are made from sheet metal. Working with a press at home is less common than rolling. Extrusion of sheets under a press can be either manual (knocking and pressing) or automatic. At home, it is cheaper to use hand stamping. To do this, the master needs to make several blanks that will be printed on a metal sheet under pressure.
A drawing of a future forged product will greatly facilitate the work of the craftsman
Metal forging equipment:
- Punch (press stamp or cotter pin) is the upper part of the press, it pushes the sheet inward. The pressing side of the stamp can be drawing or smooth.
- Matrix is an element that is made in the shape of the required object. The applied relief deforms the plate under pressure, giving it the required shape.
- Press lever - a handle or relay for bringing the dies closer together and adjusting the force of the press.
Before starting work, you need to create a drawing of the future product. Sketches of artistic forging are transferred to the workpiece, it is cut and ground along the edges. You can use a regular vice as a workbench for pressing. It is most convenient to place them in a vertical position so that the plate lies horizontally to the plane. This way, the plate will be positioned exactly between the dies and will not slip out when the lever is rotated.
Different types of workbenches allow you to create unique forged elements
Simple forging of metal at home can be done with a chisel and hammer. In this case, the chisel acts as a punch, the anvil as a matrix, and the hammer as a lever. To better print the design, you can put a plate with notches under the sheet. This way the relief will be clearer and more beautiful.
Important! The metal used for stamping must be softer than the punch and die. Otherwise, the tools will quickly break.
To make the “sheet” element, a blank of the desired shape is cut out of a metal plate 20-30 mm thick. A longitudinal line is drawn on it with a pencil in the center. The chisel striker is placed at an angle to this straight line. After hitting the handle, a line is imprinted on the plate, similar to the veins of leaves.
The cold forging method can be used to create three-dimensional elements
You can use pliers to form the required volume of a cold forged product. The part is clamped between a vice and bent into the desired shape. This type of work is well suited for completing a small number of items for personal use. The process of beating a pattern by hand takes a lot of time, it is quite monotonous and requires great precision.
It is more profitable to purchase stamps for permanent work (in the form of leaves, petals, flowers, etc.), since accurately turning two identical elements is a very complex process. The main parts are machined from a blank or cast by hot forging. This type of work requires a lot of experience and high precision. The punch and die must match. With strong pressure, irregularities will be imprinted on the product. If the discrepancy is very large, then the press will crush the workpieces - and you will have to start work from scratch.
Styles and elements of patterns: photos of artistic forging
Creating a beautiful pattern begins with a forging sketch. The master must have a clear idea of the picture he wants to make. Initially, a drawing is drawn, materials and the number of necessary elements are calculated, machines and equipment are selected. In order for the product to look beautiful, it is better to immediately choose the style in which it will be made. Looking through photos of cold forged products, you can easily notice which direction the pattern belongs to.
Beautiful forged products can be made in various styles
There are several styles of forming a forged pattern.
The Romanesque style is characterized by severity and symmetry. On the fences you can see a dense arrangement of spirals in the same order, the details are often repeated and of the same type. This is a monumental pattern using the volute element (C-shaped twisted one-sided curls).
Gothic ornament . Few people know that modern fencing and fences are most often made in this style. A characteristic feature is upward striving. The rods are pointed and end with tops in the form of arrows, spears or sharp spikes. The spiral elements used in this style are called perforations, and they look like a stem branched in different directions. For variety, lanterns or voluminous spirals are added between the straight rods.
Baroque style products are the most common
Renaissance is very rare. In this style, pointed charcoal elements are practically not used. The basis is round arcs, spirals and waves. The branching metal rods are decorated with leaves or flowers; graceful curves take the shape of a figure eight. Characteristic elements are notch, spiral, volute and figure eight. The style is very harmonious, the details are installed symmetrically in the form of intertwined lines.
Baroque is the complete opposite of Renaissance. The style is openwork and very lush. C-shaped spirals, volutes, curls, curved lines and intricate patterns are used. Three-dimensional leaves and flowers are added to the weaving, creating a dynamic shape.
Rococo . This direction is characterized by the use of thin rods and double-sided curls. The rocaille ornament creates constant movement and is distinguished by filigree and three-dimensional patterns. In the photo of cold forging, asymmetry and fractional patterns are noticeable. The use of straight rods and flat gratings is unacceptable.
Classic style allows you to combine various forged elements
Classicism . A beautiful, albeit simple style that brought symmetry back into fashion. To create an ornament, curls, perforations, spirals and straight rods are used. Another element is introduced into use - a meander (broken lines or rods bent at right angles). Vertical architectonics are always strictly maintained in fences.
Empire style is characterized by the presence of geometric patterns and long smooth rods. The main element (volute) is modified: an elongated straight line with one-sided curls at the ends. The main thing for this style is strict simplicity, symmetrical geometry combined with spiral elements.
Art Nouveau , or Art Nouveau , added biological motifs to artistic forging with one's own hands. The style does not use straight lines, only various bends, meanders, curls and spirals. Symmetry fades into the background. The ornament repeats the silhouette of a person or animal, leaves and flowers are added. The pattern is constructed in such a way that the curls evenly flow into each other throughout the entire ornament.
A beautiful forged pattern is difficult to create without a drawing.
If a person starts work without a preliminary drawing, he will quickly get confused in creating a cold forged product. Each pattern should be thought out as much as possible, and it is better to immediately transfer edits that are made during work to the sketch in order to clearly understand what the result should be.
Note! Even if you have photos of forged patterns, you need to make drawings and markings to accurately place all the parts.