Shredder design for branches and grass
The purpose of the unit is to quickly and safely grind plant debris. The main function is performed by the cutting block. The knives are driven by the engine directly or via a belt drive. The units are installed on a stable frame. The moving elements are covered with a casing. Two compartments are made for feeding branches and unloading chips.
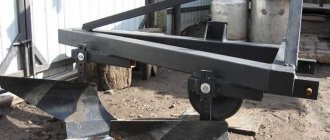
Metal frame
A homemade shredder with a powerful electric or gasoline engine needs a stable, durable frame with space to install the engine and a rectangular support for the cutting unit.
To make the shredder frame use:
- profile pipe 25;
- corner at 30;
- channel.
Fasteners:
- ears for the engine,
- nuts,
- hairpins.
Engine
Full autonomy, work anywhere in the garden, independence from the outlet - the advantages of a gasoline engine. A homemade shredder for processing branches, tomato tops, and grass is equipped with a motor from a motor-cultivator or walk-behind tractor with a capacity of 6 liters. With. It is moved from one unit to another.
You need a gearbox that provides 90° rotation if the gasoline engine has a horizontal shaft and the chopper has a vertical shaft.
Electricity costs are lower than gasoline, so if there is a network on the site, an electric motor is installed on the unit. To chop branches 2-3 cm thick, a 3-phase electric motor of 2200-3500 W is sufficient. When making a low-power grass cutter, they take engines from household devices. They are removed from washing machines and vacuum cleaners.
Knives
The thickness of the branches processed by the shredder depends on the design of the cutting unit. In home-made designs, several options are implemented:
- to grind branches with a diameter of 7-8 cm, several cutters are installed on the shaft;
- hammer-type cutting block for grinding thin rods;
- the universal cutting mechanism is made of 15-30 circular saws mounted on a shaft;
- knives from factory garden equipment - brush cutters, lawn mowers;
- chop grass - trimmer line;
- stump crusher from a plane;
- two shafts with 3-4 steel knives for cutting branches of bushes and trees.
Homemade knives are made from springs.
Protective cover
To prevent chips from flying around, you need a protective cover. It is made from sheet steel with a thickness of at least 1.5 mm. Tin is not suitable for this purpose. During active use of the shredder, it quickly becomes deformed from strong impacts of wood chips.
Container for receiving sawdust
Old shopping bags, boxes, buckets, and bins are used to collect small garbage. For powerful units, the bunker is welded from steel sheets and riveted from galvanized steel.
Electrical wires and start/stop button
To turn on and off a homemade unit, use a push-button station designed for the appropriate current. Its purpose:
- turning off and turning on electrical equipment;
- changing the direction of rotation (reverse).
To connect the engine to a three-phase network, you need a five-core flexible copper cable in double insulation; for a single-phase household network, a three-core cable is sufficient.
Device
There are a lot of options for making mechanisms that free a country or yard space from a pile of wood waste:
Branch crusher. Steel base: two powerful bearings are welded to the angle. Between them there is a shaft with knives made of springs. A tractor flywheel connected to the shaft by means of a spline and a pressure nut. Feeding hopper with rounded edges, motor, pulley with belt drive.
Do-it-yourself grass and twig chopper. Iron frame, three-phase motor at the bottom. The flywheel is from an old agricultural machinery, the shaft is from a planer with circular disks. Pulley, belts, waste bin. Mobile design on wheels
Crusher: the cylinder-shaped hopper is made of KAMAZ receiver. Inside the main structure, knives are mounted on a vertical shaft according to the helicopter principle. Under which there are iron brooms with curved edges for air injection.
From the inside, a piece of steel is welded to the body along the intake hole to reduce the entrance by half. Grass and hay do not fly away into the garden, they go right under the knives.
Types of shredders
Devices for processing branches have many names: wood chipper, wood chipper, branch chopper, shredder, branch crusher, branch cutter, chopper, etc. Regardless of the name, their design is almost the same. The branch chopper device includes:
- Two bunkers. Wood for chopping is fed into one, and finished chips are unloaded from the other.
- Protective cover.
- Steel frame. All structural elements are attached to it.
- Drive unit. Gasoline, diesel and electric engines are used, from which the shaft comes.
- Cutting elements.
- Main gear. It can be on a rigid coupling or on a belt.
Homemade branch crushers are divided only by the design of the cutting mechanism. They are designed almost identically. Other items may vary in size. You can take ready-made drawings of a branch cutter (it will be easier to assemble the device with your own hands using ready-made designs).
The most common solutions:
- Several dozen conventional circular saws, which are made of a hard metal alloy, are attached to the shaft.
- The shaft is provided with several grooves with chopping knives (single core crusher). Crushing elements are made of high carbon steel. The wood is fed perpendicular to the knives.
- Branches must be fed into the disc crusher at an angle of 45 degrees. This is usually built into the bunker design.
- Sometimes a shredder is made with two synchronously rotating shafts (double-shaft crusher). The knives are mounted on them. When rotating, the blades converge with each other at one point. This design ensures self-tightening of the wood. Feeding occurs perpendicular to the knives.
An increase in torque is ensured by installing a flywheel. It is placed on one of the ends of the shaft. The only exception is the disc crusher, since instead of a flywheel it has a metal circle.
Varieties of engines for assembling homemade products
Motors vary in power and rpm. Used from 1500 rpm and above. Power - from 1.5 to 4 kW, depending on the thickness of the branches.
Used for the device of a branch chopper:
1. Electric motors connected to the network or battery, they are more compact, simple in design, and can be easily connected to any dacha
2. Diesel, fuel-powered. The devices are more complex and more expensive, but they do not require a nearby outlet, saving energy. More powerful and mobile
Types of cutting attachments used
Typically two types of cutting parts are used:
-Milling: 2-6 steel knives are attached to the shaft; for greater productivity, two such shafts are installed. Material is loaded at right angles to avoid blockages
-Circular: 20-30 circular saws made of hard alloys are mounted on the shaft of the main structure, alternating with washers of the same diameter. Waste loading occurs at an angle. The width of the resulting chips is equal to the distance between the disks. A lot of debris gets clogged in these intervals, so you have to periodically stop and clean the mechanism. The operating principle is similar to that of an electric planer.
Garden shredder from washing machine
To create a branch cutting device, almost everything you need is in any old washing machine. How does the creative process work:
- A more convenient body is made, cut to height
- An outlet hole for the finished raw material is cut at the bottom
- The structure is installed on an iron welded frame made from angles and fixed with bolts or self-tapping screws
- The slot is covered with a flap so that waste falls directly under the knives
- The crosspiece can be used from the same machine; cutting elements are attached to it
- There is already a control panel
The mechanism has low power and grinds mainly grass, hay and small branches. Machines from different manufacturers allow you to create unique units, this answers the question - how to make a branch chopper with your own hands? You can use the entire device, where the hole for loading laundry will serve as a receiving hopper, there is even a lid. The discharge from the tank is cut through with a grinder from the side. In addition to this, you will need pliers, screwdrivers, a hammer, wrenches, a tape measure, and a marker for marks. You can use Russian tools.
Types of shredders by engine power
As already mentioned, for small volumes of raw materials a medium-power engine is sufficient. This means you can use an electric motor. Although such a shredder for the garden requires a connection to the power supply, it is structurally simpler than a gasoline shredder and is easier to make with your own hands.
Depending on the power of the power plant, the chopper is capable of processing branches of different thicknesses. According to this indicator, shredders can be divided into three categories:
- engine power up to 1.6 kW. A unit with such a power plant will be enough to chop branches whose diameter does not exceed 2 cm. Such devices are not suitable for high-intensity work;
- power 3-4 kW. Capable of working with material with a diameter of up to 4-4.5 cm;
- over 4 kW. Using such a device, you can grind logs 7-14 cm thick.
Keep in mind that powerful electric motors must be connected to a three-phase network. When using a single-phase home network (220 V), the output power drops by 2 times. If there is no possibility or desire to equip the site with three-phase power, it makes sense to consider assembling a device based on an internal combustion engine.
Depending on the planned volume of work, to make a garden shredder with your own hands, you can use motors from various household electrical appliances:
- from an angle grinder;
- trimmer;
- washing machine (together with the tank);
- powerful asynchronous three-phase motor (type AIR 100 L4 4 kW at 1500 rpm), etc.
Drive design
In factory crushing plants, two methods are used to transmit rotation from the motor to the gearbox:
- Direct drive (via clutch). Torque transmission occurs without loss, the design is compact in size. If you manage to select a ready-made geared motor, the dimensions and weight of the installation will be even smaller. However, in this case, it is necessary to provide for manual (and ideally automatic) reversing in case of jamming of the rotors.
- Belting. Efficiency losses and relatively high dimensions are compensated by the smooth start of the mechanism. If the shredder becomes jammed, the only risk is that the belt will break or slip.
Briefly about the need to process grass and branches
The garden owner does not need to explain why he needs a shredder. After each sanitary, rejuvenating pruning of fruit and berry bushes and trees, mountains of branches accumulate. A shredder is needed to grind them.
Farmers and gardeners also need a shredder. It is used to process different types of plant materials:
- potato tops, tomatoes;
- stalks of corn, sunflower;
- grass, leaves.
The chopped green mass is used as livestock feed and poured into compost heaps. Large fractions of branches are used instead of firewood, medium and small fractions are used as mulch and raw material for composting.
Why is it better to make a chopper yourself?
A rational solution for disposing of branches is to use a garden shredder. This is a special tool that is produced by modern manufacturers. The equipment operates from various types of drive devices, which can be used:
- electric motors;
- internal combustion engines;
- tractor power take-off shafts.
A significant disadvantage of factory equipment is its high cost, which is associated with the use of high-quality materials for production. Not every summer resident can afford a purchase of this kind, especially since its payback will take at least 5 years. The question of how to make a simple branch chopper yourself is becoming increasingly relevant.
The method of making garden tools yourself is in demand for a number of the following reasons:
- The manufacturing procedure is not difficult if you have experience with tools such as an angle grinder, a drill and a welding machine.
- Equipment is created from improvised means. For this you will need old electric motors, cutters, crushers, jointers, etc.
- Manufacturing of tools with the required technical parameters and performance. It can be used to shred branches, grass, leaves and other garden debris.
- Price is the main reason why summer residents prefer to make a branch shredder themselves rather than buy factory equipment, the cost of which is quite high (if we talk about high-quality installations).
Naturally, one cannot fail to mention the disadvantages of making a chopper yourself. The main disadvantage is safety, since the slightest miscalculation can result in serious injury or even cost a person’s life. That is why you should get down to business only with full confidence that you can make a reliable wood chipper. A description of the different equipment options presented in the material, which functions no worse than factory products, will help with this.
The design of a garden shredder - we will determine the most important parts of the unit
Crushing of material in a garden shredder is carried out using knives. In finished models, the knife is most often a metal disk with 2-3 cutting surfaces. A large amount of work quickly renders the teeth unusable and they have to be sharpened periodically - you must admit, this is not very convenient, and it also takes up your time. If you decide to make a garden shredder with your own hands, then you can avoid repeating these design flaws, but assemble a reliable, high-performance and, most importantly, durable knife.
We suggest using circular saws with carbide tips for this. You will need not one disk, but several, to assemble a system from them - a package. In ready-made garden shredders, the knife, as a rule, has a thickness of 3 cm, but we can make a package of any thickness - everything will depend on the number of saws purchased. On average, for a high-quality knife 6-10cm thick you will need 15-25 pieces. Each blade has many teeth, originally designed for sawing hard wood. Therefore, grass stems, leaves and branches will be the same to them as seeds. In extreme cases, if the teeth on your saw become dull, nothing will stop you from going to the nearest tool store and purchasing a replacement.
Circular saws can be successfully used as shredder knives
However, the knife is not everything. In order to set it in motion we need an engine. To quickly chop branches in small volumes, it is easier to use an electric motor. Its use may seem somewhat inconvenient due to the cable and the need to connect to an outlet, but it operates almost silently and does not emit exhaust gases. The walk-behind tractor has more power, so it is ideal for those cases where you need to crush coarse material often and for a long time.
How to start making a wood chipper
Starting work on creating a wood chipper with your own hands involves choosing the design of the equipment. After all, installations are divided into three main classes:
- Disc shredder.
- Drum - for obtaining larger fractions of material.
- Double-drum crusher - allows you to produce large-sized wood material, which can be used as a heating raw material.
The next step is to select a suitable drive device. Electric motors or internal combustion engines are used as such. The use of a gasoline engine allows you to get not only a highly productive, but also a mobile unit. However, finding an internal combustion engine of sufficient power is quite problematic, which cannot be said about electric units. If you can’t find one on the farm, you can always buy used ones at an affordable price.
The thickness of the branches that can be chopped depends on the electric motor used. The greater its power, the correspondingly higher the capabilities and service life. When choosing an electric motor for making a wood chipper, you need to consider the following:
- If the power of the unit is up to 1.5 kW, then it is capable of handling sticks with a diameter of up to 20 mm.
- If a more powerful unit up to 3-4 kW is used, then it is capable of crushing branches up to 40 mm thick.
- To crush workpieces from 70 to 150 mm, electric motors with a power of 4 kW are used.
It is worth considering that the more powerful the unit, the greater the electricity consumption. If you are wondering how to make a branch chopper with your own hands for your home and garden, then choosing an engine with a power of more than 2 kW does not make sense. Logs with a diameter of 40 mm or more can be cut with a chainsaw and used as heating material.
This is interesting! When choosing an electric motor for a shredder, consider how it is connected to the electrical network. When connected to a single-phase network, the power is reduced by 1.5 times.
When the design of the shredder and the electric drive of the appropriate power have been selected, you can begin to prepare the necessary parts. Usually, to obtain these, you cannot do without the help of a turner, but it all depends on the selected device configuration. The final stage in the production of a garden shredder is the preparation of the frame on which the drive and shredding mechanism will be placed.
Manufacturing plan
Let's look at how to assemble a wood chipper with your own hands. Need to consider:
- What motor is needed and how to calculate the belt drive.
- How to make a frame so that there are no backlashes and it is safe.
- Assembly order.
Selection of engine and calculation of belt drive
You need to know 2 indicators about the engine: shaft rotation speed and power. It is indicated on the motor housing or they can be found by the marked number. With that in mind, here are a few tips you'll need to make a wood chipper:
- Motors of 2.5-4 kilowatts are suitable for such purposes. With these parameters, we can say that it will work without breaking down and will crush any type of wood. The minimum threshold is 2 kilowatts. Motors with less power are, in principle, unable to cope with wood and are only good for straw. There is also no need to take engines of 4.5 or more kilowatts. Efficiency and energy consumption will be incommensurable. Only use it if it is lying around.
- In some cases, power is indicated in horsepower. Wood chopping requires 6-7 HP. This marking can be found on old-type Soviet engines. 1 horsepower equals 735 watts.
In general, a wood chipper requires you to know how much torque the engine has, but this information is not always available. Therefore, if you do not know it, then you will only need speed. For a power of 2.4-4 kilowatts, 1500 rpm is enough. This will give you good torque.
Now you need to calculate the belt drive. Here you have to resort to physics. As a basis, we will take a poly-V-belt of the RK type with a neutral layer of 1.5 millimeters and a minimum radius of 45 millimeters. The engine will be at 2970 rpm, power is not important. For a homemade wood chipper to be more effective, the speed needs to be reduced to 1800. Here are the formulas:
- It is necessary to determine the gear ratio: i = n1/ 1800 (shaft revolutions) = D1/D2 (pulley diameter). We get a value of 1.55.
- Now you need to find the pulley diameter at which the wood shredder will work more efficiently: D1 x I + 2 x h0 x (i-1) = 45 (minimum radius) x 1.55 + 2 x 1.5 x (1.55 - 1) = 71.4 millimeters.
In order for your DIY garden wood chipper to work correctly, you need to lower the engine speed using a second pulley of 71.4 millimeters. The length of the belt does not matter.
Otherwise, you can do it more primitively. To reduce the speed by 2 times, the driven pulley is doubled in size.
Preparing materials
For a shredder, the components may already be in the shed. As a last resort, you should go to your neighbors or even buy it at a metal collection center. It will be much cheaper than buying them at a plumbing store or hardware store.
So, to make a homemade branch chopper, you will need:
- Steel corner 60 millimeters. You can do it a little more or less – it won’t change the essence.
- A pair of 40 mm corners that need to be welded in a “box”.
- Square pipe 45x45.
- Channel with numbers 6 and 9.5.
- Round pipes of 35 and 45 millimeters.
Homemade branch choppers allow slight deviations from the specified parameters.
It is more convenient to do installation on a metal plate with a thickness of at least 10 millimeters. Wood will not work - the vibrations will break it in just a couple of days. After assembly you should get a similar design.
To fix the crusher belt, you can use 2 technologies:
- The grooves can be made oblong. To do this, 2 holes are drilled side by side in the sheet and the gap is removed with a needle file or angle grinder. In this case, the motor is simply pulled back and pressed with hardware.
- The plate must be placed at one end on the shaft, and the other must be secured with nuts and studs. It turns out that under the weight of the motor the belt tensions on its own.
The homemade garden shredder is almost ready, all that remains is to develop the shredder. Processing branches into wood chips will be more efficient if you use commercial wood saws.
You need to choose those with victorious soldering. Firstly, they will last longer and will not dull, and secondly, they cope better with hard rocks.
You will need about 20 saws and the same number of washers. By the way, you can’t apply them closely. It is desirable that the distance be approximately 2-3 millimeters between the solderings. This “sandwich” will be approximately 8 centimeters thick.
It should be taken into account that the initial product depends on the number of saws and the distance between the saws. This amount and distance are necessary to process the branch into sawdust. To process wood into chips, you will need to increase the distance by 15 millimeters.
The shaft will have to be ordered from a turner. Still, it will move towards the bearing and even the slightest subsidence will make the structure non-rigid. Optimal - bearings from Zhiguli from the rear axle shafts.
To install the discs, a thread is cut on the shaft. You will also need a flywheel. It can be cut from thick steel from 10 millimeters or a pulley from garden equipment. You can refer to this drawing.
Frame making
Chopping branches is accompanied by strong vibration, so it must be firmly fixed. It is better to weld it from steel corners 50x50. Profile pipes or aluminum are not suitable - they are too soft and pliable. The frame can be cooked at your discretion, but you can follow the recommendations:
- Height. It will take several hours to chop the branches. This kind of work can make your back hurt and your knees get tired. Therefore, the height should be comfortable specifically for you. This is easy to determine: the window for throwing branches can be at the level of your lowered palm. This way you won’t have to bend over to throw in a new portion. The height of the machine itself should reach the bent elbow.
- Frame width from 50 centimeters. This way, the jaw crusher will not wobble on the ground, even if it is uneven.
- To prevent the frame from folding like a construction set, add transverse stiffeners. It is best to weld them rather than screw them on.
- If the unit is supposed to be moved, industrial wheels and handles will be needed.
- The engine must not extend beyond the frame. You can hit it and the belt will fall off. It is advisable to make the body from plywood or sheet metal.
Build process
First, you need to assemble a block for recycling. It consists of a package of wood files that are mounted on a shaft. The “sandwich” spacers are placed between them and secured with nuts.
Next, the bearings are pressed onto the shaft and into the outer housing. Before this stage, you can remove the anthers and lubricate the balls with a thick layer of grease.
The shaft is fixed to the body using bolts. You also need to put a pulley on the end of the round timber. 2 counter knives are placed on the saw teeth. These are ordinary metal plates on which wood will be cut. It is better to get a jointer cutter as it is calibrated and made of high carbon steel. The distance between the tooth and the counter knife should be about 1-2 millimeters. It is better to fix it not with a weld, but with bolts. This will allow you to slightly adjust the height of the counter knife.
All that remains is to install the engine and tension the belt. The shredder block should look something like this.
A recycling casing can be placed on top of the structure. This is necessary so that wood chips do not fly into your face and you do not have to clean the entire area. A ready-made branch chopper, made by yourself, can be of this shape.
A cord is connected to the motor. If it is three-phase, you can use star or delta circuits. It is also worth providing a 25A circuit breaker, just in case.
Materials
Used to assemble a garden unit:
- sheet steel from 0.8 to 2.5 mm for housing and receiving hopper
- steel angles, channels
- fastening elements
- engines from old machines
- belts, pulleys
- knives, circular discs
- Welding machine, grinder, electric drill, hacksaw, pliers, screwdrivers
- Hammer, wrenches
- Ruler or tape measure, marker
Step-by-step instructions and nuances of work
1.Select your own version of the mechanism
2. A diagram is drawn to fully represent the dimensions of the unit and its parts
3. The engine is selected: electric or diesel
4. All components are manufactured
5. The frame is assembled
6. The cutting part is installed in the main body, the choice depends on the thickness of the branches and the volume of work
7.Protects the motor and belt drive
8. The engine is connected, the operation of all elements is checked
If you have experience using a welding machine, grinder and drill, then the work itself will not create any special difficulties
A do-it-yourself branch crusher is easily created according to drawings from the remains of agricultural equipment, unclaimed sheets of iron and parts from old machines and machines.
The cost of the created device will be much cheaper than a new one
You can assemble and disassemble the mechanism, remake it if you don’t like it, improve it, add a strong engine, etc.
Grass cutter from trimmer
You cannot create a mechanism without tools: drill, screwdrivers, hammer, metal jigsaw and others. You will need a metal plate to carry out the work.
Preparatory activities:
- A frame is welded from corners in the shape of a square table, or legs made of metal tubes are simply bolted to the body
- Mark and drill holes in 4 corners of 1 cm and one in the middle, intended for the shaft
- Using a jigsaw, 4 holes are expanded to trapezoidal, the edges are processed with sandpaper
- A round fragment is cut out of steel mesh and attached to the bottom of the structure with pieces of boards using bolts or self-tapping screws
- The tubes for the legs are bent in a vice, the edges are flattened, and holes are drilled into them for connection to the body
Chopper assembly
- The engine from the trimmer (lawn mower) is attached with clamps.
- The rod is passed through the lower hole of the body and connected to the cutting part
The upper part of the receiving hopper must be covered with a lid or thick cloth. To prevent pieces or branches from flying all over the site.
Schemes and drawings
Before searching for components and assembling them, it is necessary to draw up a diagram or drawing of the chopper. This is necessary to avoid errors when assembling and operating the shredder, otherwise improper operation will lead to injury to the operator. When drawing up a diagram or drawing, all stages of grinding are taken into account:
- Loading the device.
- Grinding branches.
- Accumulation of crushed particles, as well as their removal.
It is not necessary to draw up a drawing according to ESKD standards; it is enough to correctly note the location of the elements and their dimensions. According to the diagram, a list of necessary components is compiled, as well as the order of assembly of the chopper.
In addition to drawing up your own drawing, you can use a ready-made one from the Internet. The advantage will be that all the nuances have already been thought out and reflected in the diagram. The disadvantage is that the drawing is prepared for other parameters: performance, type of branches. In addition, the finished drawings may contain elements that are not at hand - this will increase the cost of the project.
Universal grass cutter and corn sheller
I also made a grass cutter. I mainly use it to chop grass for poultry. The basis of the homemade product is a kilowatt motor made in the USSR. I bought it for 1400 rubles. Works great. The engine is three-phase, but converted to operate from a 220 Volt network.
Making a homemade grass cutter step by step:
- Holes were drilled and threaded in the flange.
- The knives were made from a piece of an old rusty two-handed saw.
- The knives were screwed to the flange.
- The grass cutter frame was made from a sheet of metal 4 mm thick. A strip of metal with a cross-section of 4x40 mm was welded to the square, which was bent in a circle. A hole was drilled in the center of the frame.
I bent the strip with a hammer, striking the metal on the jaws of a vice. The radius was controlled in a circle by drawing it on the bed.
At the finish, the user welded the legs to the base. Fixed the electric motor. I made a large tank with a lid so that debris would not fly out of the grass cutter while the engine was running.
The tank is removable for ease of use of the grass chopper.
Homemade electric shredder
You can make your own chopper if you have the necessary elements. The most practical is considered to be a branch crusher consisting of two shafts. For manufacturing, a drawing is created according to which the assembly is carried out.
Initially, the necessary material and tools are selected:
- electric motor with rated power up to 4 kW
- a pair of steel plates up to 10 mm thick
- two gears made of high-strength steel
- a couple of pulleys
- shafts, hardened and machined
- bearings for reliable shaft mounting
- direct cutting steel blades
- metal case
- steel pipe of the required diameter
- set of wrenches
- welding machine
- powerful drill or hammer drill
From a square blank we grind shafts on both sides. In the center we drill holes for 4 knives, threads are cut into them. The rounded edges are inserted into bearings. The drum is made from 4 studs and two steel plates in which holes are cut for the bearings.
Bearings and pulleys are firmly secured to the shaft, and gears are installed on the opposite side. We install the housing with the cutting mechanism and the engine on the pre-prepared frame. The transmission of torque from the drive will be carried out using belts through pulleys on the motor shafts and knives.
The receiver body is made of sheet metal, cut in the shape of 4 trapezoids. Using a welding machine, they are fastened together in the form of a truncated pyramid. The box is connected to the cutting mechanism body using a bolted connection.
Attention! Must be tested without load before use.
Garden shredder from washing machine
To assemble a branch chopper with your own hands, you need to carry out the following manipulations:
- The activator is removed from an old type washing machine.
- A pre-made knife is installed directly on the motor shaft.
- The size of the working tool is made slightly smaller than the diameter of the drum.
- A hole is cut in the lower part of the body from which the wood chips will spill out.
- The housing is attached to the hole.
This design allows you to process small debris, grass, or tops of small plants, with a relatively low power.
Homemade grinder grinder
Making a branch chopper with your own hands from a grinder is divided into several stages:
- We take a 20 liter bottle, cut off the bottom part, and enlarge the hole in the top. This will be the receiver.
- We pass the axis of the device from the side.
- We install the cutting element on top of the shaft and securely fasten the entire structure.
Important! When rotating the knives, the blade should not touch the walls of the receiver body. To start chopping, the branches are loaded from above and the grinder is turned on at minimum speed.
Trimmer crusher
For a branch chopper made with your own hands from a garden trimmer, you need to prepare the following necessary elements:
- container made of plastic or metal with a volume of up to 50 l
- several metal pipes with a diameter of up to 20 mm
- steel network with an area of about 1 sq.m. with a small mesh
- scrap of wooden board or plywood
- you need to purchase metal clamps for fastenings
- wooden blocks and screws for fastening them
- directly the trimmer itself of any design
As an auxiliary tool, it is recommended to prepare:
- screwdriver
- anvil
- drill
- jigsaw
- plumber's hammer
In order to make a chopper, you must follow the step-by-step instructions:
- Initially, prepare the container of the veterinary chopper. To do this, holes in the form of trapezoids are drilled and cut out at the bottom. The edges are processed.
- The mesh is secured to the bottom using bars. This creates a membrane.
- The container is placed at a low height using a pipe structure.
- The trimmer motor is mounted on the board.
- The rod of the device is shortened slightly and also installed on a base with a drive.
- A cutting tool is placed at the end of the rod.
- Before carrying out actual work, tests must be carried out. You can use different attachments to chop branches of different thicknesses.
From a walk-behind tractor
It is impossible to make a full-fledged main working unit from a walk-behind tractor; it only acts as an engine. To do this, you will need additional elements: drive, shaft. Tools such as a channel bar and a plane (electric) are suitable. In addition, you will need bearings and a pulley to operate the shaft. A walk-behind chopper is one of the most difficult devices to assemble yourself. It will be necessary not only to select a rotating device, but also to connect it to the walk-behind tractor, and also to design housing protection elements.
From circular saws
The most common grinding mechanism is disc cutting. Circular saws are used for assembly: 20-30 pieces per 1 chopper. They are located on the shaft one after another, due to which the entire width of the input “pocket” is filled. The spacing of the disks one behind the other must correspond to the required size of the crushed particles. Adjacent disks are positioned diagonally relative to each other so that branches do not slip past and are cut at an angle.
Twin shaft design
The most complex design is two-shaft. It uses only disc cutting elements, which are located in the housing on two shafts. Due to this, the chopper is able to grind large branches: first it pulls them in, and under the force of the discs on both sides, large pieces are crushed. The design is similar to a disk chopper, which is complemented by a second shaft.
The arrangement of the disks is chosen in a checkerboard pattern and diagonally to completely eliminate clogging and friction of the disks against each other. Shredders work on a similar principle: they place blades in several shafts that crush and cut the incoming raw materials.
From a drill
Many home craftsmen prefer a drill to washing machines and electric planers when making a garden shredder. The operating principle of such a device will be in many ways similar to a vegetable cutter. To make a structure of this type, the following steps will be required.
- Take an old stool. Drill a hole in it, its diameter should be 12 mm. On the other side of the stool, attach the housing part with the bearing.
- Place a bucket of suitable diameter on the stool and securely secure it with self-tapping screws.
- Insert the bearing into the hole. A shaft with steel knives installed will be placed on it. Closer to the end half of the shaft at the bottom of the stool, attach a dual-mode drill using a keyless chuck.
- Place soft materials into a fixed bucket and start the electric drill. After careful crushing to the required fraction, the mulch will need to be removed from the container. Please note that a unit with such a device will only be designed for a small amount of waste and debris.
Special attention should be paid to all stages of manufacturing and sharpening the knife. The sharpening must be one-sided. The ground base should be located at the bottom.
To chop freshly cut grass, it is advisable to use a knife whose shape follows a diamond shape (the blades should be slightly rounded). Thanks to this feature, the grass can easily slide along the cutting edge of the knife without wrapping around it.
From a plane
Many home craftsmen make reliable and practical shredders from certain planer parts. There are a lot of options for execution using this tool. Let's consider one of them.
When combined with elements of an electric planer, you can use a walk-behind tractor. The single combination produces a fairly powerful and productive machine. To assemble it you will need:
- electric planer knives;
- walk-behind tractor;
Branch crusher made from improvised means
Some craftsmen use ready-made devices as a basis, for which it is only necessary to make additional elements or parts. Instead of powerful stationary motors, you can use an electric drill or grinder. Let's look at the most common crusher manufacturing options:
From the washing machine
An activator-type “washer” is an excellent “semi-finished product” for making a homemade shredder. You will need to dismantle the activator and install a knife on the motor shaft, the size of which is slightly smaller than the diameter of the inside of the tank. The principle of operation of the knife is similar to that used in a coffee grinder - a horizontally mounted plate with sharpened edges. A hole is made in the lower side of the tank to which the outlet casing is attached. While the shredder is operating, wood chips will enter the shredder. The design is quite simple and reliable, tested many times in practice.
The washing machine motor has a low power, rarely exceeding 500 watts, so with the help of such equipment it is possible to chop only straw or grass
From the Bulgarian
To make a shredder from a grinder, you will need a metal container, in the central part of the bottom of which a hole is made for installing a knife. The axis of the grinder is passed through this hole, and a knife is installed on it. The tool itself is fixed in a stationary state so that the knife rotates freely without touching the walls of the container. The rotation speed of the tool is quite high, so it is recommended to set it to a minimum so as not to end up with a “puree” of green mass.
To make a shredder, it is recommended to use an angle grinder with a power of 3 kW or more
From a drill
In order to use a drill as a grinder, you will need a stand (usually it is recommended to use a regular stool with a 12 mm hole in the central part of the seat). A bucket with a similar hole in the bottom is installed on top; to keep it stationary, it is attached to the stool with self-tapping screws. The knife, the size of which is slightly smaller than the diameter of the bottom of the bucket, is mounted on an axle inserted into a bushing with a bearing. The sleeve is attached to the bottom of the stool. A drill with a self-locking chuck is attached to the axle and started. The device is suitable for processing green mass in small volumes.
A homemade shredder for branches or grass stems allows you to speed up the process of chopping material before putting it into a compost pit or oven, mulching the soil, and when carrying out other work. The costs of creating a shredder are much lower than the costs of purchasing a finished product, and many design options from scrap materials and elements allow you to choose the best option for a given estate. Considering the occasional nature of using such a crusher, making the installation yourself is a profitable and simple undertaking, and the efficiency of the shredder depends only on the thoroughness of the work.
Operating homemade equipment
From all of the above, we can come to the conclusion that making a garden shredder with your own hands is easy and simple. Almost any user can handle this. However, it is important not only to know how to assemble such equipment, but also how to operate it correctly. Let's consider the intricacies of using a homemade device.
- You should only start chopping branches if you are wearing safety glasses or a mask. You will need a hat and a tall pair of shoes. It is advisable to send branches into the machine with bare hands or with gloves, but very narrow and tightly fitting on the hands.
- Do not put your hands below the opening of the waste bin. If necessary, you can push through the debris with a further batch of rods. It is permissible to use a special stick for this, which has branches at the end.
- The dimensions of the branch that you send for processing should not be more than half the center distance between the shafts. When selecting wood particles that you plan to dispose of, it is very important to take into account the knives used in the technique.
- Experts recommend installing a separate differential automatic machine for such equipment. This part will protect the device from possible electrical damage if unforeseen circumstances occur.
- Both during assembly and during operation of a homemade mechanism, it is very important to adhere to safety rules. Take care not only to protect your hands, eyes and feet, but also to ensure that all parts of the shredder are securely fastened.
- When working with a homemade shredder, you need to ensure that no inclusions such as stones or glass, metal or plastic get into its receiving hopper. These elements should also not be present in the container during storage. They can seriously damage the structure of the device.
- Twin-shaft units are most effective at shredding raw branches. If you need to process elements of dense rhizomes, then they will need to be thoroughly cleaned of dirt.
- If the snare drum is jammed due to wooden inclusions stuck in it, then the device will need to be immediately disconnected from the network. It is permissible to remove stuck waste in the future only when the device is de-energized. Otherwise you will put yourself in serious danger.
- During operation of the shredder (either branded or homemade), it is very important to ensure that the power cable of the device is not in the area where crushed waste is emitted.
- If you want your homemade shredder to last as long as possible, then it will need to be thoroughly cleaned after each waste crushing job performed on the site. After this, the device should not be thrown outdoors. Select a shed for it or equip a shed.
- Make sure that the knives of the device are always well sharpened. Thanks to such care, using the device will be much easier and more pleasant, and its main components will not be subject to a large load.
Only if all the listed operating features are observed, can we talk about the durability and wear resistance of the shredder that you made with your own hands. Of course, the quality of all the components that you use during manufacturing also plays an important role. Treat this equipment with care and attention. Do not forget to constantly clean it so that crushed waste does not accumulate (in advanced cases, it can be quite difficult to remove it). In addition, you should remember about your own protection while working with this equipment.
Under no circumstances should you begin cleaning or repairing it while it is still plugged in.
Let's summarize the work done
A similar chopper for branches, as you can see for yourself, can be assembled from various “junk” - scraps of reinforcement, metal. The only thing worth spending money on is purchasing a good, high-quality trimmer disc. You shouldn't skimp on this detail. At the same time, the assembled unit has 2 undoubted advantages:
- It is completely safe for the operator.
- At any time when necessary, the grinder can be removed and used for its intended purpose.
Therefore, I recommend that those who are interested give it a try. After all, such branch shredders in stores are quite expensive.
I hope that my story will be useful to those who like to do different things with their own hands. If something remains unclear to you, ask questions in the comments. I will answer as soon as possible. It's a busy time, it's not always possible to find time like today. If you have any opinions about the article, I will also be glad to hear about them. Perhaps I did something wrong. Write about it in the discussions below. And if you liked everything, give it a thumbs up. To everyone who read to the end, thank you for your attention.
Safety precautions when working with homemade garden crushers
No matter how easy it may seem to use garden shredders, working with them can lead to injury:
- Always make sure that there are no small children near it when using a homemade shredder.
- Never load metal, glass objects, or construction waste into the unit.
- Do not put your hands inside during operation.
- If something gets inside or the size of the branches exceeds the power of the device, you need to turn off the engine and remove the unnecessary using some tongs.
- Always wear gloves, a protective mask and safety glasses.
- If the garden shredder is powered, it should be located as far as possible from water sources to avoid short circuits.
- Do not store homemade shredders in places unprotected from moisture or at low or high temperatures.
- Before using the shredder, always check its serviceability, reliability of fastening of parts, and integrity of the wires.
- After using the shredder, clean the body and blades of any remaining garden debris. Damaged knives should be replaced immediately with new ones.
Drafting
For example, we determined that a twin-shaft shredder with a low rotor speed is suitable for production tasks.
His project necessarily includes:
- engine selection by power;
- calculation of gear ratio and selection of factory model;
- determination of the diameter and length of the rotors (based on the size of the loading window);
- calculation of shafts for strength;
- selection of bearing supports.
To do this, you will need the textbook “Machine Parts” for universities. You will also have to look at GOSTs on threaded connections, reference books on gearboxes, bearings, couplings and other assembly units.
This must be taken into account when assigning groove dimensions.
After the calculations, it is necessary to layout the components on graph paper or in an editor such as AutoCAD, determine the dimensions of the body parts and the frame.
