Probably, any gardener sooner or later thinks about how to make his work easier on his plot. Various little things, tedious, repetitive work take a lot of time and effort. One of these types of work includes planting crops that have very small seeds.
It is no secret that radishes, carrots, etc. must be planted at some distance from each other in order to reap a decent harvest in the fall. And because of the small seeds of these crops, it is necessary to thicken the sowing, and after germination, thin it out, that is, spend more seeds in the spring only to then simply tear out up to 80% of the future harvest.
Methods for uniform sowing of seeds
Summer residents go to great lengths to at least slightly reduce seed consumption and ensure more or less uniform sowing of crops. Let's look at some of them.
- Mixing seeds with sand. This method assumes that “diluting” the seeds with clean river sand will ensure less consumption. The method does not always pay off, since it is necessary to ensure that the seeds are mixed evenly, otherwise, the same thickened plantings with obvious “bald spots” where only clean sand has got into the ground will be in the garden.
- Gluing seeds onto thin strips of toilet paper. This method involves quite painstaking work, which also cannot always be justified. If you are 100% sure that the germination rate of your seeds is high enough, then you can safely use it. And if not? All your work will go down the drain.
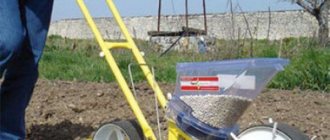
- Use of manual seed drills. Probably the most convenient method of planting, which does not require any preparation in advance and significantly saves both seeds and the cost of time resources. The only problem is that commercially available seeders are not very effective - they are usually primitive cones with latches through which the seeds fall unevenly.
It is much easier to spend some time in the winter and make a manual seeder with your own hands.
Devices for planting carrots
In country garden beds, carrots occupy a small area, so for planting it is enough to use improvised means.
Manual planters
An easy way to spread seeds evenly in the garden is to use common household items to help plant the seeds at some distance from each other. Manual carrot planter includes:
- medicine box with dispenser - sowing is done by squeezing,
- medical syringe - push version,
- old salt or pepper shaker - the holes are widened for planting.
It’s useful to know, read: — Choosing a manual seeder for small-seeded crops.
A do-it-yourself carrot planter can be made from different materials:
- from a plastic bottle: you can drill or punch a hole in the cap using a nail or screwdriver. For sowing, a tube is inserted and the seeds are mixed with sand. If you cook a paste from flour or jelly from starch, and then add seedlings to it, then the tube will not be needed;
- from a block: screw or nail bottle caps to the board at a distance of 1.5–2 cm. They squeeze out holes in the garden bed, fill them with seeds, water them and cover them with soil. If the lids are replaced with wooden pins 5 cm long, you will get a manual garlic planter;
- from a wooden rake: the teeth are fixed perpendicular to the ground, they are used to make holes in a loosened bed, and plant a vegetable.
Seeders for garden beds
A more convenient way of planting is to make simple devices. A do-it-yourself carrot seeder includes a roller and consists of a round body, an axis of rotation and a handle-handle. In the body, the central hole provides the ability to rotate around an axis, and the diameter of the holes is for planting crops. The handle sets the roller in motion, the body rotates, and the seeds fall out.
Note! When using a homemade roller, you do not need to bend towards the ground. The height of the handle is adjusted to the height of the person. Allows you to plant other crops with small seeds.
A manual carrot seeder, made with your own hands: metal tubes that are bent at an angle depending on the height of a person are suitable for the work; the container for grains is made in the form of a cone or funnel from a sheet of iron. A hopper (one or several) with the top down, wheels and handles are attached to a metal axle.
Types of seeders
All manual seeders are divided into several types:
- garden;
- fertilizer;
- grain-cereals.
Garden (vegetable manual seeders) are designed for sowing crops in personal plots.
Fertilizers - used for spreading mineral fertilizers and lime.
Grain-cereals - intended mainly for planting grain on large agricultural fields.
The seeder can also be single-row or multi-row. From the name it is clear that such seeders, when sowing, “scatter” the seeds in one or several rows at the same time.
Purpose of a manual seeder
The basic requirements for any seeder, whether store-bought or home-made:
- uniform distribution of seeds along the entire length of the row;
- reduction of seed consumption;
- sowing seeds to a given depth;
- gentle planting without damaging the seed.
Below we will look at examples of such seeders that you can make yourself.
Universal hand seeder
It is a box with a movable insert into which seeds are poured. Depending on the area of the proposed planting and the number of seeds required, it can be a matchbox, a school pencil case, a box for some kind of toy, etc. At the bottom of this box, a hole of the required diameter is drilled or pierced (approximately the size of the seed) .
When planting, you just need to tilt the hand seeder in different directions so that the seeds fall into the hole. This is, so to speak, the most primitive example of a manual seeder.
It can be slightly improved by placing a spring or elastic band between the walls of the movable insert and the main container and drilling two holes in the top and bottom of the container. In this case, the upper hole should be slightly larger, and the lower one should coincide with the diameter of the seed. In this case, the holes in their normal position should not coincide with each other. In this case, you can pour any number of seeds into the upper container: by pressing on it and aligning the holes, you will move a small amount to the lower compartment for planting. The entire sowing procedure will consist of simple steps: tilt – press – move – tilt – press.
For such a manual precision seeder, you can not only adapt some available means, but make it out of plexiglass, polystyrene, even plywood (in this case, the plywood needs to be thoroughly “cleaned” so that the seeds do not cling to uneven edges and fall out without problems). But it’s better if the top is transparent in order to monitor the number of seeds.
Such a manual seeder can be made not just one, but several with different hole sizes for different crops.
Rules of application
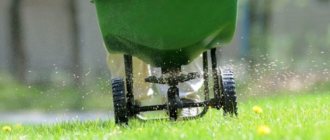
It is recommended to sow the lawn in dry soil in calm weather. Before you start sowing, you need to loosen it with a fan or regular rake and level it. The surface soil layer must be compacted with a roller or roller.
The operating principle of the hand-held device is very simple and looks like this:
- Pour the seeds into the hopper.
- Operate the seeder using pushing movements while simultaneously rotating the handle.
For maximum uniform seeding, you can use the cross method. To do this, the number of seeds must be divided in half: one half should be sown lengthwise, and the other half crosswise.
Important! To prevent the crops from being dense and the seeder from clogging, you should not immediately pour a large number of seeds into the box. It's better to add them gradually.
The principle of operation of mechanical devices is the same as that of manual ones. But you don’t need to turn the handle in them. The diffuser is activated by pressing a button. Adjustment of the dispenser occurs without much effort. Professional machines are controlled using levers and buttons. After the seeds are scattered over the area, the ground must be leveled with a rake, covering them with a layer of 5 mm. It is also recommended to carry out compaction.
So, you can get the perfect lawn at your dacha if you sow it using a seeder. For small areas, hand-held devices are suitable, which you can buy or make yourself from improvised means. If you have to cover a large area with a grassy carpet, then it is better to purchase a mechanical unit.
Manual carrot seeder
Another example of a manual seeder for small seeds, such as carrots. To make it you will need:
- A piece of electrical box.
- Micromotor with eccentric.
- Battery.
- Button.
Install the motor, battery and button in series on the box, connecting them to each other. It works quite simply. By pressing the button, we activate the motor, which runs on a regular battery. The motor turns the eccentric, which scatters small seeds over the surface of the soil with air currents. With a little practice, you can achieve good seeding uniformity from this manual seeder.
Manual seeder for large quantities of seeds
It is perfect for sowing lawn grass, although if you make it small, it will also serve as a manual precision seeder for seeding any crops. To make it you will need:
- seed box;
- shaft with recesses for seeds;
- wheels.
The principle of operation of such a seeder is that when the shaft rotates with wheels, a seed falls from the box into a recess on it and as they rotate, they alternately pass under the box and fall into the ground. The distance between landings will be determined by the distance between the notches on the shaft.
Such a seeder can be made from sheet iron by soldering the necessary parts together. The distance between the box and the sleeve should be minimal, which will prevent a large number of seeds from falling out. It is enough to make recesses for small seeds of 0.4 mm, for larger ones - 0.6 mm.
It should be said that making such a manual seeder with your own hands is not entirely easy; you need to have not only the materials, but also certain knowledge. To achieve the greatest efficiency, you can take an industrially produced seeder as a basis and use its design to make an independent version.
Constructions
All models introduce seedlings into the ground; they differ in the method of sowing. Spreaders and planting equipment are provided.
Operating principle of spreaders
There are two types of spreaders:
- Manual: seeds pour out through the holes when you turn the handle of the device; there is a built-in distributor inside. The ability to adjust the diameter of the holes allows us to classify the devices as universal. Usually made of plastic. They are used for spreading fertilizers, but mainly as a manual lawn seeder.
- Mechanical: there is no motor, but there is a moving part. Seeds fall into the ground by periodically pressing a button on the handle while moving. One or more containers for seedlings are attached to the axis.
The main disadvantage of spreaders is the unevenness of sowing, so they are rarely used for vegetables, more often as a disperser for lawn grass.
Precision Fitting Devices
To uniformly sow vegetables, precision sowing devices are used, created on the principle of transmitting torque from the wheel to the shaft:
- Simple: the device moves, the shaft with recesses rotates, the seed from the cone-hopper falls on it, lingers in the recess, and then falls into the prepared groove with a given step. The seeding density depends on the distance between the recesses.
- Complex: the principle of operation is the same, but additional devices are added. Blades or spikes are attached to the front wheel to create grooves during movement, while the rear wheel is made level, which allows you to level the ground after landing. The supply of seeds to the shaft is regulated by a valve, and the seedlings move from the hopper along a special spout .
They are suitable for crops with small seeds, just like a seeder for regular lawn grass.
Note! The device allows you to work in a comfortable position, increases the sowing speed, and the seeds are distributed evenly.
Recycled materials, jars or plastic bottles will be useful when making a simple version of the product, and iron sheets, wheels, etc. will be needed for complex designs.
Manual beet seeder
Let's look at another way to make a manual seeder for larger seeds, such as beets.
Making such an “assistant” will require a minimum of knowledge from you. So, we need:
- a plastic transparent jar, for example, from canned fish;
- a bolt that will serve as a shaft and rotate the container with seeds (plastic jar);
- a plastic tube, the length corresponding to the depth of the jar;
- the metal tube is slightly narrower than the diameter of the plastic tube;
- washers to secure the container;
- a metal plate for making a door that will cover the hole through which the seeds are poured (a tin from a tin can will do);
- aluminum wire;
- cutting of the required length.
Let's make a seeder from a plastic bottle
This seeder is inexpensive and simple.
Prepare a used plastic bottle and tool. A suitable bottle will be the one that suits you in volume: 0.5 liters, 1 or 2 liters.
Holes in the bottom of a plastic bottle can be drilled or pierced with a hot nail. To avoid getting burned, hold the nail with pliers over a fire or heating device. Holes must be made all over the bottom: first, a little and check by pouring the seeds, shake over the pan, if this is not enough, do more.
See the diagram for hole diameter:
Manufacturing
- Drill a hole right through the middle of the plastic jar, and make another one on the side to fill in rectangular or triangular seeds.
- Make a lid from a tin that will cover the second hole. Make sure that it fits tightly to the jar and that the seeds do not spill out through it. It is best to secure it at the bottom and leave the top part movable. To add the seeds, you only need to slide this lid.
- Insert the metal tube into the plastic one and place it in the center of the jar, making a kind of shaft on which the jar with seeds will rotate.
- Secure these tubes with a bolt, placing washers on both sides so that the container rotates freely.
- Using a hot nail, we make holes of the required diameter at the required distance along the side of the can. It is clear that these sizes will depend on what crops you will sow with its help.
- The seeder is ready, all that remains is to screw it to the wooden handle. For greater efficiency and automation, it can be placed on the front of the chopper. In this case, after sowing, you will immediately cover the seeds with soil using a hoe.
Precision seeding mechanism
An important task of using seeding structures is to ensure uniform planting . To plant seeds in the ground at a strictly defined distance, manual precision seeding drills are used; these mechanisms are easy to make with your own hands, just like the simplest devices described above.
Design
The device consists of one or more containers with seeds, a frame on wheels, and a control handle. To independently manufacture such a unit, you will need a turning tool or a drill to drill metal sheets, the thickness of which is approximately 1 or 2 mm, and the diameter is about 5-8 mm.
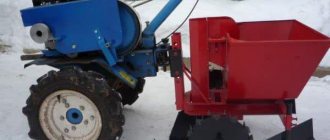
When planning a connection between a seeder and a walk-behind tractor, it is better to use rigid bolts that are more vibration-resistant instead of rivets . The front wheels are designed to form furrows in the beds, where the seeds fall from the hopper. Using the rear wheels, the resulting holes are filled with loose soil.
The basis of the precision seeding design consists of a rectangular metal frame. Containers are attached along the edges into which seeds are loaded. It is recommended to buy the blocks necessary for turning the shaft separately, since it is very difficult to make them yourself without special skills and tools. For example, containers that are used in conventional manual seeders or in conjunction with walk-behind tractors are perfect.
The precision seed drill is driven by reversible wheels, which also adjust the height of the head, designed to get the seeds into the ground . Each container must be secured separately. The wheels are connected on a springy and rigid base.
The sowing unit is a container in which the seeds are placed. When the seeder is dragged along the ground, a mechanical wheel with blades, also located in the container, is activated. At the end of the container there is a narrow slot where only one unit of planting material can be placed, so seeding is uniform and very economical. The size of the hole can be changed to accommodate seeds of different sizes.
Operating principle
When working with a manual precision seeder, first do the assembly, move the handle to the working position, and put the rear wheel on the axle. The marker can be adjusted if necessary. Depending on the crop being sown, a disc of a certain size is installed in the hopper. The depth of the chalk is adjusted to the size of the seeds.
This device forms the required depth of the holes. When the seeder is put into action, the front wheel of the structure begins to spin; with the help of a belt drive, the rotational movement is transmitted to the disk, which captures the seeds from the hopper.
Using a marker, smooth planting rows are formed. It is often recommended to carry out the first sowing along a certain contour for a more uniform distribution.
DIY making
The bunker container must be made of plastic. This makes it easier to visually control the number of seeds poured. Take the following components:
- A bolt that will be used as an axis on which the seed-filled container will rotate.
- A plastic pipe equal in length to the dimensions (depth) of the bunker. Steel pipe of the same length.
- Aluminum wire.
- Washers for fixing the pipe.
Assembly is a step-by-step process. Let's describe the algorithm :
- A through hole must be drilled in the center of the selected plastic jar. The cover is removed and an additional hole in the form of a rectangle (through) is made in the side wall. The hopper will be filled with seeds through it.
- We install a plastic pipe in the center of the jar to prevent the seed from spilling out. A steel pipe is installed into it, a bolt and nut are screwed in. The rotation mechanism is ready.
- On the side of the hopper, points are marked for holes at a distance of 30 mm. They are then pierced with a hot nail. The seeds should fit into the holes.
- They make a handle. A through hole is drilled in the wooden handle at the end. Using a bolt and nut, attach the handle to the seeder.
- To automate the process, a device is made from an iron sheet to fill planting holes with seeds.
- The workpiece is attached to the handle above the seed hopper.
The device is ready. Before starting sowing work, it is recommended to prepare the site and loosen the hardened soil.
Advantages and disadvantages of homemade manual seeders
It is clear that the main advantage can be considered that a simple seeder can be made very easily from scrap materials with minimal monetary costs, and sometimes without them at all.
But simple manual seeders are designed for sowing only one type of crop, or more precisely for one size of seeds. Making a universal hand seeder that fits all sizes is quite difficult and requires certain knowledge and skills in working with metal or plastic.
Store-bought seeders are basically all the same type; they differ only in the method of feeding seeds; the hole sizes are almost the same. You can independently make devices with different diameters, suitable for all types of garden crops, and almost completely automate the sowing process.


