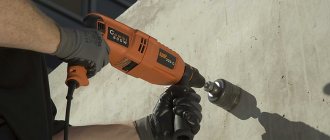
Ceramic tiles are one of the most practical facing materials for the bathroom. Its advantages include ease of cleaning, protection from mold, resistance to wear and chemicals, while its disadvantages include difficulties in installation, dismantling and drilling holes for shelves, pipes and plumbing fixtures.
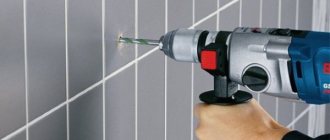
Before drilling tiles on the bathroom wall, you need to prepare the surface and firmly fix the drill: this will avoid accidental impacts and increase work efficiency.
Difficulty drilling tiles
The difficulty of drilling ceramic tiles is due to the following nuances:
- Risk of splitting due to shock and vibration. Effective drilling tools operate by rotating and impacting. Impacts from a hard tip and rotation at speeds of more than 1000 rpm lead to the formation of small and major cracks in the tiles.
- Drill slipping from the surface. The surface of each cladding element is covered with glaze, which provides protection from moisture and abrasion during cleaning. At low rotation speeds, the tool may slip off the coating.
- The formation of chips on the edges of the tiles. The edges of the tiles are characterized by increased fragility, because do not have a protective coating. Breaking off the surface of the glaze, the drill jumps into the seam and forms a crack at the edge. If the required recess is located near the corner, then there is a high risk of the segment breaking off.
- High labor intensity of the process. Despite its increased fragility, ceramics is a fairly strong and hard material. Limiting speed places increased demands on physical strength, the professionalism of the craftsman and the quality of the drills.
- The need to use multiple tools. To make the hole you will need a tap or hammer, a drill with a carbide bit, and a drill bit for concrete under the tile. Large diameter holes are made with a grinder, a drill in combination with glass pliers, a ballerina and other devices.
Processing tiles with improvised tools
But not everyone has a drill or an electric jigsaw at home, what to do then? There are ways that allow you to make a hole in the tile using a regular glass cutter and pliers. To do this you need to follow the instructions:
- We make markings and outline the outline of the hole.
- Use a glass cutter to trace the outline, creating a shallow furrow.
- Tap the surface with the head of a glass cutter to make the groove deeper.
- Use pliers to carefully break off the cut section piece by piece.
- We sand the edges with sandpaper.
Using special drill attachments
If you have special attachments for your drill, the work will be simplified several times. Some of them, such as the ballerina, have already been mentioned earlier. As a rule, they have a central drill and cutter. The sequence of actions when using them does not change.
Using a Diamond Core
A diamond crown is an expensive, but reliable and durable tool. It is designed for repeated use, and the diamond coating will make the work quick, accurate and efficient.
Drilling tiles that have not yet been fixed to the wall
You can also drill ceramics before they are fixed to the wall. To do this, you should adhere to the following operating algorithm:
- Leave the tiles in water for half an hour before starting work.
- After this time, we transfer the tiles to a flat surface, it must be wood or concrete; you cannot drill tiles on a metal surface.
- We fix the tile in this position and mark the center of the future hole.
- We start drilling, carry out the work starting with low speeds, gradually increasing the speed.
Rules for drilling ceramic tiles
To avoid cracking ceramic tiles, the following rules must be observed when drilling:
- Before the process, wipe off dust and dry the finishing area;
- firmly fix the drill in the drill chuck to avoid slipping and tangential impacts;
- cover the treatment surface with paper tape or masking tape to create a rough surface;
- place the holes at least 15 mm from any edge of the tile;
- if there are microcracks or defects in the glaze, it is advisable to seal the entire surface of the element with construction tape to strengthen the coating;
- hold the tool correctly: perpendicular to the tile, without excessive pressure, but with a firm hold;
- drill only clockwise at a speed of 700-900 rpm, do not use the reverse rotation mode;
- when using a hammer drill, work only in non-impact mode (special drilling heads and a shock blocking toggle switch are designed for this);
- Do not allow the drill and tile to become too hot; during work, take breaks for 5-10 minutes or cool the tool with water or machine oil.
You can drill holes of the required diameter both before and after laying the tiles. The first option reduces the risk of cracks, but is more difficult to implement.
To drill out loose cladding, you need to lay it on a hard, flat surface (for example, a wide board) covered with shock-absorbing material. It can be fabric folded in 1-2 layers, or a backing for laminate.
The safest tools for making holes in tiles include:
- hand drill (low productivity);
- low speed electric drill;
- screwdriver (it is recommended to choose a cordless device);
- hammer drill with drilling head.
Drills for ceramics have high hardness and abrasive coating.
Marking
An important stage in drilling tiles is preliminary marking. To do this, many people use stencils, adhesives, masking tape, and even paper tape. Stencils are cut from a sheet of plywood or chipboard.
It is also important to determine at the installation stage where the hole will be in the tile. To do this, it is specially necessary to move the tile so that the hole is exactly in the center of the tile. This reduces the likelihood of cracking. In addition, it creates an aesthetic appearance.
How to make markings with tape or adhesive tape? We mark on it the points at which we will drill (we calculate in advance the correct distance between them, height, etc.), after which we attach the tape to the right place and begin work.
Drilling small diameter holes
Holes with a diameter of up to 12 mm are made with spear-shaped and tubular drills. If they are not available, you can use a drill or concrete drill with a pobedite alloy tip.
Drill or drill bit with pobedit tip
Drills with tips made of hard alloys (VK4, VK6, VK8, etc.) are designed for drilling homogeneous materials with high compressive strength: concrete, brick, etc. According to their configuration, they are not very suitable for drilling tiles, so a number of rules must be followed:
- use only new drills and drills;
- monitor the temperature of the drilling tool during operation;
- center the tip using a portable jig or a block with a hole of the required size;
- Do not use pobedit drills for porcelain tiles.
In the absence of a jig, the drills slide into the seam between the facing elements.
Drill spear
Spear drill bits with carbide tips are designed specifically for tiles. They have a spear point with 2 or 4 blades and a shank with 4 or 6 edges. A two-blade drill can be sharpened at home.
To center the drill, you do not need to damage the glaze of the tile: just lightly hit the back of the drill or screwdriver installed perpendicular to the surface. The spear-shaped tip is not suitable for drilling brick and concrete, so after passing through the tiles it must be replaced with a Pobedit drill bit.
Tubular drill
Tubular drills are made of durable metal with a diamond coating on the working surface. Depending on the form they are divided into:
- classic - tubes with an opening to remove crumbs and dust from the working area;
- sector - with a tip that has a cut sector with an angle of 30 degrees.
Tubular drills are suitable for working with tiles and porcelain stoneware. When preparing the surface, you need to mark not the point of application of the tip, but a full-size hole.
At the beginning of work, the tube is installed at an angle of 45 degrees, and as it is drilled, it is directed perpendicularly. After breaking through the ceramic layer, the tubular drill is replaced with a drill for concrete or brick.
Drilling algorithm: step-by-step instructions
First of all, you need to mark the center of the future hole with a marker or felt-tip pen. Next, we proceed directly to drilling a hole in the ceramic tile.
Important! It is necessary to cool the drill first by dipping it in cold water. This will help avoid overheating and cracking the enamel.
The main difficulty that many encounter is the drill slipping. How can you easily make a hole in a tile for an outlet and avoid this?
There are three main ways:
- A method that is not recommended to be used, but it can be done, is to knock off the enamel at the desired point, tilt the tile, or use a screw to make a small conical depression. We place the tip of the drill in this hole, it will be held steadily in one position, and drill the tile.
- When working, you can use a jig; this is a bar with holes of different diameters. It is applied to the wall in the right place, pressed very firmly against the surface of the wall, and they begin to drill through one of the holes.
Important! If you don’t have a conductor, making one yourself is not difficult. Just make a hole in a wooden board and use it.
- Place an adhesive plaster or mounting tape at the drilling site. They will help hold the drill while passing through the enamel layer, and will also help mark the desired point on the surface.
- If there is office corrector in the house (a white product for shading errors, sold in a bottle or in the form of a pencil), apply it to the surface and wait until it dries completely. The product creates a slight roughness on the tile, which allows the drill to hold steadily at the desired point.
To prevent the drill from slipping, simply use masking tape or electrical tape
Drilling large diameter holes
To obtain a large diameter hole, you can use an angle grinder with an abrasive disc, a multi-tool (renovator), an engraver and a special tile bit.
In the absence of special equipment, the opening can be drilled around the perimeter, cut with a hacksaw or circular tile cutters.
Angle grinder with diamond blade
The hole for the sewer pipe can be cut using a diamond blade with a diameter of 115 mm. Grinding with a grinder (angle grinder) is performed from the front side of the tile, the working surface of the disk is located at an angle of 45 degrees.
Instead of recessing, you can use the straight cutting technique. In the marked opening, 2 cuts are made crosswise, and then a square is cut out along them, inscribed in a circle of the required size. Remains of ceramics are removed with side cutters.
The cut surface is processed with a file or sanding paper.
Engraver
The engraver allows you to get precise and clean holes of any diameter. A milling tool attachment is suitable for producing large holes.
Crowns
Crowns are the main device for making large holes in ceramics and porcelain tiles. The working edge is covered with an abrasive material - tungsten carbide or diamond chips. A central drill may be located inside the crown, fixing the attachment relative to the surface.
The cost of such attachments is an order of magnitude higher than carbide drills. The price depends on the manufacturer, edge shape, diameter, presence of a central drill and other parameters.
Hacksaw
A hacksaw is used in combination with a thin drill. The saw blade is inserted into a small hole made with a carbide tip. This method allows you to cut openings of complex configurations, but requires precise following of the contour and a lot of time.
For sawing you will need a diamond-coated string. Metal blades are too ductile for cutting ceramics.
Ballerina
A hand ballerina is a tool with two points that operates on the principle of a compass. The central part is firmly fixed on the surface of the tile, and the side part extends to the length of the radius and moves in a circle. This device is often supplied with a tile cutter.
The ballerina drill has 2 peripheral points and 1 central point for fixation on the surface. The recommended operating mode of the drill is no more than 500 rpm.
Multifunctional tool
Unlike drilling tools, the renovator operates by oscillating rather than rotating. The spindle of the device deviates from the central axis by 3-4 degrees, which allows you to effectively mill the cladding, but avoid the destruction of fragile materials.
Drills, diamond-coated flat hammer attachments and saw blades are suitable for working on porcelain stoneware and tiles.
Budget renovators are suitable only for a single application: for example, drilling 3-4 holes for sockets or pipes. With prolonged use, the bits quickly become dull, so it’s worth purchasing a diamond bit.
Drilling around the perimeter
In the absence of an angle grinder, tile cutter and renovator, you can use a spear-shaped or tubular drill. The outline of the future hole is applied to the surface of the glaze, along which small holes are drilled. They should be located close to each other and touch the markings only tangentially. If you install the tip on the contour itself, the resulting opening will be larger in diameter than necessary.
After drilling around the perimeter, the middle is removed, and large irregularities are chipped off with pliers and sanded with sandpaper.
Selecting a drill for installing a pipe socket
Conventional drills are not suitable for this task. It is recommended to use special centered drill bits. A diamond-coated crown or ballerina crown is best.
If the pipe is covered with a large grill, then nothing special is required; the corners of the tile can be cut off with a grinder
Drilling large diameter holes
This is a complex and painstaking work that is performed according to the following algorithm:
- We mark the center of the future hole and place a bit of the required diameter on the drill.
- We place the drill in the center and start drilling at low speeds.
- As soon as the enamel layer has been passed, you can increase the speed slightly, and when the entire tile has been passed, we stop drilling.
- Next we use a hammer drill. It is important to do all work carefully.
Drilling with a crown To form a large hole, this tool is considered the most effective, but also the most expensive. When drilling ceramics using a crown, it must be constantly cooled with water, because the product overheats very quickly. The effectiveness of this method is due to diamond coating on the crown, which makes drilling faster and more convenient.
There is also a more economical version of a core drill - a product with a serrated edge made of hard alloy, which can reach up to 15 cm in diameter.
The crown must be cooled so that the tile does not crack and the crown does not break.
Drilling by ballerina
When deciding what to drill into ceramics with, many people choose ballerina. It consists of a central drill of small diameter and an adjustable leg, which is moved away from the center to a certain distance and determines the diameter of the hole.
It is important to remember that installing the ballerina's leg adjusts the radius, that is, half the diameter of the circle, which is important when working. After installing it, you need to tighten the screw firmly so that the leg does not move to the side during operation.
It is necessary to drill using a ballerina at low speed, without leaning on the tool. Due to strong pressure, it may jam. The device must be held at a strictly 90 degree angle.
Also, when working, you need to pay attention to the fact that the depth of the slot around the entire circumference is the same. It often happens that after work a small section of the tile remains uncut, then it must be carefully broken off with pliers. The uneven edge is then smoothed over with sandpaper.
Choosing the right tools
A hammer drill and an impact drill are bad assistants when working with finishing tiles. They are used later, when a hole has already been made in the tile itself, and then comes concrete or brick. For these purposes, it is better to use a hand drill. It regulates the rotation speed . The drill should enter smoothly: without jerking or vibration.
Tips for working with tiles are different from tips designed for other materials. Special drills for tiles or glass are required . Most of them have an abrasive coating, thanks to which, with the help of friction forces, the tiles are drilled. The speed and ease of drilling the material, and most importantly, the absence of chips and cracks on the tiles, depends on the correctly selected nozzle.
Diamond drills
These tips are spear-shaped and have a special feature: diamond coating covering the tip. This coating greatly increases the service life of the drill and the hardness of the working surface of the tip.
These tools are used by professionals in their field: work with them is done quickly and without overlaps. Diamond cutters are the most effective, but also the most expensive. For masters of various repair work, this is a quick-payback purchase.
However, there is an affordable manufacturer of diamond cutters and crowns -. An analogue of diamond-coated end switches are drills made from pobedite. They can also be purchased at a good price.
Tubular diamond bits
They, just like drills with tapered tips, make the master’s work quick and easy to use.
This set, of course, is not cheap, but the purchase will serve a professional repairman well, saving him time and ensuring the quality of his work.
These crowns are convenient for making holes for sockets; they are also used to make room for a pipe or faucet. They come in various diameters. Below are prices for different brands of diamond bits.
| Brand | Manufacturer country | Diameter (mm.) | Price in rubles | Notes |
| "Practice" 777-215 | Russia | 5 | 110 | Set contains 2 pieces. |
| "Santool" 031930-006 -070 | Russia | 6 | 123 | |
| "Dewalt" DT6039QZ | USA | 7 | 539 | |
| "Bosch" 2608550611 | Germany | 14 | 1269 | |
| "Practice" 777-246 | Russia | 10 | 170 | Set contains 2 pieces. |
| "Practice" 777-314 | Russia | 35 | 290 | |
| "Practice" 777-369 | Russia | 65 | 550 |
Working with such limit switches has a number of features:
- The drill must be immersed in water frequently to avoid overheating. Otherwise, it will quickly fail;
- A screwdriver or drill must operate at low speed.
These conditions will extend the life of the tool. The new diamond bur can drill through tiles in 2-5 minutes.
Spear-shaped cutters and specially sharpened
Some tile drill bits have spear-shaped tips like diamond bits, while others have a flat tip with sharp edges. They are made from heavy-duty materials. Using such cutters, small holes up to 12 mm are made. They are used to hang wall furniture, mirrors, etc.
Lance-shaped pobedite cutters are more affordable than diamond drills. Of course, they are significantly inferior in service life, but one tip is enough to drill holes in the bathroom and kitchen. The tile for this should be tile or ceramic. If you use a cutter when working with porcelain stoneware, it will make 4-5 holes and fail. The spear-shaped tip is very sharp , so the drill easily enters the tile and does not slip off.
- Don't forget to sharpen the tip.
- With such a cutter, it is necessary to operate the drill with speeds up to 500 rpm and not exceed this limit.
| "Skrab" 30282 | China | 12 | 680 | Hexagonal |
| "Practice" 038-456 | Russia | 5 | 70 | Hastate |
| "Stayer master" 2986-05 | Germany | 5 | 80 | Hastate |
| "Stayer profi" 2985-04 z01 | Germany | 4 | 140 | Hexagonal |
| "Course" 35455 | Russia | 8 | 253 | Hastate |
| "Graphite" 57H261 | Poland | 6 | 265 | Hastate |
| "AEG" 4932363866 | China | 6 | 350 | Hastate |
| "Zubr" 29845-10 "Expert" | Russia | 10 | 290 | Hexagonal |
Tungsten core bit with center drill
It is used mainly on laid tiles, but it is possible to drill tiles that have not yet been installed. This tungsten bit can be used to drill a hole without damaging the installed tile if you are careful. This type of crown is also used for drilling out places for pipes and sockets.
- Before work, the tiles are soaked in water to avoid possible damage.
- During work, the tiles are also moistened with water - this will prevent the tiles from cracking from overheating. The crown is cooled in the same way.
- To prevent the centering drill from slipping, glue masking tape to the ceramic tile and mark the hole for the future hole.
- Be careful and work at low speed.
With low drill speeds and careful use of bits, they are capable of making up to fifty holes in such a hard material as porcelain stoneware over the entire period of their work. Their disadvantage is the inability to adjust the hole diameter. But on sale there are the most popular sizes for sockets, switches, etc. Crowns can be purchased in a set of 4 or 5 pieces.
| "KWB" 4994-03 | China | 33 | 230 | |
| "Hurricane" 902-2123-089 | China | 89 | 400 | |
| "KWB" 4994-05 | China | 53 | 621 | |
| "Santool" 031935-004 | Russia | 33/52/67/73 | 1528 | Set of 4 crowns |
| Vorel 3301 | Poland | 33/52/67/73 | 1730 | Set of 4 crowns |
| "FIT" 16510 "Profi" | Germany | 33-83 | 2654 | Set of 5 carbide bits and carbide file |
| Hurricane 902-2623-102 | China | 102 | 349 | |
| "KWB" 4994-04 | China | 43 | 579 |
Ballerina
Unlike tungsten crowns, the diameter of the “ballerina” crown can be changed. The distance from the central to the side cutter is adjustable. With this drill it is possible to make holes starting from 20 mm and ending with 130 mm. The operation of a drill is reminiscent of describing a circle using a compass.
This is a very capricious instrument. Beginners will have difficulty working with this drill, as its use requires skill. After drilling, the “ballerina” leaves uneven edges. If the hole is covered by decorative elements, then this drawback is insignificant. When drilling large holes, the drill bit is difficult to hold in place due to the rotating side cutter.
| "Course" 1628 | Russia | 30-100 | 408 | |
| "Hammer" 202-408 DR GG BN | Germany | 21-90 | 350 | |
| "Fit" 16532 | Germany | 40-130 | 510 | |
| "Biber" 55502 | Germany | 30-90 | 440 | |
| "Santool" 032511 | Russia | 20-94 | 893 | With protective grille |
| "Matrix" 88340 | Germany | 20-94 | 845 | With protective grille |
| Legionnaire 32342 | China | 20-94 | 750 | With protective grille |
| "Stayer master" 3230 _z01 | Germany | 20-90 | 235 |
Features of markings on glossy tiles
The installation procedure for making grooves is divided into several stages. First, at low speed, a hole is drilled in the ceramic decorative material. Then a groove is made in the wall or floor covering. Regardless of the design of the drill, you should check how carefully the cutting edges are sharpened.
It is almost impossible to mark carefully polished tiles with a lead pencil or felt-tip pen, so this operation is carried out using strips of adhesive tape or narrow tape.
How else is it possible to drill through tiles?
When deciding how to drill tiles in the bathroom, many are faced with the problem that they do not have the necessary equipment in their working arsenal to perform such work. Then you can use a regular metal drill, changing the sharpening angle, making it more blunt. This tool will not last long and you will soon need more.
We also recommend watching - How to cut tiles without a tile cutter: a selection of simple methods
Can I drill with a screwdriver?
In a desperate situation, if desired, holes in the tiles can even be made using a hand drill. So a screwdriver will even cope with this task, provided that it has enough power and battery charge.
However, before you start working with this power tool, you need to take into account that it will not be able to drill through concrete and strong brick. That is, it can be used for ceramics glued to drywall or foam blocks. If the wall is hard, you will need a more powerful tool.
General tips and tricks
Drilling in tiles (porcelain tiles) with a drill or screwdriver is a rather labor-intensive process. It requires the contractor to spend time and nerves.
The fact is that the ceramics from which the wall and floor coverings are made are hard, but at the same time fragile. If you press in the wrong place, it can crack, which will be very unpleasant, especially if it is expensive and there is only a single quantity left.
To prevent such troubles from happening, here are some practical tips on how to do the work correctly so that the material does not crack and remains suitable for completing the planned finishing of the bathroom. They will include both organizational and executive issues:
- Set up a place for tile processing. To do this, you will need a durable and stable surface, a substrate in the form of MDF or chipboard, which you don’t mind spoiling. The supporting surface should not wobble or vibrate. If this condition is not met, then there is a high probability of marriage almost immediately at the beginning of the process.
- The tool must be selected with a high-quality and still intact cutting edge or diamond coating. It is better to buy a new core bit or drill to get a hole with smooth edges without chips.
- When guiding the power tool during drilling, the feed should be uniform and smooth. Jerking and shaking are not allowed.
- If the facing material is sufficiently hard, then it is recommended to use cooling to improve the passage of equipment through it. Use ordinary water and periodically water the drilling area.
Have you ever drilled holes in tiles?
Not really
Little tricks
When performing drilling work on ceramic tiles, it is worth considering several tricks that will help you complete the process:
- To prevent the tile from splitting during drilling, fix it and seal the affected area with masking tape.
- While doing the work, do not put pressure on the tool and do not rush, because careless movement may damage the tiles.
- Do not reverse as this may cause splitting.
