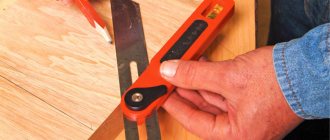
A miter box is an irreplaceable tool during construction work, which is very convenient to use. It is used for precise cutting of boards and other materials at any desired angle. When producing a wooden frame, trimming casings and other works, such a tool is indispensable. It allows you to make a perfectly even angle. That's why many people try to do it themselves.
Making your own miter box
The miter box is sold in special construction stores and departments; its cost is unpleasantly surprising due to its excessive cost, and its strength indicator leaves much to be desired.
However, if you wish, you can get out of the situation and try to make the instrument yourself. What is the purpose of the miter box? First of all, for cutting material, if it is necessary to maintain an inclination angle of 45 degrees. For example, beginners often encounter a problem when they need to cut the baseboards on the ceiling in this way for subsequent installation on the outer and outer corners of the room. The tool is useful in any carpentry work, as well as when cutting cables, plastic and plastic.
How long will it take to make a miter box? Just a few hours; another advantage is the fact that creating the tool does not require a large amount of expensive materials.
How to make a miter box yourself
To make a simple miter box we will need the following materials
:
— hardwood boards (ash, oak, coniferous) with a thickness of 10 to 25 mm, depending on the type of wood, or plywood sheets of similar thickness;
- self-tapping screws;
- wood glue;
- sandpaper;
- a simple pencil;
- a protractor or ruler with an angle of 90 degrees;
- hacksaw.
The miter box consists
of three parts fastened together with glue and screws.
— Before work, carefully sand the wooden boards, achieving ideal smoothness and 90-degree angles. The width of the boards should be from 100 to 150 mm (if the boards are smaller in height, the saw may jump out of the groove, and if it is larger, it will be inconvenient to cut);
— We fasten the boards together, for this we use glue and screws;
— Remove any remaining glue and leave the workpiece until the glue has completely dried;
- We make pencil markings, for this, using a protractor, we draw two perpendicular lines at the end of the sides, which form a square, the diagonals of the square and another line, slightly to the side of the drawn ones;
— Carefully check all angles and dimensions, you should get two lines with an angle of 45 degrees and one line with an angle of 90 degrees;
- Using a very sharp hacksaw, we begin to make cuts according to the drawn lines (each side must be sawed separately, without pressure);
— We widen the slots using sandpaper folded in half.
A carefully made miter box will serve for a long time, helping in sawing baguettes, baseboards, wooden slats, casings at the required angle with maximum accuracy.
A miter box is an irreplaceable tool during construction work, which is very convenient to use. It is used for precise cutting of boards and other materials at any desired angle. When producing a wooden frame, trimming casings and other works, such a tool is indispensable. It allows you to make a perfectly even angle. That's why many people try to do it themselves.
Safety precautions
When working with a hacksaw using a miter box, it is advisable to use thick gloves and safety glasses to prevent sawdust from getting into your eyes.
The tool must be fixed on the desktop.
If it is not equipped with any clamps, the workpiece is held in the required position by hand.
To do this, at a safe distance from the groove with the inserted saw, the thumb rests on the material being cut, presses it against the side of the miter box, and the remaining fingers clasp this same side.
When starting a cut, the saw should be inserted into the grooves at least to the height of the teeth.
Marking with a canvas is carried out with slow, even movements, which will protect the master from jumping out of the groove.
How to use a miter box correctly
Thanks to the miter box, everyone will be able to saw various materials. But before starting work, be sure to read the rules for its use. In addition, prepare additional materials:
- hacksaw (the pitch of the teeth must correspond to one or another type of material that is being processed);
- assembly knife - needed for cutting foam baseboards;
- ruler and pencil - for markings on materials;
- sandpaper - for cleaning irregularities and burrs.
The operating rules are as follows:
- It is better to secure the plinth in a miter box on the right side, and cut the corner on the left side of the product;
- the left product is attached to the left, and the corner is cut off to the right.
How to cut material
When cutting, it is extremely important not to mix up the sides. In order to correctly cut the material at an angle of 90 or 45 degrees using a miter box, it is secured in the body and then rested against the end wall. And only then the material is sawed
If the tool is professional, then you can adjust the size down to the millimeter
And only then the material is sawed. If the tool is professional, then you can adjust the size down to the millimeter.
A template should be made for each section, taking into account a margin of 50 mm. Since the walls in rooms are not always smooth, before cutting the material you should check how they fit together.
The cut should be carried out as follows:
- mark the cut line with a pencil;
- place your product in the miter box body with the front side so that the cutting line mark looks like a continuation of the slot in the tool;
- Press the workpiece from the end of the body wall, insert a hacksaw into the slot, then cut the material according to the mark;
- insert the second blank with the other side into the slot;
- We clean out any unevenness using fine sandpaper.
How to cut an arbitrary angle
Sometimes the walls are not connected to each other at right angles, then the sawing will need to be adjusted. This is done in two ways:
- Using thick paper or a homemade cardboard template. If the plinth is hollow from the inside, it is unlikely to stay vertical. In this case, you will need a homemade corner in which the product is placed, just like in a miter box. The corner is placed on a pre-prepared stencil so that it matches the template, then the product is cut according to the marks.
- Make marks on the material using a pencil. Cut two products at an angle of 90 degrees, then attach them to the wall and mark the junction line. Find the point of contact between the skirting boards, then transfer the markings to the material and make a cut.
Sawing off corners of floor plinths (internal and external)
The rules for sawing off the inner corner of a floor plinth are as follows:
- the miter box must be placed on the table parallel to itself;
- press the product to the side opposite to you;
- place the right plinth on the right, and the left one on the left, respectively, cut from the opposite side;
- align both parts of the plinth, you will end up with an internal corner, the top of which is located away from you.
As for sawing off the outer corner, you must adhere to the following rules:
- We place the miter box on the table parallel to ourselves, as in the previous case;
- press the baseboard on your side;
- we install the right product on the right, the left one - on the contrary, we bring it to a diagonally located line, sawing is carried out from the bottom up;
- Connect the parts, we get an outer corner with the vertex towards you.
Preparing the side walls for the miter box
Parts of plywood or scraps from boards are used to make side parts for the miter box. To ensure a high-quality tool, you should adhere to precise measurements and recommendations:
- the approximate dimensions of the side walls should be 10 millimeters for plywood and 20 mm for boards;
- their height is selected from 30 to 50 millimeters, depending on the purpose of the tool (30 mm is recommended for ceiling plinths, and about 50 mm for wooden ones);
- The length of the side walls of the miter box should be 250 mm or more, but it is not recommended to lengthen it too much, since it will be inconvenient to perform the work. As an exception, a longer miter box length can be used, but this is only for massive objects.
After measuring the side parts of the boards, we cut out two absolutely even and identical elements
This is very important for further cutting of boards and marking them with tools. In the prepared instruments we make notations at the bottom for confirmations. This is interesting: Dividing heads - universal and optical
This is interesting: Dividing heads - universal and optical
Practical advice
Unfortunately, this method is not ideal, and no matter how hard you try, you may end up with a gap at the joint.
You can fix this in the following ways:
- Take your time when gluing the cornices along straight sections. Take care of the corners first - in this case, you can trim them if necessary, or sand them until you get a good joint.
- If the task of cutting did not work out perfectly, simply fill the cracks with a compound suitable for the material of the cornice, and then paint it.
Cutting ceiling plinth is not a complicated process at all. The main thing is to do everything carefully, following the rules for performing work. After this, all the butt seams of the ceiling moldings will be practically invisible, and apartment renovation will bring pleasure to its owner.
A miter box is a carpentry tool designed for sawing material at a certain angle. The use of this device greatly facilitates the work of cutting skirting boards.
The tool is fixed on a workbench or table, pressed with a clamp, and is completely safe and easy to use. In this article we will look at how to use a miter box, how to make a tool with your own hands and its types.
Read also: Soldering lead with a torch video
Cutting Features
Let's take a closer look at how to correctly cut a corner on a ceiling plinth using a miter box using different materials.
Polyurethane
Polyurethane foam (colloquially simply polyurethane) is a very good material for ceiling plinths. Due to its good flexibility, it adheres precisely to the base (the junction of the wall and the ceiling), even if due to construction errors the walls and ceiling are uneven. In addition, polyurethane is easy to clean and therefore can last a long time. Low load resistance is not a problem here: there is almost no load on the ceiling plinth. We also have a separate article that discusses in more detail the question of how to make a plasterboard ceiling and suspended plasterboard ceilings with your own hands.
Material polyurethane for ceiling skirting boards
The polyurethane baseboard should be cut using a miter box as follows:
- Measure the wall and ceiling at the joint.
- Select a suitable template on the miter box for cutting.
- Place the end of the plinth in the miter box and make a cut. It is recommended to use a miter saw, but if you don’t have one, you can take a regular hacksaw or, better yet, a metal file - it has a finer pitch, and therefore the cut will be more accurate.
- The ends of the cuts are placed in place and compared. If necessary, modifications are made using hand tools (in extreme cases, just a knife).
- Correctly cut and fitted ends are sanded with fine-grained sandpaper. This is necessary for better adhesion (sticking) of the glue.
- The finished skirting boards are glued in place. If cracks form, they are sealed with silicone sealant or special putty.
Styrofoam
Polystyrene foam is also often found as a decorative element in rooms. Its characteristic feature is increased fragility, so it must be adjusted to the location very precisely; foam plastic does not tolerate any deformation.
Foam plastic for ceiling plinth
You need to cut it using a miter box as follows:
- The plinth plates are placed in a miter box.
- An incision is made. Unlike polyurethane, polystyrene foam is a soft material, and it can be cut even with a knife or, better yet, a stationery or construction cutter. Here it is better to use a small, but even piece of wood, a metal die or a ruler. As a last resort, you can make marks with a pencil corresponding to the slits of the miter box, connect them with a ruler - and make a cut.
- If desired, you can use any type of saw, but you need to take into account the fragility of the foam. Therefore, it is better to moisten the blade with water in advance.
- After trimming, adjustment is made in the same way as for polyurethane.
Asterisk IMPORTANT: foam is a fragile material, so the cutting tool must be sharpened as best as possible
Polystyrene
Polystyrene has the same properties as polystyrene foam. Therefore, polystyrene skirting boards are cut in the same way as foam skirting boards. The main thing here is to sharpen the cutting edge of the tool as sharply as possible to avoid chipping. In this case, there is no need to sand the ends: their edges are usually already sufficiently textured to ensure good adhesion of the glue.
Cutting polystyrene using a miter box
Tree
Wooden plinths are rare and expensive, so their processing must be approached extremely responsibly. The cutting technology looks something like this:
- The cut end is fixed in the miter box.
- The cut is being made. This can be done with a regular wood hacksaw, but it is better to use a special saw or metal file to avoid cutting too wide.
- The edges are adjusted to fit. If necessary, they are further sanded using a belt machine (or a drill with a sanding attachment), or cut off.
- The plinth is secured in place using glue or self-tapping screws.
Asterisk IMPORTANT: when adjusting you must be extremely careful; it is better to cover the uneven cut with a decorative overlay or wood putty than to gouge out too much wood
PVC
Skirting boards made of plastic (polyvinyl chloride, PVC) are now widespread. It is convenient because:
- Easy to cut with any tool.
- Flexible, can be used even in uneven corners.
- It usually has internal cavities, which means it can be used as a cable channel for laying electrical wiring or fiber optic lines for the Internet.
PVC skirting has proven itself well
PVC skirting boards are cut in the same way as polyurethane. However, you need to take into account: the best tool, a hacksaw with fine teeth, is only suitable for thick baseboards; in thin ones it can tear out pieces. Therefore, the best option for thin products is a stationery or construction cutter or a sharp knife. Using it requires some skill, so it’s better to practice in advance on scraps or sheets of thin plastic.
Adhesive compositions
Glue for suspended ceilings on which foam fillets are attached should not contain aggressive chemicals based on benzene, acetone, etc. Upon contact with polystyrene foam, the latter will enter into a chemical reaction and lose its user properties.
It is recommended to use glue for the following types of foam ceiling skirting boards:
- Direct use in the form of a dry mixture. Preparation for use is detailed on the powder packaging. When purchasing, you should carefully consider the expiration dates and storage conditions of the composition. The price of such glue is budget, the consumption is small. Fastening to metal surfaces and concrete is not recommended.
- On a polyurethane basis. The advantages of the compositions include a convenient method of application to the surface, excellent adhesion during distribution, moisture resistance and low design consumption. The cost depends on the brand. When making this choice, you should pay attention to the components that make up the glue. If solvents are detected, it should not be used on polystyrene foam.
- Fastening with sealants. Due to its short drying time, its use requires experience. It is not recommended for beginners to use it.
- Self-prepared mixtures. They can be combined with dry glue and “liquid nails” or a mixture of putty and PVA glue in a ratio of 1/5. Mixing of the composition is carried out immediately before installation.
READ Cover the roof of your house with corrugated sheets yourself
Attention! Adhesive compositions from dry mixtures should be made in portions - they “set” quickly, and it will not be possible to mix them again. At the same time, freshly prepared glue should sit for 5-10 minutes before use.
Tools and materials
In order to make a miter box with your own hands, you need to have the following tools and materials:
- cutting boards of any hardwood with a thickness of 20 mm, you can use scraps of substandard plywood with a thickness of 10 mm, other sizes of boards are arbitrary, based on specific needs - 2 pcs.,
- board, the thickness corresponding to the sides, as the base of the miter box - 1 pc.;
- carpenter's hacksaw with fine teeth and a blade, for cutting wooden boards (plinths);
- hacksaw for metal – 1 pc.;
- confirmations – 4 pcs.;
- hex key for confirmations – 1 pc.;
- drill 1 pc.;
- set of wood drills and step drills for confirmations – 1 set;
- clamps or vice – 1 pc.;
- protractor, ruler for determining angles before cuts - 1 pc.;
- pencil for marking – 1 pc.
- Narrow file or sanding paper.
Return to content
Subtleties of choosing a saw
Even before you start creating a miter box, you will need to choose the right hacksaw. A high-quality tool has small teeth, thin blades, high rigidity and strength . The small size of the teeth allows for accurate cutting without damaging the condition of the wood surface. The thinness of the blades guarantees greater precision of cuts - right along the intended line.
In the case of rigidity of the canvas, the required condition is achieved with the help of an additional element called a butt.
If you are going to process skirting boards or stucco molding made of polyurethane, then the hacksaw must be made of metal.
How to cut the corners of a ceiling plinth without a miter box
In order for the device to serve for a long time, you must follow a simple rule: the distance between the marks must be equal to the width of the tray. Next, a hacksaw is used, with which the slits are made. They need to be sanded - and the miter box is ready!
If a homemade tool does not suit you, you will have to go to a specialized store and buy a finished product, which is presented in a fairly wide range; they are produced both in China and in Europe.
In the first case, the tool will cost less, and if you are not particularly picky, you can save money. But for a miter box from a European manufacturer you will have to pay quite a hefty sum.
Considering that the instrument was invented by the Germans, it is not surprising that German miter boxes are considered the very best.
Kupper products deserve special attention; they are very functional and comfortable, every detail has been thought out. Miter boxes from Stayer are also popular. This renowned hand tool manufacturer needs little introduction.
The range of models is very wide, so choosing a tool will not be difficult.
The procedures for installing floor and ceiling panels, installing window and door panels, various profiles, plastic cable ducts, etc. involve marking and opening the corner joints of the elements. Making precise cuts without using special tools is too difficult. Precious products are ready for sale, but purchasing them for temporary use is not wise.
If you know how to make a chair, each home owner independently produces an improvised device that makes cutting parts at right angles easier and faster. The connection of adjacent elements in this case turns out to be as ideal as possible - without gaps or protrusions of sections.
Making your own miter box
The miter box is sold in special construction stores and departments; its cost is unpleasantly surprising due to its excessive cost, and its strength indicator leaves much to be desired. However, if you wish, you can get out of the situation and try to make the instrument yourself.
What is the purpose of the miter box? First of all, for cutting material, if it is necessary to maintain an inclination angle of 45 degrees. For example, beginners often encounter a problem when they need to cut the baseboards on the ceiling in this way for subsequent installation on the outer and outer corners of the room. The tool is useful in any carpentry work, as well as when cutting cables, plastic and plastic.
How long will it take to make a miter box? Just a few hours; another advantage is the fact that creating the tool does not require a large amount of expensive materials.
Mechanical miter box of rotary type
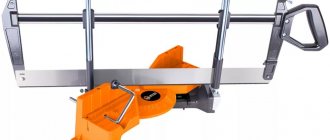
To improve cutting accuracy, a rotary miter box is used. It is used for processing workpieces made of wood or plastic of medium and small thickness. In work, you can use a hacksaw from 290-600 mm with a turn of 15-135 degrees. There are also models with the ability to rotate up to 180 degrees. Structurally, the device consists of a metal frame.
Instead of a side wall, there is a rotating structure, which involves fastening the blade for cutting in the guides of the rotating unit. The miter box is supplemented with a back saw or bow saw. The base of the miter box has a special clamp for fixing the workpiece.
Among the available models you can choose Fit Profi and Champion 180, miter box saw ZUBR. The advantage of the design is high precision of operation, as well as a long saw stroke, as a result of which the cutting speed increases. The cutting depth will be higher; it is possible to process parts of different lengths and thicknesses.
Top best models
The rating of the best models includes rotary miter boxes that have high-quality assembly, are time-tested and produced by well-known manufacturers.
Gross 22759
Price: 4,500 rub.
For convenience, this model of the tool is equipped with a removable two-plane saw blade made of high-strength Japanese steel 60 centimeters long. The saw blade is equipped with a comfortable handle. The tray is made of impact-resistant plastic and has a scale that allows you to make the most accurate horizontal or vertical cuts. On the working surface there are six limit stops for semi-automatic installation of frequently used horizontal angles. For vertical cuts, they are installed manually.
Santool 030203
Price: 2,700 rub.
The 550 mm miter box is used for cutting materials such as metal, plastic and hard wood. Angles are set in vertical and horizontal planes. The part to be cut and the saw blade are installed securely, resulting in an even and precise cut. The kit includes a sharp hacksaw with a closed metal handle. The tray is made of metal and the stand is made of wood. This model is often used in home workshops.
Gross 22757
Price: 3,500 rub.
The tool of this model has two clamps and a limiting stop, which allows for the most accurate cutting of wood, plastic and metal workpieces at different angles. The kit includes a hacksaw made of high quality Japanese steel. There is a quick installation of frequently used corners. The tray is made of impact-resistant plastic and is securely fixed on a special stand. The maximum cutting height is 10 centimeters, and the thickness is from 8.5 to 13.7 centimeters.
FIT Pro 41315
Price: 2,500 rub.
The cheapest model of the tool is sold complete with a hacksaw made of high-quality steel, which has adjusting screws for changing the tension of the blade. This means that for cutting the material you can select a certain tension of the blade. For a secure grip, the handle is made of plastic and has a comfortable shape. The tool is made in the form of a rotating design, which allows you to saw parts no more than 15 centimeters wide.
FIT Pro 41321
Price: 3,800 rub.
Unlike the previous model, the length of the blade of this miter box is 60 cm. It is used for cutting parts at angles from 45° to 135°. During cutting, the workpieces are securely fixed, which prevents defects. The maximum width of the workpiece is 12 centimeters. Due to the fact that the tool is made of durable and high-quality materials: plastic, aluminum and steel, it can last for several years.
NOBEX Champion 180
Price: 13,000 rub.
The expensive model of the miter box from the rating is a bow saw 63 cm long. The kit includes a hacksaw blade with a pitch of 1.5 mm. It has a high-precision scale that allows you to make the most accurate workpieces. The tray has two clamps that securely hold the part while cutting. Thanks to the presence of an extension, it is possible to saw long parts. The height of the sawn parts is 18 cm, width is from 12.6 cm to 20 cm. For convenient storage, the saw blade can be installed parallel to the miter box.
BISON 15442
Price: 3,100 rub.
The miter box of the domestic manufacturer is a professional device for sawing hard materials in the vertical and horizontal plane. Made from lightweight and durable aluminum. On the working surface there is a high-precision scale in inches and centimeters. The 56 cm long saw is made of high quality steel and heat treated. For a secure grip, the saw handle has a rubberized insert. If necessary, the blade can be replaced quickly. Thanks to the special design with small backlashes, high precision cutting of the workpiece is ensured. If you use a steel saw blade, you can cut metal workpieces.
Types of miter box
There are 2 types of miter boxes:
- The usual one is a plastic, wooden, metal box (more precisely, in the shape of a channel - the letter “P”), into which we insert the workpiece and then saw it at an angle in a horizontal projection. The cutting angle and the hacksaw create a common straight line thanks to a series of slots, and you can cut the workpiece at the desired angle evenly, without distortions;
- Rotary: usually a metal tool that is marked from 15 to 135 degrees. A hacksaw mounted directly on the miter box, up to 60 cm long, rotates at the selected angle in this interval. This “intricate” design is fully justified - this professional tool allows you to saw absolutely evenly and at the desired angle, even the smallest, or saw several parts in a row with any pitch size (meaning angle increments - 1 degree, 10, 15, 50, and so on).
It is also worth mentioning 3 design options, speaking in the language of working angles:
- 45 and 90 degrees – the absolute majority;
- 15, 22.5, 30, 45, 90 degrees – professional tool;
- rotating mechanism from 15 to 135 degrees - a rare, but very versatile type, also a professional tool.
Speaking about a professional miter box with a rotary hacksaw (see photo), it is worth saying that this tool is more versatile, since the hacksaw blade can easily cope with plastic, wood and non-ferrous, ferrous metals.
If you want to make a miter box with your own hands, then there is no need to make a sophisticated tool for a saw with a rotary gradient. For cutting ceiling plinths, a regular miter box will suffice.
Best kits
Most often, professional miter boxes made of steel are purchased; there are simple sets with horizontally rotating platforms, and there are devices in which you can also change the angle of inclination of the hacksaw blade relative to the vertical plane. This allows you to create complex dovetail joints.
STAYER "PROFI"
Angular metal rotary device with a saw, blade length – 550 mm.
Peculiarities:
- Strong and stable base.
- There are clamps for fixing the workpiece.
- Convenient rotating platform for a hacksaw.
- The set includes a powerful saw with a plastic handle.
GROSS 22759
Set for professional use when sawing wooden parts and plastics, base made of durable plastic.
Characteristics:
- Machine dimensions: 360×80×40 mm.
- The length of the cutting blade is 600 mm.
- MFD platform with dimensions: 490×200×15 mm.
- Cutting angles on a scale: 15, 22.5, 30, 36, 45 and 90 degrees.
STANLEY 1-20-800
A device with a metal base for sawing workpieces from all types of materials.
Machine parameters:
- Cutting width – 143 mm.
- Cutting height – up to 95 mm.
Center tool 0347
The set is suitable for domestic and professional use when working with all types of workpieces. Features: convenient mechanism for moving the frame horizontally, strong fixation at a given cutting angle. The base has rigid fixation on both sides when tilted along a vertical plane. The miter box is equipped with an impact-resistant platform and an alloy steel blade, which is easily and quickly replaced.
Characteristics:
- The length of the hacksaw blade is 600 mm.
- The maximum cutting width is up to 115 mm.
- The cutting angle in the vertical plane is 45 degrees.
- The cutting angle in the horizontal plane is 45 degrees.
- The installation angles of the blade are up to 45 degrees.
- Cutting height – up to 98 mm.
Matrix 22750
The platform is assembled from durable aluminum elements, there are holes for screwing to the workbench. Suitable for sawing wood, plastic and steel workpieces. It is possible to adjust the position of the blade in two planes.
Characteristics:
- The maximum permissible cutting width is 160 mm.
- The maximum cutting height is 110 mm.
- Saw blade length – 600 mm.
- The angle of installation of the canvases is 45-135 degrees.
To ensure precise cutting when carrying out finishing, plumbing or carpentry work, miter boxes are used. The device allows you to cut workpieces at certain angles
It is important to securely fasten the part and use appropriate blades for hacksaws.
- Hand hacksaws for wood: how to choose a suitable model based on purpose and characteristics, popularity rating, pros and cons
- How to choose a manual jigsaw for wood: what types are there, how to choose a blade, a review of the 4 best models, their pros and cons, as well as assembly instructions
- Wood sanding machine: how to make a disk, belt or drum grinder with your own hands, recommendations for selecting materials, review of factory models, tips for care and maintenance
- Wood sanders: belt, vibrating, eccentric, flap, rating of the best models, their pros and cons, how to choose the right one
Required materials and tools
You only need a little experience to make a miter box with your own hands. Drawings can be found on the Internet, and it is advisable to follow them, as well as the recommendations of specialists, as this allows you to avoid mistakes in the future.
First you need to thoroughly sand all materials
For such a tool, it is very important to choose high-quality and dry wood. It should not have defects, chips or dents
Experts do not recommend using plastic as a starting material, as it can easily be damaged during operation. The boards from which the miter box will be made should have a thickness of 2 centimeters.
To make a miter box for baguettes and other needs, you need to prepare the following tools:
- fine sandpaper;
- pencil;
- ruler;
- drill and a set of drills for it;
- vice;
- hacksaw with small teeth;
- comfirmats.
Such tools should be sufficient to produce the product, unless a special apparatus is made. Additionally, you can prepare a hexagon. With its help you can easily tighten the comfirmat. It is also necessary to first prepare individual elements for the tool in advance.
Choosing a saw for a miter box
Before starting all work, you should choose the right hacksaw for the device. Thus, it is the miter box that will be selected for the hacksaw in the subsequent order, and not in the reverse order. A truly high-quality hacksaw should:
- have thin blades;
- small teeth;
- be tough and stable.
If the teeth are small, the sawing will be soft and without dents or deformation of the wood. The thinness of the saw allows you to cut the material exactly along the line. If the hacksaw blade is not rigid, this will have a worse effect on the performance of the miter box. This problem can be eliminated with a butt – a special additional stiffening rib. Such a hacksaw is also needed at the beginning of work on the manufacture of the device.
In order to be able to cut skirting boards and polyurethane stucco, craftsmen recommend choosing a hacksaw for metal. The metal saw has very good rigidity, a thin and even blade due to the tension of the blade.
Preparing the Side Walls
- The width of the plywood walls should be approximately 1 centimeter for plywood and 2 centimeters for boards.
- The height is determined in the range from 3 to 5 centimeters, depending on the intended purpose of the instrument.
- The length should be on average 25 centimeters, but it is not recommended to make a miter box that is too long, since it will not be very convenient to work with it.
As an exception, a longer miter box length can be used for large items. If the height of the miter box is 3 centimeters, then it is more used for ceiling plinths, and when it is 5 centimeters, then for wooden floor skirting boards.
After determining the dimensions of the future tool, you need to measure and cut two identical elements from plywood or boards. This is an important stage of manufacturing work, since the further evenness of cutting materials will depend on it. For cut-off elements, you also first need to make marks for the confirmation materials.
How to mark up correctly
The most important stage in making a miter box is nothing more than marking it. Many people do not know how to do it correctly and evenly. In order to avoid mistakes, you should use drawings and diagrams, as well as recommendations from specialists.
The process of making markings occurs in several stages:
The final stage of production
At the final stage of manufacturing the device, it is necessary to carefully connect all the parts together. The strength of the miter box and the duration of its operation will also depend on this.
Here, too, you need to follow several steps:
And if the tool will be used in different conditions, then rubber can be mounted in the lower part. This will allow the tool to rest securely on the surface. When making a miter box, you should carefully consider the width of the base. In this case, you need to be guided by the width of the materials being processed in the future.
What it is?
A miter box is a box made of wood or plastic, equipped with recesses placed at an angle of 45 degrees (see photo). Sometimes the design includes mechanisms for evenly cutting parts, as well as holders and various saws. But such additions are more likely to be needed by professionals than for home use. Making a regular miter box with your own hands is very simple. This will take only a few hours and a minimal amount of materials. In this case, you can choose the width and length of the structure yourself.
Using a homemade miter box is also very easy. To cut off part of a part at an angle of 45 degrees, you just need to make a mark, insert it into the desired slot and make a cut. More detailed information on how to use the tool can be read further.
Preparatory work
In order to make a miter box with your own hands, it is better to use wood. Plastic is suitable for making tools exclusively in factory conditions. When working, it is best to use hard wood, but if it is possible to use pine, then this can also be used. The main thing is that the thickness of the pine board is at least 2 centimeters. Boards made from ash or oak may have a smaller thickness - about 1.3 centimeters. Another important point: the boards for making a miter box should be as even as possible, and their corners should be straight.
The width of the tool must be selected depending on the width of the objects that will be cut in it. Most often, work is carried out with skirting boards, and they are rarely wider than 15 centimeters. Therefore, the width of the structure can be made within such limits. The height of the instrument can also be made equal to 15 centimeters. This value will be optimal, because if the height is made greater, it will not be very convenient to work, and if it is less, there is a possibility that the saw may jump out of the grooves.
Self-created
So, in order to build a miter box with your own hands, you need to watch the video presented, and also read the instructions provided.
Construction of the box
To do this, individual planks are connected to each other with self-tapping screws. For greater structural reliability, you can also use glue that is poured into the joints. After connecting all the parts, they must be carefully fixed and left at rest until the adhesive has completely dried.
Creating markup
To create diagonal guides, you first need to mark the middle of each side of the box. This will help you draw lines as accurately as possible at an angle of 45 degrees. It is recommended to double-check the accuracy of the markings several times, because if the measurements are incorrect, the miter box will show incorrect angles, which can simply ruin the material as a result.
Cutting guides
Using a hacksaw, you need to make neat cuts along the resulting lines. To make them clean or to widen them a little, you can work with coarse sanding paper folded in half. Grooves for even cutting of parts are made according to the same principle.
If you approach the matter as responsibly as possible, the resulting tool will be no worse than those sold in markets and hardware stores. If you wish, you can even create several designs to work with materials of different sizes.
Terms of use
- Before cutting the material, you must carefully secure the resulting tool to the surface. For greater stability, it can be screwed to the table with self-tapping screws. Marks are made on the material where it is necessary to make an incision.
- A part, for example a plinth, is placed in the corresponding groove of the miter box and pressed firmly against it.
- Careful sawing of the material begins. At this time, you need to make sure that he is motionless. Otherwise you will end up with a very sloppy cut.
- In order for the cut to be as smooth, straight and precise as possible, it is necessary to use only special hacksaws (see photo).
Principle and rules of working with the device
For many owners of an apartment or house who carry out renovations on their own, it is news that there are special devices for cutting the corners of a baguette. Therefore, they are poorly versed in how to use a miter box for baseboards.
The very principle of using the device is extremely simple. Take a baguette and fasten it in a miter box opposite the 45o slot in the same position as it will be glued to the wall. At the same time, it should protrude 1-2 cm beyond the boundaries of the zone in which the corner will be cut, which will make it possible to obtain a smooth, chip-free end. The workpiece is fixed with clamps, and in their absence, it is pressed to the base of the device by hand. There is a little trick here: it is more convenient to cut if the saw is located on the side of the working hand (the grooves in the tool allow this to be done).
Knowledge of the operating principle does not guarantee accurate and beautiful connection of the baguette in the corners. You also need to know the basic rules of how to cut a ceiling plinth using a miter box.
- The cutting tool must match the material of the fillet. It is best to cut polystyrene foam with a knife with a replaceable blade. Plastic - with a knife, a hacksaw or a grinder with a diamond-coated cutting wheel. Wooden fillet - using a fine-tooth wood saw.
- Baguettes with relief or ornament must be combined according to the pattern.
- To avoid mistakes when determining the direction of the cut, you need to mark in advance with a pencil the line along which the saw will go. There is no need for special precision here: the main thing is to correctly indicate the chosen direction.
- You need to start cutting after checking the quality of fixation of the plinth in the tool: whether it is installed correctly; How securely is it fixed?
Cutting rules
The main rule is to correctly determine the side of cut. A common mistake is incorrect fastening, as a result of which the wrong side is cut or at the wrong angle. To avoid such incidents, stock up on a measuring device and a pencil with which you will mark the desired side or angle.
Fix the material, rest it against the wall with its end so that the fixation is maximum and there are no errors. In the case when not a simple design is used, but professional equipment, then you can adjust the angle not limited to 45, 90 degrees. You can begin work only after you are sure that the material is fixed correctly and securely.
And the cutting rules are as follows:
- Measuring, marking;
- Fix the material, the marks should coincide with the cut in the tool, it is best to place it so that the saw is on the side of the working hand;
- Clamp the end additionally, if necessary, take a saw and cut;
- Do this with other parts;
- Sand any uneven surfaces with a grinder or sandpaper.
The rules may change when using electrical, mechanical devices and other modification devices (clamps, clamps, extensions, attachments, etc.).
How to cut a ceiling plinth without a miter box
To hide the uneven border between the walls and the ceiling, you can cut off the internal and external corners on the baseboard without a miter box. It would seem that there is nothing simpler in cutting off the edges of ceiling plinths: I made an angle of 45 degrees on each fillet and glued one to the other.
To correctly cut corners without a miter box, you need:
- prepare a cutting tool. This could be a metal saw or a sharp knife. Take the ceiling plinth (otherwise called fillet) and place it in the corner of the ceiling in the same way as you will glue it;
- draw a line along the plinth on the ceiling and then remove the part;
- the next step is to place another fillet in this corner and draw a line along it. After removing the baseboard, you will see markings on the ceiling. The lines from the two baseboards will intersect at a certain point in the corner;
- Again, attach the first plinth to the ceiling along the markings and mark the intersection point on its inner part. Then remove the baseboard;
- From the marked point, draw a line to the opposite corner of the fillet. This will be the place where the baseboard will be cut. Do the same with the other baseboard. Next, use a sharp knife to cut the inner corner along the drawn line. Place the cut skirting boards one on top of the other in the corner of the room. If there are no gaps between them, you can stick them on. If the gap is still visible, then correct it with a knife.
If the angle in the apartment is exactly 90 degrees, then it is best to use the second method. You need to take cardboard and draw two parallel lines at a distance greater than the width of the baseboard. Next, mark the center between them and attach a protractor. Mark the angle at 45 degrees. Place the cardboard against the corner to check the markings are correct. Transfer the markings to the plinth, placing its bottom edge against one of the lines, and cut the corner on the fillet with a sharp knife. Do the same with the other baseboard.
The next option for cutting the inner corner of a plinth without a miter box is also simple and interesting, and does not require much labor effort. Measure the end of the baseboard and measure this distance from its edge. Draw a diagonal line between the bottom edge mark and the top corner of the baseboard. An angle of 45 degrees will be accurate. Cut the inner corner along the line. Cut the second plinth in a mirror image.
Making a miter box: the last stage
At the last stage of work, it is necessary to connect all the workpieces:
1. We will attach the side parts of the blanks to the base so that the end area of the guide boards can be connected to the side ones.
2. Using a drill, we drill holes according to the previously formed marks. It is better to use drills with different diameters for the drilling process rather than using one stepped drill designed for confirmations. Using larger diameter drills, we first form an area for confirmation, and using a sharper drill with a specific thread, we make a hole of the required length at the base of the end.
3. Using confirmations, we tighten all the details. For better convenience, you can make a hole in the middle of the tool and connect it to a table or other flat surface.
4. It is recommended to make the tool dismountable, so it is not necessary to use glue.
5. You can make cuts at the base of the device, which are used as marks for convenience during work.
Useful tips
Definitely, almost anyone can make a corner miter box, but in any case it is worth taking into account the nuances and features of the work. For example, if you want to make the instrument collapsible, then it is enough to secure it with confirmations, and the use of glue is not necessary. For professional and stationary work, it is better to attach the tool to a surface, such as a desktop.
When the work load is high, it is worth attaching a piece of material, for example, rubber, to the back of the working surface, which will not allow the tool to move. During the manufacturing process of the tool, it is worth correctly calculating the width of the base. Typically, this depends on the size of the materials being processed.
Marking
You can draw preliminary markings on paper, or you can make a drawing directly on the wooden box itself.
Draw perpendicular lines at the ends of the side parts. Measure the outside width of the miter box and make the first mark. Then make a second mark on the side at a distance equal to the width of the box. Likewise on the second side. By connecting opposite marks, you get an angle of 45 degrees. You should end up with a square if you visually project all the marks onto a plane.
Check the accuracy of the markings several times - the distance between the marks should be the same, the lines should be strictly parallel. The quality of your future work depends on the quality of the markup.
Instructions for making a miter box with your own hands
Make miter boxes from durable wood
Assembling the tool for precision cutting of lumber is carried out in the following order:
- We drill holes for screwing in self-tapping screws. To make this procedure easier, first take a core and make small indentations at the marked points.
- We make grooves in the side walls. Securely secure the material in place using a vice or clamps. The cut along the center line is made perpendicularly, and along the extreme lines - at an angle of 45 degrees. Make cuts strictly according to the applied markings, to the junction of the sides with the base of the miter box. The saw handle should be held tilted towards the center line.
- The sides are ready - and now we move on to assembling the device. We attach the walls so that their middle grooves are in the same plane with the center line of the base. Then we fasten the parts with self-tapping screws. We use a screwdriver for this.
- The miter box is almost ready. All that remains is to treat its surface with sandpaper and clean the slots from chips.
