During repair and construction work, you need to know about the location of electrical wiring, reinforcement and other elements in the walls, floor and ceiling.
will help you avoid scoring or drilling with unpredictable consequences .
In this review, we will look at the best hidden wiring detectors and analyze the criteria for choosing equipment of this type.
Page navigation:
What types of devices are there?
The indicator is a small-sized mobile device, the weight of which does not exceed 200 grams (which is why the device is convenient to carry with you).
It can be useful for both a professional electrician and an ordinary apartment owner. Thanks to the device, it will be possible to find wires and pipes not only under a layer of plaster, but also under tiles and other finishing materials that hide them. Various types of devices are produced to detect electrical wiring. Their main differences are in the principle of operation and functionality.
Most indicators work on the principle of a metal detector; they signal if there is metal in the wall. This happens due to the magnetic field created by the device. The inconvenience is that it reacts to absolutely all metal objects, and not just to hidden wiring, therefore, if fittings are built into the wall, the device will work.
It is most convenient to detect wiring in the wall using indicators or detectors. Such devices detect electromagnetic fields created by current as it passes through conductors.
In order for the indicator to give a signal, there must be voltage in the network. If the wall is wet, devices of this type will not be useful. Moisture tricks the indicator by reflecting its electromagnetic field, causing it to give erroneous readings.
It is better to choose universal devices for searching electrical wiring. Their distinctive feature is the ability to work in several modes, thanks to which you can not only determine whether there are metal objects in the walls, but also search for hidden wiring separately. If it is possible to switch modes, then you can quite accurately calculate where exactly the cable is located. The devices can even find wood or plastic if the material is wet or filled with water. Such equipment is considered professional and costs an order of magnitude more than simple household indicators.
According to operating principles
The main division of hidden wiring indicators occurs according to the physical principles on which their work is based.
There are the following types of detectors:
- electromagnetic;
- metal detectors;
- electrostatic;
- combined devices.
Electrostatic detectors are able to detect live wires without passing current through them. They have a low price and are easy to use. Non-metal detector detectors can also be expensive if they have built-in high frequency generators. Devices are connected to the network, and then their fluctuations are detected by sensors
With the help of electrostatic detectors, it is easy to detect cable breaks. The disadvantages of these devices include high sensitivity to induced electromagnetic interference. The normal operation of detectors can be disrupted by routers, microwave ovens, computers, and televisions connected to the network.
Electrostatic indicators are also not suitable for locating wiring in damp walls and metal-reinforced structures.
Electromagnetic ICPs can only detect wires carrying current. For budget models, the minimum load on the network for the device to operate correctly is 1 kW. That is, using such a detector it will be almost impossible to determine the wiring going to lamps and chandeliers. The advantage of such devices is their high accuracy, which allows you to track the location of an electrical cable down to a few millimeters.
Metal detectors in their pure form are rarely used as wiring indicators because they react equally to copper pipes or wire, metal fittings, nails and wire clamps.
In ICP, metal detectors are typically used to confirm weak or intermittent signals received by other sensors.
A metal sensor helps to find deep wiring if it is reliably known that there are no other metal elements under the analyzed surface
Combined hidden wiring indicators are expensive, but also have good functionality. By using multiple detection methods simultaneously, these devices provide high operating efficiency. In addition, combined ISPs are often equipped with additional functions that professional electricians need.
Inexpensive electrostatic indicators are quite suitable for household use; they are enough to identify surface-lying residential wiring.
According to performance characteristics
Hidden wiring indicators have a lot of structural and functional differences, so they can be divided into several categories.
According to the scope of application, ISP are divided into:
- household;
- professional.
Household detectors usually do not contain metal sensors, so their use on reinforced walls is highly effective. The cost of the simplest devices starts from $5. They are equipped with one sensor, as well as a light or sound indicator for detecting electrical wiring.
Compact devices for detecting hidden wiring rarely have adjustable sensitivity and greater depth of action, so they are rarely used by professionals. Some professional models can even detect cables at a depth of up to 150 mm with an accuracy of 5 mm. Their cost can reach $500-600, with the same dimensions as household detectors.
Wiring detection indications can be of the following types:
- sound;
- light;
- graphic;
- combined.
Light and sound indication is realized using an LED or an audio speaker, respectively. Sometimes signal intensity correlates with the power of electromagnetic radiation. Graphic indication is displayed on the liquid crystal display.
The light indication on combined devices may differ in color, depending on the detection of a live or de-energized wire
By appearance, ISP can be divided into:
- cylindrical;
- flat.
Cylindrical devices are usually an indicator screwdriver with the function of detecting hidden wiring. Such models are low-functional, but also cheap. Screwdrivers are capable of detecting electrical cables usually at a depth of no more than 2 cm.
If the wiring in the apartment was laid superficially in a groove, then the cheapest detector model will be enough to detect it. The cost of the detector depends largely on the depth of detection of hidden wiring and additional functionality. Therefore, you should study the operating principle and scope of various indicator models.
Detector design
The basis for the manufacture of this device, like any other electronic product, is a circuit diagram. Before making a detector for hidden wiring with your own hands, let’s understand the circuit diagram of this device. On the Internet you can find a large number of various schemes. The diagram presented below is simple, which in turn makes the manufacture of the device easier and more cost-effective.
A small number of components does not always mean poor performance of the device. Quite the contrary, because we all know that the simpler the mechanism, the more reliable it is. In our case, the absence of a large number of components will help to avoid difficulties in manufacturing, as well as subsequent configuration of the device.
Instructions for using the detector
Due to the variety of designs of hidden wiring indicators, it is necessary to consider the instructions for their use using the example of a specific model. For this purpose, the inexpensive electrostatic ISP “Dyatel E-121”, widely used by domestic installers, was chosen. But first you need to prepare for the search procedure.
Preparing for upcoming work
To speed up the detection of electrical wiring using any detector, experienced specialists suggest following a number of simple rules.
You can test the new detector using a regular extension cord that is plugged into an outlet. You can use books or ceramic plates as a barrier.
Below are the main ones:
- Initially, test the functionality of the device on any live wire. The batteries in the detector may simply run out and it will not work correctly.
- Calibrate the device at a distance of 1 meter from the walls, if such an option is present.
- The surfaces to be tested should not be wet.
- If possible, turn off all working electrical appliances in the apartment, including telephones.
- The accuracy of electrical wiring detection will be greatly reduced if conductive wallpaper adhesive was used.
These recommendations will eliminate wastage of time due to inoperative equipment and unacceptable parameters of the surface under study.
Using the Woodpecker E-121 detector
The Woodpecker E-121 detector is capable of operating in 4 sensitivity ranges.
The procedure for using this device to detect wiring is as follows:
- Press the sensitivity range buttons one by one. In this case, the signaling device should emit a short light and sound signal. If the device does not respond, check the battery.
- Press button “4” (provides maximum sensitivity), bring the detector to the surface being analyzed and, if there is an indication, reduce sensitivity by pressing buttons “3” to “1” in sequence.
- Simultaneously with the decrease in sensitivity, it is necessary to reduce the distance to the detected object, localizing the alarm zone.
- To detect the location of the conductor, move the detector along the wall, trying to find the area with the maximum electromagnetic field.
- To neutralize interfering surrounding currents, place your hand on the surface to be analyzed near the detector. If there is no conductor near the hand, then “Woodpecker E-121” will stop giving signals.
- When searching for a broken wire, apply voltage to the damaged core and ground the rest.
The accuracy of determining the location of an electrical cable depends on the degree of humidity and the materials surrounding the wire.
Locating electrical wires in plaster walls, reinforced concrete panels and ground shields will be difficult.
The domestic detector “Woodpecker E-121” effectively detects wiring at a depth of up to 8 cm and costs around $15, which guaranteed its popularity among electricians
To test fuses and fuse links, you must turn on mode “1” or “2” and touch the antenna to the contacts before and after the fuse. If there is a malfunction, the detector will not generate a signal.
The Woodpecker E-121 detector has a combined light and sound alarm system, which allows you to maintain the functionality of the device if one of the alarms breaks down
To correctly interpret the results of the device’s operation, you should first read its instructions, because almost every detector requires correct initial settings.
Areas of application of indicators
The scope of application of the IPS depends on the configuration of the device and its sensitivity.
Basic models of combined detectors can be used for the following purposes:
- identification of hidden electrical wiring in ceilings, walls, floors;
- detection of electrical cable breaks;
- correct connection of electric meter phases;
- determination of phase wire;
- detection of ungrounded equipment;
- checking the serviceability of fuses and fuses;
- detection of locations of metal reinforcement in the wall,
Detectors from the middle price category
This group contains wiring detectors in the price range from 4 to 10 thousand. All of them are equipped with a liquid crystal screen, which displays the results of the ongoing search and system tips. The devices operate in 4 modes:
- Search for phase wire.
- Search for metal and steel (reinforcement, metal frame rods for walls).
- Search for non-ferrous metals (copper and aluminum wires in a de-energized state).
- Search for wood (timber for sheathing walls and partitions).
Important! All of them operate on a 9V Krona battery and can be used for home and professional purposes.
Types of indicators
Detectors come in several different types. They are classified according to their operating principle, the mechanism used to alert the user when wires are detected, and so on. Each device has its own advantages and disadvantages.
Let's look at them below:
- The electrostatic hidden wiring indicator is used to search for the electric field generated by the voltage on the wires. Among the advantages, we highlight the simplicity of the circuit and the ability to detect current over long distances. Disadvantages - the ability to work only in a dry environment, as well as the presence of mains voltage to register the wiring.
- An electromagnetic device detects the electromagnetic field created by current moving through wires. The detector circuit is as simple as possible, allowing for high accuracy. The disadvantage is similar to the electrostatic analogue: the wiring must be energized, and the connected load must not be lower than 1 kW.
- An inductive indicator is essentially a regular metal detector. Such a device independently creates an electromagnetic field and then records its changes. The main advantage is that there is no need for tension. The disadvantages include a complex circuit and the possibility of false alarms, since the detector will detect any metal products.
- Combined indicator - factory models, which have different operating principles. Against the backdrop of high accuracy, sensitivity and efficiency, the only drawback is the high cost.
Electrostatic devices
Finders of this type register the presence of an electromagnetic field emanating from wires to which voltage is connected. This is a fairly simple device that is easy to assemble with your own hands (a diagram of the device will be given in the final section). Note that almost all inexpensive detectors operate on this principle.
Detector E121
Features of electrostatic type detectors:
- given that the device reacts to electromagnetic radiation, to detect the wiring it is required that it is not de-energized;
- When working with a detector, it is necessary to select the optimal sensitivity level. If it is low, it may be difficult to detect deep-lying wiring; at the maximum level, there is a high probability of false alarms;
- damp walls or the presence of metal structures in them make searching for wiring almost impossible.
Given their low price, simplicity and efficiency (with the exception of minor limitations), devices with an electrostatic principle of operation are popular even among professional electricians.
Electromagnetic finders
This type of alarm device allows you to detect electromagnetic excitation emanating from wires if a load is connected to them. The accuracy and efficiency of electromagnetic wiring finders is much higher than electrostatic ones.
Electromagnetic alarm
These devices have a characteristic feature, which is that in order to guarantee the determination of the wiring route, it is necessary to connect to it a load with a power of at least one kilowatt, which in most cases does not cause difficulties. For example, this can be done by connecting an electric kettle to the appropriate power line (remembering to fill it with water).
Metal detectors
In cases where it is not possible to connect voltage to the wiring or a load to it, metal detectors are used. The principle of operation of these devices is based on the fact that metal, entering an electromagnetic field, causes disturbances in it, which are recorded by the device.
Model PMD 7 from Bosch
The features of this class of devices include the fact that they react to any metal located in the walls. That is, in addition to wiring, the detectors will be triggered when they detect fittings, screws, nails, etc.
Passive detectors (radiation receivers)
These wire detectors respond to the electric or magnetic field of a wire. They are insensitive to de-energized wiring. It is also useless to search for DC wiring with them.
Combined finders
Devices of this type are multifunctional devices - multidetectors. They can combine several principles for searching for hidden wiring in a wall, which significantly expands the scope of application and increases efficiency.
An example is the TS-75 model shown in the photo below. This device combines the functions of a metal detector and an electrostatic detector.
Photo: TS-75 – reliable and inexpensive multi-wiring detector
Active detectors
These devices are more advanced than those already discussed. They cost more, but have additional capabilities and help to find not only wiring.
Metal detector
A metal detector operates differently than the scanners described above.
In essence, this is the device that was previously called a mine detector. Now it's called a metal detector. He finds metal. It doesn't matter whether the metal is energized or not. Devices of this type are quite sensitive, in addition, their sensitivity can be adjusted and fine-tuned to the search conditions.
The principle of operation of the metal detector is as follows. The coil with the wire, which is the sensor, is supplied with high-frequency alternating current from one generator. The device has another generator operating at the same frequency, and this frequency is strictly stabilized. Signals from the coil and the reference oscillator are fed to a mixer, which separates the difference between these frequencies.
When a metal object approaches the sensor coil, the frequency of the first oscillator changes slightly. But due to the fact that this frequency is quite decent, even a small change in it creates a signal of a completely detectable frequency on the mixer. Then it is amplified and displayed on the indicator.
The sensitivity of the device turns out to be very high compared to what we discussed above. But its cost is also several times higher. The advantage of a metal detector is that it can detect metal pipes in which wiring is laid. It also detects wiring, regardless of whether it is energized or not. Of course, he discovers reinforcement embedded in concrete and other metal things located in the walls.
Finders for non-metals
In addition to the magnetic field, active detectors can use an electric field.
They turn out to be sensitive not only to metal, but also to dielectrics, for example, wood. Such a sensor is an “open” capacitor, sensitive to changes in the electric field near its plates. It is also powered by alternating current and also uses the beat method (differences of close frequencies), like a device with a coil.
Combined instruments contain a coil and an electric field sensor simultaneously. All these devices, in the spirit of the times, are equipped with microprocessors that calculate electrical signals from sensors and show the user the result in a human-readable interpretation. For example, the distance to metal objects, the presence of voltage and even its approximate value. Perhaps, such a device can most often be found on the market as a mid-level device at a price of several thousand rubles.
Finally, a few words about the ultrasonic and radar sensor. These are also active devices. The first of them emits ultrasound, exactly like an echo sounder or sonar for submarines. The reflected ultrasound, after amplification, is analyzed by a microprocessor and the user can learn quite a lot about what and how is located inside the material under study.
Metal objects, wood, plastic, various inhomogeneities, all this will be accurately detected. For an accurate and deep search for metals and wires, a real radar is used, only hand-held. This is the most expensive finder; it is used by professional builders in difficult and critical cases.
Indicator screwdriver
Often there are voltage indicators made in the form of a screwdriver. They identify the phase wire of a 220 V network and indicate the presence of current piercing the conductor. This is a simple and affordable device that works by contact and non-contact methods.
The indicator handle is transparent, a light bulb and a resistor light up inside. By sound and light signal it is easy to determine where hidden wires are laid. The slot of the screwdriver is made straight so that it is convenient to contact the surface of objects.
There are screwdriver modifications designed for different voltages and operating conditions. With their help, you can determine in 2-3 seconds whether voltage is supplied to the house, whether the outlet is working, where the wire runs. By running the hidden wiring indicator along the surface of the wall, you can safely drive in a nail, screw in a self-tapping screw and use a hammer drill.
Contact model
The contact indicator is used to determine the operability of sockets, check the presence of grounding of extension cords, find the phase of chandelier sockets and phase wires when installing electrics.
For the contact indicator to start working, you need to take it in your hand and press the button on the handle. The sharp end (sting) is used to touch the contact. If there is voltage on the wire, the light will blink. This is how the phase wire is determined. Contact with the body must be necessary, since a person enters the chain. The built-in resistor has a high resistance, so the current in the circuit will be small and will not cause harm.
The contact indicator is considered the simplest and cheapest. It does not require additional power sources to operate.
The disadvantage may be poor assembly or weak light from the bulb. It is clear that such a device will not detect hidden wiring.
Contactless model
Indicators equipped with a battery can already detect hidden wiring in a non-contact manner. They install an LED light bulb that consumes minimal energy. Although the range of the indicator is small, it is able to find wiring under a layer of plaster and even a small layer of cement.
The indicator's action is based on the generation of a magnetic field (induced field). Using a screwdriver in the form of an indicator, you can easily determine the integrity of the hidden wire and check whether there is a current leakage to the device body.
Another advantage of such an indicator is that it can be used like a slotted screwdriver. With its help, small screws and bolts are unscrewed without applying significant force so as not to damage the device. The power supply battery will have to be changed periodically. This is considered one of the disadvantages of the indicator.
They produce electronic non-contact indicators. They beep when voltage is detected, and in addition show its value on the displays. The measurement range is 12…250 V. Such models are very convenient, but their cost is higher. Due to their simplicity, accessibility and compact size, indicator screwdrivers are in demand among electricians and people who are in no way connected with this profession. Indicators are used in everyday life and in production.
Passive detectors (radiation receivers)
These wire detectors respond to the electric or magnetic field of a wire. They are insensitive to de-energized wiring. It is also useless to search for DC wiring with them.
Electrostatic scanner
Reacts to the electric field created by a current-carrying conductor. The device detects an alternating electric field created near the electrical conductor. Such a scanner will not be able to detect wiring if it is not energized.
Voltage can be supplied from a low-power pulse generator. The scanner is used to examine the location of the proposed route and must be brought to the place where the signal is strongest. Signal indicators vary. This could be an LED, a buzzer (“beeper”), or an LCD display. Such a device detects wiring at a distance of up to 10 ... 15 cm, which is quite enough for walls. This is the cheapest type of scanner.
Electromagnetic scanner
Reacts to an alternating magnetic field from a current-carrying wire. Like the previous detector, it only detects wiring if it is live. The sensitivity of this scanner is approximately the same as that of an electrostatic one. The price of both types of devices is approximately the same. Such hidden wiring finders are well suited for home repairs by non-professionals.
Difference between detectors
In an electrostatic finder, the sensing element is a small pin in which a voltage is induced by an alternating electric field. An electromagnetic device uses a coil. An alternating magnetic field induces a current in it. Since the signals are too weak for direct display, they are further amplified by an electronic amplifier.
In principle, both detectors act like a radio receiver. Since the frequency of the alternating current is too low, the sensitivity of such a detector is only sufficient for a very short distance from the wire. But it is quite sufficient for the purpose of searching for wires in thin walls that are not shielded with metal mesh, sheets and other conductive obstacles.
If the wiring is in metal pipes, then it will be impossible to detect it with such detectors. Plaster or wood practically do not present any barriers to the electric or magnetic field.
Expert opinion Pavel Maksimovich Torsunov
There are diagrams online for homemade assembly of simple wiring detectors, but they will require some knowledge and skills to make. Although this is the cheapest option, it is not suitable for everyone. People for whom time is money will prefer to buy ready-made ones.
How to choose the right one
When choosing a device for searching hidden wiring, you need to understand why you need it. If you only need to find the wiring, you can get by with inexpensive models that will cope with the task relatively well. To search for pipelines or frames, you need more sensitive equipment that can operate in several modes, or two different devices, which will cost more.
Another important parameter is the depth to which the device is capable of scanning the wall. You should not purchase the cheapest indicators: usually they are able to “probe” the wall no more than 20 mm, and the plaster is 40 mm thick, that is, there will be no benefit from such a device. You should not skimp on scanning depth: the deeper the device is able to recognize objects, the better.
The type of notification also plays an important role. There are three of them:
- sounds;
- light signal;
- displaying information on the screen.
Sounds differ in tone and come in different durations. From them you can understand what item was found.
Often the device is equipped with LEDs that indicate the detection of communications or hidden wiring. On an expensive device, knowing the color scheme, you can accurately determine the location of the object and understand what exactly was detected.
LCD screen is the most accurate and convenient way to identify finds. The device displays all information on the display. However, such a device costs much more than similar models without a tap. There will be no problems decoding the signals. Metal or cable detection may also be accompanied by sounds.
Detector with field-effect transistor: operating procedure
The device operates according to the following principle. An electric field acting on an np junction leads to a change in the thickness of the latter, as a result of which its conductivity also changes. Since the change in the electric field coincides with the network frequency (50 Hz), when approaching the wiring, an increasing hum will be heard from the speaker. In order not to confuse the terminals of the field-effect transistor, it is necessary to check their markings.
Using this circuit to assemble a detector for hidden wiring in a wall is no more difficult than the simplest electrical circuit that schoolchildren make in physics lessons, so such work is unlikely to cause difficulties even for an inexperienced craftsman.
To visually display the process of identifying existing wiring in the wall, connect the pointer device in parallel to the source-drain electrical circuit. The indicator must have a ballast resistor. The value of the resistance element can vary from 1 to 10 kOhm.
As the transistor closes, which occurs when it approaches the electrical wiring, an increase in the indicator readings will be noticeable. This will indicate that there is voltage in the cables inside the wall, and therefore an electric field.
Rating of the best hidden wiring detectors
Analyzing user reviews, you can rank the top three as follows:
- Hidden wiring alarm Woodpecker E121 . It works on the electrostatic principle, is lightweight, compact and quite highly functional - it can track hidden wiring, its breakage, determine the phase and neutral wires in a household electrical network, check grounding, etc. Woodpecker E121 is easy to use, since the device moves directly along the surface under study. Disadvantage: to use the device on the network, operating voltage must be present. The asking price is 1800...2000 rubles.
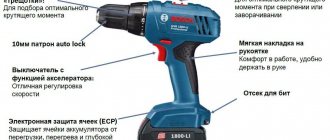
- The detector model Bosch GMS 120 Prof belongs to devices in the mid-price category. It can determine the necessary parameters remotely when moving away from the object at a distance of up to 50...60 mm (with increasing distance the error increases) for metal objects, and up to 100...120 mm for wood or plastic. Bosch GMS 120 Prof runs on batteries and a rechargeable battery included with the device. The accuracy of the determination is not affected by the humidity of the walls and room, and the result can be recorded not only on the scale, but also with a corresponding mark on the wall. The cost of the device is 6000...6200 rubles.
- Metal and hidden wiring detector model DSL-8220S . Requires a supply voltage of 9 V, and runs on Krona type batteries. Its capabilities are similar to the Woodpecker E121 device, but differs in its ability to be used for indicating hidden objects made of non-metals and plastic. The housing has a splash-proof design, the depth of detection of defects is up to 200 mm. At an affordable price - up to 1000...1200 rubles.
What to look for when choosing
Before reading this rating, it should be clarified which criteria you should pay closer attention to. From a wide list of device characteristics, you should be primarily interested in the following:
- Detectable materials. Most of the models presented in the rating are capable of detecting electrical wiring, metal fittings, wooden sheathing or other frames. Some can “find” plastic (water and sewer pipes).
- Depth. In this case, everything is extremely simple - the technical characteristics of each model indicate the limiting values within which it can detect certain materials. In this case, it is recommended to purchase a device with a so-called “deep” reserve.
- Auto calibration. This implies automatic adjustment of the sensor to certain operating conditions. Detectors belonging to the budget and mid-price ranges require auto-calibration. For professional options, such actions are not performed, since their operating principle is completely different.
Checking work
In order to accurately determine the location of hidden wires, you should first learn how to use the indicator. To do this, you need to try working with it on open wires, pipes, and other elements. This will help you understand when and to what objects the device emits a signal.
Before making a purchase, you should test the indicator in a store. Any switched on electrical appliance is suitable for this. You can use its wire for testing. The device must be tested at different distances. The wire can be covered with a board or some plastic object. If the detection was successful, then you can safely buy the indicator you like.
Finding the phase
To find a phase in a socket or on a cable, you need to touch the contact being tested with a screwdriver. Do not touch the metal patch at the end of the indicator!
If you do this, the indicator will glow equally in both sockets of the socket, and it will be impossible to figure out where the phase is and where the zero is.
True, the sensitivity of such a screwdriver can be not only an advantage, but also a disadvantage. For example, in a three-phase 380V network, when the phases are located close to each other, the tool may be affected by the induced voltage.
Therefore, to simply determine the absence of voltage, a battery-free indicator with a neon light bulb is still more reliable.
It is better to use this device precisely because of its additional capabilities.
Simple DIY hidden wiring detector
First of all, let's make a search antenna. Cut a piece of wire approximately 30 cm long.
We wind it on a frame 3-5 mm in diameter. A skewer will do.
Take out the skewer and stretch the coil a little. The result is an antenna.
Hidden wiring detector diagram:
The pinout of the transistor is as follows:
We collect everything according to the diagram. First we solder the transistors to each other.
The good thing about this 5-part design is that it doesn’t require a board—everything is assembled by surface mounting. Solder the LED.
Then the resistor.
We connect the whole thing to the block.
And finally we solder the antenna.
As a result, a ready-made working sample.
To turn it on, you need to put the block on the battery.
We bring it to the wire:
The LED lights up. Real world tests:
When approaching live wiring, the LED lights up clearly.
Such a device does not require any configuration and, if the parts are in good condition, starts working immediately. Now you can easily identify life-threatening places where you should never drill.
Recommendations for selection
Which hidden wiring detector is better: imported, domestic or self-assembled? In principle, no particular complaints were noted regarding the work of both foreign and Russian testers. Therefore, when choosing a device, the installer must determine for himself its necessary characteristics:
- appearance;
- functionality;
- basic electrical parameters;
- ease of use;
- other details.
However, the following should be noted here. Since domestic detectors are manufactured in accordance with Russian electrical regulations, their functions when searching for hidden wiring will also comply with domestic wiring regulations.
Domestic detectors are manufactured in accordance with Russian electrical standards
Foreign devices comply with the regulations of the countries in which they are manufactured. This means that they will not necessarily be adapted to our conditions. In addition, they cost an order of magnitude more than domestic devices.
Foreign devices comply with the standards of the countries in which they are produced and are more expensive
When making an electrical wiring tester with your own hands, it is necessary to minimize the possible shortcomings of the created device. It is better to carry out such work under the guidance of an experienced specialist.
When making an electrical wiring tester with your own hands, it is necessary to minimize the risk of defects in the created device.
Other schemes for homemade hidden wiring finders
In this section we will give as an example several wiring finder circuits that even novice radio amateurs can assemble. Let's start with the most basic device.
Scheme: a simple field-effect transistor wiring detector.
The parts we need are: a field-effect transistor, KP303 or KP103 is suitable (the letter index does not matter), a telephone speaker with a resistance of 1600 to 2200 Ohms and an ohmmeter (used as an indicator).
The transistor body plays the role of an antenna; it is carried along the wall. When the wiring is detected (it should be live), a characteristic sound at a frequency of 50 Hz will be displayed in the speaker, and the indicator needle will deflect.
Unfortunately, the sensitivity of such an indicator leaves much to be desired, so let’s consider a more complex scheme.
Diagram: finder with three transistors
List of required radio elements:
- transistors (any index will do): T1-KT315, T2-KP103, T3-KT361;
- LED HL-AL307B or any analogue;
- resistance parameters: R1 – 2.2 kOhm, R2 – 10.0 kOhm, R3 – 470 Ohm, R4 – 1.0 MOhm;
- capacitance C -10.0 µF 10 V.
As an antenna, you can use copper wire of appropriate thickness, 80 to 100 mm long (the longer the length, the higher the sensitivity)
The two devices above do not provide the ability to adjust the sensitivity, which will somewhat complicate the search for wiring. Below is a diagram where this function is implemented.
Diagram: finder with adjustable sensitivity
Designation of parts in the diagram:
- T – KP103;
- HL – AL107BL (can be replaced with an analogue);
- R1-2.0 kOhm;
- R2 -2.0 kOhm (may need to be adjusted to achieve maximum volume);
- R3- 1.0 MOhm;
- C1 -5.0 µF;
- C2 – 20.0 µF
- SP – speaker with impedance from 30 to 60 Ohms;
- L – contains from 20 to 50 turns of wire with a diameter of 0.3-0.5 mm per frame of 3 mm, frameless execution is allowed.
In conclusion, we present a diagram of a combined device that combines the functions of a metal detector and an electrostatic detector.
Combined finder circuit
Why do you need to know the electrical wiring in the house?
Drilling blindly, you can stumble upon a live wire
Although repairing damaged wiring is not very difficult, it is still advisable to avoid it. Therefore, it is necessary to determine the wiring diagram in the following cases.
- When remodeling a house and moving partitions, moving door and window openings.
- If we are going to carry out repair work related to the installation of various elements in the thickness of the wall or ceiling. Even when hanging a picture on the wall, you can accidentally touch a wire.
- If we are going to install heating devices. Although they may not be mounted on the wall, pipes and radiators are not allowed to be adjacent to electrical wires; they must be located at a distance of at least half a meter to prevent damage to the insulation from overheating.
- When repairing and upgrading the wiring itself (for example, installing additional lamps or sockets).
Of course, you can simply turn off the power to the house and connect the damaged wires, but this is inconvenient and dangerous for many reasons.
- It is impossible to make modern repairs without power tools; if we turn off the power supply, we will not be able to use them.
- When installing fasteners in the wall, we do not know how far away they are from the wires. It is possible that, without noticing, we did not break the wire, but damaged its insulation. Then the self-tapping screw and the metal shelf it secures will be energized.
- There is a possibility that we will damage the ground wire. This is not noticeable, but the devices he was going to and the people using them will be without protection.
Summary table of technical characteristics of wiring scanners
For clarity, I selected those performance characteristics that are more important for use by a home craftsman and summarized them in a table.
I understand that the choice is also influenced by the cost of the device and the conditions for its purchase. However, the price is a variable value. You can find it out by entering the name of the device and the word buy into Google or Yandex.
The search engine will present you with many options from which you can choose the best option.
| Brand of hidden wiring detector | BOn3 SCH GMS 120 Professional | MASTECH MS6906 | UNI-T UT387B | Woodpecker E121 | Floureon hidden wiring detector | Skil detector 550 | ADA Wall Scanner 80 |
| Weight, kg | 0,27 | 0,25 | 0,195 | 0,12 | |||
| Detects materials | Wood, metal, wiring | Wood, metal, wiring | Wood, metal, wiring | Wood, metal, wiring | Metal, wiring | Wood, metal, wiring | |
| Calibration | Auto | Manual | Auto | Manual | Auto | Auto | |
| Metal search depth, cm | 12 | 3-5 | 8 | 7,6 | 8,0 | 8,0 | |
| Wiring search depth, cm | 5 | Up to 7.5 | 8 | 7,6 | 5,0 | 5,0 | |
| Color search depth metal, cm | 8 | 8 | 7,6 | 6,0 | 6,0 | ||
| Tree search depth, cm | 3,8 | 3-5 | 2 | 3,8 | 2,0 | ||
| Max. search depth, cm | 12 | ||||||
| Nutrition | 9V battery | 9V battery | 9V battery | 9V battery | 9V battery | 9V battery | 9V battery |
The performance summary table has empty cells. I just took all the data from the technical data sheets published by the manufacturers, but I couldn’t find some parameters.
If you have such devices, you can add this information through the comments section.
In general, while collecting information from manufacturers’ websites, I noticed one strange feature: not a single factory gives a 100% guarantee on the accuracy of determining the final result.
Even Bosch specifically stipulates in its data sheet that the accuracy of the device is affected by many accompanying factors that must be taken into account at the measurement site.
These include:
- strong magnetic and electric fields;
- presence of foreign metal objects of different sizes;
- wall humidity and its conductive properties;
- other hidden wires laid nearby;
- voltage pickups;
- other random phenomena.
Therefore, it is imperative to additionally review the design and as-built construction documentation and consult it during work. It’s just that implementing these Boch recommendations in practice can be very difficult for us. All we have to do is take into account all these factors, carefully study and follow the requirements of the instructions for calibrating and measuring the detector, and take into account the possibility of its error.
By the way, tests carried out measuring the same wall with hidden wiring with different detectors showed slightly different results.
Individuals are wondering how they can steal electricity and how to deceive the hidden wiring detector when Energonadzor begins to check their household. I want to warn you right away that this is a very bad idea, which is almost immediately doomed to failure. An experienced master, and also a very financially interested one, can easily solve such problems.
In general, devices for searching hidden wiring greatly facilitate the work of home and professional electricians. Their results should be approached creatively, taking into account that the greater the load on the wiring, the less error the scanner can make.
The main disadvantage of their design is that if a malfunction occurs, the manufacturer recommends refusing repairs and advises simply purchasing another device. This also needs to be taken into account when purchasing. I remind you that now it is convenient for you to share your experience in operating such detectors with other readers of the site in the comments section. It will be useful to many people.
Finder check upon purchase
If you want to buy a device in a retail chain, the seller will not prevent you from checking its performance. To carry out such a check it is necessary:
- Turn on the detector and try to find visible wiring of switched on devices or lighting.
- Carry out the same operations, moving a little away from the desired network.
- Then search for an unloaded network, and it is better to do these actions at various distances.
- Cover the wire with insulating agent and repeat the test.
If you have completed all these operations and the test results coincide with the description in the operating instructions, then you have a quality device in your hands.
Remember that foreign devices are manufactured according to the standards of the country of origin. Therefore, functions that comply with the rules for laying electrical networks may not coincide with domestic requirements, which can lead to an unexpected error.
Thanks to the use of detectors to search for invisible wiring, it is possible to significantly reduce the danger to human health when working in the area of influence of electrical networks.
Non-standard ways to find hidden wiring
You can detect hidden wiring not only with the help of a specialized detector. You can use other means. Few people have a compass at home, but if you have this tool, you can independently find the wires in the wall. Apply a load to the electrical line, watch for the deflection of the arrow that points to the cable.
The second option is much more effective, but is based on approximately the same action - the force of a magnet. Tie a magnet made of neodymium to a piece of thread. Guide it along a partition or wall. The magnet will deflect every time it is near an armature or wire. The electric current generates a magnetic field to which the homemade tool reacts.
Thus, to search for hidden wiring it is not necessary to buy expensive professional devices. Detectors and alarms can be created from improvised materials and inexpensive components from an electronics store. There are simpler methods, but remember that searching for wiring using a magnet and thread does not give the most reliable results.
What is useful to know in advance
There are several types of devices for finding cables and wires in walls.
The price of wiring scanners ranges from 700 to tens of thousands of rubles. To make a choice, you do not have to rely on the seller's advice without having your own opinion. Any seller wants to sell goods at a higher price or get rid of stale ones. If you don't know much about the topic, read this article! You will not regret.
The devices use different physical principles and are roughly divided as follows:
- Electrostatic.
- Electromagnetic.
- Metal detector.
- Combined.
- Radar.
- Ultrasonic.