Special machines are used for sharpening knives of planer and jointer types. The work can be done with your own hands; the machine can be assembled independently if necessary. Sharpening is carried out according to certain rules; several options are used. You need to be careful and not violate the technology.
Methods for sharpening a jointer knife.
Otherwise, knives for planers, jointers and planers will be poorly processed and will not be able to fully perform their functions. In addition to special equipment, sharpening stones can be used for sharpening, but a small sharpening machine that has cooling is best suited for the job.
High-quality sharpening of planing knives
To work accurately and accurately with cutting tools, it is necessary to monitor their condition and periodically sharpen them. The working tool can be made even sharper by entrusting it to our experienced craftsmen. All of our employees are specialists with many years of experience, and they operate special machines perfectly. Without a doubt, sharpening thicknesser knives and sharpening flat knives of any type is exactly the service that we provide better than all competitors on the market.
| Our craftsmen will not only carry out high-quality sharpening of reismx knives, but will also remove chips, if any, which is especially important for precision tool knives |
Simple homemade machine
The most common type of machine design is considered to be 2 pairs of wooden slats, which are fastened together with screws. The machine operator installs a block between such parts.
The main reason for the popularity of using a hand- made homemade machine for sharpening various knives is its stability. During operation, the machine structure does not move in any way on the workbench.
When fixing the block, the mechanic uses support strips that are located between the wooden elements.
However, such a homemade machine has the following disadvantages:
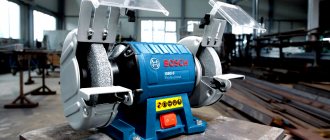
Sharpening of knives for planes and surface planers is carried out using professional equipment
We are open 7 days a week from 10:00 to 20:00
Depending on the specifics of the product being manufactured, the sharpening angle of the thicknesser knife may vary. An incorrectly selected sharpening angle can cause the blade to quickly become dull.
Sharpening of thicknesser knives, which our company offers, will allow your equipment to work at an impeccable level, just like right after purchase. Our service specialists use special tools in combination with innovative sharpening techniques. It is impossible to achieve the razor-sharp knife blades that you get after contacting our company on your own at home.
Setting up a hand plane, sherhebl and jointer
A plane is a tool for working with wood. In the hands of a good craftsman, with his help, a nondescript board can turn into a real work of art. It will become smoothly sanded and perfectly level if necessary. Or, if necessary, you can make a notch in it using a plane. They remove shavings in order to give the wooden surface the desired shape and smoothness. The thickness of the chips may vary depending on what is required to be obtained as a result of the work.
Craftsmen, as a rule, use hand planes. The application technique requires certain skills; anyone can acquire them. Often this tool turns out to be indispensable for work, and it is impossible to use an electric plane instead of a manual one. This applies to cases where surface smoothness is required to be almost perfect. It is more difficult to achieve this result with an electric planer.
In order to use this tool for its intended purpose, you need to configure it. To do this correctly, you will need to follow the steps for setting up your plane. Only in this case will it work as it should. Every craftsman should know that the adjustment of planes, jointers and sherhebels determines the quality of the work. And it needs to be carried out in such a way that it is convenient and reliable to use.
Sharpening process and operating rules
The holder moves to the right and left, movements are made relative to the sharpening stone. The blade should not be allowed to go beyond the edge. It is best to immediately install the holder 12 mm from the edge of the working circle. If sharpening is carried out, water cooling must be supplied. You will have to add water to the tank, you need to make sure that it does not run out. It is necessary to ensure that water does not accumulate on the floor near your feet. This is done for security reasons.
When performing work, you must ensure that the stone remains clean at all times, as it gets dirty quite quickly. A special whetstone is used for cleaning; it is recommended to carry out this procedure frequently, since only clean stones can be used for sharpening. The choice of stone itself depends on what kind of knives are used. Today, manufacturers produce jointing knives from soft or hard tool steel, so working conditions will vary.
Sharpening takes approximately 20 minutes, then fine-tuning is done. A special paste is used for this. After polishing, there should be no burrs left on the surface, otherwise the jointing knife will not be ready for use. The test is simple to carry out; a finished knife with excellent sharpening should easily and evenly cut a sheet of paper while hanging, leaving a neat cut.
Description of sharpening knives for woodworking machines
Sharpening knives for woodworking machines is a mandatory process that can be done with your own hands using special tools. Sharpening is the restoration of the previous cutting capabilities of hacksaws, scissor shafts, planers, jointers and other devices for wood processing.
Photos of sharpened knives
- To sharpen the blade shaft of a planer or jointer, you will need the appropriate device;
- The sharpening work is done by hand;
- Craftsmen learned to assemble sharpening devices;
- When restoring hacksaws, jointing devices, sharpening knife shafts, be sure to follow several recommendations and strictly follow the technology;
- If the teeth of hacksaws and knife shafts are sharpened incorrectly, the quality of wood processing with tools will significantly deteriorate;
- Sharpening stones are a good alternative for a sharpening machine. But if you have the opportunity to assemble it yourself or purchase a sharpening machine, be sure to take advantage of it.
Diagram of the device for sharpening knives of woodworking machines
If you need to sharpen knives for a woodworking machine, you should start with the required preparation steps. It is not so important what parameters the knife shaft or cutting sheets of hacksaws have 13 mm, 20 mm or all 200 mm, they will definitely need sharpening.
Some people prefer to send dull shafts to special workshops, where they can easily restore the previous sharpness of a 200 mm knife or a small lathe cutter. But both ordering sharpening and buying new knife shafts is a financially expensive matter.
Preparation for sharpening begins with familiarization with the available means of restoring the surfaces of cutting tools and some recommendations.
- To keep jointers, planers, and hacksaws in working order, assemble or purchase an appropriate sharpening device.
- The simplest, budget option is a whetstone. But the quality of processing directly depends on your skills in working with stone. If there are none, it is extremely difficult to achieve the required level of sharpening. Plus, stones are not able to cope with all types of cutting tools that are equipped with modern woodworking machines.
- Choose a machine that can sharpen at low speeds, as this has a positive effect on the quality of the finish.
- The recommended equipment for a sharpening machine is a water cooling system.
- Carefully study the equipment of household woodworking machines. Often there is already a sharpening stone, which is optimally suited for processing the knives used.
- If the stone is not included in the package, it will have to be purchased separately, leveled with a special device, and smoothed. This is the only way you can sharpen the knife shafts of jointing machines efficiently.
- The machines have a function for setting the angle of inclination, adjustable with a special screw. By turning the screw and changing the position of the sharpening device, you can correctly fix the tool relative to the stone.
- The next preparatory stage is the holder into which the knife shaft is installed.
- If you are a beginner, it is not recommended to start your first job with 200 mm knives. Start literally with 13-15 mm, and gradually you will learn to process 200 mm and even 2 mm. To do this you need to accumulate certain experience.
- The length of the knife is not a fundamental parameter, since the knife in the holder can move to the distance you require.
- Make sure to hold the shaft firmly in place. Otherwise, you will get a significant distortion, due to which the quality of woodworking will suffer.
- Study the operating manual of the purchased sharpening machine in detail. If this is a DIY tool, you will have to rely on drawings and available information on the Internet about a specific sharpening device project.
Sharpening
In order for the sharpening of knives for a woodworking machine to give a positive result, you can resume working with the equipment at the same level of quality, you need to adhere to a few fairly simple rules.
- The sharpener holder can move left and right relative to the stone to sharpen knives.
- Do not allow the blade to end up over the edge.
- Immediately fix the holder at a distance of 12 mm from the edge of the grinding wheel.
- When sharpening knives of 200 mm or smaller variations, make sure that the water cooling function is activated on the machine.
- The cooling system requires constant monitoring. The tank usually has a small volume, so water needs to be added periodically. If it runs out and the sharpening process continues without cooling, you risk ruining a rather expensive knife.
- As the knives are processed, water from the cooling system may accumulate on the floor. Since sharpening machines are electrical devices, ensure that water is drained away from your feet and wear rubber shoes. In any case, standing in a puddle of water while working with an electric machine is always dangerous. Follow safety regulations.
- Keep the whetstone clean. It gets dirty quite quickly with active use.
- The grinding wheels of machines are cleaned using a special device. The machines should be equipped with this cleaning bar, but if it is not included in the set, then you will have to purchase it separately.
- Each subsequent sharpening, according to the operating rules, is performed only on the condition that the stone is cleaned. Therefore, after each sharpening, arm yourself with a cleaning bar and treat the machine with it.
- On average, sharpening using a special machine takes about 10-20 minutes. It all depends on the type and size of the tool, which became dull as a result of woodworking operations.
- After sharpening the tools of woodworking machines, do not rush to return them to their place and continue working. After processing on the machine, the tool needs to be fine-tuned.
- Finishing consists of applying a special paste to the surface of the cutting element. Proceed according to the instructions provided by the manufacturer of the finishing paste on the packaging. Different pastes may differ slightly in application methods.
If you did everything correctly, then the knife should be perfectly smooth, sharply sharpened, and free of any irregularities or burrs. Don't worry when the result doesn't meet your expectations the first time. This takes some time and a little experience. That’s why you should start with simple and inexpensive knives that you don’t mind ruining.
Article rating - material rating: 5.00 out of 5 Loading…
tvoistanok.ru
Benefits of contacting our company:
Our service is located at the station. Taganskaya metro station, on Verkhnyaya Radishchevskaya street, at building 9. If you would like to call us to clarify details, you can do this by phone.
We carry out the following sharpening work:
- Sharpening circular saws. Approximate price 400 rub.
- Sharpening and setting a hacksaw for wood. Approximate price 300 rub.
- Sharpening claw clippers. Approximate price 200 rub.
- Sharpening ice axes. Approximate price 150 rub.
- Sharpening manicure tools. Approximate price 350 rub.
- Knife sharpening. Approximate price 250 rub.
- Sharpening blender blades. Approximate price 250 rub.
- Sharpening lawn mower blades. Approximate price 250 rub.
- Sharpening machine knives. Approximate price 450 rub.
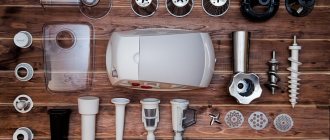
- Sharpening knives for meat grinders. Approximate price 225 rub.
- Sharpening planer knives. Approximate price 300 rub.
- Sharpening scissors for metal. Approximate price 220 rub.
- Sharpening hairdressing scissors. Approximate price 250 rub.
- Sharpening tailor's scissors. Approximate price 200 rub.
- Sharpening planes. Approximate price 220 rub.
- Sharpening garden pruners. Approximate price 200 rub.
- Sharpening axes. Approximate price 250 rub.
- Sharpening cutters. Approximate price 120-200 rubles.
- Sharpening chains for chainsaws. Approximate price 250 rub.
Why should you contact us for sharpening planing knives?
Running unconfirmed advertising and playing on the feelings of our customers is not in the rules of our serious company. Our goal is to serve our customers efficiently and quickly, to sharpen the planer knife so that you return to us as a regular customer. All clients who trust us must be served in such a way that they can use the tools sharpened by us for a long time and receive only positive emotions from it. These are the basic principles of our company. We are constantly working on our reputation.
Contact us for sharpening knives for surface planers and you will receive:
- Professional attitude
- There is a guarantee for every service
- Affordable prices
- Quality service and kind treatment
Don’t hesitate to contact us, everyone who has been served by us once becomes our regular customers. Our prices and service will not leave you indifferent and you will remember our productive cooperation for a long time.
| Our craftsmen know how to properly sharpen a surface planer knife so that you can make the most of its potential. |
The price of sharpening knives on a thickness planer is 250-450 rubles.
Address of the workshop for sharpening thicknesser knives: Moscow, Taganskaya metro station, st. Verkhnyaya Radishchevskaya, 5, building 5. (Call for directions).
Working hours: seven days a week from 10:00 to 21:00
Special machines are used for sharpening knives of planer and jointer types. The work can be done with your own hands; the machine can be assembled independently if necessary. Sharpening is carried out according to certain rules; several options are used. You need to be careful and not violate the technology.
Otherwise, knives for planers, jointers and planers will be poorly processed and will not be able to fully perform their functions. In addition to special equipment, sharpening stones can be used for sharpening, but a small sharpening machine that has cooling is best suited for the job.
Mechanized disc sharpening
- saw blade;
- disc sharpening machine;
- pendulum protractor;
- marker.
How to sharpen a circular saw mechanized? There are a large number of different machines. Some mechanisms have software systems to provide fully automated turning mode. In a home workshop, when turning discs is occasional, you can use a simpler device.
The sharpening angles of the circular saw teeth are: rake angle (γ), back angle (α) and bevel angles of the front and rear planes (ε1 and ε2).
How to sharpen a disc? In such a machine, after it is installed and secured in a position that provides the required sharpening angle, all other operations of turning the blade around its axis and controlling the thickness of the metal removed from the tooth are performed manually.
Sharpening a straight tooth along the front plane is performed in the following sequence. Place the blade on the machine frame. Clamped using a centering sleeve. Then, using a mechanism, it is installed in a strictly horizontal position. Thus, the bevel angle of the front plane is equal to zero. If the machine does not have a built-in angular scale, the horizontalness of the disk is checked using a pendulum inclinometer.
Then the screw of the mechanism is rotated, which ensures horizontal movement of the frame with the circle. Set the required rake sharpening angle. The blade moves in a position in which the front plane of each element fits tightly to the working surface of the circle.
A marker is used to mark the first tooth from which sharpening begins. Then turn on the engine and sharpen the front plane. The machine brings the tooth into contact with the wheel and performs several movements of the blade back and forth while simultaneously pressing the element against the wheel.
READ How to Sharpen a Metal Drill Using a Grinder Video
After sharpening one element, the blade is removed from contact with the abrasive wheel and rotated by one element. Then the operation is repeated in a similar way. This way the machine works until the element marked with a marker completes a full circle, showing that all elements are sharpened.
Sharpening a beveled tooth differs from sharpening a straight one in that the saw is positioned with an inclination equal to the bevel angle of the front plane. To sharpen an element along the back plane, it is necessary that the machine allows you to install the blade so that the back plane of the element is in the same plane as the surface of the circle.
To sharpen a circular saw on a machine, you do not need to have special skills. Anyone can do this job if they follow all the instructions and rules for working with disc sharpening machines.
Sharpening saw blades
The circular saw is sharpened from the back surface if you work in a position facing the material being processed.
- The front surface, which runs into the material when sawing, remains in the same position.
- The disc can be sharpened directly in the machine. Otherwise, you can remove it from the machine or circular saw.
- In the first option, you must first pull out the plug from the socket to prevent the consequences of starting the machine, which can happen accidentally.
- The disk needs to be wedged, for which you need to place thin pieces of wood on both sides of it and press them against the teeth.
- With a marker, you need to mark the side of the tooth from which you will begin sharpening. This will allow you to avoid mistakes in such important work.
- Care and extreme caution must be exercised.
It is important to remember the number of movements you make when sharpening the first tooth, while using a file or diamond needle file.
You will need the same effort to sharpen all the other teeth.
If you removed the disk from the machine, you need to clamp it in a vice to do the same steps that you read about above.
Next, the disk is returned to the machine, and the unnecessary wood is sawn. It is necessary to check the tooth height if your work was accompanied by loud noise or uneven feed. This can be done by bringing a marker to the cutting edge and turning the disc with your hand in a slow rhythm one turn in the direction opposite to the direction of rotation. Each tooth will receive a mark, and when examining the disc, it will become clear which teeth are higher than others. If there is a significant difference, it is necessary to carefully reduce their height.
Sharpening circular saws
- saw blade;
- file;
- diamond file;
- marker;
- thin wooden blocks;
- vice;
- wiring;
- adjustable wrench.
How to sharpen a circular saw with a disc? The circular saw must be sharpened from the back surface if you work with the blade facing the wood. The front surface, which touches the material when cutting, remains in the same position.
You can turn a disk in a machine. You can pull the canvas out of it. If turning is performed in the device, the plug must be removed from the electrical outlet to prevent the device from being turned on accidentally. You need to wedge the product by placing thin blocks under it on both sides and pressing them against the teeth.
It is necessary to mark with a marker the element from which turning begins. When turning, you must be careful and apply maximum attention. Turning is performed using a file or diamond needle file.
It is necessary to remember the number of movements and efforts applied when turning the first tooth. The same efforts must be made when turning other parts. If the blade has been removed from the machine, you need to clamp it in a vice, then sharpen each tooth in the same way. Then the canvas is installed back into the device.
Check the cut on a sample. If there is noise during operation or the material feed is uneven, you need to check the height of the teeth. To do this, you need to bring a marker to the cutting edge. Then you need to slowly turn the blade by hand 1 turn in the direction opposite to the direction of rotation. A mark will appear on each tooth. Upon inspection, you can find out which elements are higher than others. If the difference turns out to be significant, you need to carefully reduce the height of the elements.
Sharpening the saw
Let's go over the material on how to sharpen a wood saw or sharpen a circular saw.
How to set disc teeth
Sharpening a circular saw tooth along one and two planes.
If it is necessary for the disc to move more freely, then the teeth are set.
It is necessary to bend all the teeth in turn in different directions to the same distance. The work is done using wiring. Routing is a tool for routing elements. To perform the wiring, you can use an adjustable wrench. When working with soft woods, they are diluted more. Less when working with hard rocks.
To choose the right wiring, you need to test the device when cutting durable wood. The best wiring option would be approximately 0.3-0.5 mm in one direction. The main requirement is to distribute elements no more than the thickness of the fabric on both sides. The layout is carried out before sharpening.
In cases where it is necessary to turn a blade of higher quality, a mechanized turning machine is used.
Adjusting tool knives
A woodworking master knows very well how to adjust the knives on an electric planer. To perform this work you must have:
- Hexagon included with the product.
- Metal ruler.
In order to set up a tool with several knives quickly and correctly, it is necessary to follow a certain technological sequence:
- Turning the device over, you need to remove tar deposits from the canvas with a solvent.
- The front side of the sole is exposed. Its position must correspond to the minimum planing depth.
- Each blade is installed in the gap between the plates.
- The ruler is placed on the base plate. Moreover, the cutting edge must touch the supporting surface. If this does not happen, you need to loosen the fastening bolts and set the desired level.
- Then tighten the bolts.
- All attachments are subjected to the operation. The exposed gaps must have the same dimensions. As a result, vibration and tool imbalance are eliminated.
- To determine the ease of rotation of the drum on the shaft, you need to turn it by hand.
- To check the correctness of the settings, process the unnecessary workpiece.
If the knife has a straight shape, the protrusion of the working part should reach 0.5 mm. For a rounded shape, this size should be more than 1 mm.
Sharpening and setting the saw
The main cutting element of any hand saw. a series of teeth cut on the blade and representing wedge-shaped cutters. Wood, in the manufacture of all kinds of products from it, is sawn along, across and at an angle Θ to its fibers; in this regard, transverse, longitudinal sawing and sawing at an angle to its fibers are distinguished, and in each case they use the appropriate type of saw, which differs from others in shape teeth
A. cross cutting; b. longitudinal sawing; 1. wood; 2. cut; 3. marking line for sawing; Θ. the angle of inclination of the marking to the wood fibers during mixed sawing.
When cross-cutting, cross-cut saws are used, the cutting edges of the teeth of which, when moving in the wood, cut its fibers like a knife and form a cut. Longitudinal sawing differs from cross-cutting in that the direction of movement of the saw is parallel to the grain of the wood. The leading edges of the teeth of rip saws plan wood, like knives in planes, and, going deeper, form a cut. When sawing wood at an angle Θ, universal (mixed) saws with teeth that are an intermediate form of teeth for transverse and longitudinal saws are used to its fibers.
Tool support device
When making a handhold device, the following steps are performed:
Removes the flat inclined part from the base, modifies it and installs a fixation device on it, as well as the clamp of the device used;
Measures 40 mm from the edge in front and, using a garden hacksaw, uses this mark to cut out a groove, the depth of which is 2 mm;
Using a shoemaker's knife, chip off the top 2 veneer layers from the end of the board. The result is a sample into which the mechanic inserts a 2 mm steel plate at the same level as the general surface;
The tool rest consists of 2 steel strips measuring 170x60 mm and 150x40 mm. The machine operator connects them along the large end, which has equal edge indentations, and makes 3 through slots of 6 mm.
Using bolts, tighten the planks along the cracks made. In such a situation, the machine operator leaves the bolt heads on the side of the large top plate;
Next, using electric arc welding, the bolt heads are baked and welded to the plate;
Then he removes metal defects of the weld in the form of beads and grinds the plate to give it a smooth surface;
Applies a small striker plate to the edge recess, moves the slots with a drill and secures the support with bolts.
Sharpening process and operating rules
The holder moves to the right and left, movements are made relative to the sharpening stone. The blade should not be allowed to go beyond the edge. It is best to immediately install the holder 12 mm from the edge of the working circle. If sharpening is carried out, water cooling must be supplied. You will have to add water to the tank, you need to make sure that it does not run out. It is necessary to ensure that water does not accumulate on the floor near your feet. This is done for security reasons.
When performing work, you must ensure that the stone remains clean at all times, as it gets dirty quite quickly. A special whetstone is used for cleaning; it is recommended to carry out this procedure frequently, since only clean stones can be used for sharpening. The choice of stone itself depends on what kind of knives are used. Today, manufacturers produce jointing knives from soft or hard tool steel, so working conditions will vary.
Sharpening takes approximately 20 minutes, then fine-tuning is done. A special paste is used for this. After polishing, there should be no burrs left on the surface, otherwise the jointing knife will not be ready for use. The test is simple to carry out; a finished knife with excellent sharpening should easily and evenly cut a sheet of paper while hanging, leaving a neat cut.
How to sharpen jointing knives with your own hands?
Special machines are used for sharpening knives of planer and jointer types. The work can be done with your own hands; the machine can be assembled independently if necessary. Sharpening is carried out according to certain rules; several options are used. You need to be careful and not violate the technology.
Otherwise, knives for planers, jointers and planers will be poorly processed and will not be able to fully perform their functions. In addition to special equipment, sharpening stones can be used for sharpening, but a small sharpening machine that has cooling is best suited for the job.
READ How to Properly Sharpen a Lawn Mower Blade
Base
When making a sharpening machine at home, you can use various parts. In particular, you can use laminated box plywood 12 mm thick, which was previously used to create radio equipment housings.
When constructing a machine at home, a household member performs the following actions:
Selects a base for such an installation, which must weigh at least 5 kg. Otherwise, it will be impossible to sharpen chopping devices and tools on the machine. Therefore, in the manufacture of such equipment, the tenant uses various steel angles measuring 20x20 mm;
Next, 2 parts are cut out of plywood with a jigsaw, which have a trapezoidal shape, the base is 170 by 60 mm, and the height is 230 mm. When cutting, the mechanic makes an allowance of 0.7 mm for sharpening the ends: they end up straight and fit according to the markings;
Preparatory work
Anyone who has a plane or jointer faces the problem of sharpening knives. It is expensive to constantly buy new ones, especially since knives can be easily sharpened with your own hands using special machines or sharpening stones. If the jointer is used frequently, like other woodworking equipment, then it will be inconvenient to constantly send knives to the workshop for sharpening. It is better to assemble the machine yourself. To ensure that the jointer is always in working order, it is recommended to sharpen it at home. The easiest way to do this is with a regular sharpener. You only need to take a sharpener with low speed, its quality should be high. Water cooling must be available.
You can also use a sharpening stone, but it must first be leveled with a special device. Usually it comes complete with a small sharpening machine, so there is no need to additionally look for such devices. After the editing is completed, it is necessary to smooth the stone; a block is used for this. Sharpening a jointer knife without this step will be problematic.
What to do next? You need to set the angle of inclination. A special screw will allow you to correctly secure the blade relative to the position of the sharpening stone. Using this screw, you can subsequently set any angle of inclination of the knife. Next, take the holder that comes with the machine. jointing is installed in it . Experts advise starting sharpening knives with a width of at least 13 mm. The length is not critical; if necessary, the knife holder can be rearranged to any position.
The knife must be securely fastened in the holder, otherwise sharpening will be carried out skewed, and this will worsen the quality of the jointer. How to properly secure a knife in a holder? While holding the blade in the desired position, tighten the clamping screws until they stop. To control the sharpening angle, you must use a marker; it marks the sharpened chamfer of the knife. It is with this simple method that you can easily monitor the quality and progress of work. The sharpening will be correct if the corner of the knife touches the stone. The stone must be rotated manually to determine if further adjustment is necessary.
How to properly adjust knives on a woodworking machine
To solve this problem you just need to set up the receiving table.
Whenever a planer, thicknesser, or drum sander is used to level flat wood surfaces, you run the risk of “stepping”—an annoying, shallow indentation at the beginning or end of a pass on the workpiece. On thicknesser and drum sanders, the "step" occurs because just as the front feed rollers grip the workpiece, allowing it to rise slightly, the cutterhead or sanding drum removes too much material from its surface, leaving an unsightly depression.
On a planer, the "step" that usually occurs at the end of a pass is caused by the machine's take-up (rear) table being too low. When the rear end of the workpiece leaves the infeed (front) table, it is lowered onto the back table and a rotating planer shaft, the knives of which select a “step” across the entire width of the board.
To ensure that “steps” no longer appear on your workpieces, set up your planer for optimal quality work. First, set the cutting edges of the planer shaft blades flush with the surfaces of the front and rear tables. Use a factory or homemade device to adjust the position of the knives. It is important to align the knife blades exactly with the height of the take-up (back) table, and not parallel to the planer shaft, as it may not be parallel to the tables. After aligning the knives, do not turn on the machine, but start setting up the back table. First, for ease of operation, remove the protective devices. Lower the back table 3 mm below the cutting edge of the knife, located at the highest point of the rotation circle. Place a piece of flat plank on the back table so that it touches the cutting shaft.
(We used 19mm thick MDF. Do not use a steel ruler as this may damage the cutting edge of the knife.) Raise the table slightly. Then turn the planer shaft clockwise while pulling the drive belt. If the board moves, raise the table a little more. Repeat these steps until the knives no longer move the board, but only lightly touch it. Finally, secure the receiving table.
The first task that a craftsman faces if he wants to do a quality job is to create an even square workpiece. This article will discuss such nuances as installing jointer knives, their adjustment, and the principles of operation of the tool. In order to form a general picture, you need to consider techniques that allow you to keep your jointer in working condition, after which you can learn some features that should be taken into account when working. Many novice professionals have difficulty setting up knives; first of all, this article was created for them.
The work involved in removing or installing knives largely depends on the fastening mechanism and may vary. In most cases, even a novice will have no difficulty removing the jointer blade and putting it back.
It is not the installation of the knives that is of great importance, but the adjustment of the jointer knives and the adjustment of the tables.
It often happens that workpieces have irregularities, for example, convex or concave. Before you rush to adjust the knives, you need to make sure that the problem is not related to the table. This is signaled primarily by concavities. This means that some part of the tables is tilted below the desired height. To determine the unevenness of the table, use a straight ruler. Convex edges indicate that the inside of the tables is excessively inclined towards the cutting head.
How to make a machine with your own hands?
To sharpen a jointer knife, you need to use special sharpening machines. This is especially important when jointers, planers and other woodworking equipment are used frequently. The sharpening machine is compact in size and can be installed even in a garage or small shed on a summer cottage. Before starting assembly, you must prepare the appropriate tools that will be used during assembly of the sharpening machine:
- the table on which the work will be carried out;
- faceplate;
- vacuum cleaner;
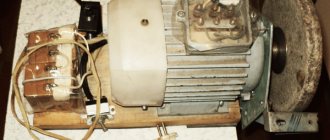
- engine;
- casing for the machine.
You need to start assembling the machine by finding a suitable faceplate. It is one of the most important parts for a sharpening machine. All jointer knives are quite narrow, so they can only be sharpened using a suitable type of faceplate. Then the sharpening work will be high-quality, safe, and fast. The faceplate takes up the bulk of the cost of all equipment. Making a sharpening machine yourself is more profitable; you don’t need expensive parts for it. Manufacturing will be quite justified if you have to frequently carry out woodworking.
You need to buy new faceplates; it is recommended to take American or German-made elements. They have the highest quality, and the cost fluctuates around 25,000 rubles. Next, you need to choose a motor for the future sharpening machine, it is best to take a 1-1.5 kW motor, you can even use a used element. Motors from old washing machines are excellent for the machine, but first you need to make sure the engine is working.
The motor is mounted under the tabletop, the faceplate is mounted to the moving part.
It is imperative to provide a button to turn the machine on/off. It should be located within reach of your hand. The faceplate is covered on top with a casing, which is made in the form of a square. One corner of the casing must be cut off, since from this side the jointing knives will be sharpened with your own hands. A hole is made in the lower part of the tabletop; it will be intended for a vacuum cleaner pipe, with the help of which all contaminants that arise during sharpening will be removed. In addition to sharpening jointing knives, a similar machine can be used for other work, for example, for processing ax blades, saws and other tools used in the garden.
Sharpening jointing knives can be done using various methods. Special sharpening stones are suitable for this. However, you can assemble a compact sharpening machine yourself. It will be used to sharpen a variety of tools including saws and axes.
Features of working with an automatic machine
- the wet method is more suitable for sharpening planing knives, because the blade is constantly cooled;
- at the preparation stage, you already need to set all the parameters, including the angle of inclination and the distance of movement of the carriage;
- the most important factor is the installation of knives on the carriage;
- the process should be carried out quite smoothly, without sudden twitching
Installation of knives on the shaft.
The slots or areas for the knives on the shaft should be smooth, without roughness. The edge of the shaft on which the cutting edge of the knife rests, the so-called chip breaker, must be smooth and sharp; nicks and crumbling of the edge are not allowed.
The knife shaft should lie in the bearings without play and be easily turned by hand.
The knives are installed in the nest so that the knife blade protrudes (overhangs) above the edge of the chip breaker by an amount of 0.25 to 2.km (usual limits are from 1 to 1.5 mm). Large euro is used in cases where it is desirable to increase the cutting angle.
The position of the blades of all knives in relation to the machine table should be exactly the same. This is achieved by aligning the knives on the machine. To do this, the knives are first screwed in lightly, so that they can be easily moved by blows of a wooden hammer or by tightening the adjusting bolts.
To check the position of the knives, the following methods are used:
A. Checking with a wooden template.
A template is made from hard wood (Fig. 242). The machine table is installed so that the template can be inserted under the knife shaft (when installing a thickness planer). Holding the template firmly on the table with one hand, turn the knife shaft by the pulley or clutch with the other (with a belt drive, the belt must be removed; in an electrified machine, the motor must be de-energized during installation) and bring the knife blade to the template. The table is then positioned so that the knife blade lightly touches the template. Having installed the table at one point, check whether the template touches evenly along the entire length of the knife blade.
Rice. 242. Scheme for installing knives using a template.
The rest of the knives are checked in a similar way. After checking, the knives are tightened with a normal doot-kaza wrench, starting from the middle to the edges.
Lengthening the arm of the wrench to increase tightening is not allowed.
b. Checking the installation using the Vadkin template.
The wooden template described above is convenient for checking the installation of knives on the surface planer. To check the installation of knives on the jointer, the Vadkin template is more convenient. The template consists of a ruler, at the ends of which two control templates protruding forward are installed (Fig. 243). The templates are pulled out at an equal distance from the edge of the table and first one knife is installed on them, and then the rest.
Rice. 243. Installation diagram of knives according to the Vadkin template.
When installing knives in square shafts, washers must be placed under the nut or bolt head.
c.Check with indicator.
The considered methods can only ensure relative accuracy of knife installation. To obtain high purity of processing, an installation accuracy of within 0.0025 is theoretically required, but checking using templates gives an accuracy of up to 0.05. A more advanced and at the same time quite quick way is to check the installation with an indicator. An accurate and sensitive indicator is installed on a special stand with a polished base (Fig. 244). By placing the indicator on the knife blade at one point and moving it along the knife on the table, you can set the knives with the almost necessary extreme accuracy.
The described methods allow you to perform a static check of the installation of knives (static alignment) on the machine. After checking, the knives are finally fixed on the knife shaft.
Using a special device (Fig. 245), you can install and check the cutter head outside the machine. At the same time, installation and alignment operations take significantly less time.
The required installation accuracy depending on the feed amount, ensuring processing with both knives, can be selected using the graphs in Fig. 246 and 247.
Static alignment allows you to install the knives with sufficient accuracy in relation to the geometric axis of the shaft. However, at high peripheral speeds of the knife shafts (common in modern machines), a deviation of the geometric axis from the actual axis of rotation occurs. Due to the elasticity of the knife shaft and bearings, off-axis of the rotating shaft appears, due to which the trajectories of the knives, even with the most accurate installation, may not coincide. This misalignment increases sharply and can exceed 0.25 mm if the cutter shaft and knives are not balanced and especially if there is play in the bearings, the transmission belts are too tight, or the operation of the self-centering devices with removable heads is disrupted.
To check the dynamic balancing of the knife shaft, use a special device with a “pencil” (touchstone) (Fig. 248) made of hard abrasive with a cross-section of about 25 mm. This device consists of a frame along which a carriage with a “pencil” moves using a worm clutch. The frame is firmly fixed to the machine bed above the knife shaft, and the keystone is installed so that when the shaft is rotated, the knives approach it without touching, but with minimal clearance. After this, the knife shaft is set in motion, and the whetstone is given translational motion along the knife shaft by rotating the handwheel. In case of misalignment, which appears during rapid rotation of the shaft, the knives, deviating, will touch the touchstone and grind off. When moving the carriage to one side or the other, the deviations of the knives can be gradually removed.
Rice. 244. Scheme for installing knives using an indicator.
Rice. 245. A device for installing and aligning the knife shaft outside the machine.
When checking the balancing with such a whetstone, it is necessary to ensure that the whetstone does not come too close to the knife blade, which can cause too sharp an impact on the knife blade. The forward movement of the whetstone along the knife shaft should be uniform and not too fast.
Sharpening jointer knives
The hand jointer has been actively used in carpentry since ancient times and is now widely used. And since then, special attention has been paid to such an event as sharpening jointer knives. After all, only a well-adjusted tool allows you to obtain a high-quality product.
So, sharpening jointer knives with your own hands begins with removing the knife along with the chipbreaker, which is subsequently unscrewed. After this, the resin and dirt that formed during work are washed off the knife. Gasoline copes well with this task. After cleaning the knife, you can proceed directly to sharpening. Sharpening jointer knives can be done in many ways. Anyone who does this often and has enough experience sharpens a knife by simply holding it with his hands at the desired angle. For those who have less experience, there are a lot of devices, electrified and manual. Since machines for sharpening and straightening blades are expensive, hand tools are most often used. Such products are both factory-made and home-made. An extremely simple device for maintaining the sharpening angle unchanged is shown in the photo below. It is a furniture bolt, about fifteen centimeters long with a semicircular head. This shape of the bolt head reduces friction during sharpening. There are two nuts attached to the bolt threads, one of which is fixed relative to the other. By moving these nuts up or down you can change the sharpening angle within a wide range. In addition to the nuts, the bolt has two wide washers, between which the jointer blade is clamped. The knife is secured using a wing nut. The assembled structure is shown below. The sharpening angle of the jointer knives can be calculated geometrically or measured using a protractor. For planing soft wood, the jointer knives are sharpened at an angle of 25 degrees; for planing hard wood and for soft steel, the jointer knife should be sharpened at an angle of 30 degrees. There are also factory-made devices for sharpening carpentry tools on sale. In addition to jointing knives, such devices can be used to sharpen chisels, turning cutters and other cutting tools. The photo below shows the most common and inexpensive device for sharpening jointer knives with your own hands. With its help, it is easy to adjust the sharpening angle by moving the knife up to increase the angle and down to decrease it. The set sharpening angle of the tool can be determined using the existing ruler, which is folded down in this photo below. The knife is secured with two screws. The scale is graduated for the most common sharpening angles - 25,30,35 degrees. Among the disadvantages of such a device, it can be noted that sharpening often occurs unevenly, due to an unevenly clamped blade. The shaft, thanks to which the device moves, is made of plastic and is not very durable. Sharpening of jointer knives, regardless of the chosen device, is done on sandpaper, which is attached to a piece of tempered glass. By changing the grain of the paper, acceptable sharpness is achieved. Finish sharpening by grinding and polishing the blade chamfer. For sanding, use the finest-grained paper available. Polish the blade on a leather belt, onto which GOI paste is applied. After finishing polishing on the paste, the blade reflects objects like a mirror and has a razor sharpness.
READ How to Sharpen a Stihl 180 Chain
10, total, today
Safety precautions when working with a woodworking machine
Technical documentation of any equipment includes instructions for operation and maintenance. When purchasing a woodworking machine, carefully study all accompanying documents. Woodworking machines are considered high-risk equipment. During work, the master is faced with high voltage, moving components and cutting tools. To avoid injury, electric shock, or fire while operating the machine, basic safety precautions should be strictly followed. Before starting work on a woodworking machine, prepare your work area.
- It should be clean and well lit.
- Remove all things that clutter the work surface.
- There should be no flammable liquids or gases in the room where carpentry work is carried out. Sparks flying during operation can cause fire.
- To avoid an accident, children and strangers should not be near the machine.
People who have reached the age of majority and have appropriate training, who are well aware of the structure of the machine and the operating rules, are allowed to work on a woodworking machine. You should be extremely careful when working with a woodworking machine. Avoid being distracted by extraneous thoughts and conversations to avoid injury. You should not work when you are tired or not feeling well. It is strictly forbidden to use the equipment while under the influence of alcohol or drugs. When making products on a woodworking machine, always observe personal safety:
- Work in special clothing. It should not be bulky or loose. No long sleeves, belts, ties or scarves. Tuck long hair into a ponytail or under a hat. Remove rings from your fingers and bracelets from your wrists.
- Hands should be clean, dry, without traces of oily liquids.
- Use personal protective equipment: respirator, mask, goggles, gloves, headphones.
Equip your workshop with fire extinguishing equipment: a fire extinguisher, a box of sand. There should also be a first aid kit with medicines and dressings so that in case of injury, first aid can be quickly provided.
Sharpening knives in specialized workshops
If you are unable to organize the correct sharpening of planing knives or it becomes difficult to set the desired level of inclination, then contacting a workshop will be an excellent solution to the problem. This method has the following advantages.
It couldn't be simpler! A device for quickly sharpening planer and planer knives.
- Expensive and high quality equipment is used. The straightness of the cutting edge will be much better than when processing it yourself.
- Modern cooling systems are used that will prevent the cutting surface from overheating and collapsing.
- Additional materials and special technologies are used to refine the knife, which affects the functionality and service life of such knives.
- In a workshop environment, it is possible to obtain the most even edge due to the absence of overheating and weight differences. In practice, the result should be an ideal instrument.
Rules
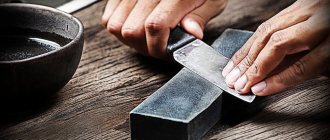
Often, when sharpening knives at home, household members use abrasive whetstones. However, in order to use them in practice, you need the necessary skills and experience working with them. After all, if the knife is sharpened at the wrong angle, the blade remains dull.
Layout of the block to the blade.
Before actually manufacturing the machine, you need to listen to the advice of sharpeners.
When sharpening a knife, the master performs the following actions:
Defines the angle between the working area of the blade and the block. Moreover, for each model the angles are different;
The knife is located at an angle of 90 degrees to the direction of the block. The grooves that are formed when the razor blade of the knife rubs against the block should be at 90 degrees to the knife line. The angle in such a situation is equal to half the sharpening;
Typically the angle is 25 degrees;
The mechanic begins processing from the beginning of the foot blade;
When adjusting the sharpening angle, the master paints over part of the foot blade with any marker. As a result, the mechanic directly controls the work area.
As a rule, after sharpening the working blade has non-uniform deformations. Therefore, when processing independently, the “point of reference” should not be the sharp part of the knife.
Choosing whetstones for sharpening a knife
The main indicator of a block is its grain size.
The whetstone is the main component that makes the blade thin and sharp. As a result, before choosing a design, you need to select the necessary blocks.
When sharpening knives on their own, household members use these types of whetstones
which have a high grain size. Using such bars, the shape of the leg blade is corrected.
having medium grain size. With the help of such bars, the mechanic removes the grooves that are formed during the initial processing of the knife
whetstone, which is covered with GOM paste. In such a situation, the mechanic polishes the blade.
When processing knives for the kitchen, you can use two types - with medium and high grain. And also in this case it is necessary to use a touchstone.
DIY sharpening machine
If desired, it is possible to assemble the sharpening machine yourself. You will need the following items: table, faceplate, vacuum cleaner, motor and machine cover. The faceplate will become the main and most expensive component. It is advisable to choose American or German manufacturers. Then an engine with a power of 1.5 kW is selected; even supported options are suitable. For example, you can purchase motors from washing machines.
The motor must be installed under the tabletop, and the faceplate must be secured to the moving element. Don't forget to consider the on and off buttons. You need to put a casing on the faceplate, cutting off one side, from which sharpening will be done. You will also need to make a cutout at the bottom of the tabletop for a vacuum cleaner. This machine is also suitable for working with other cutting surfaces.
Kitchen knife made from a circular disk
Greetings to those who love to craft, I offer for consideration a high-quality kitchen knife that any cook will be happy with. The starting material for the knife was a circular saw blade. The blade was hardened, the blade was sharpened so much that the knife easily cuts paper. The manufacturing process is not difficult, but you will have a lot of sanding work to do, so it will be useful to have a belt sander. If the project interests you, I suggest you study it in more detail!
Materials and tools used by the author:
List of materials: - saw blade (better than the old model); - wood for the handle; - brass, textolite or G10 for the bolster; - brass rod for the pin; - epoxy glue; - acid for etching; - heat-resistant cement.
Step one. Cutting out the main profile First you need to select high-quality source material. The author used a saw blade for such purposes. Before making a knife, it is important to check the steel for hardening, since in modern disks the steel may be bad and the knife will turn out unsuccessful. Well, then we draw the desired profile of the knife on the disk with a marker and cut it out. For cutting, the author used an ordinary grinder.
The easiest way to sharpen the knives of a jointer or planer. How to sharpen jointer knives.
Step three. Bevels We begin to form bevels on the knife, but for this we first make markings. It is important for us to draw a line along the blade, which, after grinding, will become the blade itself. This can be done with a special device, or using a drill of the same diameter as the thickness of the workpiece. And so that the fishing line is clearly visible, we paint over the metal with a marker.
Next, you can start sanding, in this case we will need a belt sander. The author holds the workpiece with his hands, and to prevent the steel from overheating, we wet the blade in water from time to time. When working, make sure that the bevels are symmetrical. The blade after work must have a thickness of at least 2 mm, otherwise the steel will burn out during hardening.
Step four. Heat treatment Let's start hardening, the author decided to use a hamon line on the blade, with it the blade looks unique. To obtain such a mowing line, we need heat-resistant cement; we coat the upper part of the knife with it. Where this coating is, there the steel will then differ in color.
That's all, now heat the blade until it glows red and lower it into the oil. To avoid unpleasant surprises such as cracks and deformations, the oil must first be heated. After hardening, we check the blade with a file; there should be no scratches.
After hardening, we must temper the steel to give it spring properties. As a result, the blade will be able to withstand high bending loads; it will also break if thrown onto concrete. We release the blade in the oven, the temperature should be around 200°C. As for the time, this is usually about 2 hours; you need to ensure that the blade is covered with a straw-colored coating, this will indicate the tempering of the steel.
Step five. Pickling To obtain the hamon mowing line, we need to pickle the steel. To begin, sand the blade very carefully until it shines. The steel must also be well degreased, otherwise the reagent will not react with the steel. We lower the blade into the acid for a while and watch the process, waiting for the desired result.
After etching, treat the blade with soda or another reagent to neutralize the acid. Then the knife is washed under running water and now we have a wonderful blade ready.
Step six. Blank for a handle To make a handle, we will need a block of beautiful wood, as well as G10 material or sheet brass, if desired, to make a bolster. First, we make a bolster, cut off a piece of the required size and make a slotted hole for the shank of the knife. If you don’t have a router, you can use a drill and flat files.
Also, a slotted hole must be drilled in the block, from which the handle will then be made. You can drill a series of holes and then combine them. That's all, now we glue all these parts onto the shank of the knife. We use epoxy resin as glue. The steel must be well degreased for high-quality gluing. We clamp the whole thing with a clamp and leave it to dry.
Step seven. Forming a handle When the glue is completely dry, you can now set the desired profile for the handle. We cut off the excess on a band cutting machine or with a hand jigsaw. Next, we refine the handle with wood files and sandpaper. The wood must be brought to a perfectly smooth state, so the handle will be pleasant to the touch, and you will also get an expressive wood pattern.
When the handle is ready, saturate it with wood oil or wax. This impregnation will perfectly protect the wood from moisture, which is important for a kitchen knife. Oil also emphasizes the natural beauty of wood.
Step eight. Completion That's all, the knife is ready, all that remains is to sharpen . For such purposes, it is very convenient to use sharpening stones or a manual machine based on sharpening stones. The author sharpened the knife to the point of a blade; it easily cuts paper. Of course, such a knife will cut greens and other products perfectly.
In general, if the knife is not left to sour in the sink, it will last quite a long time. At this point the project can be considered successfully completed, I hope you liked it. Good luck and creative inspiration if you decide to do this again. Don't forget to share your ideas and crafts with us!
Sources:
https://kakpravilno-sdelat.ru/kak-pravilno-tochit/kak-pravilno-razvesti-i-natochit-disk-cirkuljarki.html https://moiinstrumenty.ru/rasxodnyj/zatochka-fugovalnyx-nozhei-svoimi-rukami .html https://elton-zoloto.ru/raznoe/kak-tochit-nozhi-na-fuganke.html https://usamodelkina.ru/14469-kuhonnyj-nozh-iz-diska-ot-cirkuljarki.html