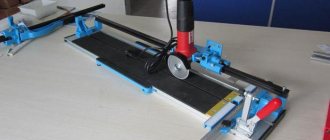
How to repair a screwdriver with your own hands? + (Video)
For example, if the tool stops turning on, then you first need to check the health of the battery.
If the breakdown does not disappear when you place the device on charge, then you will have to arm yourself with a multimeter and start scanning the device in search of the root cause. First of all, take a look at the voltage value indicated on the device body and compare it with the measurement readings on the battery. The data should be approximately the same. If the voltage is too low, then most likely the problem is hidden in the charger or battery pack. For example, the charger can be checked using a multimeter by connecting it to the network and taking measurements at the terminals of the device at idle
It is important that the voltage criterion is slightly greater than the nominal one. In a situation where there is no voltage, then the culprit of the breakdown is definitely the charging unit
Interskol screwdrivers suffer from this fairly common problem. In general, correcting the defect will require specific knowledge of electronics or require the purchase of a new unit.
If you discover a battery problem, for example, with a Makita screwdriver, you can open this block with your own hands, where the power elements are located. As a result of the opening, you should conduct an examination of the connecting wires and ensure that the soldering is of high quality. If no visible defects are detected, then using a scanner you should measure the voltage in each element. The values should show 0.9 - 1V voltage power. If a block with a low voltage reading is found in a row, it must be replaced.
If the battery and charging unit are working, but the screwdriver does not work
If it turns out that the charging unit and battery of the tool are working, then you should look a little deeper for the cause of the electrical malfunction. To do this, you need to disassemble the screwdriver. Further steps to identify breakdowns and eliminate them are as follows:
- Measure the presence of voltage coming from the battery to the terminals of the “Start” button. If there is voltage, then power is supplied to the button. If there is no voltage, it means the wire is damaged or the contact is broken. We follow the chain further to find the fault
- Check the start button. First, you need to remove the battery from the tool - this is necessary to check the serviceability of the button. After removing the battery, you should short-circuit the contacts (connect the wires that go from the battery to the input terminals of the button). You need to connect the multimeter probes to the output contacts of the button and set the device to resistance measurement mode. To measure the resistance value, you need to press the tool button. If the button is working properly, then the device readings will tend to zero. If it malfunctions, the device readings will tend to infinity (break)
The button can be replaced or repaired. If the part is collapsible, then you can disassemble it and clean the contacts. Very often, the cause of button malfunction is burnt contacts. If you clean them with sandpaper, the device will operate as before. If the button is not removable or its contacts are badly burned out, then you will need to buy a new part. Its price is not high, so everyone can afford to buy it to avoid repairs.
This is interesting! The button consists not only of contacts, but also of small springs, which can fly out at the slightest wrong movement. To prevent this from happening, you need to disassemble the button carefully and slowly.
The purpose of all parts and components of the tool - what they are called
If a screwdriver breaks down, then before you repair it, you need to figure out which specific part has failed. To find out the malfunction yourself, you need to understand the purpose of each unit and its design parameters.
- The start button is where the tool starts working. This mechanism performs two options - it turns on the power circuit, that is, it supplies voltage to the electric motor, and also regulates the number of engine revolutions. The harder you press the button, the faster the chuck will rotate. An electronic PWM generator, which is installed on the board, is used as a speed controller. When you press the button, the contact moves along the board. A field-effect transistor is used as a contact, which plays the role of a rotation speed regulator
- Electric Motor - Portable tools use single-phase brushed-type DC motors. The advantages of these units include high reliability and ease of maintenance. An electric motor consists of magnets (playing the role of a stator), an armature and brushes. The use of magnets significantly reduces the cost of the unit
- Reverse - this option is implemented by changing the polarity at the terminals. To prevent the user from manually changing the polarity, the design of the tool uses changeover contacts in the form of a switch. This switch is located near the Start button.
- A gearbox is a set of gears that increase the torque of the cartridge or reduce the speed. Shuriks use two types of gearboxes - planetary and classic. Classic ones are similar to those installed on drills, only they are very rarely found in screwdrivers. More popular are planetary gearboxes, consisting of a ring (intermediate) and sun gear, as well as satellites. The sun gear is driven by the motor shaft. Its rotation sets the satellites in motion, transmitting torque to the ring gear. Depending on the number of speeds, planetary gearboxes can be two-stage or three-stage. The more speeds, the more expensive the tool will cost
- Force regulator - usually 16 force positions are used, but there are also models that have a larger number. The ability to screw a screw into wood depends on the amount of force. If you need to screw a screw into drywall or other soft materials, then a lot of force will not be required, so the regulator can be set to positions from 1 to 7
- The cartridge mechanism has a simple operating principle. The device consists of three cams that securely fix the installed attachments. The advantage of quick-clamping devices is the high speed of changing attachments
- The case is a plastic impact-resistant structure, inside of which all the components are located. To repair the device, you need to disassemble the housing. For this purpose, manufacturers produce housings made of two parts, connected with screws
- Battery - Manufacturers make two types of portable batteries, nickel-cadmium and lithium-ion (like those found in cell phones). Lithium-ion batteries are longer lasting and more reliable, but they cost 3-4 times more than nickel-cadmium batteries. Typically, a screwdriver comes with two nickel-cadmium batteries, which is due to their short service life
This is interesting! If you come across batteries that have a one-piece body design, this means that they are not intended for self-repair.
If a screwdriver breaks down, it is not difficult to repair it at home, if only you can find the breakdown. Frequent problems with screwdrivers include battery failure, replacing which can cause some difficulties. Let's look at mechanical and electrical faults, as well as the features of eliminating them on your own.
TOP 5 powerful cordless screwdrivers
CALIBER DA-20
Inexpensive, fits comfortably in the hand, autonomy. In terms of assembly, it is better than some makita or metabo. LED backlight, low noise. Battery charging time: 1.5 hours. Includes 2 batteries, bits, case.
SOYUZ DShS-3320LU
Drilling light, enough power for most repair and plumbing work. Impact mechanism, screw force adjustment. Narrow, quick-release chuck, speed switching, charge indication. Charger, removable battery, case.
Sturm! CD3220L
Metal gearbox, price-quality ratio. Spindle lock, built-in LED lighting. Compact, lightweight and convenient. Cone-shaped chuck, ergonomic handle, power button lock. Overload protection, speed control, charger, case.
Hyundai A 2020Li
Compact size, works with the ceiling, has overload protection. You can switch the torque, there is a drilling mode. Power button lock, pulse charger, case.
DEKO DKCD20FU-Li Li-Ion 2 Ah 20 V x2 case set
Small screwdriver, powerful, good quality. High battery capacity, the presence of a rotation speed function depending on the force of pressing the trigger. The battery lasts a long time and charges in 1 hour. The kit includes universal cutters, a socket clamp, woodworking drill bits and stone drill bits. To this you can add hex keys, a magnetic holder, and a countersink bit.
9.Replacing brushes on a Makita screwdriver.
When working with a brush screwdriver, natural wear of the brushes occurs over time. They are located inside the electric motor and have a graphite base. Of course, brushless screwdrivers have already been invented. Which gets rid of this problem forever. But let's get back to our brush replacement. They are not expensive and you can replace them yourself. The screwdriver needs to be disassembled. Replace the brushes in the electric motor. You can also make brushes with your own hands by removing them from any non-working electric motor and bringing them to the required size using a file. After replacing the brushes, reassemble the screwdriver and give your engine a long service life.
Frequent malfunctions
Having understood how a modern cordless screwdriver works, you can safely move on and consider what problems are typical for such a tool.
If at any moment you notice that the tool simply does not start, then perhaps it was struck by a certain malfunction. In practice, the situation is that a tool may not work for two main reasons:
- breakdowns in which such devices stop working are in many cases caused by problems associated with their electronic “stuffing”;
- Many breakdowns of modern screwdrivers occur due to mechanical damage.
If we understand directly the objective reasons for the breakdown of such tools, we can identify a number of characteristic signs:
- at some point the equipment stops turning on;
- the speed controller stops functioning normally (it may even stop working altogether);
- reverse stops working.
As for the mechanical problems of such devices, there is often significant wear on parts located in the internal part of the instrument. For example, a screwdriver may produce the characteristic crackling sounds of a mechanism. In most situations, a broken screwdriver begins to make unusual noises in places where the bushing has seriously worn out, or the bearing has fallen apart. Quite often, Hammer tools encounter these problems.
The most common problems with screwdrivers include the following problems:
malfunction of the battery (the charger may stop charging it, or the device may no longer hold a charge);
severe wear of the brushes located in the inner part of the engine;
breakage of the start button;
lack of response to turning the device on and off;
“uneven” work with noticeable failures.
You can deal with all of the above breakdowns on your own if you have at least minimal skills in such matters. Here you need to have soldering and measuring instruments on hand - they will help solve many problems with screwdrivers. In some cases, it will not be possible to avoid completely replacing important components, since not all spare parts are sold separately in stores (such parts include gears located in the inside of the tool).
How to disassemble the cartridge + (Video)
If the cartridge fixation is conical, then it is simply removed - by carefully hitting the block body with a hammer. If the fastener is threaded, the following steps will be needed:
- Unscrew the screw with the left-hand thread in a clockwise direction.
- We squeeze the hexagon in a vice, place the key on it and hit it with a hammer. Likewise, the cartridge should move from its original position. You can choose one more option:
- Place the screwdriver on a flat surface, on a table, for example.
- Turn it on.
- Observe whether the cartridge has moved from the table. when struck by a hexagon.
It also happens that all of the above methods do not work, and then there is only one thing left to do - disassemble the screwdriver, after which:
- Remove the gearbox and spindle;
- Place the assembly in the clamps of a vice;
- Take a pipe wrench and then disconnect the chuck.
And if there is debris in the gearbox, then that’s what you need to do.
https://www.youtube.com/watch?v=Y_BuGSHAEeM
Disassemble the battery with a spatula or utility knife
For those who are not used to working with a mallet and want the process of disassembling the battery to look quieter and gentler, you can suggest using a small metal spatula or a utility knife. The main thing is that they do not have sharp edges, like a large screwdriver, which can easily damage the plastic.
This is interesting: How to properly charge a lithium polymer battery?
First, you should completely go around the perimeter of the entire block with a knife to loosen the seam, and only after that you can begin to “pick” the flexible plastic with a small screwdriver. The method is no less painstaking than the first, and if a person is not experienced enough, damage may remain on the plastic case
However, if you work as carefully as possible, it is possible to avoid “losses” in this case too
Charger repair
There are several most common charger breakdowns:
- fuse burned out;
- network cable refraction;
- broken primary winding of the transformer;
- broken diodes.
Having disassembled the charger of the tool, you can see the step-down transformer and the circuit board. Using the mains wire, the voltage passes to the primary winding of the transformer. The thermal fuse operates in series with the mains winding, causing overheating to occur first and protecting the winding from breakage. During the secondary winding, the voltage is directed to the diode bridge. When current is passed through the charger, yellowness appears near the diodes. The transformer windings overheat and the diodes break down.
- Use a multimeter to measure the resistance on the primary winding. If it is absent, the circuit may be broken, as a result of which the voltage does not reach the primary coil. The fuse is located under the transformer insulation near the wires that connect to the network. Next you need to check it using a tester.
- When the fuse is intact, you need to check the power cable. Alternatively, it can be interrupted.
- If the mains cable is solid, it is recommended to check the winding. If there is a breakdown, the transformer will need to be replaced.
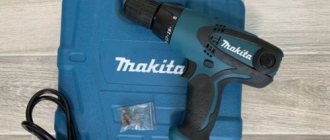
Makita TD0101
The Makita TD0101 corded screwdriver has exceptional capabilities . Despite its small overall dimensions, the device has high power ratings. The unique tangential impact system allows you to tear off the most rusty nuts, bolts, screws and screws. To check and replace the electric motor brushes, you do not need to disassemble the device. Even an inexperienced user can perform maintenance. The weight of the tool is only 0.99 kg, it is powered from a household network, the power reaches 230 W.
Operating principle and main components
Before you start repairing a screwdriver with your own hands, you need to understand the principle of its operation and what parts it consists of. The main difference between a screwdriver and other power tools is the use of a mechanism that stops the rotation of the working part of the device. This happens when the maximum resistance configured for the instrument is reached. This value is not constant and can be adjusted. There are two types of device:
- operating from a 220 volt network;
- using a rechargeable battery.
Regardless of the type of device, their operating principle is the same and is based on the transmission of torque. It determines which fastening tool the screwdriver can tighten. To increase torque, devices use gearboxes with a large gear ratio, but the rotation speed is reduced. For screwdrivers operating on AC power, the torque value is related to the power consumption of the tool. The main parts underlying the device of a screwdriver, be it Makita, Hitachi or Bison, are as follows:
- electric motor;
- push button;
- speed controller with reverse;
- chuck;
- the electronic unit;
- gearbox
The electric motor rotates the spindle at a set speed using a planetary gearbox. The torque is controlled by a clutch, and a chuck or hex holder is placed on the spindle. A replaceable device called a “bit” is installed in this cartridge. The screwdriver is controlled by an electronic circuit and reverse switching.
Reverse occurs by changing the polarity of the power supply. The motor is a single-phase continuous current commutator motor. This motor is designed to be connected to an alternating current network. The field winding is connected in series with the armature winding and is divided into two parts. One turns on before the anchor, and the other after it.
The tool uses a planetary type gearbox. The gearbox includes sun and ring gears, satellites, and carrier. The electric motor shaft rotates the sun gear, which transmits torque to the satellites, and they directly affect the carrier.
The gearbox is available in one- and two-stage types. In the second case, a double carrier connected to the shaft is used. The design of two carriers and satellites is located in the middle of the ring gear. It is fixed through special grooves on the body. Along the entire perimeter, the lugs of the ring gear rest against spring-loaded balls through the ring. The load control mechanism acts on the ring through a controlled spring, the force of which is changed by moving the regulator.
Speed control is performed using a pulse circuit assembled on a pulse-width modulation (PWM) chip. The controller controls a field-effect transistor operating in switch mode. The pulse frequency is changed using a variable resistor. The resistance value of the resistor depends on the force applied to the button.
The screwdriver clutch is a ratchet. If the load on the cartridge exceeds the permissible value, the load regulator is activated. The spring force becomes insufficient to hold the ring gear, and it comes off the balls. The electric motor begins to rotate the gear idle. When switching to electric drill mode, this gear is turned off and does not participate in the work.
The battery consists of several elements installed in one housing and connected in series. The case has a special latch that allows you to quickly remove the battery.
General information
Makita electric screwdriver design
A screwdriver from Makita is a fairly simple design that consists of several main parts:
- Mode switch.
- Gearbox.
- Electrical engine.
- Battery.
Additional devices may be added to certain models, but the main components will always remain the same. The battery is a completely disconnected part that will be recharged from time to time at a specialized station. It is quite rarely considered as a direct instrumental component. But it is the battery that often fails. The inside of a device like a Makita screwdriver is quite simple.
From the battery connection point, the wires will go to the speed switch, and also to the start button itself, from which contacts will go to the electric motor. Its front part is inserted inside the gearbox, which consists of a whole set of gears with different configurations. The composition of the set will depend only on the number of speeds or operating modes of the screwdriver. The modes will be switched using a specialized controller, which is located outside.
The gears in a gearbox with external teeth work in close connection directly with the housing, which has teeth on the inside. And if in certain parts the teeth are made of metal, then the body itself is made of plastic and will include plastic teeth. It is not surprising that after a while this design will begin to wear out and fail.
How to disassemble a Makita screwdriver
In order to disassemble the screwdriver, you must first disconnect the battery. After this, the tools in the case will unscrew all the screws that are capable of holding the pair of halves together. After this, the housing should be removed, and then all the external components will be revealed to the master - the electric motor, switch and gearbox. It should also be noted that in these models, specialized plates are often installed, which are responsible for switching between modes. With less than careful disassembly, the small plate may simply not be noticed. After disassembly, you can immediately begin repair work on the relevant part.
Mechanical breakdowns - how to fix them
Faults in the mechanical part of the tool are easier to detect than in the electrical component. This is due to the fact that any mechanical defects are audible. The main signs of mechanical malfunctions of the devices in question include:
- The occurrence of extraneous sounds
- Vibration and chatter of the chuck
- The tool motor can be heard running, but the chuck does not rotate
To repair the device and eliminate mechanical faults, you will first need to disassemble the housing. Knowing the design of a screwdriver, it will not be difficult to eliminate any breakdowns that occur in the mechanical part. If extraneous sounds occur, which indicates the cause of wear on the bushings and bearings of the motor armature, then these elements need to be replaced. When the bearings and bushings wear out, they need to be replaced, but first you need to buy these parts. Difficulties may arise when purchasing, since it is almost impossible to find spare parts for outdated models of tools.
This is interesting! Before installing a new bearing, it should be well treated with lubricants, for example, Litol-24 or Solidol, or even better with special lubricants.
In addition to bearing failure, the gearbox on the screwdriver may break. A number of malfunctions of this device include:
- The gearbox shaft bends due to heavy loads
- The working surfaces of the gears wear out
- The pin on which the satellites are attached breaks
- The bearing or support sleeve of the gearbox is worn out
Most often, it is the gearbox that fails, or more precisely, its component parts—gears. The causes of gearbox failure are:
- Incorrect use of the tool
- Heavy loads for which the device is not designed
- Lack of lubrication
- Material from which the devices are made
If the screwdriver is “old school”, that is, its gearbox consists of steel gears (instead of plastic), then it is advisable to repair it rather than buy a new one. To do this, you need to disassemble the device, inspect it and find the cause of the malfunction. When repairing a gearbox, it is necessary to clean the mechanism and parts from obsolete lubricant and apply new lubricants. If there are damaged gears, they need to be replaced. Do not rush to dispose of faulty gears, as you will need to buy the exact same parts (use them as a template).
This is interesting! If the tool has plastic gears, it is not recommended to replace them with steel ones. The reason is that plastic gears break under heavy loads, which protects the engine from combustion. If the device has metal gears installed from the factory, this indicates that the engine has a large power reserve.
To avoid unnecessary questions when independently repairing the mechanical part of screwdrivers, there is a table below that shows the main signs of mechanical faults, as well as ways to eliminate them.
| Symptoms of tool malfunction | Troubleshooting methods |
| The occurrence of extraneous sounds and hum | If extraneous sounds begin to appear when using the tool, this indicates wear of the bearings. To eliminate the breakdown, you need to check the integrity of the motor armature bearing and gearbox. If the bearings are in good condition, you should also check the integrity of the bushings, as they also wear out. Most often, the bearing shaft support sleeve wears out. |
| Vibration | Curvature of the reduction shaft, which contributes to the occurrence of strong beating and vibration. To solve the problem, you need to disassemble the case, assess the damage and make the appropriate decision to replace the part. |
| Clamp chuck failure occurs | If runout of the cartridge is detected, then you need to check the quality of its fixation. The part is fastened with a bolt, which is located inside the part (to see the bolt, you should separate the jaws). To screw the cartridge, the bolt must be rotated not to the right, but to the left, since it has a reverse thread |
| Jamming | If the tool is jammed, as indicated by the operation of the motor, but the chuck does not rotate, then you need to disassemble the housing and check the integrity of the gearbox. Jamming of the tool indicates displacement of the satellites, a violation of the integrity of the gears, or a violation of the integrity of the bearing. To fix the breakdown, you need to disassemble the screwdriver and find the cause of the jamming |
| Cracking and spinning at switch position | Gearbox malfunction. To eliminate it, you need to disassemble the tool and inspect the integrity of the mechanism. |
https://youtube.com/watch?v=Jr_xq9ZvvdE%3F
Dismantling of INDIVIDUAL components
Description, general information
Makita screwdrivers are very powerful. The average speed for various models is about 2300 rpm, which is a good indicator compared to other brands. The weight of most instrument models is within 1.5 kg. Its small mass means that such a tool will be comfortable to work with. The manufacturer also took care of the convenience of working in poorly lit rooms, making most models backlit with LEDs. Separately, it is worth highlighting the type of handle for holding THESE tools on weight. As a rule, they are made of rubber, and therefore they are comfortable to hold in the hand, and accordingly, the work process is much easier.
The disadvantage of THESE screwdrivers is the strong vibration of the handle during operation, as well as their short-lived batteries
In addition, the price of this company’s products is quite high, which is important for domestic consumers
Disassembling a Makita screwdriver
To disassemble the screwdriver you will need a Phillips screwdriver and a little personal time. To disassemble the screwdriver completely, you need:
- Unscrew the screws securing the housing;
- remove the composite start button mechanism;
- remove the electric motor together with the gearbox;
- disconnect the gearbox from the engine by unscrewing the bolts holding them together.
To disassemble the screwdriver battery, you need to unscrew the bolts connecting the case, or separate the adhesive-based connections of the case using a soldering iron. Inside the battery there are several nickel-cadmium batteries that have a certain capacity and carry a charge. If the battery is repaired, they must be replaced with new ones.
The cartridge is changed using a screwdriver and a hex key. First, you use a screwdriver to unscrew the mounting screw in the cartridge, rotating it clockwise. Then the hexagon is inserted, the reverse button is turned on, it is clamped, and then the cartridge gives in easily.
How to repair a gearbox yourself
A gearbox is a mechanism that is practically impossible to repair. We are talking about repairing a screwdriver gearbox with your own hands. For example, the wires can be soldered and a button attached. Here the way out of the situation is to replace faulty parts. Also, if the speed switching occurs late or in some cases does not switch, you can try to lubricate the gears in the gearbox. When disassembling, you may come across debris that interferes with the normal operation of the planetary mechanism.
You can lubricate the gears with such improvised material as antifreeze. Well, it’s better to do this with the “original” lubricant. It can be found in the store or service center of the company to which the device belongs. The price of a tube is usually not high, and it should last for several maintenance of a screwdriver or other equipment.
Screwdriver gear diagram
Disassembling the screwdriver gearbox:
- It is necessary to remove the cartridge. The most convenient way to do this is with a 10 mm hex key.
- It is necessary to clamp the short end of the key into the chuck, and then perform a short run with the tool so that the key hits the table surface at full speed of the electric motor.
- But this method is suitable for a screwdriver, where the gearbox somehow starts. If the mechanism is faulty, you need to clamp the spindle in a vice. In this position the gearbox can be disassembled.
Now you can carry out the planned operations - lubricate parts or perform replacements, provided that new elements for the screwdriver are available.
It is not recommended to take gears or couplings from other models, as there will most likely be a discrepancy, although it may not be visually visible. It is not recommended to work with a screwdriver for a long time at high speeds, as this will most likely lead to breakdown.
In this article we will look at a screwdriver from the famous Makita brand, describe its technical characteristics and general structure, talk about the main problems and malfunctions that arise during the operation of the tool, as well as how to diagnose a breakdown and repair this or that element with your own hands screwdriver.
Frequent malfunctions
Having found out the cause of the breakdown, you need to know exactly how to repair a screwdriver with your own hands at home. To do this, you should listen to the advice of the masters.
Electric motor
Problems with the motor arise due to brush wear. They are not repaired, new ones are installed. If a break is detected in the winding, you will have to buy a new motor.
Electrical damage
If the electrical elements are faulty, the screwdriver will not turn on, it cannot be switched to reverse mode or the speed can be adjusted.
A malfunction of the elements in the motor is indicated by a voltage drop at the tool terminals when the battery is working. If the voltage is normal, check the button. The tester is switched to ringing mode, the probes are installed parallel to the button. If there is no squeak when you press it, clean the contacts.
If there is no resistance when switching reverse, the wiring is damaged. The engine speed control does not work - the button or control transistor is broken.
Disassembly and repair of the gearbox
The assembly is disassembled into individual parts, then:
- check their integrity;
- blow;
- lubricate;
- are collected back.
In order to remove the gearbox, the housing is disassembled. Take out the start button and switch, disconnect the fastening bolts. Remove the gears in the gearbox and the speed switch washer. The teeth that are on the body are also inspected. If they are erased, the speed selector will not work properly. To restore them, small bolts are inserted into the plastic area.
Not all manufacturers produce individual gearbox parts, so if damaged, you often have to install a new one. All its parts are subject to frictional force, this leads to gradual wear and grinding, as a result they do not adhere well. This may not happen if the parts are periodically well lubricated, but there should not be an excess of lubricant.
The gearbox is adversely affected by settling dust, which then heats up during operation. It poses a particular danger to plastic gears. As a result of heating, dust gears become deformed and break.
When the contacts oxidize, the button stops working
Problems with the button
When the contacts oxidize, the button stops working. To clean, the red push mechanism is removed with a rotating motion. The cover is dismantled by pushing out the latches using a knife. The 2 metal elements located on the side are disconnected using a soldering iron. Remove the cover and remove the mechanism. Oxidized or worn areas are wiped with cotton wool, which is soaked in alcohol. Adhered dirt is removed with a knife.
Replacing brushes
Electric motor brushes are contacts through which current is supplied to the rotor windings. The screwdriver stops working due to excessive wear. Then the case is disassembled and the worn-out set is pulled out. It cannot be restored. They install a new one and assemble the body.
Charging block
Due to constant misalignment of the wire, the charging unit becomes unusable and a break occurs. The wires are soldered and insulated.
Keyless chuck
The quick-release chuck is more versatile and easier to use; its disadvantage is its short service life. If he stops holding the drill or bit, there is no way to fix it. It must be removed and replaced with a new one. This is one of the most common screwdriver malfunctions.
If the chuck is jammed and you cannot pull out the drill, it means the clamping jaws are jammed. This may happen due to broken internal parts of the cartridge or lack of lubrication. A gearbox malfunction causes the chuck to spin
If a bit is bitten in it, take 2 adjustable wrenches, hold the base of the cartridge with one, and carefully rotate its upper part with the other
A common cause of screwdriver failure is a problem with the keyless chuck.
How can I repair the battery of a screwdriver? The easiest way to revive it is to change one of the cans. Using a tester, a defective battery with low voltage is found. It is unsoldered and replaced with a new one. The work must be done using a powerful soldering iron so that the can does not overheat.
Most often, faulty parts are not repaired. In order not to waste energy on such a thing as repairing a screwdriver, it is better to buy similar or new original spare parts. This applies to damaged elements of the cartridge, a bent gear shaft, a motor with a broken armature winding, a non-removable power button, etc. Experts do not recommend attempting to repair the charger yourself without the appropriate knowledge and experience.
Top 10 popular screwdrivers
A little about how to convert a battery from cadmium to lithium and who needs it
Let's talk about how to convert the battery yourself from one type of battery to another. There are many videos on the Internet on this topic, where they talk a lot about the advantages of using lithium in a screwdriver. However, unless you use the tool intensively and constantly, there is absolutely no point in using a lithium battery. Lithium-ion batteries tend to “age” faster than cadmium, and simply will not have time to exhaust their service life under conditions if the tool is used occasionally.
Converting a screwdriver battery using lithium batteries may be necessary for professional craftsmen who use the tool every day and need powerful power sources. Of course, if you really want to, you can solder the battery to lithium, but whether this will be advisable is up to you to decide. Read more about which batteries are best for a screwdriver →
Thus, you can not only disassemble the battery of any screwdriver, but also solder two bundles into one, which will last as long as possible, and you will not have to buy a new battery in the near future.
The performance of a converted battery, provided the elements are properly soldered, will be no worse. The main thing is to treat the process with patience and maximum care, so that during the first experiment you can finish the job with minimal losses and solder everything correctly. If you manage to collect everything, this will be an additional incentive to continue your experiments in the field of electronics. Assemble the battery yourself once - and you can save on buying new batteries for your screwdriver in the future.
Features of charging batteries of different types
Below are charging options for various batteries.
Nickel-cadmium
Nickel-cadmium (Ni-Cd) batteries have a fairly high-speed “memory effect”. Owners of Bosch PSR screwdrivers should take this into account. Therefore, they need to be discharged to zero. Otherwise, the batteries will quickly become unusable.
- Before starting the charging process, nickel-cadmium cells must be discharged.
- Connect the charger and wait until it turns off until the battery is fully charged. The indicator on the charger will let you know about this.
- In some cases, charging is not designed to turn off automatically. Then you need to wait until charging is complete and manually turn off the charger.
Manufacturers sometimes allow themselves to be disingenuous. On average, a nickel-cadmium cell lasts 500 hours. But in the instructions for a screwdriver you can often see the number “1000”. You should know that the tool will only work for this amount of time in conditions close to ideal. For example, a Vinzor screwdriver costing less than 1,200 rubles will work for less than 500 hours.
Nickel metal hydride
These batteries also have a “memory effect,” although not as strong as cadmium ones. Nickel metal hydride (NiMH) batteries are fully discharged before charging. Before starting work, you need to charge it five times and discharge it the same number of times.
Lithium-ion
The very first undemanding and popular battery for a screwdriver. There is no “memory effect”. Lithium-ion (Li Ion) cells, new or used, can be charged at any time.
- It is better not to charge completely discharged Li Ion. It is desirable that the remaining charge is 20-40%.
- The suitable temperature for charging should be between +10° and +15°. Since lithium-ion batteries are not afraid of cold, you can operate a screwdriver at temperatures down to – 10 °C.
Li-ion screwdriver batteries
Elimination of mechanical breakdowns
Mechanical breakdowns of a screwdriver include malfunctions of the ratchet, gearbox and chuck of the device.
Ratchet repair
If the ratchet on the screwdriver does not work, you will need to disconnect it from the gearbox to troubleshoot. Sometimes special rods are installed in the coupling, which regulate the force, and in some devices, instead of rods, 2 balls are installed in each hole. They are pressed by a spring, which, when the adjusting ring is tightened, presses on the balls.
In most cases, repairing a screwdriver ratchet consists of cleaning its components from dirt and applying new lubricant.
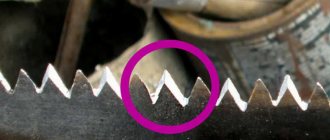
Screwdriver gear repair
If unusual noises are heard in the gearbox, or the spindle rotates jerkily, with slipping, then the fault may be faulty gears of the mechanism, ground off teeth on its body.
In the next photo you can see the gearbox structure.
The reason that the spindle does not rotate when the engine is running may be wear of the plastic teeth inside the gearbox housing.
To restore the functionality of the mechanism, it is necessary to disassemble the gearbox (it is better to photograph the disassembly process) and screw in a small bolt ground to the required size in place of the worn teeth. The place where you will install the bolt must be marked. It should be located strictly opposite the plastic tooth located on the inside of the case.
Make the same markings on the back side of the case, opposite the first.
Next, drill holes in the marked places.
Screw bolts of the required length into these holes, first grinding them down so that they are flush with the other plastic teeth. After adjusting the bolts, you can assemble the gearbox by applying the required amount of lubricant to the gears. At this point, the repair of the screwdriver gearbox can be considered complete.
Keyless chuck repair
To begin repairing this unit, you must first remove the chuck from the screwdriver. To do this, complete disassembly of the screwdriver is not required. How to unscrew the quick-release chuck was described above.
Frequent chuck malfunctions include incomplete exit of one of the jaws, as shown in the following photo.
The cause of the malfunction may be a worn thread on the nut that clamps the cams, or worn teeth on the cams themselves. To verify this, you will need to disassemble the cartridge.
Disassembling and repairing the screwdriver chuck is done as follows.
- It is necessary to hit the part protruding in its center with a hammer. In order not to deform this part, you can lay a small piece of wood.
- Separating the top will not be sufficient and further disassembly of the cartridge will be required. To do this, you need to lightly clamp the bolt into your fists and hit it with a hammer.
- When the inside of the cartridge falls out, its disassembly is considered complete. You will see a nut consisting of 2 halves. Most often, malfunctions in the cartridge occur due to this part. The thread on it wears out and the cams slip when tightened. Therefore, incorrect alignment of the latter occurs.
Also, the threads can be worn out on the cams, which, like the nut, need to be replaced. But if you do not find the necessary parts to change them, you will need to completely replace the cartridge. When assembling the cartridge, the cams must be installed at the same level, in a compressed state, after which a nut consisting of 2 halves is put on, and after that the entire structure is placed in the housing. When the problem is fixed, you can assemble the screwdriver.
Details
How to repair a screwdriver
One of the most common problems with Makita screwdrivers will be problems with working at first speed. At the same time, everything will work perfectly on the second, and this problem is due to the fact that the gearbox in the tool is faulty, which does not allow the first speed to be used effectively. We suggest considering how to get rid of this problem and repair the screwdriver.
How to disassemble the gearbox
First of all, you should definitely disassemble the tool itself and separate the gearbox. Next, it is important to remove all other parts that are unnecessary at this stage. To do this, you simply need to pour out all the gears from inside the gearbox, and it should also be noted that if there is no information about the exact location of all the parts, it is better to disassemble it carefully and sequentially. Also, do not forget to write down and mark the location of the gears. This is required for high quality assembly after repair work has been completed. You can also use educational articles or videos.
How to screw in bolts instead of teeth
How to repair a Makita screwdriver? After all the gears are removed from the gearbox, the inside of such a device will open to the eye. Taking into account the specifics of the problem, the technician will most likely see that all the plastic teeth on the inside are worn off. This will happen during long-term use of the device, or if there was a gross violation of the rules of use. Plastic teeth are very soft, because under the influence of temperatures and constant mechanical load they will simply grind down. This can lead to the fact that the main gear has nothing to cling to and it begins to scroll. To restore and repair functionality, you will need to restore the teeth. In this case, it is not necessary to restore all the teeth; installing a couple of iron ones is enough. In order to achieve what you want, you will need a drill, drills and bolts. It is advisable to use a drill coated with diamond, because it makes it possible to effectively grind off the excess part of the bolt in a short period of time.
The work order is as follows:
- At the location of the plastic tooth, a hole will be drilled in the side of the gear wall. It is required to use drills with a slightly smaller diameter than the diameter of the bolt. This way you can screw it in with reinforcement and also ensure secure fastening.
- A couple of holes are required to be drilled diagonally to ensure reliable gear retention and stable tooling performance. Thus, the load will begin to be distributed over both teeth.
- When drilling, it is advisable to point the drill slightly downward so that the bolt does not stick up. Otherwise, it will take much longer to process it with a drill.
- Next, you should firmly screw the bolts into the holes that are created.
Good to know
Do I need to lubricate a screwdriver?
This tool has a gearbox, and it requires lubrication, such as ELF MULTI MOS. The frequency depends on the model and intensity of use. The following signs will indicate that your tool needs lubrication:
- unpleasant “hysterical” sound;
- It is difficult to rotate the cartridge by hand.
You can lubricate with lithol, manol, silicone or Teflon grease.
Is it possible to drill with a screwdriver?
If you have a model that has two operating modes - drilling and screwdriver. Typically, professional models have such capabilities, for example the Makita DF347DWE. It is not necessary to use a model that does not have a drilling mode; the engine may burn out, since drilling requires higher speeds to reduce the load.
Ergonomics
The ease of use of hand tools is more than just comfort. Many manufacturers of these devices are constantly trying to constantly improve ergonomics. There are many different body shapes and materials for linings. Many devices differ in weight distribution and location of controls. So, which cordless screwdriver is better, you need to choose according to the hand of the master and the type of work that has to be done. It is best to choose a screwdriver that is convenient in every sense, even if you have to pay for it with other characteristics.
One of the important ergonomic parameters is the angle between the axis of the handle and the axis of the motor. Designers, creating, in their opinion, comfortable equipment, sometimes make the angle of tilt of the handle back too large. Because of this, it is not always convenient to use the tool. Masters experience numbness or overexertion in their palms, and a callus appears between the thumb and index finger. You need to switch the direction of rotation with one hand, this has to be done quite often. Which cordless screwdriver is better? Reviews will help you decide, but it’s best if you hold your choice in your own hands. It is also a good idea to make sure that the selected instrument is perfectly balanced.
How to fix a screwdriver \ First speed does not work \ Do-it-yourself repair \ Makita BDF 450
Makita DFR550RFE
This screwdriver with automatic feed of screws allows you to increase operator productivity several times. The Makita DFR550RFE uses SPIT tape with screws tucked into it, and can withstand non-stop loads for an extended period of time without overheating or requiring interruptions in operation. Clear and smooth functioning is ensured by the high quality of assembly of the mechanical part of the tool.
The kit includes 2 fairly powerful batteries of 3 Ah each. Li-Ion battery technology requires less than an hour to fully charge, which makes it possible to keep a charged battery ready even with intensive work. The comfortable handle and relatively light weight of the tool (2.1 kg) allow the user to work tirelessly all day long. The manufacturer Makita has several similar models, but it was the DFR550RFE that became a participant in our rating, because it is lighter than others and has high performance. The tool comes in a convenient and durable case along with a charger. The complete set largely determines the decent cost of a screwdriver - a similar model (DFR550Z) without batteries, a case and a charger will be almost half the price.
Is it possible to mix the solution with a screwdriver?
It's possible, you just need a special attachment. And of course, be careful not to accidentally fill the screwdriver itself with the solution.