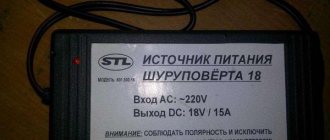
A cordless screwdriver is an indispensable tool that is often used around the house. There are situations when the device's battery fails. In this case, it is not necessary to buy a new battery. You can modify the tool to work from the mains. However, before that, you need to figure out how to make a screwdriver directly from charging.
Why remake a cordless screwdriver?
Some people don’t understand why turn a cordless electric screwdriver into a corded one. It's actually quite simple. The fact is that you can use such a tool only until its battery runs out. After discharge, you will have to recharge the screwdriver and only then continue to use it. Many people are not satisfied with this, and they decide to start converting the tool into a network model.
This is also often done when the battery fails and stops charging. Many people don’t want to spend money on a new battery, and they decide to remake the tool so that it works from the mains.
Ways to solve the problem
Although a tool such as a screwdriver is the most popular, not every home craftsman uses it every day. Every day the battery is subject to spontaneous discharge, as a result of which the internal structure of the product is destroyed.
After the battery does not last for several minutes, the question arises, what to do with the screwdriver now? You can buy a new battery, but first you need to find it, because you can only find the exact design of the power element from official dealers. The second option is to throw away the screwdriver and buy a new one, the cost of which is at least 2-3 thousand rubles (this is an average quality product). The third option is the simplest, but at the same time it requires effort - to convert the product to be powered by alternating voltage.
The advantages of the latter option are the following factors:
- There is no need to constantly recharge the battery, which is very annoying during the work process;
- Now the screwdriver can be stored as long as you like, without thinking that the battery spontaneously discharges every day;
- Constant torque, which will provide voltage from the mains.
Among all the advantages, there will be only one drawback, which is due to the need to connect the device to an outlet, so the product must be connected to the electrical network during operation.
Advantages and disadvantages of remodeling
Converting a screwdriver into a network model has a number of advantages. Among the main advantages are the following:
- no need to periodically recharge the device;
- the power of the tool will not deteriorate due to a weak battery;
- no need to change batteries.
However, this rework also has its drawbacks. The main disadvantage is that such a tool is more difficult to use in hard-to-reach places. You will have to buy a special extension cord.
When is it necessary?
There are situations when the screwdriver charger is not available. For example, it may fail, which may cause the operation to stop. In addition, the charger may be lost. The third reason is the elementary burnout and wear of the charger, as well as the unbending of the terminals in the battery itself, which causes the contact to come off. To fix the problem, you have to look for suitable charging options that will be compatible with the existing screwdriver model. In this case, it is preferable to buy the correct charger, which will facilitate safe operation and fully charge the tool’s battery.
How much power will the PSU need?
People who decide to learn how to make a screwdriver from the network will have to deal with the required power of the power supply.
Pulse
To connect the instrument to the network, a switching power supply is often used. Calculating its power is quite simple. Most often, rechargeable models operate on batteries with a voltage of 12 V. Based on this, it turns out that during operation the device consumes at least 120 watts.
It is recommended to choose a power supply with a power reserve of about 20-30%. This way the screwdriver will be able to work normally even under maximum loads.
Transformer
Since the operating voltage of most screwdrivers is 12 V, choosing a transformer power source is quite easy. You can power an electric tool using any model with a power of about 200-300 W.
Fault prevention
Batteries are made of several elements put together, which do not fail simultaneously, but in parts. To determine the broken part of the battery, it is necessary to fully charge it and allow it to work at full power until discharged. After that, disassemble and measure the voltage of each individual element.
Parts on which the voltage will be absent or inferior to other elements must be completely replaced. Repairs are carried out using a soldering tool. All battery cells are soldered together with the same wire strip that originally connected the parts.
How to convert a screwdriver to work from the network
You need to figure out in advance how to convert a 12-volt screwdriver to work from a 220-volt network. There are several recommendations that will help you do this correctly.
Connecting to charging
The easiest way to connect the tool to the network is to do it through the charger. This is done as follows:
- Solder the power wires to the charger.
- Disassemble the old tool battery.
- Make holes in the housing for the cable.
- Solder the wires to the power supply of the electric drive.
Using this method, you can use your laptop charger.
Connecting the unit in the housing from the battery
People who were able to find a suitable power supply can use it to connect the screwdriver to the network. Before assembling an electric screwdriver with a power supply, you need to understand the nuances of such work. This is done like this:
- Remove the old battery from the screwdriver and remove the used components from it.
- Install a new power supply into the case.
- Connect wires to the block to connect to the network.
- Install terminals.
- Assemble the housing and place it in the screwdriver.
If you use a compact power supply, you need to take care of cooling. To do this, several holes are made in the walls of the housing for air circulation.
Connection to external power supply
If you cannot install a compact power supply into the case, you will have to use an external one. To connect an electric tool to it, you must perform the following steps:
- Disassemble the screwdriver body and remake the input for connecting the power source. This is done so that you can connect the power supply.
- Connect the power supply to the device. You may need a special low voltage adapter for this.
- Launch the tool and check its functionality.
If nothing happens after starting, you need to carefully inspect the connections of the wires. Often the contacts come loose and because of this the tool does not start.
Connecting to the power supply from a computer
People who decide to remake a cordless screwdriver and connect it to the network can use a computer power supply. A model with a power of 300 W or more is suitable for this. Such devices output 16-18 A. This is quite enough for the tool to operate.
Connecting a screwdriver to a computer power supply is simple. This is done using two wires. One of them is 12 volt “plus”, and the second is ground.
Consider the option with a remote power supply
Using a power supply from a personal computer. On the radio market, buy an old PC power supply for a low price. We needed a variant of the “AT” format, which had to be turned off with a button after logging out of the system.
Experienced users remember such system units. Which is owned by the gaming slots of such a power supply in addition in such a context that the bona fide power is indicated there. If it says 300W, then there is an option to safely remove 15-16 amperes from the 12-volt output (and again we turn to Ohm’s law). This is completely enough to power an average screwdriver.
How to power a screwdriver while maintaining its autonomy
There are situations when you have to work outdoors or indoors where there is no electricity. In such situations, you need to power the screwdriver yourself to make it work. There are several ways to do this.
Replacing old elements
Most often, people are unable to use a cordless tool because the battery has failed. The easiest way to solve this problem is to connect a new battery. It is recommended to use the same batteries that were previously installed in the screwdriver.
Important! When replacing the battery, the polarity of the components must be observed. This will prevent a short circuit.
Connecting to a car battery
Another way to quickly power the tool is to use a car battery. This is done as follows:
- Take three wires from the cigarette lighter and strip them of 3-4 cm of insulation.
- Connect the wires. They are connected to the battery terminals and to the screwdriver.
- Tighten the connections with clamps or insulate with electrical tape. It is necessary to wrap them in such a way as to hide all metal parts.
After this, you need to check whether the tool works.
Connecting to an external battery
If you need to use a screwdriver, you can connect it to an external battery. A battery from any unnecessary UPS is ideal for this. To connect the instrument, do the following:
- Cut the screwdriver cable and clean the contacts on it.
- Connect the cord to the battery terminals.
- Check the connection is secure.
- Insulate connections.
After finishing work, the screwdriver must be disconnected from the battery.
Homemade charging devices
It’s quite simple to make a charger for a 12-volt screwdriver yourself, by analogy with the one used in the Interskol charger. To do this, you will need to take advantage of the ability of the thermal relay to break the contact when a certain temperature is reached.
In the circuit, R1 and VD2 represent a sensor for the flow of charge current, R1 is designed to protect the diode VD2. When voltage is applied, transistor VT1 opens, current passes through it and LED LH1 begins to glow. The voltage drops across the chain R1, D1 and is applied to the battery. The charging current passes through the thermal relay. As soon as the temperature of the battery to which the thermal relay is connected exceeds the permissible value, it is triggered. The relay contacts switch and the charging current begins to flow through resistance R4, the LED LH2 lights up, indicating the end of the charge.
Circuit with two transistors
Another simple device can be made using available elements. This circuit operates on two transistors KT829 and KT361.
The amount of charge current is controlled by the KT361 transistor to the collector to which the LED is connected. This transistor also controls the state of the KT829 component. As soon as the battery capacity begins to increase, the charging current decreases and the LED gradually goes out accordingly. Resistance R1 sets the maximum current.
The moment the battery is fully charged is determined by the required voltage on it. The required value is set with a 10 kOhm variable resistor. To check it, you will need to place a voltmeter on the battery connection terminals, without connecting the battery itself. Any rectifier unit designed for a current of at least one ampere is used as a constant voltage source.
Using a custom chip
Manufacturers of screwdrivers are trying to reduce prices for their products, often this is achieved by simplifying the charger circuit. But such actions lead to rapid failure of the battery itself. By using a universal chip designed specifically for the MAXIM MAX713 charger, you can achieve good charging performance. This is what the charger circuit for an 18-volt screwdriver looks like:
The MAX713 chip allows you to charge nickel-cadmium and nickel-metal hydride batteries in fast charge mode, with a current of up to 4 C. It can monitor battery parameters and, if necessary, reduce the current automatically. Once charging is complete, the IC-based circuit draws virtually no power from the battery. It can interrupt its operation due to time or when the temperature sensor is triggered.
HL1 is used to indicate power, and HL2 is used to display fast charge. The setup of the circuit is as follows. To begin with, the charging current is selected, usually its value is equal to 0.5 C, where C is the battery capacity in ampere hours. The PGM1 pin is connected to the positive supply voltage (+U). The power of the output transistor is calculated using the formula P=(Uin - Ubat)*Icharge, where:
- Uin – highest voltage at the input;
- Ubat – battery voltage;
- Icharge – charging current.
Resistance R1 and R6 is calculated using the formulas: R1=(Uin-5)/5, R6=0.25/Icharge. The choice of time after which the charging current turns off is determined by connecting the PGM2 and PGM3 contacts to different terminals. So, for 22 minutes PGM2 is left unconnected, and PGM3 is connected to +U, for 90 minutes PGM3 is switched to the 16th leg of the REF chip. When it is necessary to increase the charging time to 180 minutes, PGM3 is short-circuited with the 12th leg of the MAX713. The longest time of 264 minutes is achieved by connecting PGM2 to the second leg, and PGM3 to the 12th leg of the microcircuit.
Operating rules
Before using a screwdriver, each person should familiarize themselves with the rules of its operation. There are several recommendations that must be followed:
- You only need to work in a stable position, watching the position of your arms and legs;
- if you have to screw in screws at a height, it is better to use a stepladder;
- Every half hour you need to take a break so that the instrument cools down;
- When drilling, you need to secure the workpiece so that it is stationary.
Another important rule that must be followed is regular checking of all components. Before use, you should inspect the screwdriver to ensure there is no damage.
What do you need to know?
When choosing one of the options that replaces the screwdriver charger, you need to remember: the safety of the process will depend on the correct connection of the devices
In addition, it is important to ensure that the charging mode matches the technical characteristics of the battery itself. Regardless of which charger option is chosen, you need to understand: temporary methods can save the situation several times
But it is undesirable to constantly use them, since only original chargers provide the required voltage and current values.
You cannot use chargers with a USB port from a laptop - they are not designed for this. If the battery does not charge, you can try to overclock the battery. To do this, the unit is disassembled and the cause of the malfunction is identified. Afterwards the block is charged first with a larger and then with a smaller current. This allows you to bring it back to life if there is still electrolyte left inside.
To learn how to charge a battery using a screwdriver without a charger, see the following video.
Precautionary measures
There are several safety precautions you should be aware of before using a cordless power tool:
- The device can be stored at a temperature not lower than 0 degrees;
- Do not allow liquid to come into contact with the battery;
- The battery can only be charged at a temperature of 10-50 degrees Celsius;
- You cannot charge a damaged battery.
Quite often, owners of cordless screwdrivers are faced with situations where the battery stops working. In such cases, you will have to connect the device to the network. However, before this, you need to find out how to convert a screwdriver to power from a 220V network and what needs to be done for this.


