Category: Weapons 42,075
0
Throwing knives drawings - twelve models we present to your attention.
In the article “Drawings of knives with dimensions, how to make them yourself, manufacturing technology,” you can get acquainted with the manufacturing technology.
Universal knife.
It can cut, stab and strike at a distance as a thrown weapon. During throwing, they are lost, therefore, it is considered to be a disposable weapon. Therefore, the design of a throwing knife, according to the proposed drawings, is simple and universal, provides high destructive properties, is well camouflaged and is not expensive to manufacture. It is a flat plate that is pointed from both sides to the center. Balancers (weights) can be used for alignment. They can be moved progressively in specially made grooves. Centering allows you to adjust the blade for throwing at a certain distance. They usually have wide blades.
Non-revolving knife throwing
Many masters consider this technique to be the most effective. Training does not require a long time; the rotation of the knife is compensated by the movement of the hand, due to which the knife turns over in flight and pierces the target.
Experts recommend non-revolving (wave) knife throwing in the following sequence:
- right hand and turn left;
- Place the knife on the edge of your palm with the handle facing away from you;
- balance the state of the blade (at the point where the blade and handle meet) and grasp the knife by the blade;
- when swinging, the knife should describe a semicircle, and the blade should turn towards the object;
- usually a short throwing distance is assumed, which directly depends on the force applied; a stronger swing implies a greater flight distance of the knife without flipping it over.
Sport equipment.
The “throwing knives drawings” models under consideration represent a sports equipment. As in any sport, it is very important to have high-quality and easy-to-use equipment. At competitions, blades made only by production methods are used.
Main selection criteria:
- weight (throw range, force of penetration into the target to a certain depth)
- balancing (flight behavior and hit accuracy)
- size
- form
- quality of steel (reliability and durable use)
Good sports equipment will contribute to better achievements in this difficult and hard work.
Not a bad target
in throwing training, a large-diameter end cut of a tree trunk twenty to twenty-five millimeters thick can serve well. It is best to use poplar, linden or birch for these purposes. The outline of the target is marked with black paint. If we use several butts of wood with cut edges, we get a square shield of the size we need, onto which a standard target is attached. The shield is installed (attached) in the right place and at the required height. Typically, the dimensions of such a shield are: width of at least one meter; height of at least two meters.
The figure shows a variant of the design used.
Thrower training, as in any sport, is based on repeated repetition of the same exercises under the supervision of an experienced master (trainer), or independently, studying literature and throwing techniques down to the smallest detail. The closest sport in terms of content in training is sport shooting.
Sportswear should be loose (not restrict sudden movements of the arms), durable, tight and safe (protect the thrower’s body from the blade bouncing). A kimono is best. Shoes with a closed hard top.
For any athlete, preparation is divided into the following components:
- psychological
- technical
- physical
- tactical
When training, you need to consistently set priorities, have endurance and a lot of free time, which you wouldn’t mind spending on your favorite activity. It is impossible to cover everything in detail in a short article. There is a lot of serious literature on throwing methods. Having studied it in detail, you need to make a decision. After all, you can achieve serious results in more than one year of training.
Source: chertegnik.ru
What will it give
Throwing knives is good entertainment and an excellent organization of active leisure time. This sport can complement the game of laser tag, airsoft or paintball. You can throw knives in nature, taking a break from other activities, or entertain your friends with an exciting spectacle.
This sport, like other sports exercises, is very good for health. Regular exercise has a beneficial effect on the musculoskeletal system and the body as a whole. Exercises that develop precision of movements have a positive effect on the level of self-control, strengthen the nervous system and general physical condition.
In addition, a person who handles knives for a long time develops invaluable qualities. He becomes more confident in his abilities, attentive, acquires the ability to soberly assess the situation and quickly make informed decisions.
Drawings of throwing knives. Download here
The cost of throwing knives varies online. But if you decide to master this science, you will need not one knife, but at least five. Calculate for yourself how much money it will cost you. Is it possible to make a throwing knife yourself? There is nothing complicated here! I outlined for you the most popular models and indicated all sizes. Download the drawings of throwing knives and I’ll teach you how to use them.
I'm posting a few drawings for now. I will add new ones as soon as possible. Write in the comments what models of throwing knives interest you. I'll do it and post it.
Throwing knife designs: "Cobra"
(Chrysostom). The only model in the company's line of throwing knives. There used to be more. The reason is simple: the CEO of the company is a professional knife thrower. He spent several years developing this model. Cobra is well balanced, inexpensive and colored red (easy to find in the grass).
The drawing shows the main dimensions of the Cobra throwing knife. Blade thickness 5.00 mm. Weight 145 gr.
This is what Cobra looks like live
Buy a throwing knife "Cobra"
Throwing knife drawings: “Gadfly”
(Chrysostom). A distinctive feature of the line of knives with the “Rosarms” brand is the handle wrapped with cord, steel EI-107, leather sheath.
The drawing shows the main dimensions of the Gadfly throwing knife. Blade thickness 5.00 mm. Weight 210 gr.
This is what “Gadfly” looks like live
Buy throwing knife "Gadfly"
Throwing Knife Blueprints: "Strike"
Same . The large throwing knife “Udar” (290 mm) is designed for long-distance throwing.
The drawing shows the main dimensions of the Udar throwing knife. Blade thickness 5.00 mm. Weight 272 g.
This is what “Udar” looks like live
Download the drawings of throwing knives in one archive from the link. And if you decide to make your own stand for throwing knives - read and do it!
How to use drawings?
Print it out, stick it on thick cardboard and cut along the outline. Then place it on a metal plate and outline it with a marker. Then everything depends on whether you have a tool. You can cut it out with a hacksaw, and select the rounded parts with a grinder.
Where to learn
Knife throwing in Moscow is represented by many clubs and specialized schools.
It is difficult to imagine a more interesting and useful entertainment for a person accustomed to an active lifestyle and sports activities.
Teaching knife throwing in metropolitan clubs and schools involves providing familiarization with the basic skills of effective techniques for beginners, organizing practical classes, and providing an opportunity to hone their skills for those who already have some experience.
Typically, training is carried out in special halls, which makes it possible to exercise at a distance of up to 9 m. During an hour-long training, you can work with both hands at the same time, as well as with each hand separately. For those who wish, throwing knives can be supplemented with similar actions with axes, sapper blades, and nails.
There is an opportunity to study alone or in a company (corporate orders), organize a holiday, the program of which will include your favorite sport, compete or become a participant in a master class from an experienced instructor.
You can come to classes one time or purchase a subscription. Prices (very affordable!) and other necessary information can be found in specific establishments.
Addresses of some Moscow clubs:
- Sports Knife Throwing Club, address: st. Varshavskoe highway, 14, building 3. Tel..
- Center for extracurricular activities "Patriot", address: st. Grimau, 11AS1, telephone.
- Underground shooting club “Labyrinth”, address: st. Kutuzovsky pr-t, 12, bldg. 1. Tel5.
- Gamer knife throwing school, address: st. Volgogradsky Prospekt, 32, room 13. Tel.: +7
- Club “Solid Hand”, address: metro station “Oktyabrskoye Pole”, st. Marshal Rybalko, 13. Tel.: 8-926-236-12-09, 8-916-884-59-05.
Drawings of throwing knives. Download here: 2 comments
Hello. My hobby is making knives, but I'm just a beginner, I don't know much. Tell me what the basic conditions should be for throwing knives. Is balancing important, what kind of sharpening, etc. thank you in advance.
Good afternoon “Balancing of throwing knives” is a secondary parameter. With practice comes the ability to throw knives of any type and with any balancing. The knife should not be sharpened, since knives are thrown not only by the handle, but also by the blade (you can be left without fingers) - it is better to make the descent 1-1.5, or even 2 mm. Also pay attention to the heat treatment of the knife. The hardness of steel should be between 45-47 HRC.
Source: knifehacker.ru
How to easily and simply make a throwing knife?
Throwing knives are considered an effective weapon in medium-range combat, but, unlike firearms, they require high skill, so to speak, “hardcore.” Therefore, throwing knives are held in special esteem by men. Of course, a weapon such as a throwing knife is far from perfect and, according to many, is much inferior to the same firearm. However, I believe that combat knives and throwing knives in particular are still relevant, so to explain my position I will give the pros and cons of the mentioned weapons.
Disadvantages of throwing knives:
— disposability (threw a knife and was left without a weapon); — narrow specialization (not suitable for close combat); — difficulty in mastering; — the range of destruction is much inferior to firearms.
Pros of throwing knives:
— easily hidden under clothes; - make it possible to avoid physical contact with the enemy; — in some modern models, the problem of narrow specialization has been corrected, that is, some throwing knives are effective at two distances at once: close and medium; — unlike an assault rifle, a knife cannot jam, and in combat conditions you need to be prepared for anything.
Despite the disadvantages, the benefits of throwing knives are undeniable, which must be why the mentioned weapon is still in demand among special forces.
How to make a throwing knife at home?
You will need the following tools
: 1. Sheet of steel with a thickness of at least 2 mm. 2. Hacksaw for metal. 3. Paper, scissors and pencil. 4. Vise. 5. File and sandpaper.
Step 1.
Draw a sketch of the future throwing knife on a piece of paper, then cut it out.
Step 2.
We transfer the sketch to a prepared sheet of steel with a thickness of at least 2 mm (the figure shows stainless steel; to make a high-quality throwing knife, it is recommended to use stainless steel).
Step 3.
Clamping the metal plate in a vice, carefully cut out the workpiece along the contour.
As a result, you should end up with the following sample:
Step 4.
We form the blade of the blade with a file.
Step 5.
Polish the surface of the blade with sandpaper.
Eventually
, if you did everything correctly, you will get a throwing knife like this:
This type of throwing knife should be held by the handle when throwing, since the balance of the knife is such that the blade has more weight relative to the handle. To check the balancing of the knife, find the place where the blade and handle are fastened, place the place where the knife is fastened on your finger, and you will see in which direction the advantage goes. Please note that the advantage should not be too large, the knife should not immediately fall to one side, otherwise the effectiveness of the throwing knife will be reduced.
Practice throwing knives and maybe over time you will have no equal in mid-range combat. Do not forget that a man must be able to stand up for himself, his family and his country.
Source: usamodelkina.ru
Basic operations for making knives
Before you start creating the blade and handle according to the drawing, you should prepare all the necessary materials.
The blade is made of tool steels, for example, P6M5 steel, which has good hardness. A blade made of this steel will not wear down for a long time. You can also use some carbon steels or material from car springs that have not been corroded.
The handle is most often made of wood, which dries out little and has sufficient strength. Suitable for this:
- birch;
- nut;
- ironwood;
- heather, etc.
If the handle is overhead, then small diameter rivets will be required. They can be made from brass rod.
Tools you will need:
- drills and countersinks;
- sandpaper for rough processing and zero;
- electric drill;
- vice;
- files;
- hammer.
The technological process of making a hunting knife with your own hands consists of several stages.
- It is necessary to transfer the drawing with all dimensions to a metal plate.
- Cut the blank along the contour, grind off the excess and drill holes for the rivets.
- Make the cutting edge of the blade. Secure the future knife in a vice and grind off the metal with a file at a certain angle. Repeat the process on the reverse side if necessary. After filing, finish the process with sandpaper.
- Temper the blade in an oven or over a fire for 15 minutes. To do this, place the metal workpiece in close proximity to coals or another heat source. As soon as the metal turns red, you need to pull out the workpiece for a few seconds. The heating should be checked using a regular magnet. The heated metal stops being attracted to the magnet. In this case, heating must be stopped.
- Lower the hot workpiece into the oil with the cutting part facing down. The immersion should not be carried out completely, but only 2/3. Hold in this position for about a minute, and then slowly immerse completely in the oil.
- Temper in an oven at 400 °C for 45 minutes.
- Finish with sandpaper or other means.
- Make a handle from wood according to the sketch, drill holes for rivets.
- Impregnate the handle with special solutions to increase its service life.
- Assemble all parts.
- Polish the handle.
At this point the manufacturing process is completed and we have a beautiful and reliable homemade knife.
The technology for creating a throwing knife is not as complicated as it might seem at first. A throwing knife differs from others primarily in its shape and material. Such knives are made from light and elastic grades of structural carbon steel with a hardness of 40 HRc. Tool and alloy steel are also used, all the properties of these steels can be easily found on the Internet, but our task is to manufacture a throwing knife from material prepared for processing. By the way, if it is not possible to find the above-mentioned steel, you can use a car spring or an engine valve and forge it. The design of a throwing knife is quite simple - a plate without a pronounced handle. Let's look at the method of making a “swimming shark” knife model. The figure shows the size and shape of this subspecies of “cutting fish”.
The balance is checked at the junction (neck) of the blade and the handle, by hanging it on a thread or in the manner indicated below in the figure. The knife rests with its neck on the finger of the right hand, and is lightly held by the tip with the finger of the left hand. After you remove your finger, the handle, as if pausing, smoothly slopes towards the floor; if the handle is too heavy, the knife will simply fall to the floor. In this case, the handle should be lightened.
It is better to make the handle from duralumin plates. It can be made of impact-resistant plastic or ebonite.
But, as a rule, on throwing knives there are no foreign materials on the handle (shank) at all, except for adjusting weights and braided cord
The cutting edge of the blade can be sharpened in four ways, shown in the figure below.
Some designs have special balancing weights to regulate the throwing distance. In other cases, the balance is regulated by the selection of the mass of rivets securing the handle and the size of the hole to which the rope is attached. A rope or strong cord is required to pull the knife back after throwing.
The main working tool for processing the workpiece will be sandpaper and a set of rasps. After marking the main outline
Let's start processing it on sandpaper.
After roughing and giving the knife the desired shape, we will begin the so-called finishing: adjusting hard-to-reach places with a rasp, sharpening and polishing. Sharpening methods are shown above. It is better to carry out grinding on a special grinding wheel, finishing it manually with sandpaper and polishing with goy paste.
Akbar knife
"fighter"
Warrior knife
Knife "grouse"
Dushman knife
Cobra knife
Knife "Fox"
Mongoose knife
Marine knife
Wasp knife
Feather knife
"Pirate" knife
Scout knife
Warrior knife
Sniper knife
Typhoon knife
Knife "frigate"
Knife "predator"
Hornet knife
Knife "bumblebee"
Knife "Jaguar1"
Knife "Jaguar2"
As you can see, there is a great variety and scope for the fruitful creativity of home craftsmen. If you wish, you can create a whole collection of wonderful throwing knives, which will allow you to turn any weapon into a real work of art.
I just don’t advise you to carry them with you everywhere and always, you know, it risks being taken to the police station with a subsequent fine or something even worse. It’s better to keep them in a “cabinet” under glass and take them out only for training in throwing at targets.
Types of throwing knives: drawings with dimensions
There are a lot of types of throwing knives, they are mainly divided by weight:
- Ultralight weapons, also called knife darts or arrowheads, cannot fly long distances; when launching them outdoors, it is worth considering the direction and strength of the wind, which can change their trajectory. For this reason, they are often used for home workouts.
- With light throwing knives it is not difficult to master the initial technique. When using heavier bladed weapons, there is a greater load on the wrist during the swing, which can lead to damage to an untrained hand. The length of light weight knives ranges from 16-22 cm, where the blade length is 12 cm.
- Throwing knives of medium and heavy weight categories are used for long-distance throwing. They are more suitable for people with the appropriate equipment.
About inertial wave throwing
A new qualitative leap in this sport was the non-revolving inertial-wave throwing technique, Scanf, developed during many years of practical research.
Throwing knives using this system (a complex attacking system of hand-to-hand combat) provides for special preparation of the body to perform non-standard and complex movements, significantly increasing the variety of motor potential, speed and force of blows, and the ability to strike an enemy from the most unexpected positions.
To train muscles and ligaments in the Scanf system, there is a special preparatory program aimed at developing flexibility and plasticity.
Using certain methods, the system develops the ability to distribute attention, providing the ability to simultaneously successfully combine several actions. A fighter trains the ability to simultaneously perform heterogeneous, asynchronous, multiphase movements, develops a non-standard logic of actions, and therefore behavior in battle that is unexpected for the enemy.
The wave technique provides for the development of the ability to produce effective blows with a small body weight, ensuring the effective defeat of the enemy.
Drawings of throwing knives
It is important to understand that each knife is designed for a specific use. A butcher, fisherman or hunter will use different tools. Therefore, when choosing a drawing, you should first decide on the ultimate purpose of the application. You also need to pay attention to the size so that the tool is convenient to use. You can borrow some part using one picture you like, or an entire element from a finished drawing. The template will help turn your idea into reality.
The idea of making a throwing knife with your own hands can take a lot of time and effort. Drawings of various models will help you make your choice. It is most convenient to print the finished sketch on a photo with a scale of 1:1.
Throwing knife "Gadfly", drawings of which are also easy to find, are made of Zlatoust steel. An original find in the design is the use of a cord as a handle.
From the same) there is another throwing knife called “Strike”. Characteristic differences are the increased size and weight, which allow it to be thrown over longer distances.
Cobra throwing knives are manufactured in the city of Zlatoust. Drawings of knives of various models are publicly available on the Internet, but today only one is officially produced. The developers chose to produce one, but well-designed and balanced knife. Factory produced items are painted red to make the item easier to find.
How to use drawings
You need to print the sketch onto cardboard or thick paper. The scale of the drawing and the knife should be one to one. If another person will make the workpiece, the requirements should be detailed and the dimensions indicated on the drawing. Cut out a stencil and lean it against a sheet of metal, circle it with a center punch or marker. Make the workpiece with a margin of 1-2 mm and then remove the excess with a file or other tool.
DIY throwing knives: drawings and dimensions, blade shapes
To make a throwing knife with your own hands, you will need a drawing - it is made based on standards for the sizes and shapes of blades. A standard throwing knife has the following parameters:
- handle length – 100 mm;
- metal thickness – 4 mm;
- blade length – 150 mm;
- product width – 25 mm.
Most often, throwing knives are simple “skeletons” that do not have a pronounced handle and any cutouts or waves. They are made from a single piece of metal.
Read also: How to make arrows in an open office?
Handle material
The quality of the throw directly depends on the comfort of the handle, so the main criteria for the material of this part of the throwing knife are strength and pleasantness to the touch. Others include:
- light weight;
- easy processing;
- availability.
Experts believe that wood will be the best choice. The material is absolutely accessible, easy to process, and after specific treatment has a long service life even with active throws. It is best to use apple, maple or ash to make a wooden handle - these are hardwoods. Growths from birch are suitable, but it is better to avoid representatives of conifers altogether.
Knife with wooden handle
To prevent the handle from slipping in the palm and to prevent accidental injury to the hand during throws, it must be equipped with a single stop. It should be fixed directly in front of the handle, but it can be done more simply - equip the handle with small protrusions (if it is made of wood and the size of the source material allows this).
Preparing steel for a knife
It is worth starting the manufacturing stage only after you have finally decided on the type, shape of the blade and handle. You also need to prepare in advance the materials and tools that you will need during work:
- steel sheet with a thickness of 4 millimeters;
- sandpaper;
- hacksaw for cutting metal;
- special vice;
- cardboard or thick paper;
- scissors;
- a simple pencil and marker;
- file.
A suitable material for making a throwing knife is steel, but it is not always possible to find a sheet of suitable thickness and size at home. If the steel intended for the workpiece has irregularities and is thick, then forging will be required. This process is complex and requires a specialist blacksmith. If you do not have the opportunity to turn to one, it is better to purchase ready-made steel with the necessary characteristics. At home, it is unlikely that you will be able to forge a sheet with the same thickness, without pits, cavities and cracks.
Whichever method you choose, the end result should be a flat steel plate 4 mm thick, possessing the qualities of the future product. We determined the shape at the previous stage, but it’s worth clarifying this point: you can make a throwing knife at home with notches, protrusions, or make holes in them. But experts advise abandoning additional elements and intricate shapes if the product is being made for the first time. The finished blade should fit comfortably in the hand, but not be too large or, conversely, small.
Pirate knife
Now we will tell you how to make not a karambit knife from paper, but a pirate knife. This craft is perfect for games and theatrical performances.
For production we will need:
- cardboard;
- regular pencil;
- scissors;
- glue and markers.
Making a pirate knife:
- on cardboard we draw the shape of a pirate knife, exactly the size of a real one;
- cut out the blank, place it on another cardboard, trace it with a pencil and cut out another identical blank;
- We put two blanks next to each other and glue them together.
The pirate knife is ready, for a real look, cover the blade with foil and the handle with colored paper.
Selecting handle material
Even the most carefully thought-out blade shape loses half its effectiveness with an uncomfortable handle. The quality of throwing depends on this part: whether the knife will fly in the intended direction, whether the hand will get tired depends on the handle. The material used to make it must be durable to withstand constant impacts and pleasant to the touch. It should not freeze to the skin during frost and should not absorb moisture.
The handle of a throwing knife has the following requirements:
- light weight;
- easy to process;
- availability.
The material that meets the specified requirements is wood that has undergone the necessary processing. The blanks are made from dense types of wood: maple, ash or apple.
In the blanks, which have already been given the desired shape, small holes are made for fitting onto the shank. Holes in the rectangle are made at the stage of connecting the handle and blade. This is due to the fact that the transverse dimensions of the shank can change during the manufacturing process.
DIY instructions
Basically, the production of any type of knife occurs using similar technologies. Following the subtleties and recommendations will allow you to get a blade no worse than the factory one. But on an industrial production scale, machine labor is used, but in our case everything will have to be done manually.
Standard throwing knives have the following characteristics:
- thickness - 4 mm;
- width - 25 mm;
- tip length - 15 cm;
- handle length - 10 cm.
Taking into account the parameters, we make a drawing and cut out a template from cardboard with a scale of 1:1. We apply this drawing to the already prepared steel plate and trace it along the contour. Then we cut out the steel blank using a hacksaw: you can deviate slightly from the contour - this will delay processing, but will prevent mistakes that often happen due to inexperience.
Steel workpiece processing
As already mentioned, in order to get a quality product, when cutting, it is better to leave a margin of 2-3 mm. You can bring the edges to the intended line after we receive the finished workpiece. To carry out this work, you can use any convenient and familiar method: bars, sandpaper, files. You need to get a blade thickness of 4 mm. It is better to lay this out when selecting or forging a steel sheet.
Blade sharpening
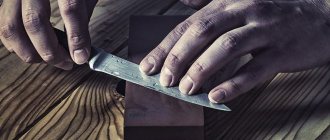
We move on to this stage only after the workpiece has taken on the desired shape and thickness. A good throwing knife can only be obtained by following the technology. The sharpening process takes place from top to bottom, while the sharpening itself is carried out only to the middle of the narrow edge of the blade. Triggering movements are carried out over the entire area of the abrasive used; work must begin with coarse grains intended for rough sharpening. We work alternately, first with one side, then with the other, doing the same manipulations.
After this stage, we get a knife whose tip is not yet sharp, since the descent was carried out only to the center of the blade. Now, using a thinner abrasive, we shape and refine the cutting edge, gradually reducing its grain. The final stage is polishing.
Product assembly
We have a ready-made steel blade with a bare tang and prepared wooden handles for the handle. All that remains is to connect everything.
The best option for overhead mounting of the handle would be rivets. If the blade does not yet have holes for the handle, then drill them, placing wooden pads on top. Holes are made to the diameter of the rivets. Next, we connect tightly, recessing the heads of the rivets into the body so that they do not interfere.
Source: vashnozh.ru
Manufacturing process
Each homemade knife differs in length, shape and material from which it was made. It is worth noting that purchasing edged weapons intended for hunting is quite difficult, since you must have a permit. Of course, you can order it online, but, as practice shows, the product arrives of poor quality: the tip is dull, the handle is uncomfortable.
But homemade tools have a lot of advantages, the following positive qualities can be noted:
- you can choose any model, shape, size and appearance of the knife;
- If desired, you can customize the handle;
- In the installation, scrap materials are used, which allows you to significantly save money, and in some cases you can do without investment at all.
The manufacturing process of any type of knife is carried out using similar technologies, and if you follow all the rules and recommendations, then the homemade blade will turn out like a factory one. But it is worth considering that in factories everything is done by machines; at home you will have to do the process yourself. First you need to take care of the tools that you will need during work.
A standard throwing knife has the following parameters:
- thickness - 4 millimeters;
- width - 25 millimeters;
- tip length - 15 centimeters;
- handle length - 10 centimeters.
All these parameters are transferred to cardboard, and an accurate drawing is made from them, taking into account that the scale is 1:1.
Then, they cut out the design and apply it to the steel plate, moreover, it is necessary to do this in such a way that there are no “shells” in the area where the blade is located. They trace the pattern, after which a well-circled blank of the future edged weapon should be obtained on the metal. Now all that remains is to carefully cut out the steel product using a hacksaw designed for working with metal.
Processing of steel workpieces
To get a comfortable and high-quality knife when cutting, you need to leave a small margin; leaving 2-3 millimeters will be enough. Then you can bring the edges of the blade to full readiness. As a sharpening material, you can use emery blocks, files and other suitable devices. At the end of the process, you should get a steel blade at least 4 centimeters thick.
After this, they begin more labor-intensive work - grinding the blade to a certain thickness . To do this correctly, it is necessary to place the workpiece in a vice, clamp it securely, and the clamping should occur in the area of the narrow edge of the product. That is, the thick side of the workpiece should face the master.
It is most convenient to start turning from the top side, and then gradually move to the opposite side. It is worth noting that this process takes a lot of time and effort, so you need to prepare for it. The result is an excellent throwing knife with a thin, light and sharp blade.
It is worth adding that accuracy at this stage is not necessary; it will be enough to sharpen the blade to an approximate thickness. All inaccuracies can be removed later, so you shouldn’t worry too much about any discrepancies.
Sharpening the tip
After the blade has been ground to the required thickness, they move on to the next stage - sharpening the steel plate. The best knife for throwing can only be obtained if the technology is followed. All actions are carried out from top to bottom, while the sharpening itself is carried out only to the middle of one of the narrow edges of the blade.
