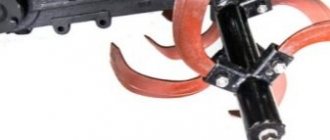
This is my first, one might even say, the first attempt in my life to make a copy of a part for a construction set using epoxy resin. And since I have never made split molds before, the topic is more for familiarization than instructions for use. In general, we have such a radiator from the Ashetov model of the Tank and the desire to make the same copy of it, or approximately the same radiator.
I almost forgot, the easiest way is probably to make a mold from silicone, but purchasing it will cost the same amount as the radiator itself costs. And since I have Alabaster at least. and chew, I decided to try to make it from scrap materials without buying anything. In addition to alabaster, we also have epoxy resin, paraffin, PVA, grease, motor oil, plasticine and other disposable tools. So if you don’t have epoxy or plaster in stock, then it makes no sense to buy them, because buying a ready-made radiator will cost you less than fiddling with these molds. But this applies more to those who are already assembling a model of this tank and decided to save on only one number.
To begin with, I used sandpaper to go over all the radiator pins to give them a barely noticeable cone shape. I also cleaned up the side planes of the tank a little, thus getting rid of parallel lines. All this is to make the cast part easier to remove from the plaster mold. In general, roughly speaking, the point is to make an egg out of a square, because this shape is the most ideal for removing it from a rigid plaster mold.
I also cut plastic strips, from which I then assembled a bath using plasticine.
To prevent the part from sinking if something happened, I threw a piece of plastic of a suitable height onto the bottom of the bathtub. The radiator itself was stuck into the plasticine wall with flat pins.
I lightly lubricated the radiator with machine oil and installed it in the bath; I did not lubricate the bath itself, since it is made of thin and flexible plastic, and besides, it is already greasy from plasticine. After which he mixed the alabaster and poured more water so that the mixture could be poured in and not applied.
Due to the fact that the part is immersed from above and there is no way to expel all the air bubbles from under it, this half will most likely be thrown away. The radiator turned out to be a good float, so I pressed it down with a weight, it’s good that I put that piece of plastic on the bottom.
Here you can see an error that I did not notice at first; the cavity of the filler neck remained open, which subsequently prevented the part from being pulled out normally from the upper plaster half. At this moment I would like to stick this depression with plasticine (on the cone towards the top), then there would be fewer adventures.
The good thing about plaster is that it sets quickly, literally in 5 minutes. To be sure, I waited 20 minutes, after which I used a drill to select the locks in the plaster half.
Then the still wet plaster was smeared with grease and the part was lubricated with machine oil because the grease is thick and would ruin the design of the radiator grille in the plaster.
This is already a crucial moment, this half needs to be poured very carefully, since it is at the bottom of the gypsum mixture that very clear imprints are obtained. Well, the secret is simple: when pouring, you need to use a brush to distribute the mixture over all corners and depressions, thereby expelling air bubbles. We dilute the alabaster thinner because when pouring, the lower half will quickly begin to take water from the mixture and it, in turn, will thicken.
Half an hour later I dismantled the bath.
Using a scalpel, I cleaned and prepared the end of the gypsum cube for the last half. Gypsum is easy to process as long as it is wet and not completely hardened, and there is no dust.
I drilled grooves for the locks.
I oiled the end of the block, erected the formwork from the same plastic and poured plaster.
Twenty minutes later I dismantled the formwork, put the block on the radiator and forgot about it for the night.
Read also: Chainsaw calm 180 high idle speed
I applied a lot of solid oil, but the plaster still absorbed it, so it was not easy to separate the molds. I had to use a little brute force, tapping the rubber handles of the pliers on the end of the block. As expected, the lower form turned out to be very poor, just shells and no detailing.
But the top one turned out very well.
I redid the cavity of the filler neck on the form (so that it was on one half and not two), after which I reassembled the formwork and refilled the defective half of the plaster mold.
The result turned out much better, but still not ideal, there are micro-sinks, either I was slack when leveling the mixture with a brush, or these bubbles were attracted to the radiator from the mixture itself. Most likely I messed up when leveling the plaster with a brush because I was in a hurry.
Well, then surprises began to fall: it turned out that the epoxy resin was perfectly absorbed by the gypsum. I tried soaking the plaster in the corner with paraffin, then pouring epoxy resin. It didn’t help, the resin began to be absorbed after the paraffin.
By trial method I found out that you can close the pores of plaster with PVA glue, diluting it with water so that it does not greatly spoil the detail of the form. Here in the photo the block is covered at the edges with PVA glue, then lubricated with machine oil and drops of epoxy are poured on top of it. There is no protection in the middle, so it is clearly visible that the epoxy is absorbed into the plaster.
Another surprise, after the resin hardened, drops of epoxy came off along with the PVA glue, where the oil went remained a mystery to me.
Another experiment revealed that if you cover PVA with paraffin, droplets of epoxy resin are very easily separated from the mold.
In the end, after so much. oh, I started to lean towards buying a magazine with this radiator. But the future pile of numbers with shells forced me to continue fiddling with casting. In general, I covered the molds with diluted PVA (diluted it until it looked like milk), then threw the molds onto the radiator to dry. As a result, the molds acquired a characteristic shine.
I melted the paraffin while warming up the molds.
I greased the molds with paraffin. The main thing is to warm up the molds thoroughly so that the wax does not harden on the plaster, but is applied in a thin layer.
In order not to waste the epoxy resin, I cut up some junk from the sprue.
I greased the molds again, tightened them with rubber bands, poured in a little resin and spread it into all corners with a brush.
Then he fell asleep and sank it a little. I applied some epoxy resin to the longitudinal grooves of the end cap.
I wrapped the whole thing with rubber bands. After some time, the epoxy began to seep through the seams, so I sealed them with plasticine. Fearing that air bubbles would accumulate somewhere near one edge, I decided to speed up the setting process of the epoxy resin. He began to warm up the block over a candle fire, while simultaneously rotating it in his hands. It took me 10 minutes, after which I abandoned this block for x. th (battery) and already on the battery simply turned it over periodically for the first few hours.
The next day, I removed the rubber bands from the block, with the naive hope that the halves of the mold would fall apart right in my hands and a factory-quality radiator would fall out of them. Schazzz, the block turned into a monolith, for about half an hour I tapped on the block like a monkey, trying to break off at least something. Knowing that two-component materials do not like heat and become plastic, I threw it on the fire. This immediately brought results; the halves fell apart almost without my help.
Looking at the light, for some reason I remembered the movie Jurassic Park, with mosquitoes in amber. It was necessary to roll up the cockroach in epoxy, for the sake of history.
In general, the layers of PVA and paraffin did their job, the part lost a little in detail. Most likely there is some kind of chemistry in the form of sprays or oils, and with silicone there are probably fewer hemorrhoids in general, but I acted on the principle that if I went to the store, then buy a ready-made radiator, so I sculpted it from what I had. In any case, for me it was an experiment, so to speak, to gain experience before cloning the ammunition.
I added a topic about casting shells in silicone molds, although the results were not very impressive. Therefore, I made another collapsible mold, this time from resin, and cast ammunition for the Tiger tank in it.
Read also: How to refill a gas cylinder at a gas station
I also advise you to take a closer look at these gelatin molds (link 1, link 2), since recently I’ve been using it to quickly form molds and cast various small things from resin.
Write a message to the author Author: Nikolay Golovin – – – – – – – – 11/20/2013
Gypsum is an affordable and easy-to-process material. Since prehistoric times, plaster casting, along with clay modeling, has been used to make various crafts, toys and ritual figurines.
And today, gypsum retains its popularity as an ornamental material. It is also used to make jewelry and parts of scale models of equipment.
How to organize the production of garden figures
Garden figurines are one of the elements of landscape design. Today they are very popular among gardeners who carry out landscaping in the local area. With their help, you can create a complete appearance of your landscape design, skillfully disguise unsightly technical components (well hatches, pipeline valves, not uprooted tree stumps), and create a certain mood. It is difficult to hold back a smile if you are greeted at the entrance to the house by a very funny, mischievous gnome holding a basket or a lit lantern in his hands.
Today, in almost every city there is one enterprise that produces garden figurines. But even despite this, according to experts, this niche for business is still free. There is not much competition in the market, interest in this type of product from buyers is growing from year to year, so you can open your own business and produce garden figurines.
Production of garden figurines Source ostwest.su
To do this, you need to register an enterprise, rent premises, purchase equipment and organize an advertising campaign. The technology for producing garden figures is a simple process from a technological point of view. Its implementation does not require specific professional knowledge and skills. It consists of several stages. You will need:
- prepare the mixture;
- pour it into ready-made molds (molds for small garden figures for large and medium-sized architectural elements);
- remove the finished product after it dries well inside the mold;
- prime and paint the blanks obtained in this way .
In order to establish the production process, it is necessary to purchase several dozen different types of molds.
Molds for garden figurines Source samtex.polfirms.pl
Types of forms
The production of garden figures without the use of molds is impossible. It is they who help create the basis, which can then be modified and decorated, brought to a commercial appearance. Today on sale you can find molds made of different materials. Each variety has its own advantages and disadvantages.
Plaster molds
These are the most affordable molds. Their cost price is equal to the cost of the material spent. You can buy ready-made samples in specialized stores, or you can make them yourself. For this you will need formwork. It can be made using thick cardboard. The joints are secured with tape. If there are remnants of chipboard and furniture confirmats in the house, they will also make good formwork.
Before pouring plaster, the figurine is generously coated with liquid soap. Then you need to let it dry. Using a similar procedure, it is possible to create a protective separating layer on the base, which will then allow the garden figurine to be removed from the frozen form. The base is placed inside the formwork, and a liquid solution prepared from gypsum powder and water is poured onto it. Its consistency should be like thin sour cream.
Formwork for pouring gypsum, made from remnants of chipboard Source restaurarconservar.com
Afterwards, you need to wait for the solution to completely harden. Then the mold must be carefully cut in half with a thin hacksaw and the product removed. Experts recommend immediately coating the resulting relief inside the workpiece with a thin layer of epoxy glue. And let it all dry thoroughly again. The mold is ready to use. In order to make a copy, you need to generously coat the inside of the mold with liquid soap, let it dry well, after which you can pour liquid plaster inside.
Attention! Making garden figures using plaster molds is a very labor-intensive process. The molds themselves weigh a lot, after pouring they become even heavier; you will have to put a lot of effort into removing the blank from the mold. If moved carelessly, the product can break, and then all the work goes down the drain.
See also: Catalog of companies that specialize in landscape design of sites.
Polymer forms
They are made of fiberglass. The finished samples weigh very little, but still the polymer is also a brittle material. Practice shows that it can withstand a limited number of pours. Many manufacturers purchase polymer molds to make plaster copies. This helps optimize costs and significantly simplify the process of making molds for filling garden figures yourself.
Polymer molds for filling garden figures Source pabrashu.info
Metal molds
They are used extremely rarely today. And all because working with such basics is very time-consuming and effort-consuming. The result is a product with a lot of sagging remaining on its surface. They have to be additionally cleaned, which increases the production time of one product.
Silicone molds
When silicone appeared, many problems in the production of garden figures were solved by themselves. Molds with a metal base, inside of which there are two layers of soft, dense silicone, have appeared on sale. The two halves of the mold are connected to each other using bolts. There is a place at the base for pouring liquid composition.
The mold has one design feature: one part overlaps the second part. This helps to end up with a figure that does not have a swell in the center. After pouring, the mold does not need to be constantly shaken, allowing the liquid gypsum or polymer to be evenly redistributed. The properties of silicone are such that you can do without this procedure. No cavities are formed on the surface of the finished product; there are no voids inside. This means that the figure will last much longer.
Silicone mold for making garden decor Source moysadiogorod.ru
Some rules for diluting gypsum mortar
First, we will need containers, and it is best to take a disposable one. The reason is ordinary - in the case of reusable installation, when washing such containers, we risk clogging the drain pipes. Of course, the container must be clean. Gypsum should be poured into water sparingly. In all this, it is best with a stainless steel spatula, or something made from hard wood. As for water, it can be tap water. Try not to stir the solution for too long, because in the end the finished product or layer of plaster may turn out weak.
Regarding mixing, it is important to follow a certain technique. The main thing is to prevent the formation of lumps. To do this, you need to moderately distribute the gypsum powder over the surface of the water, then wait a couple of minutes until the powder is saturated with the liquid. This is followed by a period of intensive stirring for 2-3 minutes. The goal is to make the solution very homogeneous and also to remove most of the air bubbles from it.
Features of choosing material for the production of garden decorations
Figures for the garden can be cast from plaster, concrete and polystone. Products made from gypsum sell out faster. They have the lowest price. Therefore, organizing the production of such products is a very simple process that does not require large material investments. A kilogram of gypsum costs from 40 rubles. It produces very fragile products that are not resistant to any mechanical loads. They absorb moisture. The service life of such a garden decoration is one season, but consumer demand for such products is still quite high, so you can safely work in the designated direction.
Garden figurines made of plaster Source svarka-doka.ru
The correct ratio of gypsum and water is the key to success
If we want to get a strong gypsum solution, then it is best to use a ratio of two parts powder to one part water. In general, in the vast majority of cases, gypsum dough is required to be softer. And in order to get an average gypsum solution, one and a half kilograms of powder will require a liter of water. Often the work requires something thinner, and in this case a kilogram of gypsum per liter of water will be a good option. By the way, when preparing honey gypsum , water and powder are taken in approximately equal quantities.
life hacks. How to make plaster castings. Gypsum G16.
Review|Which plaster is better
Video description
The video shows how you can make a figurine from plaster by pouring the mixture into a silicone mold:
The described choice has one significant drawback. The production of garden figures from polystone is impossible without the use of synthetic pigments and polyester resins. They contain styrene, a dangerous chemical compound. Therefore, those who choose such technology for the production of garden figurines will need to be more careful about the organization of the labor process. For its implementation, only those premises that are located five hundred meters from residential buildings are suitable; good ventilation must be installed inside, workers must wear respirators and other protective equipment.
Polystone figures with a lot of small details Source vsegdasvami.ru
Important ! There are no local raw materials on the domestic market. It has to be imported from abroad, so the cost of polystone figurines is very high.
Concrete garden figurines are also in good demand among buyers. They are manufactured using components that are quite affordable. These are sand, cement, pigments and plasticizers. All dry ingredients are mixed into the solution using water, and the solution is poured into special molds. After hardening, the result is very durable products that can last in the garden for decades. They have one significant drawback - heavy weight. It will be difficult to move the figurine from place to place if desired. Often, special equipment must be used to transport and install such sculptures.
Concrete watchdog figurine Source compras.sharemedoc.com
Preparing for work
When working with alabaster, half of the success depends on the quality of preparation, and specifically on the selection of containers and tools. To make the process easier, consider the following principles.
READ The best way to insulate a foam block house from the outside
It is convenient to seal small portions of AlebAstra in nylon buckets or small rubber containers
Often, builders use halves of ordinary children's balls of suitable diameter.
A spatula is optimal for mixing “small doses” of alabaster consistency.
line with a solid piece of cellophane, dense and without holes, pin the “tails” to the edges of the container so that the cellophane does not move while stirring; After use, the film is simply removed from the bucket and thrown away.
It is convenient to mix the solution with a construction mixer, or, if it is not available, with a drill with an attachment.
Generalization on the topic
The business described is a wide field for activity. It can bring good profits if it is constantly developed. This must be done by involving professional artists and sculptors. The cost of exclusive works is much higher than products made according to standard sketches. Garden decorations that glow in the dark can interest buyers. And if you open a multidisciplinary company and add to the staff employees involved in landscape design, providing services for the care of the created landscaping, profits will only increase.
Ratings 0