Device, purpose
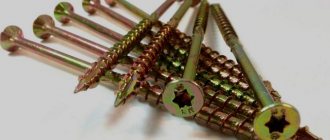
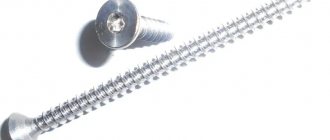
A dowel is essentially a screw for concrete. It is made of high-strength steel alloy with subsequent application of an anti-corrosion coating. It can appear white or silver, or yellow or black. At the same time, the difference between the color modifications of the surface in terms of resistance to rust is insignificant. The head of such a screw is often made in the shape of a countersunk cone with a flat base.
They can be supplemented with notches for better retention in the material. On the outside of the base there is a recess in the shape of a star or a cross for inserting a screwdriver bit or screwdriver. The threaded part is made asymmetrical, and is also equipped with special protruding segments along its entire length.
This allows you to strengthen the adhesion of the dowel to the mass of material when screwing. Along with the increased step frequency, this makes it possible to use the fastener both in standard concrete and in modified concrete with reduced density, and for better fixation of the material of the object being fastened.
Fastening a wooden block to a dowel in concrete Source ytimg.com
Note! Initially, the dowel is intended for fastening various objects to concrete. However, the specifics of the device make it possible to use it also for any type of brick. This is due to the peculiarity of the threaded part, in particular, the unevenness of its distribution.
How to screw a self-tapping screw into a brick. How to screw a self-tapping screw into a brick wall
First things first, first things tools
nails, screws, rivets, anchors
Reliable fastening of the structure is a guarantee that it will last a long time without requiring additional repairs
In this regard, it is very important to choose reliable tools and fastening elements. And this choice must be approached with full responsibility.
You will need special tools. An impact drill is best.
You can also choose a regular drill, to which a pobedit tip is selected. But in this case the work will be more complicated. In terms of cost, this will result in approximately the following figures: from 800 rubles for the tool itself and from 40 to 50 rubles in addition for the drill. Running sizes are considered to be 6 and 8 mm diameters.
The list of materials that such tools can work with is extensive. Their choice will depend on the future load of the suspended structure. The most popular are the following:
- self-tapping screws for bricks;
- dowels (will help withstand heavy loads);
- anchors (capable of holding very heavy things);
- rivets (for delicate glass shelves);
- corners (for small cabinets and shelves);
- regular nails combined with all the others.
It is also important to consider what kind of product is used for laying the surface - it can be either solid or hollow. The types and grades of this product will also tell you how reliable the screws used for bricks are
Main rules of fastening
correct fastening of screws
Before starting work, you need to understand some rules. They will help not to spoil the surface and carry out the correct fasteners:
- The most basic requirement that must be met when attaching something to a wall made of such material is not to spoil the mortar that holds the blocks together.
- It would be best to use a drill. It will help to avoid cracks that may appear if, for example, you try to “drive” self-tapping screws into a brick with a hammer drill.
- Drilling should be unhurried and gradual. This approach will help to secure any element to such a wall.
Working methods
working with self-tapping screws
There are several ways to make it easier to place fasteners on such a wall. Some of them are quite interesting:
If we are working with dowel nails, it is important to prepare a container with water - in it we will periodically cool the drill. You can wrap electrical tape around the drill itself, which will serve as a limiter.
After the hole is ready, insert the dowel glass and hammer in the nail. In order to facilitate the process that self-tapping screws go through when driven into a brick, you can use the “old” method. The dowel inserted into the drilled hole is strengthened with a wooden peg. Another “old-fashioned” method would be to drill a hole and screw a plug or cap into it, previously soaked in PVA glue. Then the “excess” peeking out from the wall is cut off and a self-tapping screw is screwed in. But such fastening is considered short-lived. It is best to use dowels designed specifically for brick walls. They have projections that will not allow it to turn, even if a screw or nail is screwed in. This rule applies even to hollow bricks, in which they will roll up into a knot and occupy the entire required volume. When you need to decorate an external wall (for example, the entrance of a house), you can use corners along with dowels and screws. They will not only connect the structure and the wall, but will even become supporting elements.
Varieties
Pins for fastening to concrete differ in the following number of characteristics:
- Material.
As a rule, hardware is made of hard-to-deform carbon steel. However, there are also less durable specimens made of brass and stainless steel.
- Coverage.
When using galvanization, the screw has a white or silver tint and can be installed both inside and outside. Zinc also gives a yellow color, but due to its rust resistance, such hardware can only be installed indoors. The black color is the result of oxidation or fluoridation. The screw can be used in a home with normal humidity.
- Head shape.
They can be equipped with either a countersunk head or a protruding head. In addition, they differ in the type of tool used - for a bit, a Phillips screwdriver, a wrench. They can also be made in the form of a classic pin and hook anchor.
L-shaped hook screw for concrete Source vsecuplu.ru
See also: Catalog of companies that specialize in finishing materials and related work
- Thread type.
The dowel is equipped with several types of threaded parts - universal, herringbone and with a variable pitch.
Important! If the dowel does not have a dowel structure, this does not mean that in order to screw it in, you do not need to first make a mounting hole. To simplify the installation procedure in dense concrete, it is better to drill a slightly smaller diameter than the threaded part of the screw. Since absolute self-tapping screws for concrete without drilling do not exist, an installation channel for the highest density material must always be made.
Difference between wood and metal nails
The question is often asked on various construction forums: can a wooden dowel for timber be replaced with metal nails or rods. Despite the fact that it is easier to work with metal nails, such a replacement is unacceptable for the following reasons:
- The main purpose of dowel connections is to resist shear forces due to elasticity; mass-produced metal nails do not have such properties;
- Metal fasteners form a rigid coupling of wooden parts; such fastening prevents shrinkage processes and can lead to distortion of the walls, contributes to the formation of cracks and cracks;
- When driven, nails tear wood fibers, deep internal cracks form, and together with the metal, this contributes to the formation of cold bridges.
Characteristics, dimensions
Concrete dowel – dimensions (range of values):
- The diameter of the threaded part is 2.5-7.5 mm.
- Length – 30-200 mm.
The parameters are strictly regulated by GOST standards. At the same time, for effective use in specific conditions, it is necessary to know the following number of technical characteristics of hardware:
- Total length.
- Thread diameter.
- The diameter of the rod without the threaded part.
- Thread pitch.
- Cap dimensions.
- Slot dimensions and geometry.
- Maximum load.
An example of the technical characteristics of a concrete screw Source porta-chel.ru
Wall mount
For concrete, the screw selected is short enough, since the recommended depth for inserting hardware into such structures is 45 mm. For comparison, the holes in a brick wall are deeper - up to 55 mm. For cellular concrete, a depth of up to 75 mm is recommended. The less durable the material, the larger the fastener should be. Screws are placed using the same principle. If the structure of the material is loose, then holes are made in the wall into the structure as far apart as possible.
When studying the question of how to use such fasteners, it is necessary to assess the condition of the structures. Strength is ensured if the wall does not collapse. Concrete should not crumble; if there are cracks, the reliability of the structure is reduced. In this case, the use of the largest dowel will not provide the required result.
When work begins, determine the area for installing the first screw. For example, it is necessary to deviate from the corner by at least 60 mm. If you break this rule, the strength of the fastening will decrease. Under the influence of significant load, the structure will begin to collapse. This will lead to the collapse of the element, which was fixed with a screw in the concrete.
Recommendations for using the dowel:
- work is carried out according to a pre-drawn up project;
- markings are made on the structure;
- prepare the holes, and it is necessary to ensure that the cement does not crumble, and there should be no chips;
- if the material is porous, it is impossible to put pressure on the tool when inserting a screw into the concrete mass, since there is a risk of damaging the structure, as a result the screws will not hold, the structure will deform over time or immediately as soon as increased pressure is applied to the fastener .
During the work process, there are many nuances that should be taken into account.
Installation begins with preparing the tool. You will need a screwdriver, drill or screwdriver, concrete screws, hammer drill, and a container filled with water.
Instructions for performing the work:
- To prevent chipping, you need to clean the surface. If the structure has defects, you can level it using cement compounds and plaster.
- The load on the fastener is determined. Based on this, drills of the required length are selected.
- Work begins after marking the site.
- Concrete is a dense, durable material. The tool will get hot when drilling. To cool it, water is used. An alternative option is oil.
- If it is not possible to drill the concrete to the required depth, use a hammer. You need to hit the head with the screw several times. However, this method is used when the fasteners will not be subject to significant load.
Recommendations for selection
Self-tapping screws for concrete should be selected based on the following criteria:
- Correct load calculation.
The lower the density of the wall material and the greater the load from the object being installed, the larger the diameter and length of the hardware should be. For example, for mounting a TV bracket, a specimen with a diameter of 3 mm and a length of 25 mm is suitable, and for installing a 100 liter boiler - at least 5 mm in diameter and 70-90 mm in length.
- Taking into account anti-corrosion resistance.
For fixation outside and in wet rooms, galvanized hardware is used; for rooms with normal humidity, oxidized and fluoridated ones are used.
Various types of protective coatings for self-tapping screws for concrete Source gipermarketdom.ru
- Combination with decoration, design and interior.
The variety of shapes, geometries and designs allows you to choose a dowel that matches the appearance well with the surrounding design.
- Price.
The price of fasteners is determined by the type of material, coating, size, as well as the popularity of the brand.
Recommendation! To determine the exact number of dowels when performing installation work in a particular case, it is necessary to assume that the distance between correctly selected hardware should be from 70 to 100 mm.
How to screw in a self-tapping screw when installing drywall
Before you screw a self-tapping screw into drywall, you need to think about tools that can make the job easier. Let's look at what tools and devices can be used: For a repairman, screwing in self-tapping screws is something understandable that does not raise any questions. Beginners believe that attaching drywall to the frame using self-tapping screws is the easiest to repair. But not everyone knows how to screw a self-tapping screw into drywall so that there are no problems later. Errors at this stage of repair can lead to the creation of a fragile coating.
The screws must be screwed in from one edge of the sheet to the other. You cannot screw them in at random, as this can lead to deformation of the drywall. The fastening pitch ranges from 15 to 30 cm, depending on the specific situation. The screwdriver applies slight pressure on the fastener and turns on maximum speed.
This is necessary so that the screw can fit into the profile to which the gypsum board is attached. As soon as it passes into the profile, you can reduce the speed and tighten the screw slowly. If the speed is not reduced, the sheet core will be damaged. The screw should fit into the sheet so that the head sank into it by 1-2 mm.
You need to work with a screwdriver gently, without much effort at first. If the self-tapping screw has not yet begun to enter the plasterboard, then the screwdriver under pressure may jump off and pierce the surface. When the screw has entered a little into the core of the material, you can already apply more force to screw it in completely.
Additional information on the topic:
- What is the difference between ceiling plasterboard and wall plasterboard
- Projects of plasterboard ceilings with suspended ceilings
- How to properly glue serpyanka to drywall when puttingtying
- What is needed for a plasterboard suspended ceiling
- Prices for puttying plasterboard ceilings for painting
Terms of use
The most important component of knowing what a concrete dowel is is how to use it in a specific application. For this there are the following series of rules:
- The nagel is distinguished by its versatility. With its help, you can mount products from various materials - wood, plastic, metal, glass, stone.
- For optimal and quick installation, before screwing in, it is necessary to drill a mounting hole slightly smaller in diameter than the threaded part of the hardware.
- If the wall is made of a material with a lower density than standard concrete, then excessive force should not be used when tightening.
- Before starting fastening work, the surface must be well cleaned and leveled.
- The screw must be screwed in strictly according to technology and taking into account the permissible load and rotation speed. Otherwise, its rod may burst and the hole may become loose. As a result, there will be no fastening as such.
- When working with a concrete surface, you must use safety glasses, as the material is very brittle and can break off into small pieces and get into your eyes.
Drill for dowel: is it necessary?
Before screwing the mount into the concrete wall, you must drill a hole. To do this, use a drill with a diameter of 6 mm. The width and length of the hole should be 15-20% smaller than the dowel itself. If you use an electric drill in drilling mode, then a universal or special concrete drill will do.
When using an impact drill or hammer drill, a drill is used that has grooves located on a cylindrical surface. For expanded clay concrete, foam or aerated concrete, there is no need to drill a preliminary hole. This is done in order to create full contact between the screw and the concrete.
Briefly about the main thing
Self-tapping screws for concrete are universal. With their help, you can attach interior items, household appliances, communications, finishing materials to the concrete surface both outside and inside. Externally, they have the shape of a screw and differ in a number of parameters:
- Material.
- Type of protective coating.
- The shape of the head part.
- Type of thread.
When choosing for specific application conditions, it is necessary to correctly calculate the load, take into account corrosion factors, as well as how the fasteners will be combined with the finishing design and what its final cost will be. During installation, a number of rules must be observed, including safety regulations.
Ratings 0
Customer errors
A minor mistake made by builders during the construction of a wooden house can dramatically worsen the thermal characteristics of the house or shorten its life.
But customers can also make mistakes. Conscientious builders always dissuade private owners from purchasing log buildings that have stood on the production site for a year or more. As a rule, their lower crowns have already begun to rot or are affected by fungus. To give it a marketable appearance, the log house can be bleached, but this will also have a bad effect on the durability of the wood. Another problem with old log houses is that there is a possibility that the cutters who made the box are already working in another place, and the assembly of the log house will be carried out by other people. The hired team will easily shift the blame for poor quality assembly onto unknown cutters. They say they made an open marriage, and it is impossible to collect it qualitatively. The assembly of the log house should be trusted only to those who manufactured it. Otherwise, there will be no one to ask for quality.
By the way, not only chopped logs, but also other materials deteriorate due to improper storage.
Director Alexey Markin talks about another mistake often made by customers.
Another piece of advice that protects you from mistakes can be considered naive, but in some cases it will come in handy. Builders strongly advise against contacting companies that promise to build a log or timber house in a month. The construction of a building from wood of natural moisture or even dry wood is always carried out in two stages - the construction of a log house with a roof, and after about a year's break, windows, ceilings, and floors are installed to allow the log house to shrink. Only houses made of laminated veneer lumber do not need shrinkage. Previously, the portal Repair.Divandi talked about.
Photo No. 1
– A log house with huge cracks.
Dowel connections - should I use glue?
Assembly using dowels is possible in two options: dry or glued
. Each case has its own characteristics. If we have ready-made parts with holes, then we don’t need to drill anything ourselves. All that remains is to arrange the parts in the required order, then drive a dowel into one of them, tap it a little so that it fits in firmly and is located in the hole, and then put the second part on it, and again knock on the part from above so that the second end entered firmly. This connection does not hold the parts in tension, only in shear, so the fastened structure should be immediately placed in the desired orientation, and not upside down or otherwise.
You should not fill the holes with glue so that the product will squish there, it is enough to lubricate the end on one side, and then also treat the other end. Moreover, if there are several fasteners located on one side of the part at once, then first install all the dowels with one end into the holes, after lubricating them with the composition or dropping a drop into the hole. And then coat the protruding edges with glue, let them thicken a little (literally a minute or two) and attach the second part, carefully aligning the holes on it with the protruding ends of the dowels. Lightly tapping the mounted part will better distribute the glue and strengthen the structure. Remember, it is not dismountable; if you want to dismantle it, you will only have to break it.
Round wooden dowels can be made quite easily at home.
Holes of the required diameter are drilled in the steel matrix plate at an angle of 45-60° to the surface of the plate.
The workpiece rack is clamped into the chuck of an electric drill and, after inserting the plate into the hole, it is gradually passed through it.
When the workpiece is rotated, the sharp edges of the hole cut off excess wood and form a cylindrical rod, which is cut into dowels of the required length.
- Dowel Cutting Jig Some projects require a large number of dowels of the same length. To quickly and accurately cut short sections while keeping your hands away from the saw blade, you can
- Homemade dowels and round tenons Knowing how to mill round tenons by milling, you can turn any drilling machine with a Forstner drill installed into a machine for selecting nests. In addition, you can always make
- Round templates will help where compasses fail. Before installing the workpiece on the machine, you need to give it a round shape using a band saw - then it will be balanced, and, in addition, you will not have to do hard work on rough
- A “shelf” of beds In families where there are many children of the same age, folding beds like these will be especially convenient. This multi-tiered “shelf” crib can stand in the corner of the room during the day without taking up space for games and
- Template for dowels This template is designed for accurately marking holes for dowels when connecting boards into a board.
Do-it-yourself dowels for timber
The construction of structures made of wood implies the mandatory use of special fastening fragments. Such elements are aimed at ensuring that the design is of high quality, reliable, monolithic, and as durable as possible.
An integral part of the structure are dowels, or dowels. It is the quality of this part that determines the reliability of the entire structure. You can easily make dowels for timber even with your own hands. The procedure is not anything particularly complicated. The main thing is to follow the chosen method.
Spikes for fixing timber: which ones to choose and why?
The most popular are dowels made from hard wood. The most durable options are spikes made of oak or birch. It is not possible to deform, bend, or break them. However, there is one condition. They must be properly secured. What are their shape and sizes? The optimal solution is details with rounded contours. Their length should not exceed 25 mm. Wooden dowels must be smooth and even not only at the point of installation, but over the entire surface. It is these nails that guarantee the longest possible service life.
Installing dowels in timber is a mandatory rule for timber and log structures. Birch thorns are the most common option. Such dowels cannot become an analogue of self-tapping screws or primitive nails. If they are used, it is impossible to guarantee the stability and reliability of the structure. It is also worth abandoning the use of reinforcement. Metal versions can lead to a number of negative consequences, which is explained by the direct interaction of materials with different thermal conductivity parameters. What can the use of metal dowels lead to? It could be:
- condensation formation;
- coating the surface of the spikes with rust;
- rotting of the entire layer of wood.
T-shaped types of connections between timber and logs
The connection with the remainder has three types of felling:
- In the oblo "in the bowl"
- In the heat of the moment
- In a huff.
Corner joints of logs “in the oblo” are done as follows:
- Half a tree
- Oval ridge
- In the fat tail.
Half a tree - easy to connect. To achieve stability of fastening, a longitudinal groove is made in the crown. We pre-fill the groove with insulation.
An oval ridge is a fastening with a remainder; here a small oval ridge is made on the bottom of the bowl; it is important that it exactly follows the shape of the laying groove. In this option, the longitudinal groove is cut not from the top but from the bottom of the log. Fat tail - more technically complex
A small protrusion (tail fat) is cut out at the bottom of the bowl, which is placed along the crown and across the bowl. In turn, a recess is cut out on the lower part, which coincides in shape with the protrusion (see picture:)
The fat tail is more technically complex. A small protrusion (tail fat) is cut out at the bottom of the bowl, which is placed along the crown and across the bowl. In turn, a recess is cut out on the lower part, which coincides in shape with the protrusion (see picture:)
In the oblo - this type of connection is almost the same as what we described above (“in the oblo”). The only difference is that the bowl is cut from above, and not on the lower part of the crown. The name oklop appeared because of the characteristic clap when rolling a log into a prepared corner.
In addition to reliable tying of the corners of a wooden building, it is very important to ensure high-quality longitudinal joining of the beams or logs that make up the crowns. For timber, extensions are most often used using a direct or overlay lock. To further strengthen the overhead joint, vertical dowels or dowels are used
To further strengthen the overhead joint, vertical dowels or dowels are used.
In addition, it is convenient to make a longitudinal connection of the crowns “in half a tree”, cutting off part of the end of the connected beams. To increase the rigidity of the joint in the contact area, you need to install two dowel pins.
The connection with a root tenon is also quite acceptable for the longitudinal extension of beams.
The combined “half-tree” joint, on the upper protrusion of which is made of a “dovetail,” is well resistant to the longitudinal tensile forces that arise during the shrinkage of wooden crowns.
If such cutting seems too complicated to you, then make a longitudinal connection of the crowns with an ordinary dovetail, which reliably fixes the timber being built up and the log.
1. Key groove on the main tenon
2. Straight groove on the main tenon
3. The already familiar “dovetail”
Length extension
The length of industrially produced timber is determined by GOST 24454-80; of the many sizes of timber, 3- and 6-meter blanks are most in demand. When splicing, the ends of the joined beams are secured in various ways:
- Half-tree connection;
- On the root thorn;
- Straight patch lock;
- Oblique patch lock;
- Oblique cut.
The choice of fastening for the connected beams depends on the tasks at hand. For decking, a straight lock is used; for vertical supports, a half-tree or tenon lock is used; for the construction of 3D structures, oblique locks are used. Locks are reinforced with building brackets, dowels and dowels; bolted fastenings are used for load-bearing supports. In order to maintain the uniformity of the surface texture of the laminated veneer lumber, the length is increased using the toothed connection method or butt joints with a key, and the joints are reinforced with waterproof glue.
The longitudinal installation of timber roof rafters has its own characteristics - it is necessary to take into account the impact of multidirectional loads. For the connection, an oblique cut is used, reinforced with bolted fastening with a diameter of 10-12 mm.
