Hi all! Mirrors are an integral part of any interior. That's why you have to deal with him very often. You can order a finished product with a bevel or an original frame, or do it yourself, using a mirror cloth as a base. In this case, the question remains open about how to cut a mirror and what is required for this at home.
Have you ever cut mirrors or glass yourself?
Yes
38%
No
62%
Voted: 50
Mirrors come in a wide variety. Moreover, you can create something unusual, original from a simple canvas yourself, or simply save on buying ready-made decorated mirrors.
Why exactly such a procedure may be required is not fundamentally important. It is much more important to understand the methods of cutting yourself and their features. This will give you the opportunity to cut a mirror for wardrobes or for the bathroom. Here you decide for yourself when and why you will need it.
Curvilinear cutting of glass
Methods for cutting glass sheets without a glass cutter
The first thing that comes to mind when it is necessary to divide the canvas into several parts is a classic glass cutter. Despite its cheapness and widespread use, there are times when you simply don’t have the right tool at hand. In these circumstances, the following may help:
- burning thread;
- scissors;
- soldering iron;
- diamond disc.
Handy tools for cutting glass Source ogorod.ru
Since cutting glass without a glass cutter is quite difficult if you lack experience, it is not recommended to use the methods presented above for sheets thicker than 8 mm. Insufficient cutting ability of available tools will most likely lead to chips and uneven edges.
Cutting glass using a burning thread
To obtain an even cutting line, you will need a wool thread and a flammable substance - alcohol or kerosene. Although the method is most often used to separate glass bottles, with proper skill it can also be used with ordinary glass.
Before cutting glass in this way, the thread is impregnated with a flammable substance. It is wrapped around the bottle or applied along the cut line and pressed tightly. The thread is set on fire and waited for complete burning. Immediately after this, the cut site is watered with cold water. Due to temperature changes, the glass cracks, forming a straight line.
Using a soldering iron
A soldering station or burning machine allows you to make both straight and shaped lines in glass up to 6-8 mm thick. The main disadvantage of this procedure is the rather long time required for high-quality implementation.
Using a soldering iron to cut glassSource ytimg.com
Before cutting the glass, the soldering iron is heated to maximum temperature. A line for the future cut is made on the glass sheet. The line is burned from the end with a soldering iron. 1-2 mm are retreated from the resulting point and the next cauterization is performed until a microcrack appears. Having finished the line, the canvas is carefully divided into two parts.
Cutting glass with scissors and a diamond blade
There is no perfect way to cut glass without a glass cutter. Almost every method is a compromise between an ideal, straight cut line and working speed. Scissors allow you to separate the glass sheet as quickly as possible. The procedure will require sharp scissors and a bowl of water. The glass is placed in water and quickly separated into pieces.
Cutting glass with scissorsSource moiinstrumentu.ru
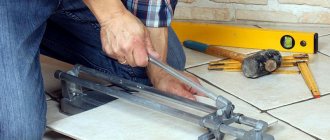
Compared to the previous method, diamond blades allow you to obtain a perfect cutting line. A special disc for cutting stone and ceramic tiles is put on an angle grinder. The cut is made very carefully so as not to break the glass. The best result can be obtained using a tile cutter, but this method is only suitable for canvas with an area of no more than 50 square meters. cm.
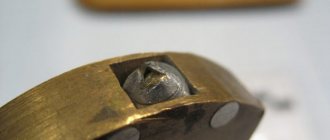
Pobedite drill
Having a Pobedit drill with a non-wearing tip can really help out when you need to cut glass without a glass cutter. The advantage of the method is that no other tools are required for the work. A flat, large table is cleared of crumbs and other debris. A blanket of soft fabric such as woolen cloth is placed on top. Then they place the glass, apply a guide ruler and, with one movement of the drill towards you, cut off the required part. It is worth making sure that the cutting tool touches the material with the sharpest side of the tip. Compared to a glass cutter, you need to press harder on the drill. Finally, the edge of the sheet is hung so that the groove created on the surface runs parallel to the tabletop at a distance of 3–5 mm. The master, holding the glass with one hand, breaks off the cut off part with a sharp downward movement. If he doesn’t have enough strength, then from below he taps with a hammer along the cut line, and then tries again.
When cutting corrugated glass, the side with the rough surface is turned towards the table, and the master works with the smooth one. The same applies to mirrors and glass with patterns.
Features of glass cutting
The material is very popular in the production of windows, photo frames, aquariums and other structures.
Before starting work, it is important to carefully study the physical properties of glass. Unlike concrete or plastic, hard and brittle glass requires a more delicate and precise approach.
Sharp edges of the material require compliance with certain safety regulations. Hands must be completely covered with gloves made of thick fabric. It is recommended to work in long sleeves and special safety glasses, which will protect your eyes in the event of sudden chipping of sharp elements.
An example of neglect of safety precautions when cutting glassSource javlad.ru
Since glass must be cut with extreme precision, it is worth taking care of a solid base. Heavy workbenches with a flat top are best. To reduce the number of fragments, it is recommended to cover them with a layer of soft fabric, which will also perform an anti-slip function, holding the sheet in place.
Some tips about forgotten technologies
Are you going to lay the tiles yourself? Please note that the process is very labor-intensive and will require certain experience from the contractor. Beginners should be given some practical advice: if you use a grinder to cut tiles without a tile cutter, then you should not make sudden movements, because the diamond wheel will damage the part that should remain clean.
Do you think it is possible to cut tiles without a tile cutter?
Cannot
Also follow safety precautions, always use personal protective equipment against dust for the respiratory system and eyes. Shards can very quickly and easily damage the cornea, and dust can clog the airways.
Preparation
You should never neglect preparation for the glass cutting process. This operation is impossible without its preliminary preparation. It is necessary to wipe the surface with a damp cloth to remove all unnecessary inclusions. After the glass is dry, dry it with a dry cloth.
Many experts advise using old paper rather than rags. It does not leave fibers on the surface that interfere with the cutting process. Glass that has already been used is much more difficult to cut, so it takes longer to prepare it. In addition to cleaning and drying, such material must be degreased with kerosene.
Features of cutting different types
Tempered glass, also known as tempered glass, is made by heating it in an oven to a temperature of 680 degrees and then quickly cooling it with even air currents. This product is used as windshield and window glass in cars, and also as a heat-resistant and fire-resistant ceiling. Typically, glass is cut and processed immediately before annealing, eliminating other problems. Processing such material by conventional methods is impossible due to its mechanical properties.
There are different cutting methods available for tempered glass. The first is laser cutting of glass. Because the laser cuts the material with heat at a specific point, the internal stresses at that point drop and prevent the glass from cracking, producing a smooth, high-quality cut. The second and more complex method involves preliminary annealing. The main goal of this method is to completely remove residual stresses over the entire area of the material and thus transform it into ordinary sheet quartz glass. Annealing is carried out by soaking the material in water to the temperature of the solidification viscosity in an oven. This is followed by slow cooling to a temperature below strain. As a result of these actions, the glass loses its tempered properties and can be subjected to mechanical cutting.
Acrylic glass, also known as organic glass, is a synthetic polymer of methyl methacrylate, a clear thermoplastic plastic. It is called glass only formally because of its transparency. The remaining properties are significantly different and have nothing in common with real glass, which allows completely different processing methods to be applied to it. In this regard, one of the most popular cutting methods is dissection using a milling machine, when specialized equipment is not required, but is used the same as for processing wood and metals.
Other methods used to disassemble glass also apply to the acrylic version. Waterjet and laser cutting machines interact with plexiglass with great efficiency and provide faster cutting speeds than using the same equipment to process regular glass. Cutting thick reinforced glass is made difficult by the presence of a metal mesh in it.
Soldering iron
Another way to cut glass without a glass cutter is by using thermal expansion and contraction of materials. To work, you will need a soldering iron, so, most likely, electricians will use it more often. At the beginning and end of the marking, a notch is made with a file. Then they begin to heat a point on the cutting line at a distance of 2 mm from this mark until a microcrack forms between them. Consistently shifting the heating zone each time by a step of 2 mm, the master creates a crack extended along the entire length. This is enough to then, as when working with a glass cutter or drill, break off the desired part. This technological process is very slow, but it can be accelerated by cooling the surface of the material from time to time with a wet cloth.
Preparation before drilling
We have chosen a drill, then we begin to prepare the glass product for drilling. Before drilling glass, you need to degrease its surface using an organic solvent. Alcohol, turpentine or white spirit are suitable for these purposes. After degreasing, everything should be carefully wiped with a dry cloth. After this, the product is placed on a flat surface so that it does not slip. Marking for the hole can be done using a regular marker. Let's start drilling.
Instructions for drilling glass with a regular drill
You need to drill slowly and carefully, never pressing hard on the glass and stopping periodically to allow the glass to cool. This way you can easily drill through both regular and tempered glass.
Finally, some useful advice. The drill must be held strictly perpendicular to the glass surface, and there is no need to drill it all the way. Before drilling the hole to the end, you need to turn the product over (if, of course, this is possible) and continue drilling from the back side. This will avoid cracks.
Hole in glass using sand
Drills and special drills did not always exist. Glass, as we know, was invented thousands of years ago, and in those days it was also sometimes necessary to make holes in glass products. They did this with sand.
Let's figure out whether it is possible to drill glass with sand today, and with your own hands. To do this, we will need the sand itself, a crucible (or metal vessel), lead or tin (a small piece), solvent or gasoline, a metal pointed rod (approximately equal in diameter to the hole that needs to be made) and a burner.
The entire process of drilling glass at home can be described by the following sequence of actions:
- Degrease the glass surface within a radius of 10 centimeters from the future hole. We do this using solvent or gasoline.
- We wet the sand with water and pour a sand hill 5 to 10 centimeters high above the future hole.
- Using a pointed rod, we make a strictly vertical hole in the sand hill. Its shape should be similar to a funnel - the lower part is the size of the hole that needs to be made, the upper part is wider.
- Melt tin or lead in a crucible and carefully pour it into the hole in the sand. We wait about 10 minutes.
- We remove the sand from the glass, and then carefully remove the frozen piece of metal from the hole where the lead melted.
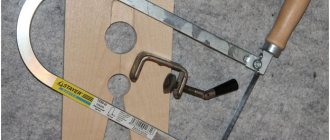
Drilling glass with a homemade drill
To drill glass at home, without buying a “special” drill, you can make it yourself. To do this, you will need an ordinary glass cutter, or, to be more precise, its part - a “cutting roller”, which is usually called a “diamond”.
First, we take a workpiece (metal rod) and make it at one of its ends. We remove this roller from the glass cutter and tightly fix it in the pre-made slot so that it is stationary. Then we tightly fix this thing in the drill chuck, after which we begin to drill the glass.
Tempered glass cutting instructions
The high strength and hardness of the surface determines that quite serious problems can arise when cutting.
When considering how to cut tempered glass, you should pay attention to the following points:
- The workpiece is prepared by annealing. This technology provides uniform heating of the surface. Due to this, the stress that forms inside the material at the time of hardening is eliminated. Due to such tension, it becomes much more difficult to achieve the required dimensions.
- The annealing process involves heating water to a certain temperature, after which the workpiece is lowered into it. It is worth considering that car glass or decorative glass should be cut at different temperatures, it all depends on the brand of material.
- The exposure time of tempered glass in water can vary significantly. In some cases it takes about an hour, the most difficult versions are aged for a month.
- After reaching the required temperature, the product is slowly cooled. The work is performed slowly, thereby eliminating the possibility of even the smallest defects.
- Once the surface temperature has dropped, you can put on glasses and cut using a glass cutter. You can cut glass for your phone in a similar way.
- Markings should be made before cutting. Smooth and accurate lines are achieved by using a square and other measuring instruments.
- The material should be pressed with medium force, as a high load can lead to serious defects. The cut is carried out quickly; attempting to make the line again is not recommended due to the fact that such actions can lead to splits and cracks.
- You should be careful when cutting, as it will not be possible to re-make the cut line. After obtaining the required line, a rod is placed under it, and with a sharp push the product is divided into two parts.
If you do the work carefully, you can get a high-quality cut. The end surface can be finished using a grinding stone.
Pipe cutting
This need arises in the area of risers going from your apartment to your neighbors living on the floor below. How to cut linoleum for a pipe? This process is not easy. It requires a special approach. It is especially common to cut linoleum to accommodate the battery pipe. This process includes the following steps:
- Place the material with the wrong side on the pipe. Give it a good squeeze.
- Make a mark in the center of the pipe on the linoleum.
- Make an even cut from this point to the nearest wall.
- Draw a circle at the designated point on the linoleum. It is necessary that its circumference touches the mark. The cut should pass through the center of the circle. The diameter of this figure and the pipe must match.
- Use a knife to cut a circle along the drawn line.
Other methods of breaking a mirror surface
It is more correct and efficient to cut with a conventional glass cutter. It may be indispensable if you decide to make a dressing table yourself, or to restore old mirrors to decorate the interior of your own home. The advantages of special tools are that with their help you can easily cut out even quite complex elements, process a thick mirror and set the desired shape of the canvas.
When purchasing a glass cutter, be sure to pay attention to its type. The tool can be roller or diamond
The first one is more budget-friendly, but has lower accuracy, quality and cutting speed. Diamond glass cutters are expensive, but with frequent use, the investment will be fully worth it.
It won’t take much time to learn how to properly operate such a device. By following certain rules, you will be able to achieve the desired result:
The glass cutter must be held at a right angle, but a slight deviation is allowed; pressing with the index finger, the instrument is firmly fixed with the middle and thumb; while moving along the blade, you cannot change the position of the cutter; it is extremely important to make the cut with a quick and confident movement; It is not recommended to make a second cut along the same line; a strictly uniform force is applied, but except at the edges; when approaching the edge approximately 5 mm before the edge, you need to reduce the load on the glass cutter; the cut is made from the far point towards you; a high-quality cut is obtained in a dark color in the case of a roller tool; Diamond cutters always leave behind a light, thin strip; It is not recommended to deepen poorly executed cuts, but it is better to step back a little and make a new one.
Some cut an old, previously glued mirror, while others use new canvases. But regardless of this, cutting requires mandatory preliminary preparation, as well as correct execution of the procedure. Only then will you choose the method of attaching the mirrors, or select the appropriate glue for the mirror to fix it.
If we consider the process step by step, it involves the following steps:
- First you need to prepare a flat surface of appropriate size. Often this is done simply on the floor, but it is better on the table. The canvas is laid face up;
- Be sure to place a soft lining under the mirror so as not to damage it when pressed;
- The surface is cleaned with a soda solution and then with alcohol;
- All irregularities on the reverse side should also be removed and leveled;
- At the next stage, markings are applied. The line should run 2 mm further than the future cut, since finishing is still to be done;
- Using a ruler to control the straight cutting stroke, a glass cutter is used;
- After making the cut, the mirror is moved to the edge of the table and hangs out a little. The cut part is carefully separated;
- You can remove excess after a cut with gloved hands, a rubber hammer, or pliers with plastic (rubber) pads;
- Using fine-grained sandpaper, process the sections.
That's it, now you have managed to cut out the required element. What to do with it next depends on specific goals and objectives.
As you can see, using a glass cutter is not so easy, but it is the most effective and useful tool in such matters.
There are several ways to break a mirror surface. Method of breaking a mirror using scissors and water. The mirror is immersed in warm water and drawn with curved scissors along the intended contour. This method is suitable for thin mirrors. Some people break mirrors with a soldering iron.
Everyone can choose the option that suits them, having certain tools. Follow safety precautions and decorate your home!
What to replace a glass cutter with?
If you have a need to cut any glass, mirror, or even tile, but you don’t have a glass cutter at hand, then this life hack will certainly be useful to you. With which you will learn how to make a homemade glass cutter from a spark plug and use it to cut glass very evenly in one or two pieces.
Cutting glass using a spark plug
So, the first thing we need is absolutely any spark plug from any vehicle.
The insulator of any candle is sintered from very durable ceramics. We place it on an anvil or a piece of steel and break its insulator with a hammer with one blow.
Carefully! Be sure to use safety glasses. Take a wooden strip, cut it with a knife to the middle, insert the sharpest piece of the split insulator
Take a wooden strip, cut it with a knife to the middle, insert the sharpest piece of the split insulator.
To prevent it from flying out, we wrap it with thin wire, thread or tape.
We've got a real glass cutter. We take glass and cut it like a real tool. We use a blade from a hacksaw for metal as a ruler.
Break it apart along the scratch. It would be a good idea to first tap the scratch so that the crack goes deeper.
Such a homemade glass cutter should be enough for a couple of meters of glass, then the insulator fragment can be replaced with another. Here is such a useful life hack. I hope it is useful to someone.
Using an angle grinder
The tiles can be cut using an angle grinder. This tool helps to make a perfectly even cut with precise dimensions.
However, to get such a good result, you need to buy the right disc for the machine. There are many models on the market, but you need a disc coated with diamond chips.
The main thing is that the size of the crumbs was as small as possible.
What tools to use?
Many of us are accustomed to thinking that glass can only be cut correctly and efficiently with a glass cutter. But what to do if you need to cut a piece of glass urgently, but you don’t have this tool at hand? There is another unusual, but no less effective method that helped our great-grandfathers get out of this situation. Such a tool is ordinary scissors, available to any owner. Let's look at each method in detail.
Option 1: glass cutter
The technology for cutting glass with a glass cutter is quite simple. To do this, you must comply with certain conditions and choose the right glass cutter. Today, the choice of this tool is quite wide, which allows you to turn work into pleasure.
- Diamond glass cutter, time-tested and remains a leader in its field to this day. Glass cutters with a beveled cutting edge are suitable for home use. This tool is designed to cut glass up to ten kilometers and is suitable for any thickness of the material used. From time to time, such a glass cutter needs to be sharpened on a special whetstone.
- Roller. As the name suggests, the cutting part of such a glass cutter is made in the form of a roller made of a durable cobalt-tungsten alloy. The number of rollers can be from one to six.
- Oil. This tool works on the principle of a roller glass cutter, with the difference that a reservoir with oil is built into its handle, which is automatically supplied to the roller. Suitable for cutting thick glass.
To learn how to choose a good glass cutter, watch the video:
So, having dealt with the glass cutter, place the glass on a flat surface. Mark the glass and get to work. To make the task easier, you can use a ruler. It is worth considering the point that the line must be drawn the first time, otherwise a repeated attempt will lead to cracking of the surface. When cutting glass with a glass cutter, you need to apply equal force along the entire length of the line.
Option 2: ordinary scissors
Cutting glass with scissors like paper is not a fairy tale, but a completely everyday reality. For this purpose, you will need the scissors themselves (sewing scissors are best for this) and a tank of water (preferably hot). It is necessary to apply markings on the glass in advance, and then elementary physics comes into play: scissors create a microcrack, and the capillary effect completes the process. Of course, the result obtained will differ from that achieved with a glass cutter, but if necessary, this method can help out significantly.
Diamond blade
A grinder equipped with a diamond blade will easily cut a piece of glass sheet. The main difficulty is to guide the saw exactly along the markings. There is no need to plunge the cutter into the material, as in the general case, only a narrow groove from edge to edge of the sheet is required to separate the required part. Particular attention should be paid to safety; a high degree of concentration is required. When working with an angle grinder, glass dust is generated, to reduce its amount, it is recommended to water the cutting line with water.
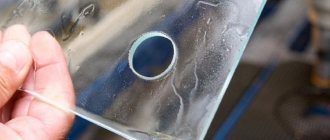
How to cut a mirror without a glass cutter
The mirrors around us: in the car, bathroom or women's cosmetic bag, are in structure ordinary glass with a layer of metal applied to the back surface. Cutting glass with a mirror coating is practically no different from regular glass and can be done with a regular glass cutter or using the methods described above. When you don't have a special tool at hand, the most effective cutting tool is a file or diamond blade. Let's take a closer look at how to cut a mirror at home without a glass cutter, using improvised means.
The first step is to prepare the surface to be treated: wash, degrease and dry. The mirror must be clean, without stains or strong streaks. Otherwise, the cut line may be drawn and the chip will be uneven. The working surface where cutting will be done must be flat and not very hard. You can lay a thick cloth or a piece of linoleum on the table.
Having prepared the material and workspace, mark the line of the future cut on the mirror. It is better to draw straight lines using a ruler or staff with a height of at least 5 mm. To prevent the stop from slipping, you can glue a strip of electrical tape to its bottom. Next, take a file, grinder or other tool and make a cut along the marked line. A more detailed process of various cutting methods is described above.
When the cut is ready, all that remains is to break off the mirror in the right place. To do this, you can place a small object (match, pencil, nail) under the cut line and apply light pressure on both sides. You can chip the glass on the edge of the table or gently tap it from underneath with a small metal object (drill or spoon). If the glass does not break, you do not need to press very hard. It is better to make the second cut a couple of centimeters from the first.
Cutting a mirror If we are talking about a small and not thick canvas, then cutting a mirror at home is not difficult. It is absolutely not necessary to go to a workshop or call a “husband for an hour”; it is enough to have a man in the house and a small set of tools.
Content:
- Variety of ways to cut metal
- Mechanical cutting of metal: how to cut iron, steel, copper
- Hand scissors
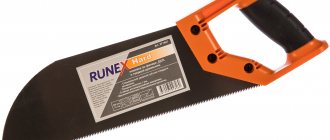
- Saws - this is what you can use to cut metal
- Angle grinders (angle grinders)
- Pipe cutters
- Wire cutters
- How to cut metal: a circular saw or a reciprocating saw
- Grinder and band saw
- Thermal methods
- Gas cutting
- Gas-electric technology
- Plasma technology
- Waterjet technology
- Guillotine
- How is injection cutting of thick metal performed?
- When arc cutting of thick metal is required
- Disadvantages of plasma technology
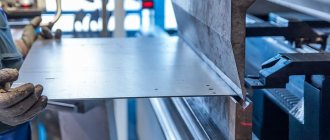
- Bend
- We break it down
- We use an electric jigsaw
- We use a multitool
- Professional ways
With the help of what tools and technologies is it easiest to separate a part from the whole workpiece? Let's consider how to cut metal, thin and thick, sheet and not, steel and iron. We will analyze the features of well-proven methods of influence so that you can be convinced that it is absolutely not necessary to use expensive equipment. Manual devices can also give the desired result and ensure the accuracy and precision of the operation, which in the future will make it possible to produce objects of the required shapes and sizes.
As a result, knowing all the options, you will be able to decide and choose the right one that is most suitable for your garage, cottage, backyard workshop, or even for production, if it is small-scale.
What to cook
Safety glasses must be used when cutting glass.
In order to carry out such a complex operation at home, you will need:
- Stove. It must be special and be able to heat up to 700 degrees Celsius. Some were lucky with such units - there were quite a lot of them in various research institutes, which were closed frequently in the 90s. Even now there is an option to purchase such a furnace for laboratory work. If there is no special equipment, then you can turn to familiar blacksmiths or build your own brick oven in the image and likeness of blacksmiths.
- Thermometer. It should have a high upper threshold of 700 degrees. If the furnace is laboratory, then it should have a built-in thermometer and temperature regulator.
- Instruments for measuring, marking. These are rulers, squares, markers, etc.
- Stones for grinding.
- Wooden rods.
- Diamond glass cutters.
- Protective equipment (glasses, special clothing).
- Powerful ventilation unit.
- Strained glass.
- Water.
Types of glass and features of work
Cutting ordinary glass does not pose any difficulties. Not only glass cutters, but also ordinary tailor’s scissors do an excellent job with this task. But what should those who have set themselves the task of obtaining a glass product with a more complex configuration do? To do this, it is worth familiarizing yourself with the properties of some glasses.
- Tempered glass products. In fact, it is impossible to cut tempered glass at home - it loses its properties. If you want to purchase an item with elements of this material, it is worth considering cutting it in the early stages. In addition, work with it must be carried out by professionals, since the hardening process of the resulting product can only be carried out under certain conditions.
- Corrugated glass. This patterned glass is especially popular in glazing doors or creating decorative interior elements. Unlike tempered glass, you can cut such glass yourself. Working with it is not much different from working with ordinary glass, the only difference is that the cut is made from the smooth side. A roller glass cutter is best suited for this.
- Acrylic or organic glass is a transparent plastic created on the basis of synthetic resins. No special tools are required to cut it. At home, a metal saw, cutter and other tools used for edge processing do an excellent job of this task. In addition, with glass whose thickness does not exceed 2 mm. An ordinary stationery knife does the job just fine.
In any case, it is worth remembering that working with any glass must be accompanied by compliance with certain precautions. The presence of thick gloves and safety glasses are the main conditions for your own safety.
It will not be superfluous to take care of the arrangement of the workplace. Since working with glass involves the presence of fragments, cover the work surface with any material that you won’t mind getting rid of. Feeling safe will allow you to achieve the best results.
what else to read:
12/31/2014 at 16:05
For some reason, everyone writes about scissors as science fiction. About 25 years ago I read somewhere about this method... and tried it - I had to cut out shaped glass. In a basin of water, ordinary scissors, glass and off you go! — I didn’t expect it to be so simple! Of course, it didn’t cut, but pieces broke off, but exactly in the right place.
12/16/2013 at 04:39
You never know what you can do till you try. It turns out there is nothing wrong with cutting glass. I used the services of a neighbor for many years, and one day I decided to try it myself. Happened! And no worse. But once I came across tempered glass. I struggled with it for a long time until knowledgeable people explained the futility of my efforts. Now I want to learn how to cut shaped glass products. Sometimes this is necessary.
02.12.2013 at 16:52
I cut glass using a grinder. I bought a special diamond coated wheel. You can pour water from a bottle so that the glass and cutting wheel do not overheat.
11/16/2013 at 10:01
Cutting glass has always been a problem for me. Every time you don’t have to run to a specialized store because of some kind of window, you have to cut it yourself. I watched a lot of videos on cutting, it seems easy, but once you start doing it you can’t really do it. In general, I realized one thing You need to practice for a long time and then over time you will achieve the desired result.
10/31/2013 at 12:27
The second option for cutting glass is borderline fantastic. It is possible that this method of cutting glass is suitable for those who have nothing at hand except scissors. For cutting I use an ordinary glass cutter, I make the markings with a permanent marker, you can also cut ceramic tiles using this method
10/25/2013 at 02:51
An oil glass cutter is best; it is easier to work with than any of the proposed options. About scissors, I’ve never heard of this method of cutting glass, it seems to me that it’s generally inconvenient and not profitable, because if it doesn’t go well, you’ll have to pay money for the glass.
Alternative solutions to the problem
The fact that it is not possible to carefully cut protective glass at home does not mean that you will have to be left without a protective accessory. We offer several options to solve this problem.
Selecting protective glass from another model
In order to select such a protective glass. You will have to spend a lot of time in the accessory store, and if you are ready for this, then first you need to select a list of smartphone models with the same screen diagonal and aspect ratio. At the same time, it is also worth considering the placement of the earpiece (whether a cutout is needed for it), after which, with a huge list, you need to go to the store where you can apply protective glasses and weed out the unsuitable ones.
It is also worth clarifying that the likelihood that the cutout for the proximity and lighting sensors will coincide with their locations on your smartphone is close to zero, which means that they will not work under a layer of glass.
Trimming the universal protective film
If you cannot cut the protective glass at home, then with the film things are different, but you should follow some recommendations so as not to damage the adhesive layer.
You can cut not only universal film, but also any other film.
To do this, place it on the smartphone screen with the side marked 1 down, trace the contours, but do not mark small holes, you will not be able to cut them out so as not to damage the silicone layer, instead of several small cutouts, it is better to make one common one for them.
Place the film on a hard work surface and cut with a sharp utility knife or scalpel in one motion. Do not use scissors, they will bend the edge and it will not stick in this place.
Next, you can glue the film to the device screen, having previously treated it from grease and dust with the wipes included with the film.
The protective film is not as hard as glass, but in most cases it is enough to protect the screen from scratches and abrasions.
Is it possible to do without glass at all? Yes, use a book case
Although this option is not the most reliable, most of the time the smartphone in such a case is closed and the likelihood of damage to the screen is minimal. And if you combine the protective film with a book case, you can keep your screen in excellent condition throughout the entire period of use.
To do this, use the promotional code art10 when placing an order, and the order amount will be reduced by 10%.
How to use a glass cutter correctly or instructions for its use
The question of how to use a glass cutter is asked not only by beginners. This is due to the fact that glass is one of the most dangerous materials, which can cause serious injury if used incorrectly. To avoid injury and to cut the glass to the required size, follow these instructions:
- The material must be free of contamination. The presence of contamination is unacceptable, as it affects the quality of work, as well as the service life of the cutting part of the tool. The surface of the material should also not be wet, because moisture promotes sliding of the cutting edge, as well as the occurrence of corrosion processes
- A paper plan for cutting the glass surface is being prepared
- To cut, you will need to use a ruler or a prepared template. Moreover, the ruler should not slide on the surface, otherwise it will lead to distortions.
- Having placed the ruler exactly along the previously measured and marked points, you should begin cutting. To do this, press the ruler with one hand, and draw a line with the other with a glass cutter (the tool must be held like a ballpoint pen, only at an angle of 90 degrees). The pass is made without pressure (depending on the type of tool), which allows you to make an invisible scratch on the surface. Strong pressure is not needed if a diamond tool is used. If a roller-type glass cutter is used, then you will need to ensure strong and uniform pressure of the tool to the surface
- If the line was not drawn correctly, do not try to straighten it. To correct a mistake, you should turn the glass over and draw a new line
- Breaking glass - do not try to make a very deep groove in the surface of the material, since the principle of cutting glass is that you need to indicate the location of the break. Light tapping is carried out on the reverse side of the material using a mandrel. These taps are necessary in order for a crack to form along the cut line. Having laid the sheet on the edge of the table exactly along the drawn line, it is necessary to make a break by sharply pressing down
After this, the cut part of the material is ready for use. The end part at the fracture will have a roughness, which, if necessary, can be removed with a special sharpening attachment clamped in the chuck of a drill or grinder.
This is interesting!
Roller glass cutters are equipped with special teeth, through which the glass is divided into two parts. The teeth have different sizes, which is made specifically for glass of different thicknesses.
Trimming corners
Above we looked at how to trim linoleum on walls. We must not forget that every room must have corners. It is necessary to trim the linoleum in them, following a certain technology:
- The flooring material must be pressed to the floor in the corner of the room. The canvas must first be carefully straightened.
- Make a cut perpendicular to the floor in the place where the linoleum “fits” onto the wall.
- After this, make two cuts along the walls (left and right of the corner).