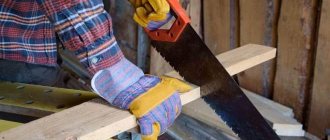
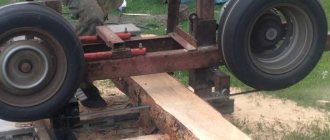
Beam, half-beam, block; Unedged and edged boards.
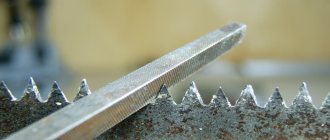
The process of setting is considered to be an operation associated with bending the saw teeth in different directions in order to reduce the friction of the saw band on the side surfaces of the cut and prevent it from being pinched. For free movement of the blade in wood, it is necessary to ensure a cutting width that exceeds the thickness of the blade by at least 30-60%. The setting is divided into several types, and they do not yet have established names, since saw manufacturers call them differently. The standard setting is characterized by alternating bending of the teeth in different directions. Scheme of the standard setting With the stripping setting, the teeth of the saw blade are divided into three, two of which are bent in different directions sides, and the third remains in place. Stripping wiring diagram It is mainly used when working with hard wood. The trapezoidal shape of every third tooth, remaining in the center of the saw, sets the direction of the entire saw blade. The most difficult to perform is the wavy set, since each subsequent tooth in a half-wave is bent by an increasingly increasing amount. Wavy set pattern With any type of set, the tooth is not bent from the base, and indented from it by 33-67% of the tooth height. Despite the fact that each manufacturer dictates its own requirements regarding indicators related to the gap, all of them do not go beyond 0.3-0.7 mm. It is generally accepted to cut trees with soft wood with band saws, which have a large gap, and with hard wood - small. But in any case, the set-up should be such that sawing occurs without the formation of a cut wedge in the center. When set, all teeth should be bent by the same amount with a permissible error of up to 0.1 mm. If the setting is not the same, the saw will be pulled in the direction of the larger setting.
Establishing the backlash between the front edge of the “driven” pulley and the inter-tooth gap of the band saw blade is carried out with the belt tensioned by swinging the “driven” pulley horizontally.
Stages of setting up a band sawmill
The sequence of setting up the units of a band saw machine requires special skills and knowledge, but is not particularly difficult. Using adjusting bolts, wheels and a plumb line, the pulleys are aligned vertically. Aligning the pulleys horizontally. This is done with the tape stretched with a special thread running along the sawmill. After installing the wheels in the horizontal plane, the “drive” wheel is fixed, which is not further involved in the adjustment. The establishment of play between the front edge of the “driven” pulley and the inter-tooth gap of the band saw blade is carried out with the belt tensioned by swinging the “driven” pulley horizontally. The gap It is positioned between the inter-tooth gap of the belt and the front edge of the “driving” pulley of the sawmill by swinging the “driven” wheel vertically.
An experienced sawyer, looking at a log, is already able to determine all the parameters of the future material, immediately find the butt part and the top of the log. The diameter of the butt part is larger than the apex. The thickness of the slab depends on the accuracy of the calculation.
Inspection of mechanism parts
Before starting work, it is necessary to inspect the components of the sawmill.
The lifting mechanism moves the frame up and down using a transmission driven by an electric motor. The control panel is located in the electrical cabinet, mounted in the upper jumper of the frame; a ground connection is required. The band saw frame consists of two beams connected to each other. Saw pulleys are located at the ends:
- “leading” – fixed motionless;
- “slave” – moves longitudinally.
Band saw frame diagram
The sawmill is equipped with a saw tension device containing a spring-screw mechanism.
On the casing of the saw pulleys of the band sawmill there is a tank with a lubricant and cooling compound.
Setting up band saws
Sharpening a band saw Band saws, which are blades with a serrated edge connected at the ends into a continuous band, have their own inherent advantages. The width of the cut left by them is less than the width of the cut from circular saws. When sawing ordinary wood, this feature may not be very important, but when cutting valuable types of wood and cutting expensive metal, it is essential. Sharpening a band saw The small width of the cut results in relatively low energy costs for cutting the material. And finally, a band saw can cut a workpiece of almost any thickness, while the geometry of a circular saw imposes restrictions on the thickness of the material it cuts.
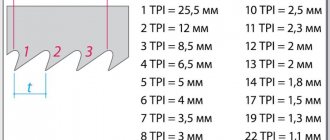
However, to reap all these benefits, band saws must be properly prepared for use. The main preparatory operations include sharpening and setting band saws. Band saws are made from different materials, depending on what material they are intended for cutting. Wood saws are made from alloy tool steel with a hardness of 40-45 HRC. Domestic manufacturers use steels 9ХФ, В2Ф (for metal band saws) and other foreign ones - their own steels (C75, Uddeholm UHB 15, etc.). When the teeth of such saws are hardened with high-frequency currents, they can acquire a hardness of up to 64 HRC and higher. Saws for cutting carbon steels and non-ferrous metals of small thickness are also made from tool steel with the mandatory hardening of the teeth with high-frequency currents. However, more often for cutting metal, bimetallic saws are used, in which the blade is made of spring steel, and the strip on which the teeth are cut is made of high-speed steel band saws with a high content of tungsten and cobalt. After hardening, it acquires a hardness of up to 65-69 HRC. High-speed steel is welded to the base of the saw with an electron beam. Teeth with greater wear resistance are obtained by fusing them with stellite (an alloy based on chromium and cobalt with the addition of tungsten and/or molybdenum) or by soldering plates of hard alloys to them. Such saws are superior in cutting capabilities to bimetallic ones. They are used for cutting fiberglass, tires, cables, reinforced plastics, heat-resistant alloys, graphite, aerated concrete, bricks and other materials that are difficult to cut. Geometry of band saw teeth Profile of band saw teeth Characteristics of band saw teeth Specific machines for a large family of band saw sharpening angles are determined by the manufacturers, based on many factors. In general, we can distinguish the following relationship - the harder the wood, the smaller the rake angle (γ). For metal saws, they also use different tooth shapes depending on what metal they are intended for cutting. Constant pitch saws come in two basic shapes: Standard, designed for cutting thin-walled, short-chip metal with a rake angle (γ) of 0°. Positive rake (γ) tooth, used in saws for cutting thick-walled, long-chip metal. For thin-walled material, saws with a relatively small pitch are used (number of teeth per inch Nuclear family from 4 to 18). Saws for cutting thick-walled material do not need a large number of teeth; their number is 1.25-6 teeth per inch. Read also: Pipe length in polyurethane insulation To eliminate the resonance effect, which leads to blade vibrations, some saws are made with a variable pitch, at which The distance between the teeth varies within a particular group. The step size is indicated by the largest and smallest values. Setting of band saws Setting is the operation of bending the saw teeth in one direction or the other in order to reduce friction of the saw blade against the walls of the cut and prevent it from pinching. In order for the blade to move freely in the cut, the width of the latter must be 30-60% greater than the thickness of the blade. There are several types of wiring, the names of which may differ among different manufacturers. The main types are as follows. Proper cutting and sharpening of a band saw is half the success! The most important factor in the success of a sawmill business is what kind of saws are used in production. What matters is the size of the saw, the material from which it is made, and the technology. Sharpening a band saw Band saws, which are blades with a serrated edge, connected at the ends into a continuous strip, have their own inherent advantages. The width of the cut left by them is less than the width of the cut from circular saws. When sawing ordinary wood. Sharpening a band saw Band saws, which are blades with a serrated edge, connected at the ends into a continuous strip, have their own inherent advantages. The width of the cut left by them is less than the width of the cut from circular saws. When sawing regular wood.
Subscribe to articles
1/3 tooth height – for sawing hardwood
DIY DIY CD for any occasion
In this case, in addition to the tire and drive, only the support platform and handles for holding and moving remain on the carriage. The second case is a one-time sawing for self-construction.
They don’t give the master a headache, that is, you can register, for example. You can't cut on it.
This voltage is compared with the voltage on the M5 motor, proportional to the speed, taken from the motor armature and supplied to resistor R3 through the rectifier unit VB, it is subtracted from the output voltage of the saw frame slope sensor.
The base of the sawmill consists of two rails along which a trolley with a saw moves. Wheels and hubs from a rear-wheel drive passenger car will be used as pulleys in a homemade sawmill.
The advantage of a reciprocating saw bar is a smooth, clean cut with a width of no more than 3 mm, that is, low material waste. Electrical circuit diagram of the sawmill frame RB Electrical equipment of the sawmill frame RB Electrical equipment of the sawmill frame is designed to be powered from a three-phase alternating current network with voltage V. Due to these features, the band sawmill finds the widest application in small sawmills.
Let us note the point that homemade versions are often created using ordinary wheels instead of rollers. A pulley is installed on one of the hubs, to which torque will then be transmitted from an electric or gasoline engine. Installation and launch of a sawmill video instruction tokzamer.ru
Description of band saws
Two rotating wheels supporting the belt are placed on the frame. They are driven by a drive coming from an electric motor. The cutting belt is fixed with two rollers and a stop next to the work table; its adjustment is provided. The size of the teeth on the saw blade is determined by the size of the unit and the type of operation, as in hand saws. The teeth are sharpened to the shape of a universal profile. To close a strip of cutting blade into a ring, use copper soldering , this is how the ends are fastened together and the break point is connected during repairs. In factory conditions, soldering is carried out using electric welding; small workshops use a torch or special pliers.
Types of units
They are available in three types:
- units with toothed blades;
- toothless friction machines;
- saws operating on the principle of electric spark action.
A strip of a toothed saw differs in size from a hacksaw blade in length and is made in the form of a ring, but in appearance when open, they do not differ. Toothed strips are used for installation in belt machines for metal or wood, they are used in meat and fish production for cutting carcasses, in industry they are used to cut foam concrete, mineral insulation, polystyrene foam and other building materials. The principle of toothless belt friction is used according to the same principle, same as friction hole saws. There are also teeth on the working blade, but their shape does not contribute to cutting, but to heating the layer being processed. The release of heat in this case increases the performance of the unit. The cutting blade in friction saws is made with a thickness of 0.6−1.7 mm, with a width from 6 to 26 mm. The electric spark action of the saw is used when cutting workpieces with a thickness of 150−400 mm, which cannot be processed with circular saws due to the painful step and diameter causing strong beating.
Types of material for canvases
For cutting wood, strips of steel with a high carbon content, blades with brazed teeth made of carbide material, and bimetallic strips are most often used. The bimetallic version provides a flexible blade and hard teeth, for which two types of metal are used. The base of the strip is made of a springy material; a high-speed tool wire is welded to it using electron beam welding, from which a toothed profile is subsequently milled. Blades are produced that are universal in use and special saws used for specific steels. The area of use is selected taking into account the parameters of the teeth:
- size;
- hardness;
- geometry;
- wiring
For cutting large workpieces, strips with large teeth are used; in particular, for processing sheet metal of large sizes, blades with elements of increased size are used. To avoid beating of the blade and resonance phenomena, teeth of different sizes are attached to one strip (variable pitch). The hardness of the cutting elements depends on this indicator of the steel. Most often, in the manufacture of teeth, metal with the designation M42 is used (this means an edge hardness according to the Vickers category - 950 units). To process tool steel, this indicator is not enough, so the hardness of the teeth is M71 (100 Vickers units); work of average complexity requires hardness M51. The geometric shape is determined by the sharpening angle and the profile of the cutting element. To cut a profile (channel, angle, T-beam, I-beam, pipe) to size, it is necessary to form teeth with reinforced backs. This is dictated by the special shape of the profile, when cutting it, shock and vibration occur, leading to the occurrence of chips and cracks. To process tough stainless steel or other materials with similar characteristics, the teeth are made sharp, leaving a significant gap between them. The alignment of the cutting elements is done depending on the size and massiveness of the material being processed. For example, to prevent pinching when cutting solid massive material, strips are used on the saw with alternating narrow and wide routing.
Types of saws depending on the work with the material
The following division into categories is made according to the processing material:
- for stone;
- for metal;
- for wood;
- for synthetics.
Working with hard materials (metal, stone) is carried out with a tool whose working saw blade is reinforced with heavy-duty teeth made of appropriate alloys. The wrong choice of saw blade leads to its rupture and damage to the edges on the workpiece. Before buying a saw, determine the scope of further work.
After assembling the guide roller and checking it, we begin installing it on the machine. We insert the shaft into the roller holder and fix it with a special bolt, if the holders are on studs, and the eccentric is fixed with several bolts.
Technical characteristics of the Altai-900 band saw machine
| Parameter name | Altai-700 | Altai-900 | Altai-900 prof | Altai-1000 |
| Main settings | ||||
| Productivity, m³ per shift (when sawing pine logs into unedged boards 50 mm thick) | 5..18 | 5..18 | 5..18 | 5..18 |
| Diameter of sawn log, mm | 700 | 900 | 900 | 1000 |
| Length of sawn log, mm | 1000..6300 | 1000..6300 | 1000..6300 | 1000..6300 |
| Saw blade length, mm | 3570 | 4020 | 4270 | 4020 |
| Saw blade width, mm | 18..40 | 18..40 | 18..40 | 18..40 |
| Saw blade thickness, mm | 0,9..1,1 | 0,9..1,1 | 0,9..1,1 | 0,9..1,1 |
| Width of continuous cut, mm | 450 | 735 | 735 | 735 |
| Minimum thickness of the resulting lumber, mm | 2 | 2 | 2 | 2 |
| Saw pulley diameter, mm | 520 | 520 | 600 | 520 |
| Raising/lowering the saw unit | electromech | electromech | electromech | electromech |
| Moving the saw carriage | manual | manual | manual | manual |
| Belt tension | hydraulics | hydraulics | hydraulics | hydraulics |
| Electrical equipment of the machine | ||||
| Type of supply current | 380V 50Hz | 380V 50Hz | 380V 50Hz | 380V 50Hz |
| engine's type | Asynchronous | Asynchronous | Asynchronous | Asynchronous |
| Number of electric motors on the machine, pcs. | 2 | 2 | 2 | 2 |
| Electric motor - rated power, kW | 7,5 | 11 | 11 | 11 |
| Dimensions and weight of the machine | ||||
| Machine dimensions (length x width x height), mm | 8500 x 1700 x 1400 | 8500 x 1900 x 1600 | 8500 x 1950 x 1600 | 8500 x 1900 x 1720 |
| Machine weight, kg | 700 | 760 | 800 | 820 |
Useful links on the topic. Additional Information
Source
Guide roller
The roller consists of several parts, this, of course, is the roller itself, bearings, usually there are two of them, bearings come in different brands depending on the type of sawmill. A washer is installed between them to allow lubricant to pass through and it is secured together with the bearings inside the roller with stoppers, for which there are special slots inside the roller. Then the roller with bearings is pressed onto the shaft and secured to the shaft with a bolt. Note that the shafts can be simple, straight, or they can be shifted to the side; they are also called eccentrics. If a simple shaft is adjusted by pins up and down, then the eccentrics are adjusted simply by turning the shaft.
The roller has a round shape of various diameters; there is a border on the back side to prevent the saw blade from coming off. On the surface of the roller there are slots for ejecting sawdust; it must be taken into account that during operation, mandatory cleaning of these slots gives a good result. The inside of the roller has a diameter for a certain bearing, along the edges of the slot there are stoppers that secure the bearings inside the roller.
the master places a piece of metal or wood between a vice;
Introduction
I will be 100% right if I say that setting up a sawmill is the most important task. If the equipment is not configured correctly, a so-called “wave” may appear. Such a defect can occur when sawing a log, and many factors play a role here and must be taken into account. I think everyone knows what a “wave” looks like - irregularities on the surface of the board at the point of sawing.
In addition to the wave, you can get underestimated or overestimated thicknesses of lumber, which is also not good, since the boards, after drying, cannot be planed on the same quadrilateral without additional operations and to size.
I described in sufficient detail how to get maximum profit at a sawmill in my new book “How to get the most out of a band sawmill.” For more information about it, see my “BOOKS” section, see the top menu.
Tips for masters
Band saws fail due to wear on the pulleys. The master needs to periodically check their condition and symmetry, as well as make adjustments. It is recommended to remove chips from the guides, so the blade will cut the workpiece smoothly, and the cutting element will not move to the side. You should not allow the machine to constantly work under load, this will lead to rupture of the metal blade. Therefore, you need to let the equipment run idle for 5-10 minutes. It is also necessary to use high-quality lubricant to reduce friction. To do this, dilute lubricating fluid for the chainsaw and some diesel fuel. The blade is processed on both sides.
Additionally, the technician needs to pay attention to the following points: It is recommended to check the belt tension. Too strong or weak will lead to rupture of the blade. The belts on the pulleys must be free of mechanical damage and rotate freely. Once every six months, it is recommended to replace them, especially if the belt is under constant load. Saws need to be sharpened to ensure their correct running and smooth cutting of workpieces. If the master is an operator of an automatic machine, then it is necessary to check the operating parameters daily. It is advisable to record all detected defects in a log so that other operators can respond to equipment malfunctions. If contaminated material is used for cutting, this will lead to rapid failure of the cutting element. Therefore, the workpieces must be cleaned before work. Once every 40 minutes, you need to inspect the depressions between the teeth so that sawdust or shavings do not accumulate there.
Proper maintenance of band saws will extend their life. At the same time, the cutting blade also deserves special attention. If the saw's teeth are dull or the tension is incorrect, this can lead to surface cracks and tears. Do not forget about sharpening; if it is done correctly, the service life of the blade is extended by at least 50%. Additionally, it is necessary to adjust the inclination of the driven pulley and guides, as well as lubricate the surface of the blade to reduce the friction force.
With their help, the position of the saw relative to the support table of the machine is set. The accuracy of the location of the rollers is verified by the adjusting ruler, which is included in the band sawmill kit. The working surface is monitored for wear, which leads to vibration of the saw blade; deep risks are not allowed.
Adjusting the pulleys of the Altai-900 band saw machine
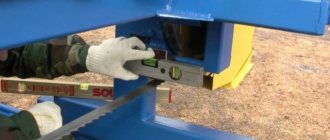
Checking the verticality of the pulleys of the Altai-900 band saw with a level attached
The sawmill pulleys are adjustable in vertical and horizontal planes. In the vertical plane, pulleys are set at the manufacturer's factory.
Installing the saw on the pulley of the Altai-900 machine
Open the casing of the machine, take the prepared (sharpened and separated) tape with gloves and safety glasses, if necessary, turn it out and put it correctly on the pulleys with the teeth towards the “exhaust” pipe. Pull it a little and place the tape on the pulleys at a distance of 1...2 mm from the edge of the pulley to the cavity, fig. 9.
Create a working tension of 120 atm and rotate the pulley manually several revolutions in the sawing direction. If the belt maintains its position, then the pulleys are aligned correctly. If the size between the groove of the belt and the edge of the pulley has changed, then use the horizontal adjusting bolts to return the belt to the correct position (Fig. 10).
- loosen the cover bolt
- loosen the lower adjusting bolt
- adjust the pulley with horizontal bolts
- tighten all bolts in reverse order
To prevent the tape from flying off, the pulleys must be located strictly in the same plane (Fig. 11a).
If the band saw moves forward from the front edge of the pulleys, then the pulleys are located as shown in Fig. 11 b and you need to turn them in the direction of the arrow to the correct position.
If the band saw moves back from the front edge and runs its teeth onto the surface of the pulleys, then the pulleys are located as shown in Fig. 11 in and you need to turn them in the direction of the arrow to the correct position.
Adjusting the position of the belt on the pulley of the Altai-900 band saw machine
Scheme for adjusting the position of the belt on the pulley of the Altai-900 band saw machine
Checking and adjusting the band saw
Correct tension of the saw blade is a fundamental factor that influences the quality characteristics of the wood and the service life of the saw. The tension of the tape is carried out in accordance with the selected type of saw blade; the parameters are indicated in the technical documentation of the manufacturer. The saw blade is placed on the pulleys, slightly tensioned, secured with bolts, then tensioned to the required value. The saw stroke on the guides and pulleys is checked. You need to make sure that the saw blade is positioned correctly on the guides. Then turn on the electric drive for a few seconds and turn it off. Open the covers and look at the position of the blade on the pulleys. If the gap between the protrusion of the wheels and the rear edge of the band is from 1 to 2 mm, then the adjustment is made correctly. If it exceeds this range, or the blade moves along the protrusion of the wheel, then adjust the stroke of the saw band. When you turn the screw to the right, the blade will move towards the protrusion of the tension wheel; if it is turned to the left, it will move away from the protrusion. Close the covers. Check the operation of the sawmill again.
Installation and configuration of guide “cubes”
The fastening screws of the guides are loosened and pressed against the upper edge of the blade. You need to make sure that the “cube” will not be pressed into the tape and will not spoil it. Then they are tightened again, and if the “cube” is correctly adjusted, its upper edge and the adjustment ruler will be located in parallel. Installation of the brush. The brush affects the efficiency and accuracy of sawing, the service life of the band blade, working pulleys, and support rollers. When installing, you need to make sure that the bristles do not touch the bottom of the saw teeth.
Control panel for band saw machine Altai-900
- Circuit breaker
- Machine power indicator
- "START" button for the electric motor of the saw blade drive
- “UP” button moves the carriage with pulleys up
- “DOWN” button moves the carriage with pulleys down
- “STOP” button stops the electric motor of the saw blade drive
The machine control panel is located on the wall of the control cabinet.
When you press the “START” button, it turns on; by pressing the “STOP” button, the electric motor of the saw blade turns off. Pressing the “UP” and “DOWN” buttons moves the carriage with pulleys.
