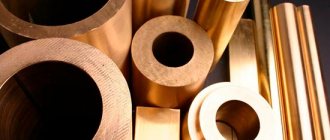
Blackening of brass, one of the methods
Recipe taken from here
Additional material on the topic: One of the methods for blackening brass
Let me make a reservation right away that I am not a chemist, and all my knowledge is only what I have left over from school. Therefore, the recipe was not fully followed and some deviations were made.
Blueish-black color
| 25% ammonia solution (ammonia) | from 100 g/l to 1 l |
| Copper carbonate (CuCO3) | 40-200 g/l |
Treatment lasts 25-30 minutes. at a temperature of 15-30°C.
Preparation of copper carbonate.
In this case, when recipes mention copper carbonate, in fact, they are usually talking about basic copper carbonate. To obtain it, you can use copper sulfate, acetate or nitrate.
A solution of potassium or sodium carbonate (potash, soda) is added to an aqueous solution of one of these salts.
The green-blue precipitate that falls consists of basic copper carbonate of variable composition, nCuCO3 x mCu(OH)2, where n and m can vary within some limits, which for us, in this case, is not very important. The precipitate is filtered off, washed with water and can be used.
The process itself.
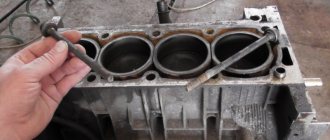
To blacken brass using this method you will need:
- copper sulfate;
- baking soda;
- ammonia;
- two glass jars, preferably the same volume;
- filter paper or something similar;
- stirring stick.
The vitriol was purchased at a nearby hardware store in the department that sells all sorts of pesticides for controlling garden pests. Soda - in the nearest grocery store, where there is simply plenty of it.
Ammonia - in the nearest pharmacy. But only 10%. As they explained to me, 25% is not for sale due to its danger.
| First we prepare copper carbonate. For this we need copper sulfate and ordinary soda. |
| Dissolve the vitriol in warm water. The solution needs to be saturated, i.e. add vitriol until it still dissolves. The solution must be made so that it occupies only half the container. |
| Then slowly, a little at a time, add soda to the saturated vitriol. It is precisely because the solution begins to bubble like soda that I recommend making vitriol in only half the container. |
| Stir. Over time, the seething subsides. I poured in soda until the bubbling stopped. After a while you will see that the result is a fine suspension of a pleasant turquoise color. On the surface you can see that the fry are still seething there. |
| Now the resulting suspension must be filtered. There was nothing worthwhile at hand except napkins. The recipe says to dry it. But I didn't do this. |
| Now we need a 25% ammonia solution. As I already wrote, only 10% is available in the pharmacy. This is what we will use. |
| Little by little add turquoise porridge to ammonia. The solution turns blue. |
| We also need a saturated solution. Therefore, we add, without sparing, copper carbonate. You will end up with a blue-black liquid. This is what we need. |
The solution is ready, all that remains is to put the necessary parts in there. Blackening time, according to the recipe, is 25-30 minutes.
After removing the part, rinse with water and dry/wipe.
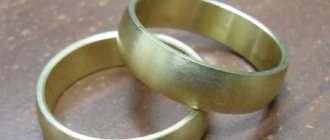
This is the final result (blue-black, blued steel color):
Some notes:
- Vitriol is not suitable for impregnating wood against fungi;
- It is convenient to use two containers, because you will have to filter the solution;
- You only need to prepare half a container of vitriol, because then there will be a violent seething;
- You can also use 10% ammonia;
- If you rinse the copper carbonate well, the reaction proceeds much faster;
- Flat parts blacken faster than rings, nails, eyelets and the like;
- If the part is kept in the solution, copper carbonate will settle on it in the form of turquoise crystals, which, in principle, can then be easily scraped off with a fingernail without damaging the blackening;
- If you have difficulty removing blue sediment from a part, I recommend simply heating it in the flame of a candle or lighter. The sediment will immediately fall off on its own.
from www.shipmodeling.ru
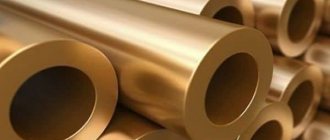
Methods and means for blackening brass
Blackening of brass at home can be done using the following methods:
- Ammonia is added to the aqueous solution of copper sulfate until the liquid becomes clear. Place the brass product in the resulting solution and leave for several minutes. Then take it out and warm it up slightly. A black film should appear on top of the product.
- Thoroughly clean the brass product with sandpaper. After this, you do not need to touch the prepared surface so that no greasy marks remain. Soak for several minutes in a solution of platinum chloride. Then remove and leave in the air.
- Prepare a composition of nitric acid and copper metal. Warm it up a little and place the brass product in the resulting mixture.
Means for blackening brass
There are many different means for blackening brass. But not all of them can be used at home. After all, some necessary substances are not available for free sale.
Blackening of brass with copper sulfate
Copper is a low-reactive metal that is often used for decorative purposes. The article discusses the main methods for changing the color of copper at home and in the laboratory.
General information about metal color
OXIDATION of copper and brass
Copper is often used as a decorative element on buildings, including in the manufacture of furniture, jewelry, and art. The surface of the metal enters into a chemical reaction when it comes into contact with oxygen, however, it takes several decades for it to be completely completed.
The result of the interaction of copper and air is patina - the same material, only with a greenish tint. Less common is a black or brown patina. Practice has shown that the color of patina can be corrected if it is treated with special means or methods.
Processing methods
Blackening copper with a boiled egg
Under the influence of high temperature, chemical reactions occur in the yolk with the release of sulfur. The interaction of our metal with sulfur gives it a dark brown color.
In order for the chemical reaction to take place correctly, the steps must be performed exactly according to the instructions: first boil the eggs, then add the copper product. The number of eggs depends on the size of the copper product.
They are cooked for exactly 10 minutes, after which they are removed and cooled.
Chilled chicken eggs are cleaned and finely kneaded using any available methods. Next you will need a small container with a lid and a wide bottom. Place the copper product and crushed eggs in a container. Be careful that both ingredients do not come into contact, otherwise colored spots will appear on the metal product and blackening will end in failure.
The combined ingredients are sealed in a container for 20-30 minutes. It is worth noting that the result of the experiment depends on the length of their stay together - the longer both ingredients stay in a confined space, the darker the metal you will get.
Pros of the method: darkening metal requires few resources: a couple of chicken eggs, an old iron container and a gas stove. Disadvantages of the method: short-term and unstable effect. The results achieved may disappear over time or when reacting with a more aggressive chemical.
Changing the color of copper with potassium sulfate
This darkening method is considered one of the best to darken copper. Sulfide is a very active substance that must be used carefully at home. Its entry into the respiratory tract can cause unpleasant symptoms of nausea, dizziness, etc.
The metal must be prepared - wash it in warm water and soap. Otherwise, dust residues and greasy stains will interfere with the normal course of the chemical reaction.
Next, the reagent is prepared - sulfide. It is sold in three forms: liquid, gel and solid. The shelf life of the reagent varies depending on its state of aggregation. For example, liquid sulfide is stored for no more than 2 weeks, while solid sulfide is stored for several decades. Check the manufacturing date before purchasing.
To carry out the reaction, you will need an empty container where solid sulfide is diluted or where liquid sulfide is poured. Dilute the reagent only with water (it can be cold or hot, there is not much difference). Be careful not to let its fumes enter your respiratory tract.
It is better to carry out the entire procedure outdoors or in a well-ventilated area. As for protecting your hands, it is better to wear protective gloves made of rubber or latex on your hands to prevent aggressive substances from getting on your skin. For added protection, wear regular glasses over your eyes.
If for any reason sulfide gets on the skin, the affected area should be washed thoroughly with running water. The same is done if it gets into the eyes. If the reagent penetrates inside, it is necessary to induce vomiting and immediately consult a doctor.
Depending on the type of substance, it must be prepared in different ways:
- Liquid and gel sulfide are diluted according to the instructions on the label;
- The solid is first crushed to a powdery state, after which it is mixed with water until completely dissolved.
To darken copper, a cold or slightly warm solution is needed. Before throwing the metal into the solution, you need to prepare a solution of water and soda in a ratio of 1:16. Baking soda will neutralize the effect of the aggressive substance and will immediately stop its action.
Copper salt changes color.
Blackening brass at home with peroxide - Machine tools, welding, metalworking
Many things and materials lose their attractiveness when they age, but this does not apply to metals and alloys made from them. Patina, or a coating of oxides, gives metal objects high cost and value.
It is for this reason that elements made of aged metal can be found in a stylized interior. Many people wonder how to patina brass at home.
In fact, this is not difficult to do, the main thing is to stock up on the necessary equipment and adhere to the rules for performing such work.
Patination: what is it?
In order to find out the essence of patination, you should learn about the characteristics of an alloy such as brass. The main part of its composition is copper, and the brass alloy is represented by zinc. Zinc can also be added to the alloy.
When interacting with air and certain chemicals present in the air, many metals and their alloys begin to become covered with oxides and oxides, which look like a brown-red or green coating. This coating is called patina; it is formed during the oxidation process of the metal.
The process of patina formation is called oxidation.
Patinated brass
Many people believe that patination is the same as oxidation. In fact, this is not true, because oxidation is a natural process, while metal patination is artificial aging. During the patination process, the metal or alloy changes its color and takes on an aged appearance.
How to age an alloy?
To apply patina to metal with your own hands, it is important to know not only how to age brass, but also how to work with the substances and tools used. First of all, you should take care to comply with personal safety rules.
The thing is that the patination agent and its analogues contain chemicals that can cause irreparable harm to human health. Therefore, during work, hands and eyes must be protected from accidental contact with the skin (mucous membranes) of aggressive substances.
It is necessary to organize work in a well-ventilated room.
Work on a metal object begins by preparing it for patination. First of all, the surface of the product should be degreased, and this can be done using acetone - just apply a small amount of this product to a cotton pad and thoroughly wipe the product with it. Then the brass product should be washed in running water and soap and dried.
A metal object can be patinated with a composition that is popularly called “sulfur liver”. It's easy to prepare:
- Take 1 part of powdered sulfur and mix it with two parts of potash.
- The resulting mass is placed in a glass container, which is then placed on low heat.
- The powder should melt and sinter. As soon as this happens, you should count 15 minutes and only after they have expired, turn off the fire.
- As soon as the mass is sintered, it should be crushed to the consistency of a powder. Store the powder in a jar with a lid.
Sulfur liver
There are several effective methods for aging brass using sulfur liver.
- Take a liter of water and add 20 grams of powder to it. A brass object is dipped into the prepared solution and watch how the product changes color. After this treatment, the brass will turn a soft golden hue.
- To make the alloy acquire a light gray tint, you need to take a liter of water and add 3 grams of liver sulfur and sodium chloride to it. The coloring of a brass product must be carefully monitored, and as soon as the desired effect is achieved, the object must be removed from the solution and rinsed with water.
- Ammonia is gradually added to a concentrated solution of copper sulfate and wait until the solution acquires a bright blue hue. The cleaned object is immersed in such a solution for several minutes, after which it is taken out and heated a little. After this treatment, the product will acquire a brown tint. This method is also suitable for aging copper.
- To age copper or brass, you will need sandpaper, which must be used to carefully treat the surface of the product. After sanding, you can apply a chloride patina solution to the product. You can also dip a product that needs patination into this solution.
- To blacken brass, you can use a solution consisting of copper metal and nitric acid.
- To obtain an olive-colored patina, you should prepare a solution consisting of Berthollet salt, ammonium chloride and copper nitrate. The solution should be heated and the brass product should be dipped into it for 15 minutes.
- To obtain a golden-colored patina, you should treat a brass product with a solution consisting of 180 grams of milk sugar, 0.6 grams of copper sulfide and 180 grams of alkali. The solution is heated to 90 degrees, after which the brass product is dipped into it for 15 minutes.
- To give brass a dark gray color, you need to use antimony. This substance should be applied to the surface of the product and rubbed with a stiff brush. Once the desired shade has been created, the product should be thoroughly washed and dried by placing it in sawdust.
- You can also apply nitric acid to the surface of a brass product (to do this, use a cotton swab soaked in acid).
Centering drill for metal
Centering drills belong to a number of professional tools, as they are used in most cases in the industrial sector.
The main difference between these devices and conventional ones is their accuracy of the drilled hole.
Find out how centering drills work and where they are used right now.
Design Features
Externally, this tool is a small, short drill with a very thick base. Moreover, its diameter can be 2-3 times the width of the working tip of the mechanism.
Thanks to this design, the centering drill (GOST is proof of this) has very high rigidity, so when drilling a hole it is almost impossible to bend or deform in any other way.
First, a small tip drills a hole of small diameter. As a rule, it forms after several rotations of the tool (no more than 2-3 seconds).
After this, that same small hole is expanded by the cutting edge of the thick conical part of the drill.
It is worth noting that the operation of this mechanism ensures the exact perpendicularity of the recess relative to the material being processed and its surface.
Application
The centering drill is used for drilling both metal and wooden surfaces. However, “according to the passport”, that is, for its intended purpose, this tool should be used only for processing steel materials.
However, this did not stop our builders from using it as a countersink for wood, for example, when it is necessary to deepen a hole for the incoming screw head.
Thanks to their heat-resistant and high-strength construction, they absolutely do not fail after processing similar objects and materials.
As for their intended purpose, these tools are widely used for drilling holes on milling, drilling and turning machines. In addition, centering drills can also be used at home. Radio amateurs also like to use such devices.
Such drills are more necessary than ever for making holes in printed circuit boards.
And since the devices used are highly rigid (this is determined not only by their composition, but also by the special geometry, which we talked about a little earlier), it is very easy and convenient to work with them.
Material
These devices most often include tool steel of the R6M5 series. In addition, center drills can be made from HSS metal.
But tools made from P9 series steel, which has a high tungsten content, are especially valued in production. Due to this, the product becomes even more durable and reliable.
Price
The cost of centering drills directly depends on their size.
For example, the smallest 1-mm devices cost about 15 rubles per unit.
The largest drills with a diameter of 6.3 millimeters cost about a hundred rubles.
Center drill, characteristics and application
The centering drill belongs to the category of a professional multifunctional combined type tool.
In other words, it has several different working parts with which you can perform several operations.
Its main task is to drill holes in metal, plastic or metal ceramics.
Why do we need centering drills, scope of application
This tool is used in metalworking and is intended for use in drilling, turning or milling machines.
In workshops, it is used to mark the center of workpieces before fixing them in a lathe without preliminary punching, which significantly speeds up the work process in mass production.
This tool is also used in CNC milling machines. Thanks to its rigidity, this drill performs work with high precision, and its design reduces the risk of breakage.
How this drill can be used in construction and repair
This tool is classified as professional. However, craftsmen have learned to use it in construction, using it as a countersink for metal or wood.
In the latter version, it is also convenient in that it can simultaneously make a guide hole for a self-tapping screw and groove a countersunk hole for its head, or for installing fittings where it is necessary to center the hole.
It can also very effectively drill out the head of self-tapping screws and screws that do not want to come out.
This tool is often used by radio amateurs to make holes in circuit boards.
They use a small drill diameter: 0.5-1.
5 mm, in these cases conventional drills often break, but the centering drill lasts much longer due to its design.
How to choose the right drill
Each size, from 0.5 to 10 mm in diameter, has two types of execution. The choice must be made based on the requirement for the roughness of the hole walls after surgery.
Blackening brass at home
You can blacken brass yourself using various means. But you must act carefully, strictly following the instructions, so as not to spoil the metal.
Preparation for the procedure
Most products used to blacken brass are toxic and can be harmful to human health. They must be stored in tightly sealed containers to prevent toxic fumes from evaporating.
Patination must be carried out in a cabinet with ventilation. The cabinet doors must be kept slightly open to ensure effective exhaust of vapors during operation.
Before patination, the product must be prepared. To do this, thoroughly clean the work surface from any dirt. First, rinse in warm water and then treat with a degreaser.
After completing the procedure, the product must be washed again and placed on sawdust. They will absorb remaining moisture without damaging the surface of the material. Using sawdust for drying is considered a more gentle method than using fabric for this. After all, mechanical drying can damage a thin layer of patina. In addition, this method does not completely remove moisture.
Uses of potassium sulfide
This is a common method of blackening brass. During it, you can use potassium sulfide in different states of aggregation - liquid, solid, gel. It must first be diluted with water in a ratio of 1:16. If potassium sulfide is used in a solid state, it must first be crushed to a powder, and only then filled with liquid.
Blackening of brass can be done using potassium sulfide
It is also necessary to prepare a soda solution. Sodium carbonate must also be diluted in a ratio of 1:16. First, place the product in a solution of potassium sulfide. Leave for a while and then place in a soda solution. This is necessary in order to stop the reaction.
Blackening with copper sulfate solution
The use of copper sulfate allows you to create a golden-brown patina on the surface of the processed material. The film will have a moderate gloss. To do this, take 20 g of copper sulfate, 5 g of potassium permanganate (potassium permanganate) and add a liter of water.
The solution should be at room temperature. It must be applied to the surface of the brass product, carefully treating all the cracks. After a day, it must be thoroughly washed under running hot water. Dry in sawdust and then repeat the procedure again. In total, you need to repeat the operation 3-4 times in a row.
When the patination is complete, the surface of the product should be polished with a dry cloth. You can also soak the product in a solution of potassium permanganate for 4-5 minutes. The solution must be heated to a temperature of 95 degrees. It is the use of potassium permanganate that makes it possible to obtain a reddish tint of patina.
Also, when blackening copper, you can use another composition based on copper sulfate (copper sulfate containing 5 molecules of water). Combine 25% copper sulfate and zinc chloride and 50% water. Place the product to be treated in the resulting solution for several minutes. Then take it out and leave it in the air for a day. After this, rinse thoroughly with hot water.
The use of ammonia
Ammonia is an excellent means for blackening brass and brass products. You can use the combined method, combining several ingredients at once. To blacken brass in this way you must use:
- Copper sulfate. It is greenish-blue crystals. Sold in hardware stores.
- Baking soda. You can also use calcined.
- Ammonia. It is a 10% aqueous solution of ammonia and has a pungent odor. Sold in pharmacies, available without a prescription.
- Water.
Ammonia - a means for blackening brass
Take two containers, pour 50 ml of boiled water into each container at least at room temperature. Add copper sulfate to one container and soda to another. The solution should be saturated, so the substance is added until it stops dissolving in water. The liquid for blackening brass with copper sulfate will need to be filtered.
Pour the copper sulfate solution into the third container and begin adding the soda solution in small portions. A reaction will begin with the formation of a large amount of foam. You can add a new portion of soda solution only after bubbles stop appearing.
Leave the resulting mixture for several hours. There should be some water left on its surface and it should be removed. Then pour the mixture into an old frying pan and cook until the moisture has completely evaporated. The result should be a light green powder. It must be placed in a ceramic mortar and ground with a pestle until a powder forms.
Pour 50 ml of ammonia into the fourth container and pour the resulting powder into it. The result will be a dark turquoise solution. This is where patination is carried out.
The product must be cleaned of the old patina film, washed with warm water and degreased. Place in the prepared composition for 10-30 minutes. Then inspect the product - if it is unevenly colored, degrease it again and place it in the solution. Finally, wipe with acetone and treat with machine oil.
Blackening copper at home - Metals, equipment, instructions
Copper is not a noble metal, but it has long been used in the manufacture of banknotes. Copper is also used as a decorative element for buildings, furniture and jewelry. Over time, this metal changes its color: it acquires black and brown shades.
The darkening of copper is the result of a chemical reaction of the metal surface with oxygen, resulting in its oxidation. Now, in order for copper to acquire the desired shade, there is no need to wait: humanity has learned to accelerate these oxidative processes using special means and methods.
Information on how to blacken copper at home is contained in this article.
What is patina?
Due to the fact that oxygen has little activity, the oxidation process lasts for decades. As a result of this interaction, the formation of patina is observed - a surface film of a greenish tint. According to experts, it prevents damage to the metal.
Since in ancient times copper was used to make coins, figurines, various souvenirs and household items, today these items, which have undergone oxidation processes, have a changed color and general appearance.
Copper blackening is performed in order to give the product an antique, and therefore rare, look, so that when you see it, you will want to buy this thing.
Color change is carried out by oxidation and patination. These methods are not synonymous, since both processes ultimately produce different results. In the first case, due to oxygen-containing elements, oxides and oxides are formed on the surface of the metal. In the second, blackening of copper occurs with the help of chlorine and sulfur.
Preparatory stage
Before you start patination of copper at home, you need to carefully prepare. The copper product is cleaned, degreased, washed and dried.
According to experts, it is not advisable to use a towel for this purpose, since particles of fabric may remain on the surface.
Due to the fact that very toxic chemicals will be used in the process of blackening copper, the master should adhere to safety precautions:
- To store substances you need to use special sealed tubes.
- Solutions should be out of reach of children.
- The process should take place in a separate cabinet with the doors slightly open.
Judging by the reviews of home craftsmen, copper-ammonia solutions and sulfur alkalis are mainly used for blackening. According to experts, blackening copper using the electrolytic method is quite effective.
Anodic treatment is carried out in an alkaline soda solution, the concentration of which is 80/about or more. A voltage of 2.5 V with a current density of 01-10 per dm is supplied to the bath with a copper product. sq.
Electrolysis lasts for 10-20 minutes.
The temperature in the container must be at least 50 degrees. The process can be improved by adding ammonium molybdate to the bath. This soda alkali does not precipitate and is a catalyst for oxidation processes. The amount of ammonium should be within 0.1 a-3/o. Electrolysis lasts no more than 5 minutes.
The oxide film is formed in two stages. If the workpiece is removed from the bath in the first phase, you can see that its surface is covered with a steel-gray dense sediment that has a metallic tint. No gas is released. If the product is continued to be treated with current, the sediment turns from gray to black.
About the use of sulfur ointment
Judging by the reviews, home craftsmen often have the opportunity to work with copper rings and other small items - pendants and earrings. In such cases, experts recommend blackening copper with sulfur ointment.
According to many craftsmen, the ointment can be applied to the product and washed off after some time. However, in this case, the result is often unpredictable: you have to wait a long time for the color to change, and it also happens that darkening may not occur.
In connection with this fact, many home craftsmen practice blackening with vapors of sulfur ointment. Patination is carried out as follows:
- To work you will need a glass container. A regular liter jar works well. It must be weighted down by placing a stone on the bottom. Metal objects should not be used, as the metal will react with sulfur, which is undesirable.
- Using a plastic or glass rod, scoop out ointment in the range of 1 to 1.5 cm. and place at the bottom of the container.
- Make a loop from the scaffolding, into which you then need to thread the patinated workpiece. The product should not touch the sulfur, but remain in a suspended position.
- Close the glass container tightly.
- Pour water into a large enamel pan, place a stand on the bottom on which the jar with the copper product will stand. It is not difficult to make a stand from a tin lid from a tea can. To prevent bubbles formed during boiling from raising the jar, it is advisable to equip the lid with several holes.
- Place the pan on a gas or electric stove. When the water boils, the heat can be reduced.
The copper blackening process can last for 2-3 hours. During work, you need to add water to the pan from time to time. In order to provide the product with an uneven patina, experts recommend shaking the jar periodically.
At the end, the copper jewelry being processed is removed from the loop, cooled and thoroughly washed in running water. The liter jar used should be tightly closed with a lid, since with the remaining ointment it will be possible to carry out about seven more patinations in the future.
About homemade blackening solution
Judging by the reviews, many home craftsmen quite successfully blacken copper in vinegar, iodized salt and ammonia. Before patination begins, the copper product is washed in warm water and dried.
You should work with gloves. The room must be thoroughly ventilated. Since harmful fumes and splashes are generated during blackening, the master will need protective glasses.
To work you need to acquire the following ingredients:
- iodized salt (125 ml);
- pure ammonia (375 ml);
- vinegar (0.5 l.).
These substances are commercially available. The home craftsman can only go to the pharmacy or garden store to get them.
Progress
In order to blacken copper at home, you need to dip the product being processed into a prepared mixture of soda, vinegar and ammonia. It is important to monitor the reaction.
Some masters are controlled in a matter of seconds. If the result of blackening is not satisfactory, then the copper item being processed can be kept in the container longer.
For those who want the product to acquire a brown tint, experts recommend using baking soda and water.
An ordinary bottle works well as a container for preparing the mixture. Soda is poured into it until it is completely dissolved. Then the copper product is placed at the bottom of a container. The prepared mixture is poured there.