Tired of doing repairs without special equipment, you finally decided to use a mounting gun and purchased one - is this a familiar situation? But from that moment on, problems began: the material is not laid out evenly, it can even come off, the gun is clogged. This is quite expected, because a beginner needs to master some rules in order to use a foam gun without difficulty and do the job efficiently. In this article we will discuss in detail how to do this.
Types of polyurethane foam
To use polyurethane foam correctly, you must first familiarize yourself with its varieties. The assortment of construction stores includes a significant number of cylinders from various manufacturers. Their capacity varies, but they all belong to one of two types:
- Professional. It is supplied in cylinders with a capacity of 1.5 liters or more, from which the foam comes out under high pressure, which is why it should be used using a special gun. Some manufacturers provide a wand for manual application, but this is not an economical way to spray. High pressure in this case significantly increases the amount of excess material squeezed out.
- For household use. They are sold in cylinders with a capacity of 0.6-0.8 liters, which are always supplied with a tube for application. With its help, it is convenient to spray polyurethane foam in small areas and eliminate shortcomings made during installation work. The mixture for household use has similar qualities as the professional one. If necessary, polyurethane foam from these cylinders can also be applied using a gun.
Professional tubes are much more expensive than those intended for household use, but solely due to the larger volume of containers in which they are sold.
Types of material
Before moving on to describing the process of using the gun, it is necessary to briefly talk about the consumables. There are two main types of it on sale:
- Regular foam. Judging by the name, it’s easy to guess that the first option is intended for widespread use. This is an ideal option for those who decide to do the work themselves, without the involvement of specialists. A screw-on tube is included with the can.
- Professional . The design of the product is designed in such a way that the cylinder can be connected to the gun. The packaging is equipped with a special tip.
There are no other features in the packaging structure.
Professional polyurethane foam has increased wear resistance and strength. Its use is somewhat more complicated compared to the usual composition.
In addition to packaging features and technical characteristics, polyurethane foam is divided into segments by season. There are three main groups: summer, winter and demi-season (the product can be used at any time, depending on weather conditions). This characteristic is very important if the work will be carried out outside.
Manufacturers also indicate on the cylinder the scope of application of the product. The compositions are used for joining pipelines, installing entrance doors, insulating structures and other work. Products differ in components, practicality, wear resistance and other aspects.
Design features of the spray foam gun
Regardless of the manufacturer, the general structure of the tool is the same and quite simple:
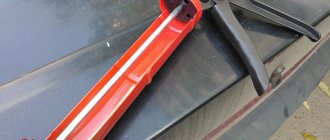
- Unlike polyurethane foam for household use, which is sprayed through a plastic tube, in a gun it is supplied through a tube made of metal, which is equipped with a special nozzle at the edge. The diameter of the hole in this nozzle has a cross-section five times smaller than that of the supply tube, which makes it possible to create a high operating pressure of the composition.
- The cylinder is connected using an adapter, which is fixed on the body of the instrument.
- The gun for polyurethane foam is equipped with an adjusting screw that allows you to change the speed of release of the mixture.
- Its handle can be made of plastic or aluminum. It is fixed to the barrel with a nut. Thanks to the collapsible design, it is easy to clean the tool from all frozen material residues.
- The trigger, which is located at the handle of the gun, is also one of the important elements, making it more convenient to spray foam from a cylinder.
After familiarizing yourself with the design of the tool, you can try to install a tube into it and perform a trial application of the mixture to any of the recesses required for processing.
What are the dangers of using foam incorrectly?
The main properties of this material are increased volume, reliable fixation and inertness to most influences. But they are the ones that turn into a problem if you use the foam carelessly. After all, polyurethane foam has specific properties:
- can expand uncontrollably, turning mounted slopes or other interior elements into a pile of garbage;
- sticks to the skin and hair so that it is almost impossible to clean them;
- if it gets on furniture or other surfaces, it can irreparably damage them;
- dangerous if ingested or in the eyes.
If the foam has dried, it can only be removed mechanically. True, the real effect comes from using the medicinal antiseptic “Dimexide” or battery acid. But these products will dissolve not only polyurethane foam, but also the coating on the surfaces being cleaned.
Compliance with these simple rules will extend the life of the equipment, save expensive materials and preserve the interior. To protect your health, it is advisable to work with gloves and goggles, ventilating the room.
Fixing the cylinder on the gun
To find out how to properly use a spray foam gun, you need to familiarize yourself with a number of specific actions that will later need to be carried out in the same way in practice. Installing the container on the tool must be done in the following sequence:
- Before fixing the cylinder, it is necessary to remove the protective cover.
- Next, you need to take the gun and, holding it with the handle down in a vertical position, screw the container to it at the adapter location. When performing this action, you need to hold the tool firmly in your hand by the handle, and rotate the other hand to secure the cylinder to the adapter.
- After final fixation, the mixture present in the container should be thoroughly shaken. During this action, the polyurethane foam composition becomes homogeneous. The process itself is carried out by sharply shaking from top to bottom an instrument held tightly in the hand with a cylinder attached for about half a minute. When shaking, the gun handle should be positioned exclusively at the top.
- Upon completion of shaking, the position of the handle should be changed so that it is downward, and the cylinder is located on the opposite side, from which it should be when spraying the mixture. Next, you need to turn the adjusting screw a quarter turn and press the trigger. Once the barrel is filled with the composition, the pistol can be used for its intended purpose.
If during application of the mixture it is necessary to change its supply, then it is enough to just turn the adjusting screw.
The working process
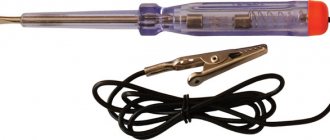
Charger
Each can has a protective cap for sealed storage of consumables. Before you start using it, you need to remove it and insert the cylinder inside the device holder. Remember the basic rule - during operation it is necessary to keep the container upside down (that is, the holder must be at the bottom, like the handle, and the adapter must be at the top).
Installing the container into the gun design is not difficult. During the screwing process, it is necessary to hold the tool with one hand and install the cylinder with the other using gradual rotational movements.
To ensure that the composition becomes homogeneous, the vessel must be shaken. It is advisable to do this in the standard position (handle on top).
About 15-20 shakes are necessary.
Foam application
Before applying foam to a specific area, you need to wet it. Moisture is necessary for swelling, so that this process occurs faster and more efficiently.
The tip is directed towards the seam. Press the trigger carefully and accurately, without sudden movements or jerks. In this case, the possibility of trigger breakage will be minimal, and the quality of the foam at the exit will be higher. The hole is filled completely with material. While working, move the nozzle from side to side in a zigzag shape.
Use the adjustment screw to change the amount of foam that is supplied to the barrel. The volume depends on the size and depth of the seam.
To ensure that the composition does not lose homogeneity, do not forget to shake it from time to time.
How to replace the cylinder?
Changing a foam container is a simple process that does not require special knowledge, training, preliminary preparation or other manipulations. Sooner or later the foam runs out and you have to replace the empty container with a full cylinder. The replacement procedure is carried out as follows:
- The barrel of the device must be directed into a bucket or other deep container.
- To get rid of the remaining consumables, you should press the trigger and wait until the remaining foam comes out.
- Next, the device is turned over so that the handle is on top, and the empty container is simply unscrewed.
- Using a special liquid compound, you should thoroughly clean the mounting area and install a new vessel. The device is now recharged and can be used again.
Read also: Oil volume in a piston compressor
Completion of work
As soon as the repair work has come to an end, the adjusting screw should be tightly closed to block the access of oxygen to the foam as much as possible. If there is still foam in the container, and the next use is planned for the near future, then there is no need to remove the incomplete container. On the contrary, experts recommend leaving it inside the instrument. In this case, the foam will not dry out due to being under constant pressure.
Before finishing using the product, treat the tip of the nozzle with a special liquid. This procedure will prevent the consumable resource from drying out. Subsequent use will be much easier and more comfortable, without mandatory cleaning before use. If the old bottle is empty and there is no new one at hand, you need to remove the bottle, thoroughly clean the construction gun and leave it in storage until the next use.
Features of spraying foam
To apply this mixture you do not need to have any special skills. To do this, you only need to fill any space with polyurethane foam several times, after which the material will be sprayed easily and without flaws, but in order for the process to be carried out as correctly and efficiently as possible, you must still adhere to a certain sequence and take into account a number of subtleties:
- The level of fixation of polyurethane foam with a moistened surface is much higher. Moisture leads to an increase in volume and more significant expansion of the material, giving its structure greater homogeneity. Taking this into account, before applying the mixture to the surface that is being treated, it should be wetted with water using any sprayer.
- The spray foam must be applied to a previously prepared space by lightly pressing the trigger with the tool nozzle previously directed at it.
It must be taken into account that vertical cracks must be filled from the bottom up. If its dimensions are quite large, then spraying should be done in a zigzag motion. - The surface to be treated with different dimensions requires the application of a specific volume of material, for which the adjusting screw is responsible. The device must be adjusted properly according to the required amount of mixture to be applied.
- Even with continuous operation, the components of the polyurethane foam begin to settle to the bottom of the container over time. To avoid this, the gun needs to be shaken periodically, thanks to which they can be returned to optimal condition.
- Upon contact with air upon leaving the container, a significant expansion of the mixture occurs. It is recommended to fill the area with it to no more than a third of the volume. If necessary, it is better to further process the remaining empty space after the previously applied layer has hardened. The process of removing significant excess foam will cause unnecessary costs and take more time.
- Even if a pistol has a fairly long barrel, it is not always possible to reach all hard-to-reach areas with its help. In such a situation, the solution is an extension adapter, which has the form of a flexible hose that fits onto this component of the tool.
Using a pistol
Many people know that the pistol must be held with the cylinder pointing upward; this is the basic rule. In addition, you should know some other rules .
- After preliminary shaking of the cylinder (15-20 seconds), it must be screwed onto the gun adapter until it is maximally secured (by hand only). The connection will be confirmed by a hissing sound, indicating that the gun is filled with foam.
Read also: Which sander is better for sanding putty on walls?
If there is no such sound, this indicates a malfunction (sticking) of the inlet ball valve; in some cases, this may indicate that the foam itself has expired. To fix this problem, you will have to disassemble the gun and clean it of old dried foam, or replace the foam.
- After connecting the cylinder, you must turn the foam flow regulator no more than a quarter turn and pull the trigger of the gun, while pointing the barrel into the garbage bag. Only after the consistency of the foam becomes normal can you begin to work.
- Foam consumption must be adjusted depending on the volume of space to be filled, and you should start with the minimum parameters. In addition, you should take into account the expansion of the foam in volume, at least 2-3 times (depending on the quality).
- The foam must be applied deep into the opening (cracks, crevices), filling no more than one third of the space. To uniformly fill the cavity with foam, it is necessary to make zigzag movements with the nozzle of the gun, filling the entire width of the seam in layers. With the minimum possible foam supply and zigzag pitch, the highest possible quality of cavity filling will be obtained.
- If it is necessary to replace the cylinder, care must be taken because even an empty switch-off element can significantly splash clothes and hands due to the residual pressure of the foam. In this case, in place of the removed cylinder, you should screw a new one on without delay to avoid the foam from hardening.
Sequence of actions when replacing a used cylinder
If the filling volume is significant, it will be necessary to repeatedly replace the empty container with another. This process must be done as follows:
- Even if the foam stops coming out of the gun nozzle, there may still be some remaining pressure in the container. Before changing the container, it is necessary to bleed it by pointing the barrel of the tool into a garbage bag and pressing its trigger. After the final hissing is complete, the gun should be turned with the handle up, and then the used cylinder should be unscrewed.
- At the junction there will be excess mixture, which must be removed without delay with a washing solution, after which a new container must be immediately installed. If this action is carried out slowly, the remaining foam will harden in the area of the tool barrel, and then to carry out further work it will be necessary to completely clean it.
By following these rules, you can quickly replace the cylinder and save time that would otherwise have to be spent on cleaning the gun.
Procedure for changing a used cylinder
When performing large volumes of work, naturally, it will be necessary to replace the used empty cylinder with a new container. This action has its own order:
- Even if the nozzle has stopped delivering mixture, the container may still contain some residual pressure. Before replacing the cylinder, you must bleed it by pointing the barrel into construction debris and pulling the trigger. After the hissing sound has completely stopped, the instrument is placed with the handle up and the empty container is unscrewed.
- The connection point, that is, the adapter, will be covered with excess foam. They must be immediately washed off with a washing solution and a new cylinder quickly screwed on. Delaying these actions will lead to solidification of the remaining mixture in the barrel. Then for further work you will have to completely clean the entire tool.
Having made a quick change of container according to all the rules, you can begin further work with the tool.
When replacing the cylinder, you must quickly wash off any remaining foam from the adapter and do not let it harden.
Interval in work and repeated use of the tool
In many situations, it happens that the capacity of the container is not used completely at one time. In this case, there is no need to rush to remove the cylinder and start washing the gun. Due to the special tightness of its design, the mixture does not harden for a month, but it is still necessary to slightly bleed it once every 4 days to avoid the formation of clots in the barrel area.
Before re-use, it is first necessary to clean the nozzle from frozen residues of polyurethane foam and thoroughly shake the container. After cleaning the adjusting screw, you need to test pull the trigger until the mixture begins to flow at the optimal pace. After this you can start spraying.
Shutdown
After all work is completed, the following steps should be performed:
- Turn off the flow regulator completely.
- It is not recommended to clean the gun nozzle; the fact is that hardened foam can provide additional sealing, especially if there is a suspicion of a leak in the exhaust valve.
- It is strictly not recommended to remove a container in which foam remains. This will lead to the need to wash the instrument and the inability to use the substance remaining in the cylinder.
- In this assembled state, a pistol with a screwed-on cylinder can be stored for several months, but this, of course, depends on the quality of the foam and the device itself. If there is any doubt about any of these parameters, it is recommended to pull the trigger of the gun every 3-4 days and refresh the foam in the barrel.
Cleaning the gun after use
At the end of work or in case of planned long-term inactivity (more than a month), the instrument must be washed with a special washing solution. During this process, the gun should be turned with the nozzle away from you and the container with polyurethane foam should be replaced with the same container, but only filled with the specified composition.
Next, you need to press the trigger to fill the barrel with the solution and leave the tool with it for 15 minutes, during which the remaining mixture will dissolve. After the specified time has elapsed, you should press the trigger again to bleed the composition with the remaining polyurethane foam. Next, you need to rinse the barrel again with a clean solution, and then unscrew the cylinder. After bleeding the residue from the barrel of the gun, you can hide it in a convenient place where it will be kept until the next use.
Rules of care
The instrument needs constant attention. Only by following the instructions for caring for the foam mounting gun can you extend the life of the device.
Let's look at the key requirements for proper care:
- dirty parts (nozzle, gearbox, etc.) are cleaned only with acetone or solvent;
- To clean the tip, you need to install a can of solvent instead of a can of polyurethane foam. By pressing the trigger, cleaning fluid will enter the inside, and the gun will become clean from the inside.
All these steps must be performed after each use of the gun or during operation.
Possible malfunctions of the gun and their elimination
It should be taken into account that the tool must be constantly washed during regular use, as well as when processing a significant amount of space. It must be cleaned after spraying every 3-4 containers. When performing this process, the first step is to pass the solution through the entire device of the gun by pressing the trigger, after which it must be postponed for 1-2 hours so that under the influence of acetone all the foam inside is removed. After this time and repeated rinsing of the instrument for 5-10 seconds, it can be used again.
The main malfunctions of the pistol are as follows:
- When connecting the container, no characteristic sound is produced and the mixture is not supplied. The reason is that the ball inlet valve is stuck. Basically, this malfunction occurs during removal of the cylinder from the tool, which is why it is necessary that it be present on the gun during storage. To repair, you need to unscrew the container adapter and release the valve ball. In some cases, this may require a solvent designed to remove foam, which must be poured over this element of the device and wait a little. When removing the ball, extreme care must be taken to avoid damaging its surface. In addition, you must avoid losing the valve spring. Once the unit has been cleaned, the tool will, in most cases, begin to function as before.
- Arbitrary leakage of mixture from the instrument nozzle. This mainly happens when the element itself or the needle of the control device becomes clogged. To fix the damage, you need to almost completely disassemble the pistol.
In the process, you need to unscrew the regulator, disconnect the barrel of the tool, and unscrew the nozzle (in a number of non-separable devices, the actions may be carried out differently, but the task remains the same - dismantling the unit supplying the foam). The needle and nozzle must be handled as carefully as possible, since if any damage occurs to any of them, it will be necessary to replace it with a similar component. Then all elements should be processed using an appropriate washing solution, in which you can even soak the barrel. After processing, all components must be wiped with a soft cloth. After reassembling the tool, the spontaneous flow of polyurethane foam often stops. - Inability to unscrew an empty cylinder. Sometimes there is a problem that in most cases occurs when the gun is not used for a long time. In such a situation, unscrewing the container together with the adapter can help, thereby reducing the increased pressure. After this action, the cylinder begins to unscrew, but the above element will need to be held with a key. In the most difficult cases, you even have to cut the balloon using a grinder, using extreme caution in the process. The container head should be unscrewed only after preliminary wetting in the solvent. To avoid this, when changing the cylinder, it is necessary to remove the remaining foam from the adapter.
With proper operation and compliance with certain rules, these malfunctions can be avoided or their likelihood of occurrence can be significantly reduced.
Device design
Let's take a brief look at how this tool works and what it consists of. It is worth noting that its configuration is very simple. Despite the huge number of models on the modern market, they are all very similar to each other.
Let's look at the main elements of the device:
- A tube. This part has two tips, which are also called nozzles. The tube and nozzles have different diameters, due to which the foam is supplied under high pressure.
- Trunk. You can’t do without it when working with deep holes. Its length can be 20 centimeters. There are two types of element design - collapsible and solid. The first option is much more convenient to clean after use.
- Adapter (aka gearbox). The part connects the container with consumables to the mounting gun.
During use, it is this element that bears the heaviest load.
- Adjustment bolt. Judging by the name, it’s easy to guess that the required foam flow rate and volume are selected using a screw. A very useful part when performing large repair work.
- Fasteners This part is responsible for placing and securing the can inside the gun. Outwardly it resembles an ordinary nut.
- Adjustment lever. This mechanism is designed to control the speed of output of the consumable resource, which depends on the force of pressing.
- Handle. The central element of the support, acting as a clamp for the remaining elements. For its manufacture, metal or heavy-duty plastic is used. In order to increase the convenience of users, special grooves are applied to it for the fingers.
Using the instructions for the device, even a beginner can work with the tool.
Spraying from a straw and its negative sides
When using a plastic tube instead of a gun, it is also possible to perform high-quality application of polyurethane foam manually, but directly from a cylinder. With significant processing, this spraying method has several disadvantages:
- When using a plastic tube, unlike a gun, there is no possibility of regulating the flow, which allows you to economically use the contents of the cylinder.
- It is less convenient to apply the mixture with a tube than with a professional tool, which is why the process takes an order of magnitude longer. Holding an inverted balloon manually all the time is quite tiring, and in some cases even uncomfortable due to arm fatigue and the need for regular breaks.
Having learned how to properly use a spray foam gun, you will not only be able to use the tool more comfortably, save a significant amount of time in comparison with a plastic tube and the material itself, but also avoid its sudden failure or clogging if certain rules are followed.
Video:
Safety precautions
First of all , you should remember about safety precautions when working with polyurethane foam.
- Never point a gun with a connected cylinder at a person or animal. Contact with the eyes can cause serious injury; in addition, the foam is very difficult to wash off the skin and almost impossible to remove from clothing.
- Despite the apparent simplicity of the gun, it is designed to work with a vessel under pressure (a foam container). Therefore, do not forget about the effects of high temperature. Do not operate the gun near an open flame or under a heat gun. Even a cylinder screwed onto a gun (brought in from the cold) should be heated in water with a temperature of no more than 30 degrees.
How to properly use a reusable gun
When purchasing a reusable gun, you should be prepared to constantly clean it and disassemble the components. Cleaning must be done using a special solvent - for example Acetone, which will easily remove all unnecessary foam residues.
If the device requires minor repairs, it must be disassembled and the broken part replaced with a new one. For example, the most common problem when pulling the trigger is that there is no foam flow, which means you should check for contamination in the adapter and barrel, the adjusting screw may need to be replaced, or the matter is too cold and needs to be heated.
Saving Tips
Experienced craftsmen adhere to a certain strategy in their work. But they, just like beginners, will find some tips useful:
- For one-time work, you can choose more affordable types of pistols, such as half-body and skeleton-shaped.
- You need to know that high-quality and reliable tools are heavier. Since it is not possible to check the functionality of the tool in advance, it is necessary to pay attention to this aspect.
- Universal options are considered to be case models, which are also well suited for permanent use.
- Guns can be used to fix sealants purchased in soft packaging. You need to remove the fixing nut from them and remove the upper spout, then place them in the device body, trim the upper part with a knife, and then return the removed parts to their place.
- Usually, the manufacturer who produces sealants in tubes marks the optimal place for cutting on the spout; you can use the instructions provided.
To reduce substance consumption, you must follow these recommendations:
- Pre-prepare the seam to be processed, clean it of dirt, moisture and degrease.
- The remaining areas of the surface that do not need to be treated can be isolated with construction tape.
- You must try to squeeze out the substance in such a way that the seam line on the surface is not interrupted.
- You need to wait until the substance has completely hardened, and only then remove the auxiliary stickers in the form of adhesive tape or masking tape.
The gun is an indispensable attribute for applying sealant during repair and construction work. It provides convenience, and sometimes ease, uniformity, and economy of application of the substance. Therefore, it is very important to understand the algorithm for working with a sealant gun before starting work.
Sealant gun, how to use it correctly (2 videos)
Types of sealant guns (15 photos)
Using replaceable attachments
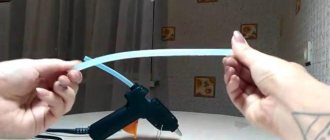
To fill joints of complex shapes and significant depth, we can recommend the use of replaceable nozzles that fit onto the tip of the nozzle. There are three types of such devices: silicone flexible hoses, rigid transparent tubes and conical tips.
Rigid tubes are used exclusively as extensions if the gun barrel is not long enough to fill deep cavities. Flexible hoses are used in cases where the seam has recesses and grooves of complex shape that require filling, while the rigid barrel of the gun does not allow turning the tool in the desired direction.
Conical spouts are used to give precise direction to the flow of foam with minimal pressure. Typically, such nozzles are used when filling very thin seams, for example, in the joints of sheet materials or for gluing various types of overlays. All attachments described are disposable and are not designed to be cleaned for reuse.
Detailed cross-sectional diagram of the pistol parts
The pistol consists of a body part (5) to which a barrel (2) and a handle (10) are attached with a threaded connection. At the end of the barrel there is a nozzle (1), an axially located needle rod (3) is compressed inside, connected to the trigger handle (12). The foam flow is adjusted by a device located in the body and includes a pressure spring (9), clamped in a fastening nut (8) and connected at one end to the body and the other end to the needle rod, lining (7), placed in the through hole (6) and fixing sleeve (11). Rotation of the liner causes axial movement of the sleeve and limits the sliding of the needle rod, thereby controlling the flow of the foam. The pistol body is also equipped with an adapter (4), which is connected to the barrel.
Depending on the type of model, mounting guns may have additional functional parts, for example:
- bolt-spacer – most often soldered into the gun body;
- replaceable nozzles - plastic or silicone tubes of various shapes, diameters or lengths. Their use makes it easier to work in hard-to-reach places.
Benefits of use
The mounting guns have a well-thought-out and ergonomic design. First of all, they are equipped with a comfortable handle for holding during work and are lightweight. The combination of these factors allows you to move freely and eliminates serious strain on your hands, which would make it inconvenient to carry out work. Other advantages of use include the following factors:
- precision during application - the long tip of the gun allows you to penetrate deep joints and holes, ensuring high-quality application strictly in the right areas and obtaining a foam layer of uniform thickness;
- dosed supply - a nozzle with a variable size allows you to distribute the material strictly in the required volume, which allows you to further eliminate the deformation of structures due to secondary expansion of the composition;
- optimal speed of foam release - adjustable speed of foam release allows you to work with greater comfort, adjusting the tool to your own pace;
- ease of processing difficult areas - when using cylinders with a plastic tube, a big problem is foaming areas under the ceiling or with other natural obstacles. When working with the gun, you can forget about this; it allows you to easily reach any hard-to-reach places thanks to the long nose;
- high work productivity - a convenient supply adjustment system allows for faster installation, and a simple system for replacing cylinders also contributes to this.
A mounting gun is an excellent solution for those cases when you need to work quickly and at the same time efficiently. The tool is convenient and easy to use, indispensable for the home workshop or professional use.